This is a quick note (mostly to myself) to say that the computer hosting www.malak.ca — the website hosting this blog — has been switched out and replaced.
Last night, I was able to access the site normally and remotely while out to dinner at the home of some friends. This morning, in trying to ssh into the machine to do a routine manual software update, the connection kept timing out and disconnecting. Some quick diagnostics along the lines of “is the machine plugged in?” and a few reboots to watch was what happening — about as much as it would allow me to do, in fact — revealed that for reasons unknown, it was rebooting, going through a grub page, booting up, showing the Fedora logo, and, after the logo disappeared but before the login prompt appeared, a bios message came on the screen indicating a signal loss, and a reboot would begin again.
I tried a few past kernels in the grub menu, including the rescue kernel, and checking the bios, to no avail. Bringing up the text display of what was going on during the bootup was hard to access since I was scratching my head wondering “What’s the keystroke to do that again?”; same for getting the console. No matter, other things needed attending to in the moment, and I moved on.
Fortunately, my brother-in-the-know was coming within the hour, and I sent him some messages about it. He offered to bring an old junk-computer-which-wasn’t-quite-junk-yet I had given to him a while back and which he wasn’t using, at least not yet. After describing the problem to him and offering my rough diagnosis — either there was a corruption somewhere in the software, causing the reboots, or, during the reboots software commands invoke a (presumably faulty due to old age) physical hardware system or circuit, which caused a problem leading to the reboots — both of which, particularly the latter, he thought may have had merit.
My brother brought the old machine. Before installing anything, he first checked the OS SSD from the server (which also contains this blog’s database) in a USB caddy, then he checked the external data drive holding the rest of the static website and my backups, again by USB. Data on both units were in good condition. We finally went straight to replacing the machine by transferring the SSD and external drive to the new old machine, and here I am typing up this memo to myself.
The machine’s specs?
Dell Vostro 420 series; 8.0 GiB; Intel Core2 Quad Q9400 x 4; Mesa Intel G45/G43 (ELK) video card, with lots of USB ports, a networking card, and other things many people including myself take for granted.
And since the 240.1 GB SSD is the drive from the previous machine, it is still running the same instance of Fedora and the LAMP stack with WordPress, suffice it to say that I’m up to Fedora Linux 37 (Workstation Edition) 64-bit on it, and running up to date LAMP and WordPress software.
In fact, as I am finishing up this post, the machine is being updated!
In mid-2006, my employer at the time was acquired by another company, and my new employers required me – rightfully so – to take some basic training that I should have taken several years earlier. The training was after work hours, two evenings a week, for a few weeks.
Normally, my eating habits were (and still are) such that a given day’s lunch was composed of leftovers from the previous evening’s supper; in fact, normally supper meal plans at the time and still to this day usually intentionally include cooking for one more serving than the meal would call for, so that I would have a lunch the following day.
The training course, however, had the effect of not only requiring me to improvise for my supper plans, such as eating fast food, but also required me to improvise for the following day’s lunch too. My memory of this period is that there was a snowball effect on much of the week’s meals, although it probably was not quite as dramatic as what my mind has woven into my memory.
One of the solutions I came up with — but never quite fully implemented at the time — was the idea of a cooking weekend, targeted at being done at the cottage. My ambition at that point was to stock the freezer with a variety, as well as a large stock, of dishes and prepared meals, including lunches, so that the above situation wouldn’t be a problem moving forward. I had notions that were fairly ambitious, both in terms of the variety of meals to be made during the weekend, as well as the sheer amount of food that I suppose I expected to make over such a hypothetical weekend.
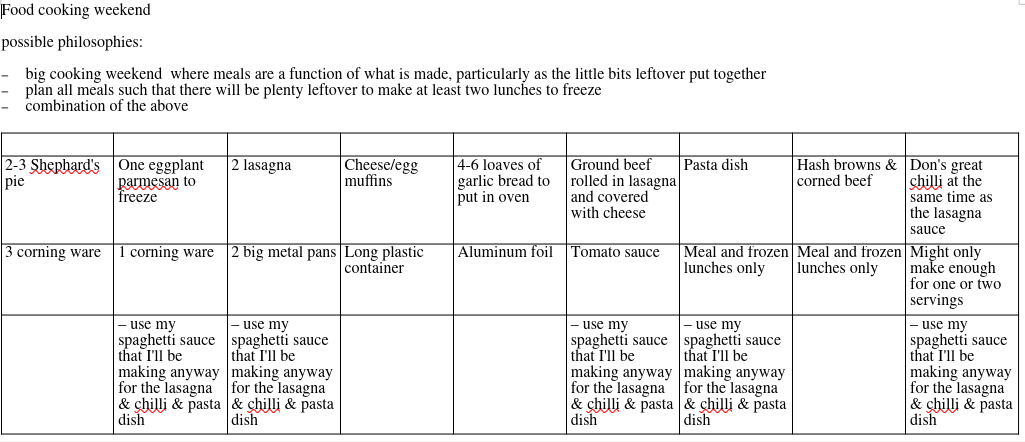
I developed the following planning table:
The table I created with basic plans for such a cooking weekend
As can be seen, one of the goals was to make a number of dishes based on a common ingredient, my spaghetti sauce, which I had begun making in the early 1990’s.
As also can be seen, although there were a few numbers of dishes to produce, overall the list is rather vague in what I would end up with in terms of numbers. Among other things, while I did have rough ideas of how much of most of the items I would make (or at least envisioned making), for instance, I didn’t start planning out the required amounts of each of the ingredients and sub-ingredients needed to make the dishes and components.
Overall, it seemed — and still seems to this day — rather vague and all over the place, and overly ambitious to the point of being daunting. Critically, although I knew that I would be making about seven to eight quarts of my spaghetti sauce, I didn’t plan out its ingredients, determine just how many of each of the other dishes for which it would be used would be produced from the seven to eight quarts, or whether some of the “larger” dishes were to be prepared for their own sake and the freezer, or to be ultimately cooked and divided up into lunch containers. Except as an afterthought, I just about didn’t even insert the making of the spaghetti sauce into the weekend’s already ambitious cooking plans!
Before coming to this last realization, I realized that my plan would only produce two or three servings’ or meals’ worth of each, which might all be eaten in short order.
Unsurprisingly, the planned weekend was never executed, and after a few weeks, my evenings freed up, and my regular lunches returned.
Years later, I realized despite the usefulness of the intentions behind my plans for the cooking weekend, at least for me, it suffered from not only being too ambitious in its own right, but from being even more ambitious than I thought. At the same time, the overall plan suffered from being a bit too wide in its intended scope given what would be a limited amount of base (the spaghetti sauce). As such, the plan was likely to produce — should I accomplish it all in such a weekend — merely an amount of food, especially the lunches, that would be consumed far more quickly than I had hoped.
My spaghetti sauce — and what I do now for tomato sauce based dishes
My spaghetti sauce was a bit of a marathon sauce to make. Based on canned tomatoes, it also included an inordinate variety and amount of chopped vegetables for a spaghetti sauce, and — especially the end product — was not unlike my current vegetable soup recipe, which I have been making since about 2013. I had a prideful joy in making it, partly as a result of it being so chock-full of vegetables, but, to a degree than I didn’t care to admit at the time, also borne of a stubborn pride resulting from it being a showcase of all the vegetables it contained and a desire to show off a certain (naïve) cooking acumen.
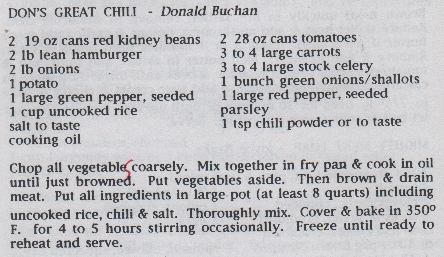
My chili recipe recipe from the early 1990’s, which is essentially my spaghetti sauce with the addition of the red kidney beans and the chili powder (image scanned from my church’s cookbook, published in 1996)
However, one of the things I realized in looking at my big cooking weekend, both early on without realizing it, as well as more formally just recently, was that I just wanted to make, say, lasagna, chilli, beef rolls, pasta dishes, or my eggplant dish (as well as a few lunches not involving my sauce). The “without realizing it” part (early on) was overshadowed by the prideful notion that it made sense at the time to want to use my spaghetti sauce to then make all these other dishes.
Except … I have come to realize that the effort to make the sauce to begin with, as well as my pride in wanting to use it, was perhaps core to the difficulty in implementing the cooking weekend. While the dishes were meant to be a showcase to myself for my spaghetti sauce and as well as my cooking in general, I realized that all these dishes were about showcasing the whole dishes, and not so much meant to showcase my spaghetti sauce.
As such, for a long time now, many of the tomato sauce dishes I make call for commercially prepared tomato / spaghetti sauces, as opposed to, specifically, my home-made sauce.
(As a side thought, were to I make spaghetti sauce again, I have a few vague notions about simplifying it somewhat, as well as chopping the vegetables much more finely, to the point of grinding them, instead of the coarse chopping I favoured for the “sauce” in the 1990’s.)
How things have evolved to today:
Despite the fact that the above weekend plan never materialized, I soon took to often planning cooking weekends when I went to the cottage, especially during the off-season (it’s a family cottage, so there always have been occasional scheduling issues which haven’t always allowed me to do what I would like, when I would like. 🙂 )
However, the first thing that should be mentioned, since this post is at least partly predicated on a period of time in which having ready-made lunches handily available in the freezer was essential, but was not the case, is that … I haven’t since planned out cooking weekends dedicated to cooking ready-made lunches for the freezer, or form a cooking club with a few friends in which we fastidiously make a week’s worth (or more) of lunches and other meals every Saturday, or otherwise come up with a systematic method of stocking the freezer with ready-made lunches.
In the intervening years, the principal approach I have taken to rectify unforeseen needs for prepared lunches is to hoard lunches and leftovers in the freezer; in addition to routinely making extra food for the following day’s lunch, I would occasionally also, at random opportunities, zealously make an extra lunch to place in the freezer. As such, my supply of extra lunches at any given time ebbs and swells according to how many lunches I have managed to hoard at that point in time, versus how many I have needed to eat recently. Fortunately, some of my recipes somewhat ease mounting full lunches in the freezer by being pair-able with odds-and-ends leftovers, such as bacon wrapped chicken, meatballs, and stuffed potato skins.
What I do do is plan “big” cooking weekends many times while I am up at the cottage, including quite often during the off season in winter, incidentally without running water. This is done in conjunction with weekend afternoons in the city with similar objectives (including a cook-through-my-collection-of-recipes project I did mostly in 2021, accessible off my home page at https://www.malak.ca ). Depending on my desires and ambitions, I usually concentrate on single projects, per day anyway; during a week over Christmas to New Year’s, for instance, I usually plan for almost as many large cooking projects as there are days – to cook various large cooking projects to fill the freezer.
I had begun large, more focused, cooking weekends not too long after my above planned weekend should have taken place, continuing a certain tradition I had started years earlier of occasionally making large quantities of my recipes, from a then-limited recipe répertoire, typically focusing on large freezer quantities of one, or perhaps two, recipes from my collection.
Therefore, early on — at this point, exactly “when” being lost to the sands of time and the multiple computer upgrades over the years, during which dates of creation, or at least the last edit, have been lost several times over — I had put the following list together. I tried to write down what my aims and guidelines had become. Note that the text of the list has been slightly edited to fit the current narrative:
A dish needs to be just as easy to make several units of the recipe as one unit – if not easier, and as such not more difficult to make because it’s in quantity (barring the extra time and labour merely due to extra quantity – taking advantage of economies of scale);
A dish needs to be easy to make in large quantities, using a repetitive production line process;
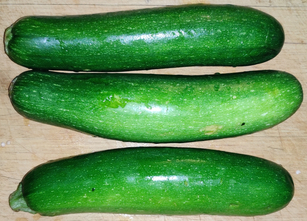
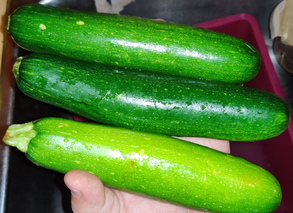
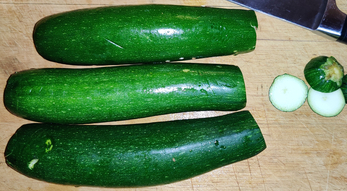
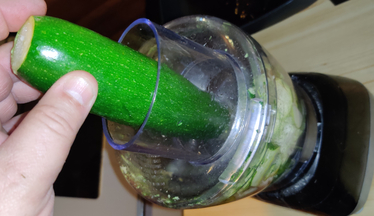
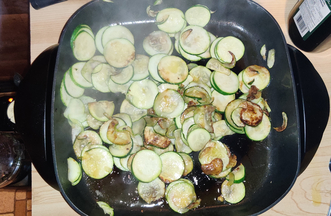
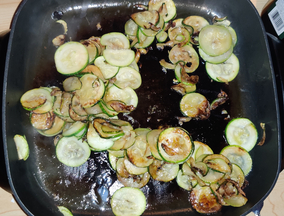
A dish must be appropriate for freezing – for instance, my zucchini dish is not appropriate for freezing, although its sauce is appropriate for freezing!
A dish should be something that just needs to be defrosted and reheated / cooked in toaster oven or regular oven;
A dish should be “convenience food” — the operative notion being “convenient because it’s made in advance and ready to eat” (or brown and serve), not as in “junk food” or like industrially produced, store bought frozen lunches;
A dish should not be something at its core easy enough to make any day of the week fresh (looking back, I suppose that this is barring a notion to make multiple units of otherwise easy to make lunches to stock the freezer, were that have been a priority at the time);
A cooking project should not just be components for other dishes – ie. projects should be to make full meals, not just cooked hamburgers or burger meat, nor just cooked chicken pieces, etc.
Given that over the years, my objectives have evolved, changed, and widened, I have long since abandoned at least a part of the guideline regarding making meal components or single items, because I now regularly cook large quantities of breakfast sausages for freezing, have in the past cooked whole packages or more of bacon for my mom, and I regularly make bacon wrapped chicken, meatloaf, meatballs, stuffed potato skins, as well as cooked ground beef frozen in ice cube trays to keep in the freezer for other times calling for small amounts of cooked ground beef.
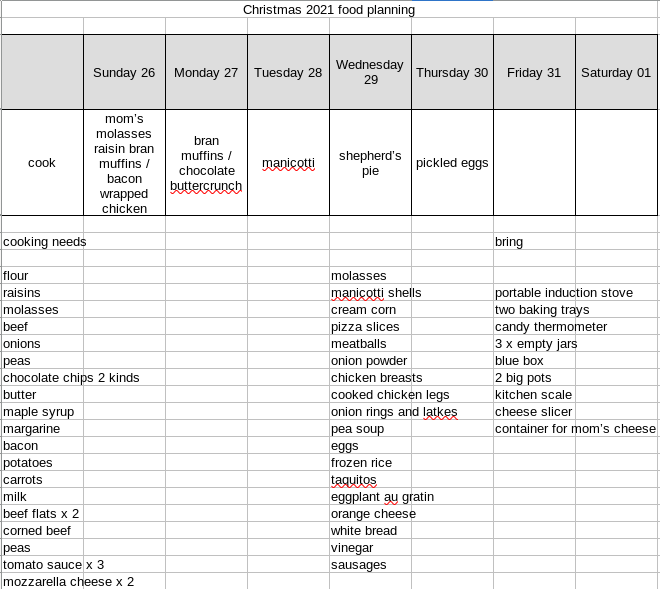
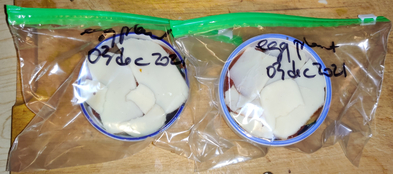
Of course, it would only be appropriate to show a recent planning table for a week’s stay at the cottage over Christmas , 2021 (regular meal planning blocked out):
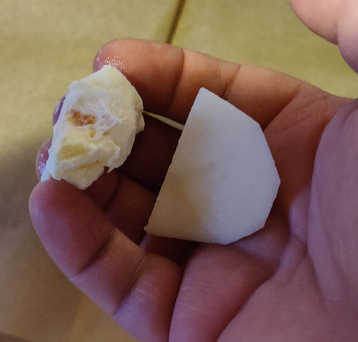
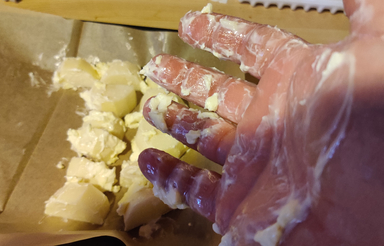
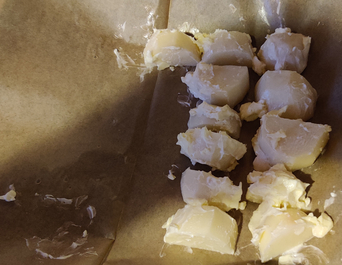
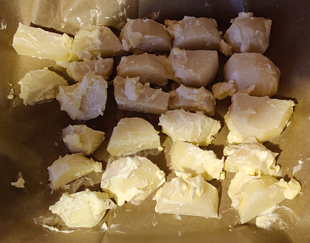
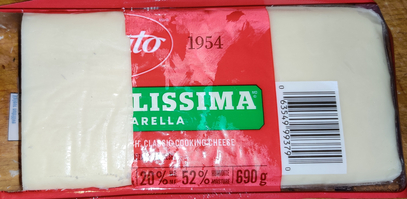
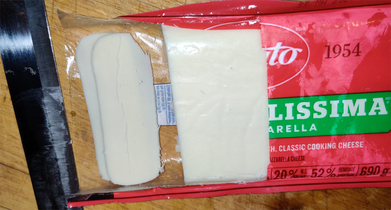
Yes, there are still a lot of details missing here from this list, such as specific numbers, arguably allowing for somebody besides myself to look at both lists and wonder, beyond the more relaxed pace and the specific list of foods and ingredients to bring, what the difference between this 2021 table and the 2006 table are. However, each entry is based on, normally, the standard amounts in my various recipes, plus often slight excesses. And, according to my notes, I also made stuffed potato skins, bran muffins for my mom twice instead of once, and the chocolate buttercrunch twice, as well as, as intimated in the “bring” list, a container of cheese sliced off of the block for my mom to consume the following week.
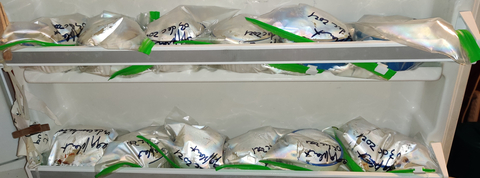
These days, my freezers are usually full of many tasty dishes from my collection of recipes, individual servings of many foods both from and beyond my collection of recipes, and various lunches made up of leftovers, some consisting of components from multiple meals and cooking sessions. This is actually served by a certain hoarding instinct; I often fill containers with bits of leftovers from a given meal to freeze, and as possible I add to them with other little bits already in the freezer as they are produced.
And … do I run out of lunches? Usually not! However … managing the freezer is a work in progress and a continuous project, sometimes a daily project beyond simply preparing tomorrows lunch; I sometimes grab opportunities to make a second lunch or portion thereof!
My mom has been making a rhubarb chutney (of the British variety, not the Indian variety) since I was young, and she has loved it as long as I remember. Every year, she would harvest the rhubarb growing in her garden and make at least one batch per season, or two, or even three, depending on the yield.
I have been saying for years that I should learn how to make the chutney for her, although it has taken until this year before I finally consulted her recipe card and notes. The recipe I present here is adapted from (and very closely tracks) the recipe on my mom’s recipe card with several years’ worth of notes. The recipe on the card, if my recollection of her stories is accurate, is apparently derived from a recipe developed by her church ladies’ group in the early 1980’s, and which was possibly assigned to her after one of their canning sessions with a request to make some at home for an upcoming fall bazaar’s preserves’ table. It also incidentally is identical in ingredients and comparable in amounts to a recipe found on the internet for a barbecue sauce … so go figure.
Mom eats it as a condiment to various dishes, such as roast pork, chicken pot pies, shepherd’s pies, and many other dishes … basically, despite its sweet nature, it is also savoury, and pairs well with a number of savoury dishes.
Making the rhubarb chutney:
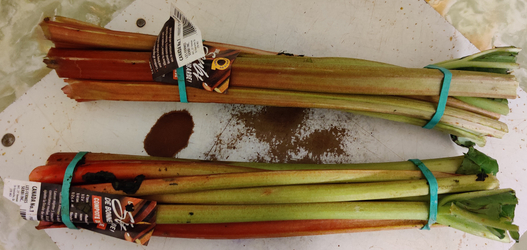
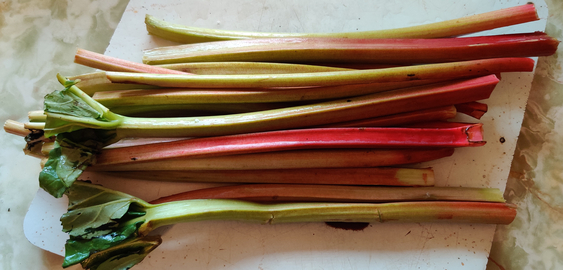
First, I took out two groupings of commercially grown rhubarb, in this case, about nine stalks each:
Two groupings of nine stalks each of rhubarb
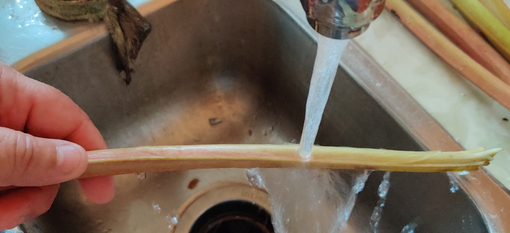
The individual stalks of rhubarb were washed:
Rhubarb stalks washed
Washed rhubarb stalks
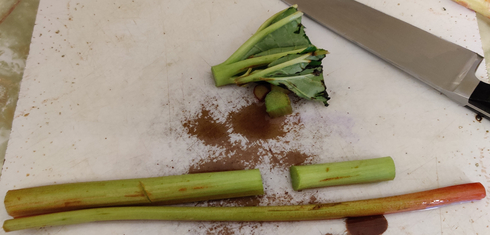
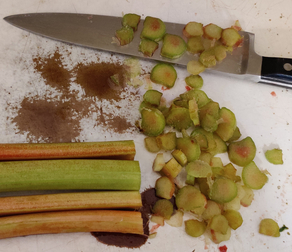
The rhubarb stalks were trimmed of their ends, leaves, and as the case may be, torn or damaged parts:
Rhubarb stalks trimmed
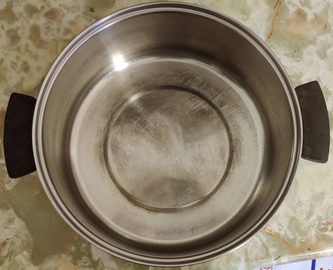
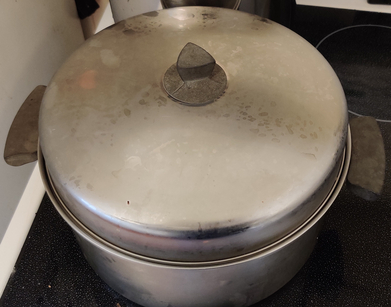
A non-reactive stainless steel pot (yes, there are some cheap stainless steel pots which will react with acid contents!) was taken out, and put to the ready beside the cutting board:
Stainless steel pot taken out
The rhubarb was sliced into 1/4″ to 1/2″ slices:
Rhubarb sliced
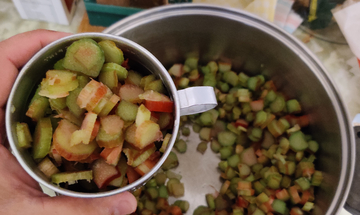
The chopped rhubarb was transferred to the stainless steel pot as sufficient amounts accumulated on the chopping board:
Transferring chopped rhubarb to pot
Transferring chopped rhubarb to pot
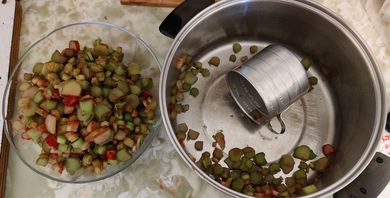
Once all the rhubarb was chopped and transferred to the pot, to be sure of the amount of rhubarb I had chopped was enough for the recipe, I measured it out …
Rhubarb measured out
… and placed it in a bowl:
Measured out rhubarb placed in a bowl
Once measured out, the rhubarb was placed back in the stainless steel pot.
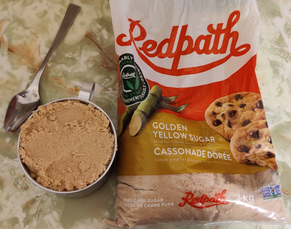
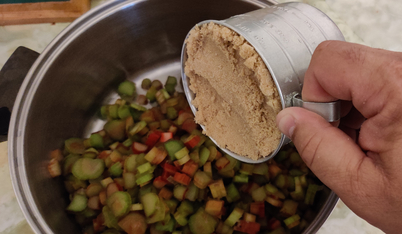
Next, packed brown sugar was measured out:
Brown sugar measured out
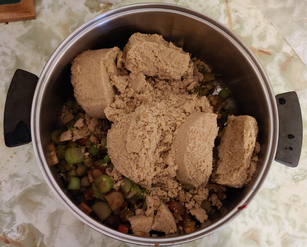
The brown sugar was added to the chopped rhubarb:
Brown sugar added to chopped rhubarb
All brown sugar added to chopped rhubarb
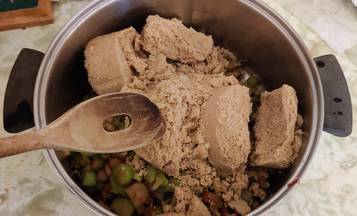
The chopped rhubarb and brown sugar were mixed with a wooden spoon:
Wooden spoon used to mix chopped rhubarb and brown sugar
Brown sugar and chopped rhubarb mixed with wooden spoon
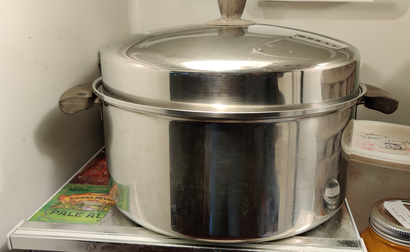
The chopped rhubarb and brown sugar mix was covered with the stainless steel pot lid:
Stainless steel pot covered
The stainless steel pot with the rhubarb and brown sugar mix was placed in the refrigerator overnight:
Pot of rhubarb and brown sugar in fridge
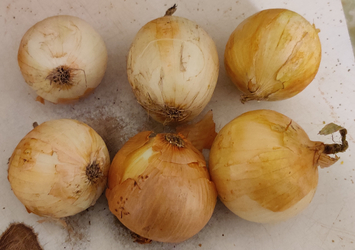
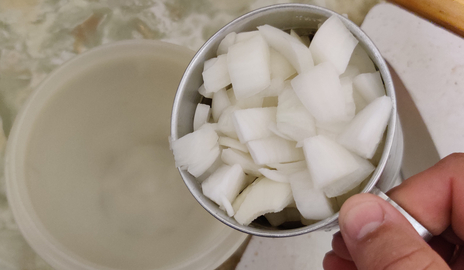
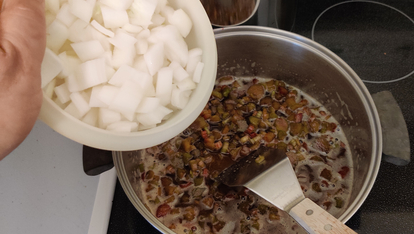
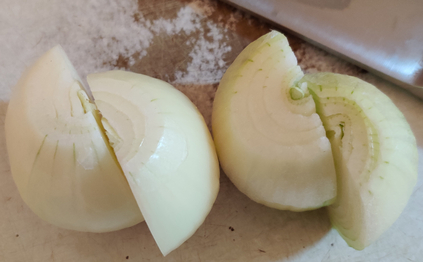
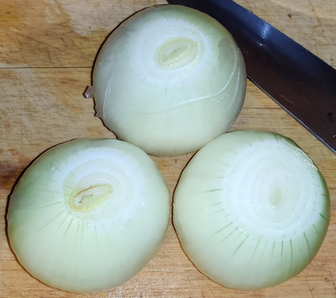
Onions were taken out:
Onions taken out
The onions were trimmed:
Onions trimmed
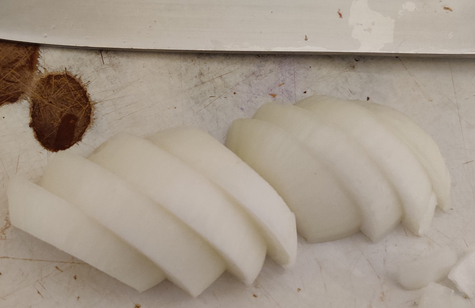
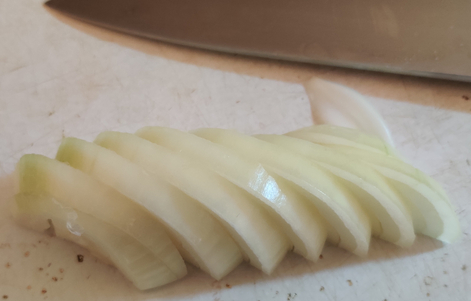
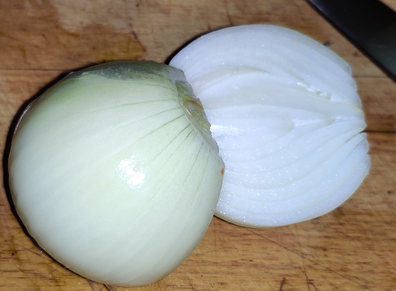
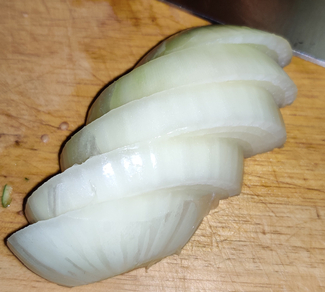
The onions were sliced into half-coins:
Onions sliced into half coins
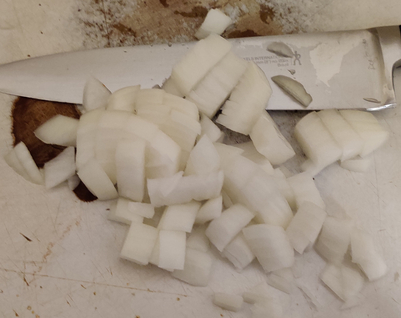
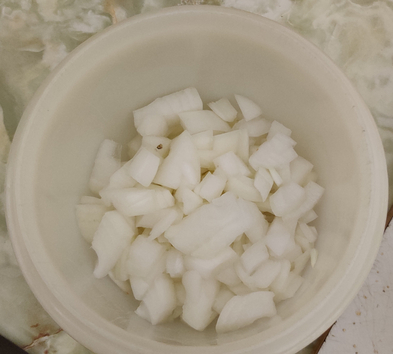
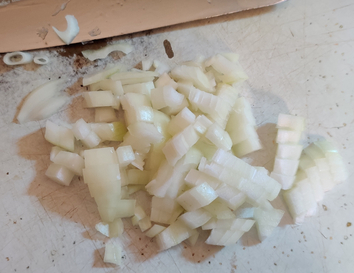
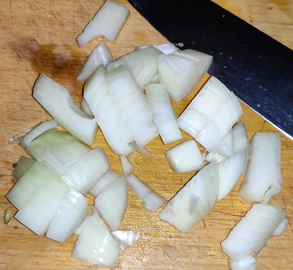
The onions were coarsely chopped:
Onions coarsely chopped
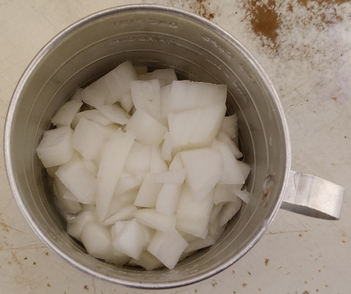
The onions were transferred to a measuring cup to keep track of how much onions I had:
Onions measured out
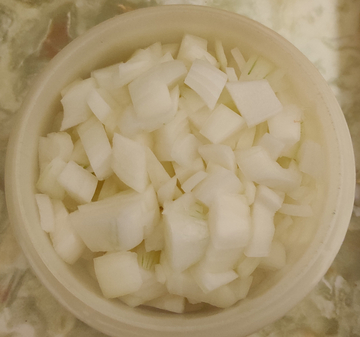
The chopped onions were transferred to a sealable container:
Chopped onions transferred to sealable container
Chopped onions transferred to sealable container
Chopped onions transferred to sealable container
The container of onions was covered and placed in the fridge until the next day.
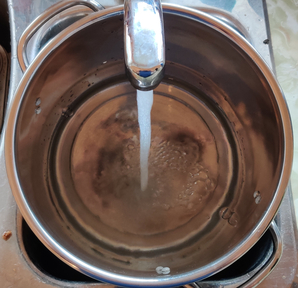
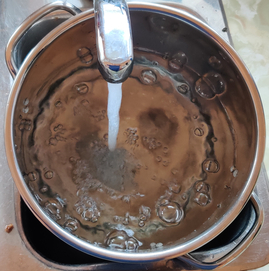
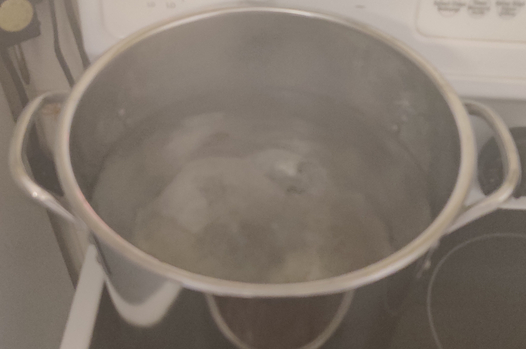
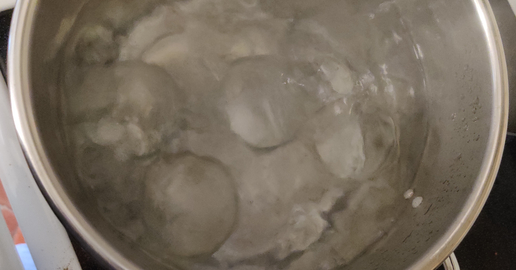
The next day, the first thing done was to fill a pot with water, for use later as a boiling water bath for the mason jars used to bottle the chutney:
Pot filled with water
Pot filled with water
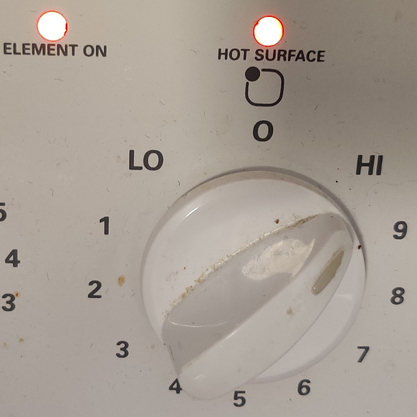
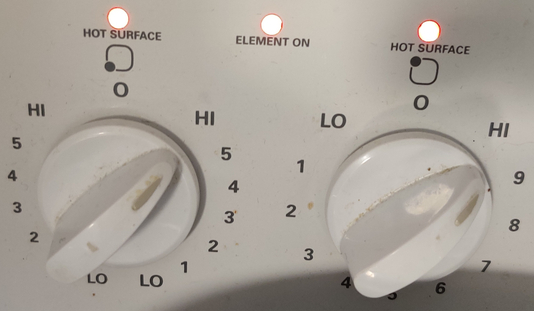
A burner on the stove was turned on:
Stove turned on
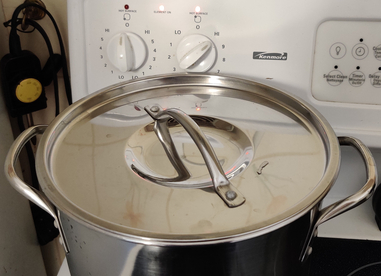
The pot of water was placed on the stove to bring it to a boil:
Pot of water placed on stove
The pot of rhubarb and brown sugar was taken out of the fridge:
Pot of rhubarb and brown sugar taken out of fridge
Another burner on the stove was turned on:
Second burner turned on
The pot of rhubarb and brown sugar was placed on the stove:
Pot of rhubarb and brown sugar placed on stove
As the mix began heating up, it was mixed to loosen some brown sugar at the bottom of the pot:
Rhubarb and brown sugar mixed
Throughout the following process, the mix was constantly stirred in order to avoid burning at the bottom of the pot.
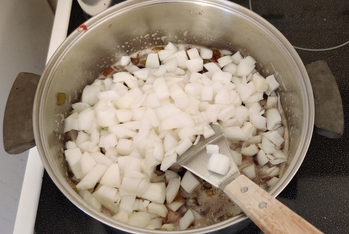
The chopped onions were added to the pot:
Chopped onions added to pot
Chopped onions added to pot
Chopped onions added to pot
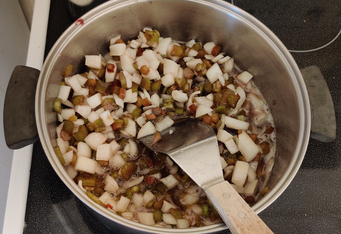
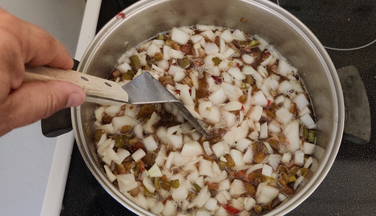
The ingredients were mixed together:
Ingredients mixed together
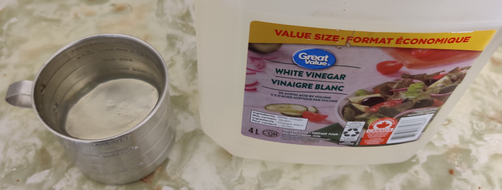
Vinegar was measured out:
Vinegar measured out
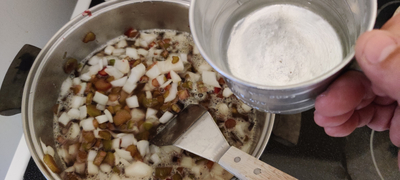
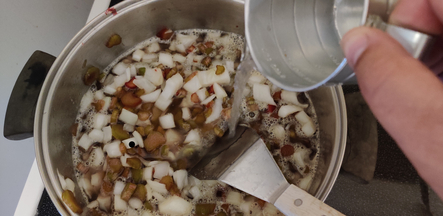
The vinegar was added to the pot:
Vinegar added to pot
Vinegar added to pot
The ingredients were yet again mixed together:
Ingredients mixed
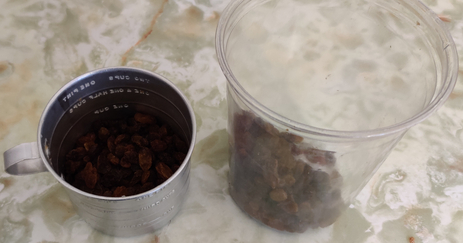
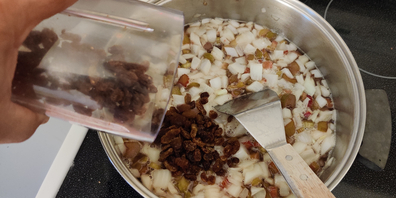
Raisins were measured out:
Raisins measured out
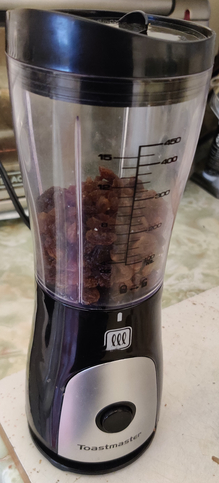
The raisins were placed in a small blender, to coarsely chop them:
Raisins placed in small blender for chopping
The raisins were chopped:
Raisins chopped
Chopped raisins
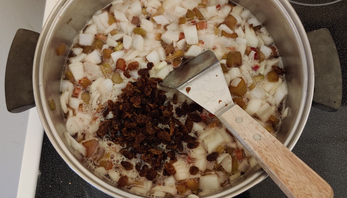
The chopped raisins were added to the pot:
Chopped raisins added to pot
Chopped raisins added to pot
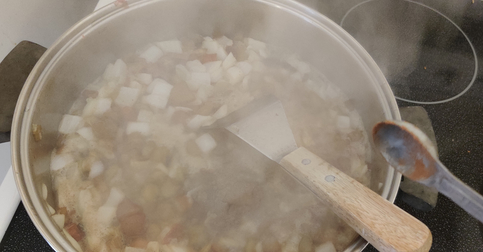
The raisins were mixed in with the rest of the ingredients.
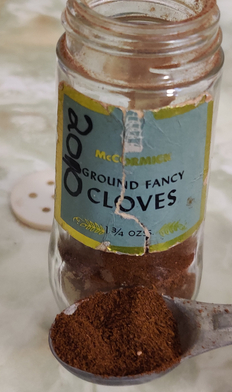
Ground cloves were measured out:
Ground cloves measured out
The ground cloves were added to the pot:
Ground cloves added to pot
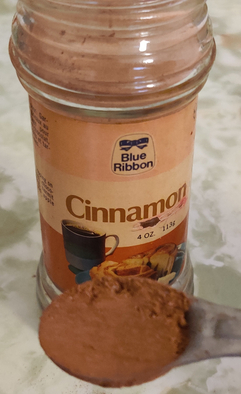
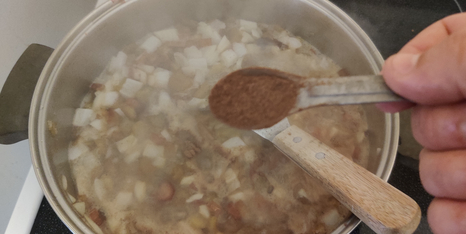
Ground cinnamon was measured out:
Ground cinnamon measured out
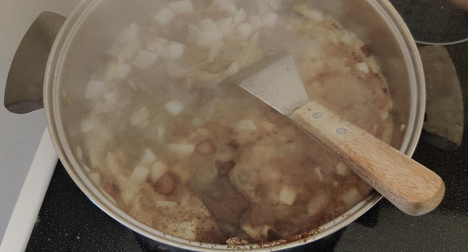
The ground cinnamon was added to the pot; as evidenced by the rising steam, the ingredients were heating up nicely:
Ground cinnamon added to pot
Ground cinnamon added to pot
Ground allspice was measured out:
Ground allspice measured out
The ground allspice was added to the pot:
Ground allspice added to pot
Ground allspice added to pot
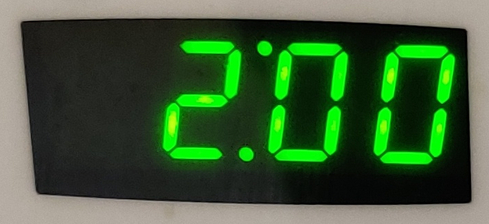
At this point, the chutney was starting to boil, and, for reference, two hours was set on the stove timer (because the original recipe called for two hours of simmering):
Timer set
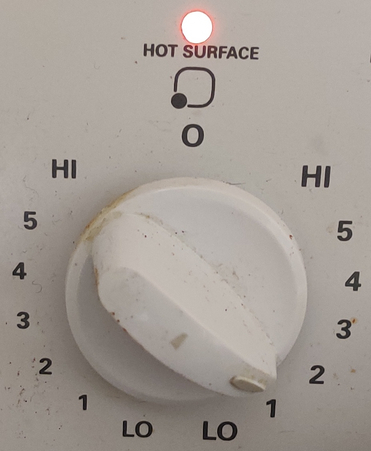
The stove burner was turned down to a low setting:
Stove set to low setting
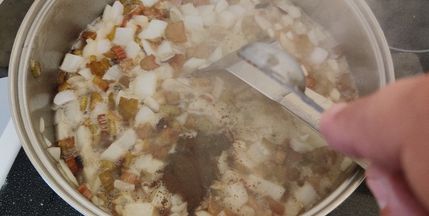
The ingredients were constantly stirred in order to avoid burning and sticking on the bottom of the pot:
Ingredients constantly stirred
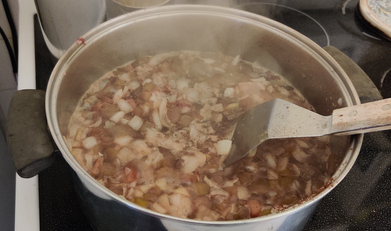
After about half an hour of simmering …
Half an hour elapsed on timer
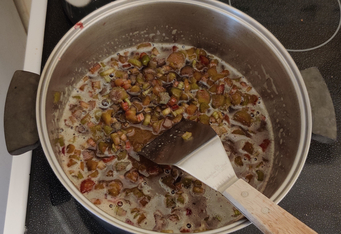
… this is what the chutney looked like:
Chutney after half hour of simmering
At this point, the pot of water for sanitizing the jars came to a boil and its burner turned off:
Water bath coming to a boil
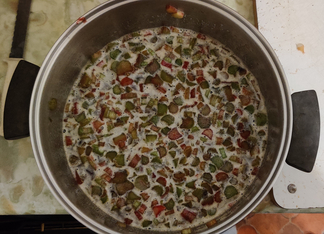
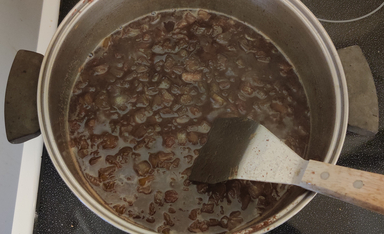
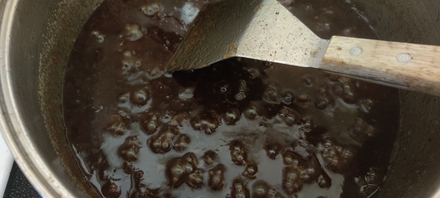
After about an hour of simmering …
Hour elapsed on timer
… this is what the chutney looked like, and was at the point of being syrupy:
Chutney after hour of simmering
As such, I knew I wasn’t going to need to continue simmering the chutney for another hour.
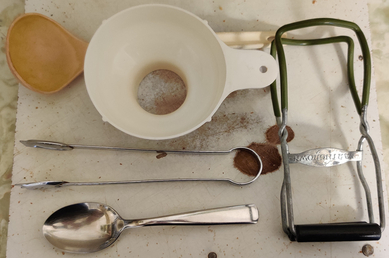
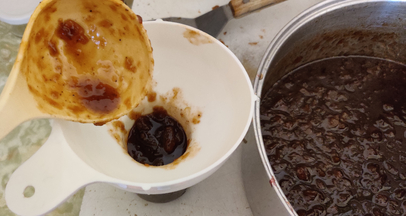
Canning tools were taken out: a ladle, a jar funnel, tongs, a large spoon, and a jar wrench:
Canning tools taken out
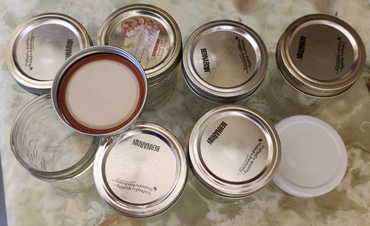
Mason jars, rings, and lids were taken out — and yes, I used good condition used lids for this batch, since I had no intention of giving away any of the jars:
Mason jars and lids
The water for the water bath was brought back to a boil, and mason jars were placed in the boiling water:
Water brought back to a boil and mason jars placed in boiling water
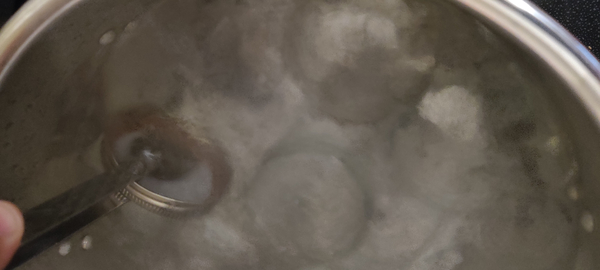
The canning funnel was quickly dipped in the boiling water to sanitize it:
Canning funnel dipped in boiling water
Unfortunately, at this point, I could not take as many photos, in order to quickly fill the jars while the chutney and jars were still hot, and create a proper seal with the lids.
The chutney was taken off the stove; a mason jar was taken out of the boiling water, and the jar was filled with chutney:
Mason jar filled with chutney
A mason jar lid and ring were dipped in the boiling water:
Lid and ring dipped in boiling water
The lid and ring were placed on the mason jar and the ring tightened.
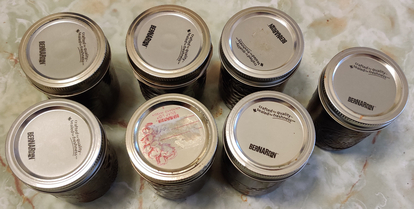
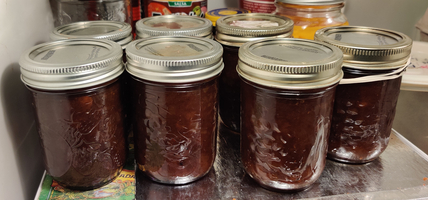
The process was repeated until all the chutney was bottled, in this case, filling seven jars:
Filled chutney jars
The jars were placed in the fridge to cool down a little more quickly:
Jars of chutney placed in fridge to cool them down
Afterwards, labels were placed on the jars, and the jars were placed in the cupboard.
And … Mom loves it, and has even whispered “it’s better than when I make it!” … no doubt (at least) a mild exaggeration. 🙂
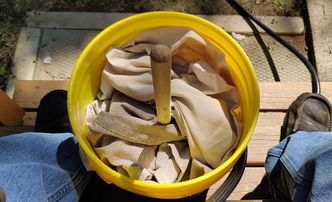
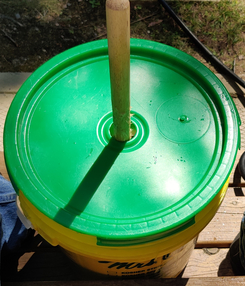
For several years, I have used a backwoods washing machine — basically, and literally, a slightly modified 20 litre bucket using a modified toilet plunger as an agitator — up at the cottage to wash clothes, towels, and even bed sheets, for its inherent value of washing clothes of course, but also to reduce the workload upon my return from holidays, as well as to implement a certain DIY ethic, and pass the time (in my eyes, in an amusing way). This is of course in the context of not having an automatic, electric washing machine at the cottage for a variety of reasons, including a lack of space, and the fact that the cottage is not winterized, hence there would issues related to freezing.
Note that while the use of modern conveniences of concentrated laundry detergent, as well as plentiful, clean water (from a pressurized water system) and a garden hose are shown in this post, depending on your circumstances and should you wish to make a backwoods washing machine for yourself, you may wish or need to adjust steps, practices, and so on.
Washing the laundry:
First, since my bed sheets at the cottage needed washing, I stripped my bed and took them outside to the back deck:
Laundry taken out
I also took out some other laundry to add to the wash:
Other laundry added to the lot
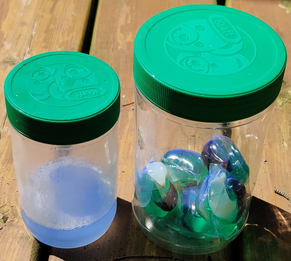
Laundry detergent was taken out (on the right), and previously, one of the laundry packs was diluted in water for easier use and dividing up in smaller laundry loads (on the left).
Dissolved laundry pack, and concentrated laundry detergent packs
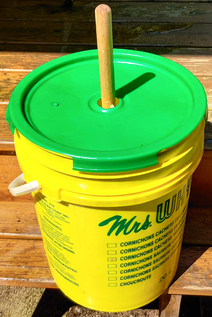
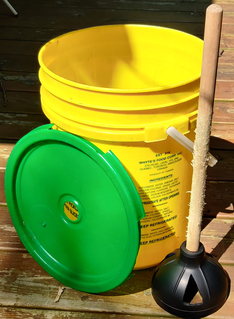
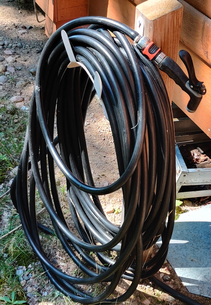
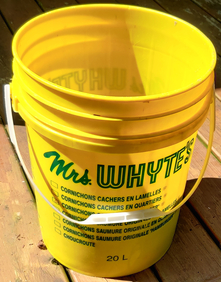
My backwoods washing machine was taken out — a modified 20 litre plastic bucket and a modified toilet plunger:
Backwoods washing machine taken out
Backwoods washing machine taken out
A garden hose was taken out:
Garden hose taken out
Garden hose taken out
The clothes line was also up and in place for use:
Clothes line set up
Finally, sufficient clothespins were in place:
Clothespins needed for later
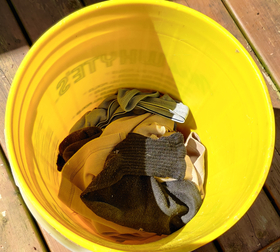
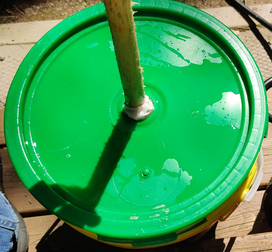
The lid to the backwoods washing machine was taken off the bucket:
Backwoods washing machine opened up
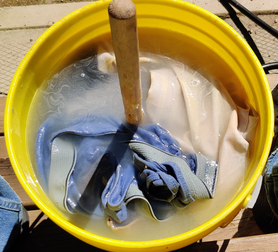
Clothes were added to the backwoods washing machine’s bucket:
Clothes added to backwoods washing machine
The diluted laundry detergent was taken out and added to the backwoods washing machine:
Diluted laundry detergent taken out
Laundry detergent added to backwoods washing machine
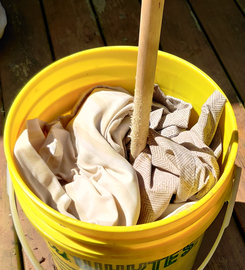
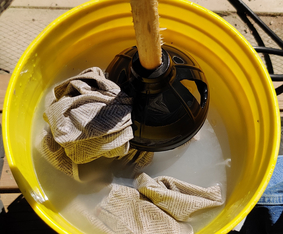
The plunger-agitator was added on top of the clothes in the backwoods washing machine:
Plunger-agitator placed in backwoods washing machine
More laundry was placed in the backwoods washing machine:
More laundry placed in backwoods washing machine
The backwoods washing machine was moved to a more convenient location on the steps of the deck at the cottage:
Backwoods washing machine moved to a convenient location on steps
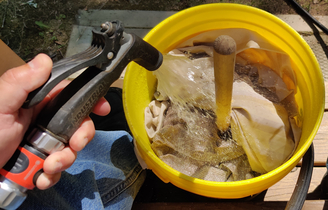
The garden hose was used to fill the backwoods washing machine with water:
Garden hose used to fill backwoods washing machine
Garden hose used to fill backwoods washing machine
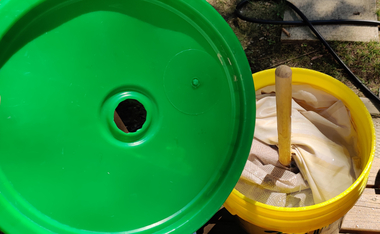
The lid to was picked up and placed on the backwoods washing machine’s bucket:
Lid picked up to place on backwoods washing machine
Lid placed on backwoods washing machine
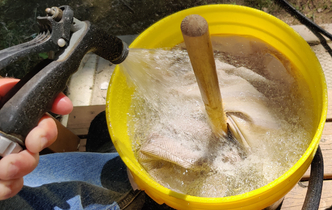
The plunger-agitator was moved up and down like a butter churner:
Plunger-agitator was moved up and down
As part of moving the plunger-agitator up and down, the laundry will sometimes get caught a bit:
Laundry caught in plunger-agitator
After about five minutes of manual agitation, the lid was taken off the backwoods washing machine:
Lid removed from backwoods washing machine
Sometimes, the laundry may become caught up in the holes in the plunger-agitator:
Laundry caught in plunger-agitator
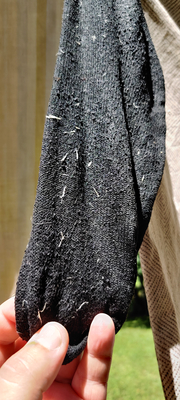
Given the rough-edged hole in the lid of the backwoods washing machine, the wooden handle can become worn and the wood fibres dislodged …
Fibres dislodged from wooden handle of plunger-agitator
… and which may transfer to some of the laundry:
Dislodged fibres transfer to laundry (already on clothesline)
After the washing had been completed for the first load, the individual items were taken out of the backwoods washing machine and hand-wrung, and were put aside for a few moments:
Washed clothing taken out of backwoods washing machine and hand-wrung
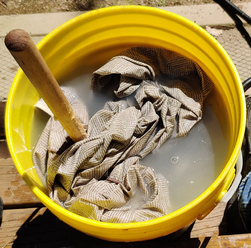
The rest of the dirty bed sheets were placed in the backwoods washing machine, and the agitation action mentioned above was repeated:
More bed sheets added to backwoods washing machine and the agitation process repeated
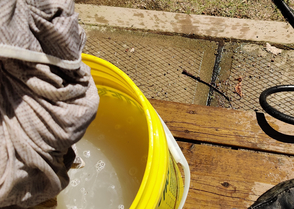
As the water on the steps of the deck and the garden tiles at the foot of the steps shows, the process can be a bit wet:
Wet steps and garden tiles at the foot of steps
At the end of the manual agitation, the bed sheets were removed from the backwoods washing machine and hand-wrung, and were put aside for a few moments.
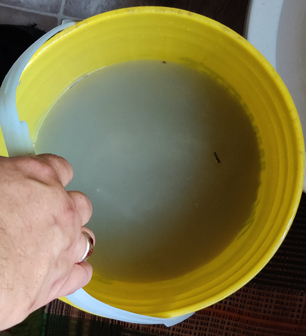
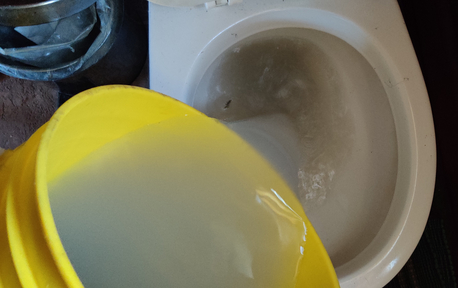
At this point, the backwoods washing machine’s bucket of dirty wash water …
Bucket of dirty wash water
… was brought inside and emptied in the toilet, and the toilet flushed:
Dirty wash water flushed down toilet
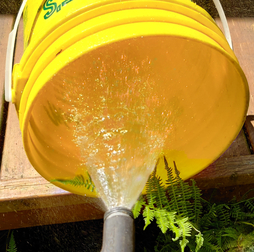
Back outside, the backwoods washing machine’s bucket was rinsed with the garden hose:
Bucket rinsed with garden hose
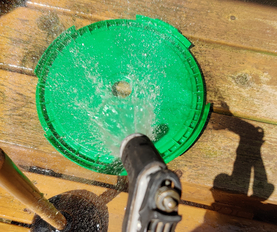
The backwoods washing machine’s lid was rinsed with the garden hose:
Lid rinsed with garden hose
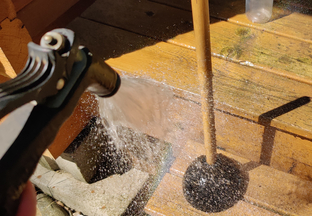
The backwoods washing machine’s plunger-agitator was rinsed with the garden hose:
Plunger-agitator rinsed with garden hose
At this point, the backwoods washing machine components were allowed to dry, and the backwoods washing machine was put away until the next use.
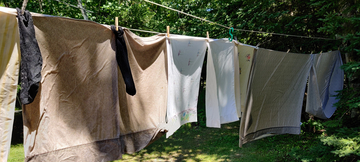
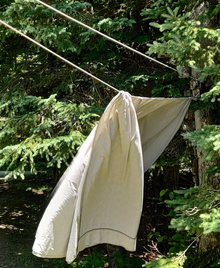
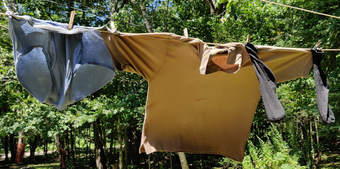
The laundry was hung on the clothesline:
Laundry hung on clothesline
In order to rinse the laundry, the garden hose was used to spray clean water on the laundry hanging on the clothesline:
Laundry being sprayed with clean water from garden hose
Laundry being sprayed with clean water from garden hose
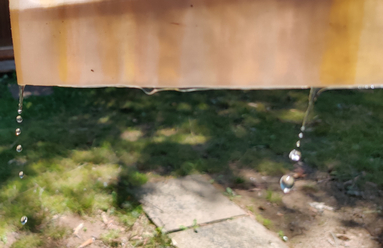
At this point, the laundry on the clothesline is dripping water:
Water dripping from laundry on clothesline
Water dripping from laundry on clothesline
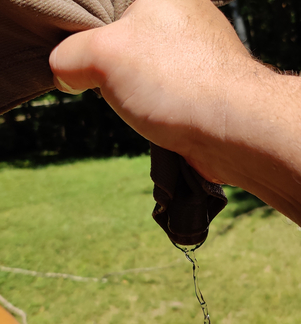
The bottoms of the various pieces of laundry were hand-wrung at their bottoms in order to remove the rinse water:
Laundry on clothesline hand-wrung to remove rinse water
As the laundry dries and become less heavy, they begin to get caught in the breeze:
Drying laundry beginning to catch the breeze
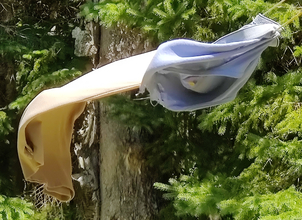
And depending on the amount and strength of the breezes and the winds, the laundry can really get caught in the wind:
Laundry really getting caught in the wind
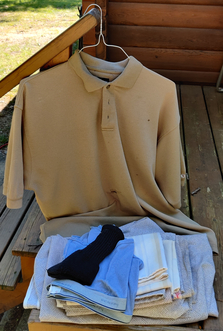
As the laundry dried, it was taken off the clothesline …
Dried laundry taken off the clothesline
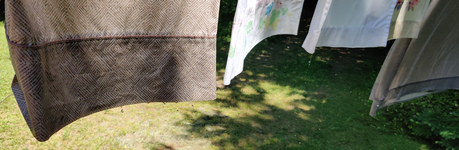
… while the rest of the laundry remained on the clothesline to continue drying out:
Rest of laundry continuing to dry on clothesline
Ah, the wind picked up quite a bit again, making the remaining laundry on the clothesline really get caught up in the wind:
Laundry really caught up in the wind
As the dried laundry was taken off the clothesline, it was folded up, ready for their next use:
Folded laundry
Although the backwoods washing machine has its limits regarding just how much laundry it can wash at once or just how well it deals with ground-in dirt, it is quite effective at washing regular albeit small loads, and is quite useful in situations in which more modern and convenient, automatic washing machines are not conveniently available!
This post is a translation of and (somewhat of an) adaptation, as well as slight update, of a presentation I gave in November, 2021, at a meeting of my local Linux Meetup. This adaptation includes some extra limited mockups of demonstrations performed live during the presentation.
The presentation was put together using Fedora Workstation (a general purpose version of Linux, in this case specializing in being a desktop workstation), highlighting some software either installed by default, or available in the Fedora Linux and rpmfusion software repositories (“App Stores”). It is therefore not intended to be a complete exposé on all available open source / free software options for PDF, even under Fedora Linux, let alone GNU / Linux in general, or other systems.
It should be noted that the presentation’s original target audience was a French-speaking group of Linux enthusiasts, Linux professionals, and other IT enthusiasts and professionals familiar with Linux. Most of the listed software would typically be available in standard or easily accessible Linux software repositories (“App Stores”). Beyond the world of GNU / Linux, free software is generally available for use on other systems, and, barring instances of a specific given package offered with paid warranty support, are usually also free of charge to download, install, and use.
In the case of the software highlighted in this post, all are either free-of-charge, or represent the free-of-charge version.
The Value of a PDF File
Context / Situation:
Take the case of the exchange of a document between two computers — such as between one running Linux, and another running Windows (or vice-versa) — and each computer is endowed with a different office suite, such as LibreOffice (cross-platform) on one, and Microsoft Office (Windows / Mac) on the other. (Of course, other possibilities exist, such as Calligra Suite (cross-platform), Pages / Numbers / Keynote / etc. (Mac), Corel Wordperfect, Google Docs, etc.)
LibreOffice, and in days gone by, OpenOffice.org, have long been touted as being “compatible” with MS Office; this purported compatibility, however, is disappointingly nowhere near as good as I and many others would like to believe.
As such, each user will open the shared document, which will be displayed according to each suite’s interpretation of the file, and may find that the actual displayed content on their screen could be different — sometimes substantially so — from the intended original display of the document. Text lines may be cut off; fonts may not be available on one or more of the systems, causing font substitution; font sizes may be changed, or text size may be different while substituting a different font due to the lack of the specified font; certain symbols may not be available on some systems; table effects may not work, or objects inserted into tables may not function or be displayed as expected, such as the insertion of a spreadsheet.
Unfortunately, I would estimate that said disappointing lack of “complete and perfect” “drop-in replacement” compatibility is a very common experience in comparing many well-known pieces of proprietary software and their open-source counterparts — not just LibreOffice and MS Office. Personally, as a Linux user, I have experienced this lack of complete compatibility a number of times since beginning to use OpenOffice.org in 2005 and Linux in 2006. Since then, I have also seen the incompatibility in action on a number of occasions during varying presentations under completely unrelated circumstances in which the presentation files were produced in one suite, and attempts made to show them in another were met with varying degrees of disappointment, sometimes leading to complete failure.
Example PDF
The PDF at this link is a somewhat varied although basic document created for this presentation (you will need a PDF viewer); images of the PDF are shown below. It was developed in order to use throughout the presentation as an example PDF to demonstrate the various given points at hand. It should be noted that the PDF was written in French because the presentation’s original target audience was French-speaking.
The following four images are jpeg images of the pages of the PDF document linked to above, and which I created in LibreOffice Presentation. It should be noted that, for the sake of argument, the pages could have been created in another format, such as a word processor, a spreadsheet program, or a drawing program, for instance.
Page 1 — Song lyrics to be displayed for a Karaoke Night
Page 1, the lyrics to a French song, such as one might want to display during a karaoke event among friends
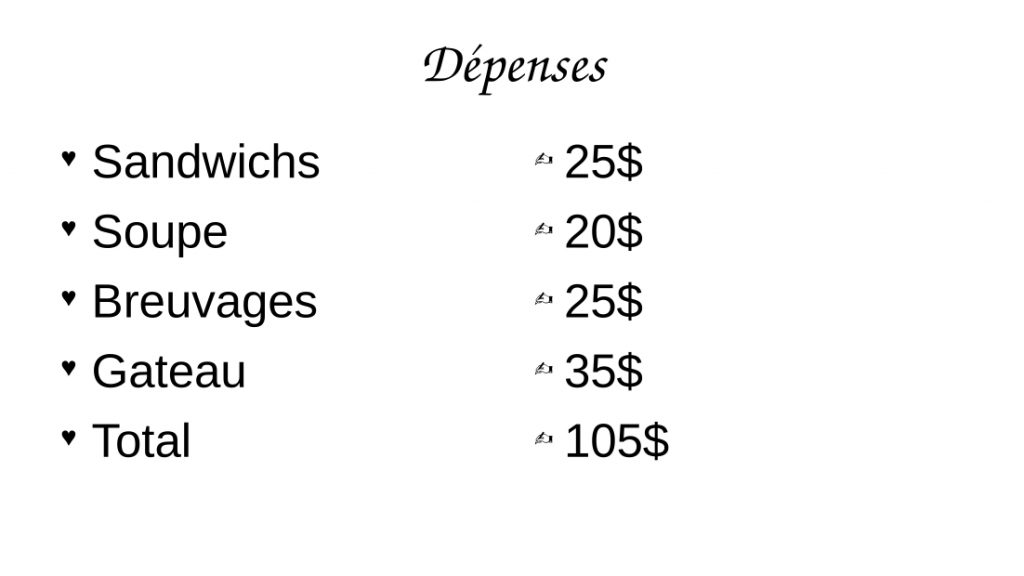
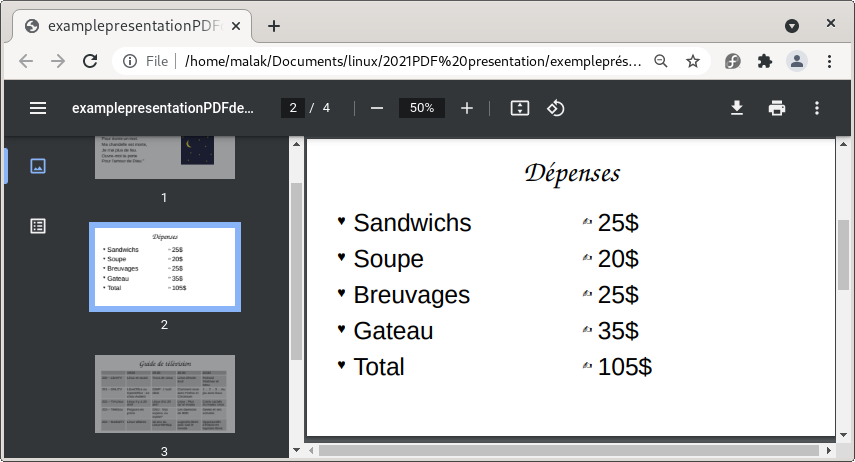
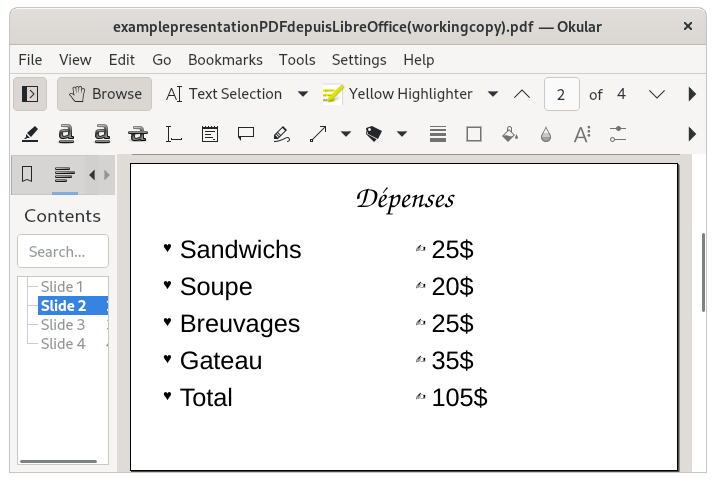
Page 2 — Expenses list for a Luncheon
Page 2, a fictitious list of expenses for a luncheon
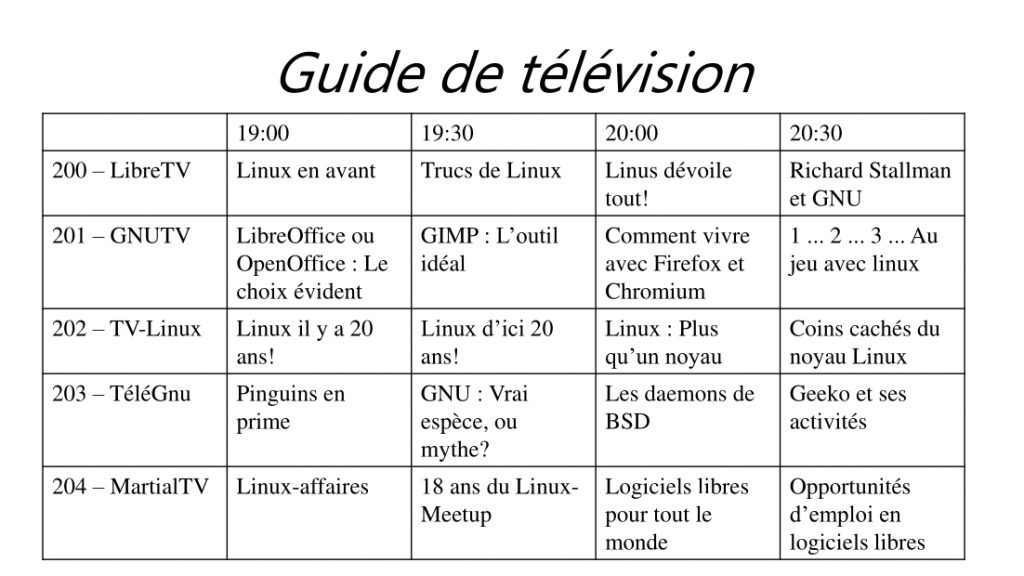
Page 3 — TV Listings
Page 3, a fictitious TV listing for an evening, with some Linux in-jokes and some in-jokes specific to the original audience
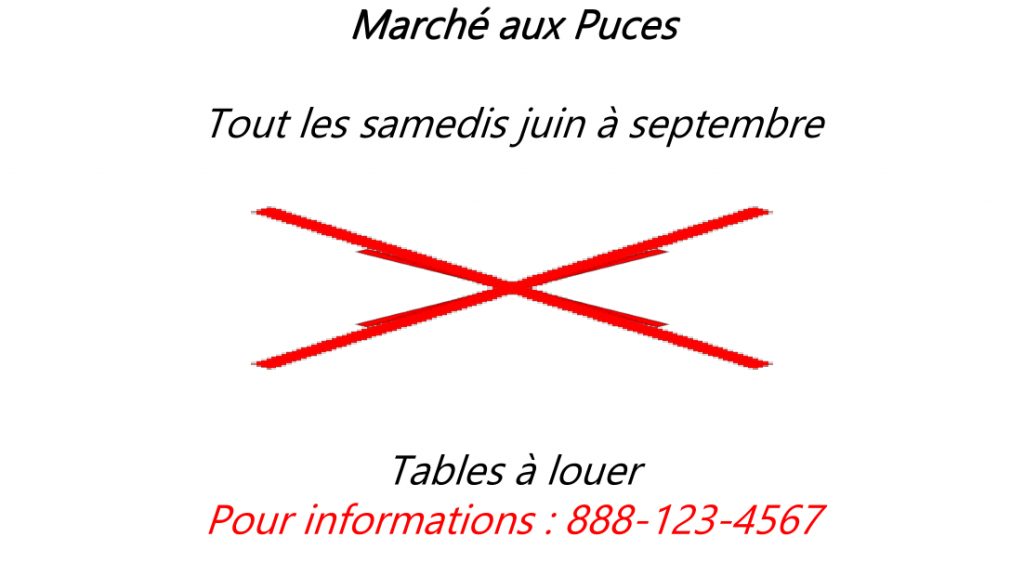
Page 4 — Flea Market Poster
Page 4, a fictitious flyer for a local flea market
The above document — represented here in jpeg format directly produced from a PDF of the document — was originally prepared in LibreOffice Presentation, and therefore correctly represented the original document.
However, the following four images are jpeg images of the pages of the PDF document I created in Microsoft PowerPoint (you will need a PDF viewer) into which I imported the original LibreOffice Presentation, in order to demonstrate the relative lack of compatibility between, at least in this case, LibreOffice Presentation and Microsoft Powerpoint.
Page 1 — Song lyrics to be displayed for a Karaoke Night
Changes: Text fonts and font sizes, causing text to be cut off the page
Page 1, note the changes in fonts and font sizes
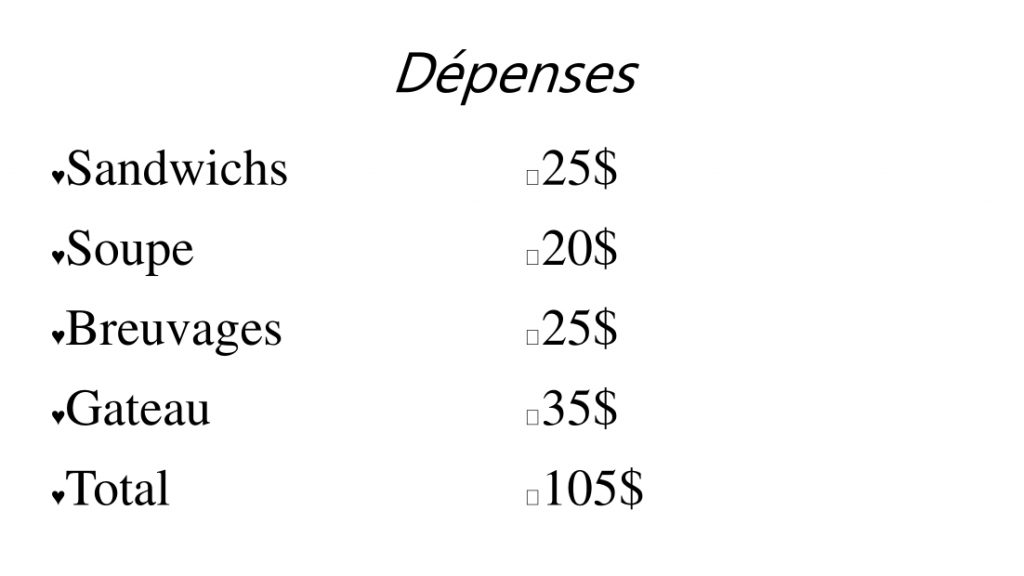
Page 2 — Expenses list for a Luncheon
Changes: Text fonts, and improper translation of symbols
Page 2, note the changes in fonts, font sizes, and improper translation of symbols
Page 3 — TV Listings
Changes: text fonts, font sizes, and lack of background colours in the various cells
Page 3, note the changes in fonts, font sizes, and lack of background colours in the various cells
Page 4 — Flea Market Poster
Changes: Text fonts, font sizes, corrupted translation of spreadsheet table in the centre of the flyer
Page 4, note the changes in fonts, font sizes, and the completely corrupted translation of the spreadsheet table in the centre of the flyer
The value of a PDF:
PDF files are generally well supported across multiple platforms and software, generally regardless of platform, and will usually be displayed in a virtually identical fashion on all systems; in the case of discrepancies, they are usually inconsequential.
However:
There exists a certain perception that, short of having Adobe Acrobat Pro (a commercial, closed source piece software), PDF files are difficult to edit and modify, allowing for a certain view that PDF files are more secure. This is a case of “security by obscurity”, since editing and modification may be performed by many pieces of software, besides but of course including Adobe Acrobat Pro.
PDF files may also benefit from a perception of being less susceptible to viruses and malware, such as through macros. Suspicious files, regardless of format, should always be checked when there is reasonable doubt, particularly under certain environments.
Warning:
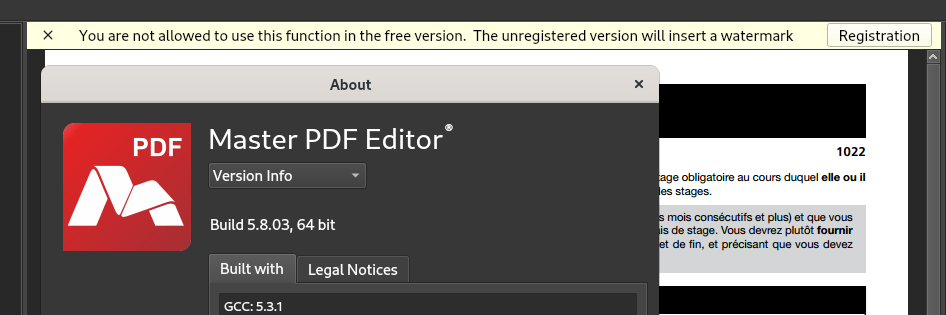
Be careful when using some PDF software downloaded from random websites on the internet, or websites which advertise PDF modification: The may add watermarks to the resulting file — this may be undesirable, and embarrassing, particularly if the software, website, or their output aren’t vetted prior to distributing the resulting file.
PDF Software which adds a watermark to edited watermarks when using an unregistered version
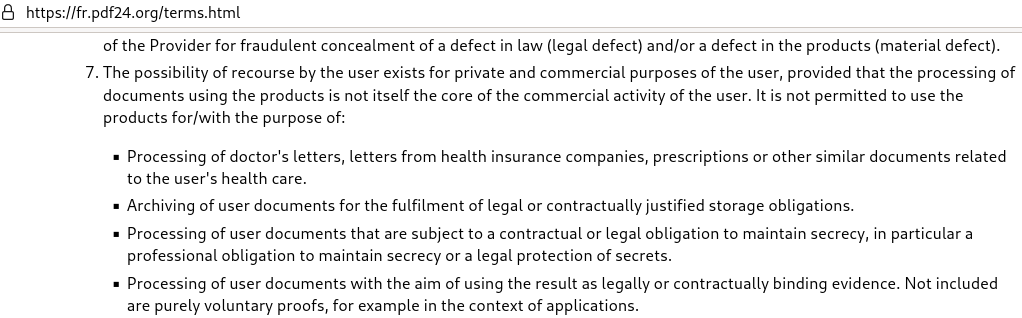
Further, websites providing PDF editing services may have very reasonable terms of service for editing your document, limiting their responsibilities toward you. By submitting a document to an external website, it may may not be able to protect personal privacy, nor be able to guarantee to not divulge commercial or industrial secrets or confidential personal information contained in the submitted document: They may become the victim of a hacking, or become the target of legal proceedings, not to mention potential dubious or unscrupulous intentions operators might have to begin with. Or, they may simply be unwilling to formally engage in such responsibilities in the absence of a paid service contract.
Sample from a website listing their conditions of use
This article’s objectives therefore are:
Firstly, presenting the utility of PDF as a useful format for distributing documents to a wide audience, without having to concern oneself with what software individual audience members may or may not have access to, if at all, and regardless of reason(s);
Secondly, presenting safe, free software and open-source software options for using and editing of PDF files;
Thirdly, beyond the general promotion of free and open-source software and PDF editing, this article is not about promoting nor deriding particular OSes or software packages, or strictly speaking their strengths or weaknesses.
As such, if a particular system or software package suits your needs and / or purposes, you should use it.
However, if a given preferred solution is costly software, perhaps your organization (or your family) may find it to be financially worthwhile to only purchase a minimum number of licences and only install it on a minimum number of designated computers, instead of needlessly on every computer in your organization (or family).
A simple cost / benefit analysis would be worthwhile: You should consider whether you wish to pay $5, $10, $15, or more, on a recurring basis (perhaps monthly), per computer on which such software would be installed. The costs, be they one-time costs or recurring, should be considered against how often the software may be used, perhaps in some cases only once or twice monthly — perhaps overall, let alone for each individual instance, depending on your organization’s size, needs, and other considerations. Further, it should be considered what operations are typically executed, especially if they simple operations such as joining multiple PDFs, or extracting a page or two, which can be easily performed by many, using any of a multitude of software packages you can get without cost, as opposed to perhaps more technical tasks which may justify costly specialized software.
Creating PDFs from an established document
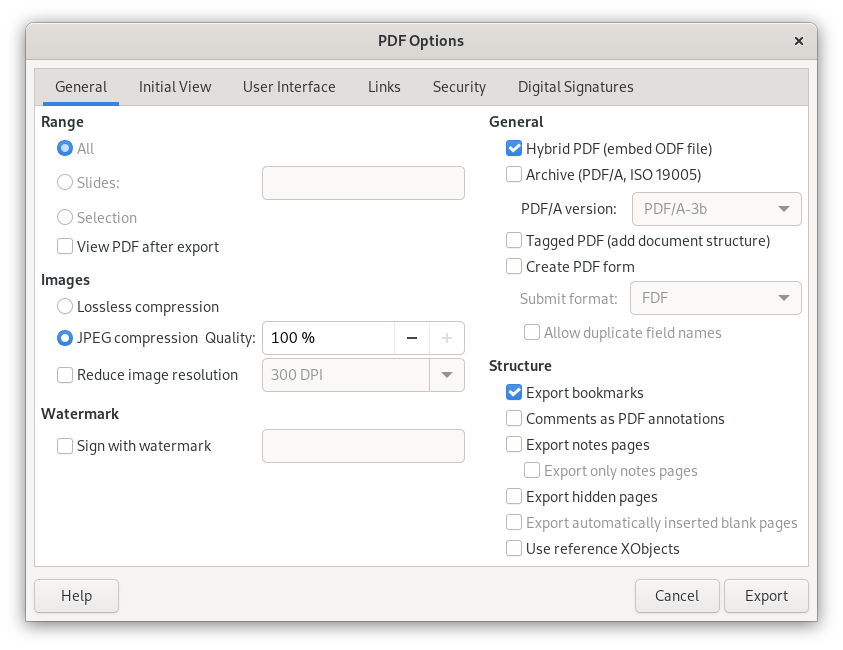
To begin with, most software which create documents will have an option in the File menu or elsewhere to Print, or Print to Document, or an Export function, which will offer PDF as a format:
PDF (creation) Options in the “Export as PDF” option in LibreOffice
At the risk of skipping ahead to the PDF splitting section below, note that it is a common option to be able to selectively output some, instead of all, pages to the resulting PDF, thereby avoiding the question of having to later split the PDF to get only the desired page(s).
Overview of PDF Software
Perhaps (or perhaps not) to the surprise of many, there are many software packages and suites which will:
Display PDF files
Combine, divide, and export PDF files, as well as reorder pages within a PDF;
Edit PDF files, such as the overall files and the file metadata, as well as the PDF file content
Import and display PDF files according to particular strengths (The Gimp, Inkscape, e-readers)
Displaying PDF files:
Here are some examples of software which will display PDF files directly:
Evince Document Viewer (Gnome Project)
Okular (KDE Project)
Firefox and Chromium (Web Browsers)
PDFSam (limited free version; there is also a commercial version with more capabilities); a version for Debian derived Linux systems is available on their website
Here is a very short list of software which will open and display PDF files and allow editing, each according to their strengths, but whose primary function is not PDF display:
LibreOffice (Office Suite)
Calligra (Office Suite)
The Gimp (Image Manipulation)
Inkscape (Vector Graphics Editor)
Evince Document Viewer
PDF displayed in Evince Document Viewer
Chromium (web browser)
PDF Displayed in Chromium
Okular
PDF displayed in LibreOffice
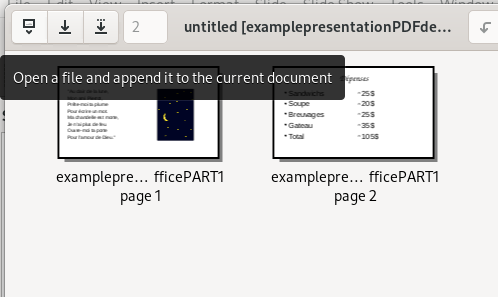
Software to Combine PDF files
A relatively common activity is to combine multiple PDF files into one file — such as, separately scanned pieces of paper, or PDF files produced separately, perhaps by different people.
Here are some examples of software which will combine PDF files:
PDF Mix Tool
PDF Arranger
PDF Mod
PDF Jumbler
PDFedit
PDFTricks
PDFSam
LibreOffice
Calligra Suite
The Gimp
Combining PDF files in PDFArranger
Combining PDF files with PDFArranger
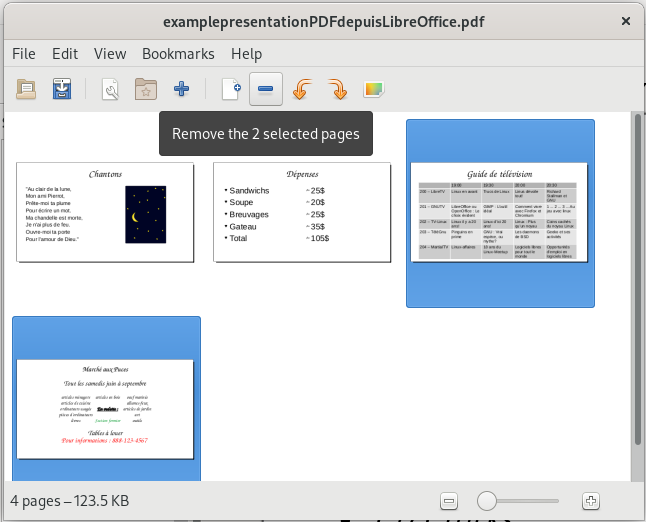
Software to Divide PDF Files / Extract Pages
Another relatively common activity is to divide a PDF File, or extract one or more pages from a PDF file.
Note that if you are the creator of the document, as shown earlier, the software you used to create the document likely allows for you to selectively export individual or multiple pages to PDF in addition to exporting the entire document.
Here are some examples of software which will divide PDF files / extract pages:
PDF Mix Tool
PDF Mod
PDF Jumbler
PDFedit
PDFTricks
PDFSam
LibreOffice — allows to print and / or export one or more pages
Calligra Suite — allows to print and / or export one or more pages
The Gimp — allows to print and / or export one or more pages
Splitting a PDF File with PDFMod
Removing pages from a PDF file using PDFMod
PDF Editing
Here are some examples of software which will edit PDF files to varying degrees:
LibreOffice permits the possibility of creating a hybrid PDF and .odt / .ods file (word processor or spreadsheet files), which will allow for the PDF to be more easily edited by any suite that is able to edit .odt and .ods files; create a document with LibreOffice, and in creating a PDF, choose Export — General — PDF Hybrid (incorporating .odt / .ods file)
In my personal experience, PDF editing — and ease of doing so — can vary wildly according to what one wishes to do, as well as wildly according to the nature of the source PDF. I have had excellent experiences editing a PDF created from a CAD software drawing (presumably created using commercial CAD software such as AutoCAD), and whose individual elements could be manipulated in LibreOffice Draw. I have also used LibreOffice Draw to insert text zones, arrows, and scanned signatures into PDFs. Conversely, documents composed primarily of scanned images — including text and forms — may require more image manipulation skills to edit, modify, and manipulate individual and specific elements of the document, depending on your objectives.
What you can do will also be dictated by which software package you choose and its strengths and weaknesses.
For instance, it should be noted that the phrase “Editing a PDF” can be a nebulous thing which can mean many and different things to many and different people. For instance, actually editing document text directly in the PDF may be what one understands and expects, while the strengths of a given piece of software may lay elsewhere.
LibreOffice has some PDF import functions, as well as imperfect document layout functions. Depending on the source PDF document, it can be quite effective at editing text directly.
Note from the closed-source world: I once had an excellent experience with a moderately-difficult-to-edit PDF using Microsoft Word, which included being able to edit the text — and presumably save in MS Word’s native file format.
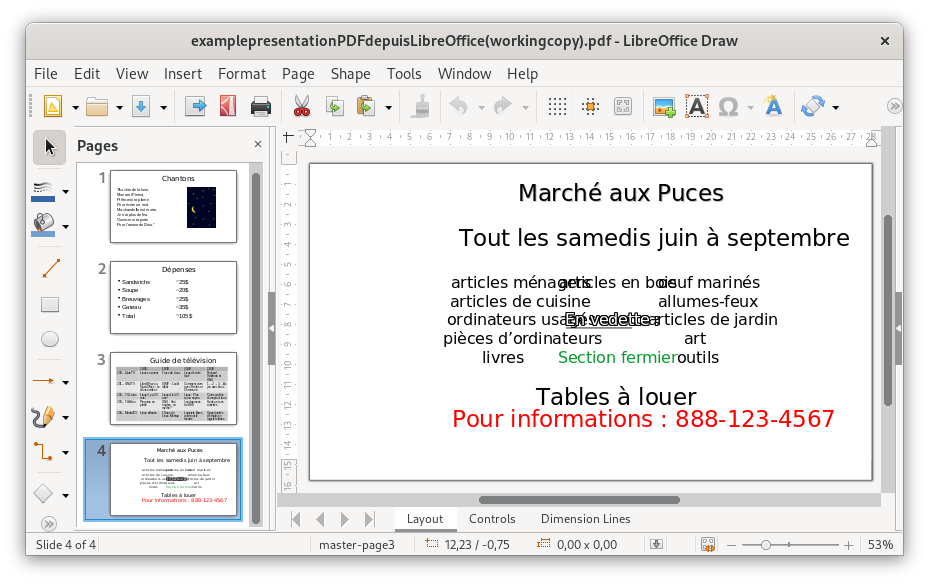
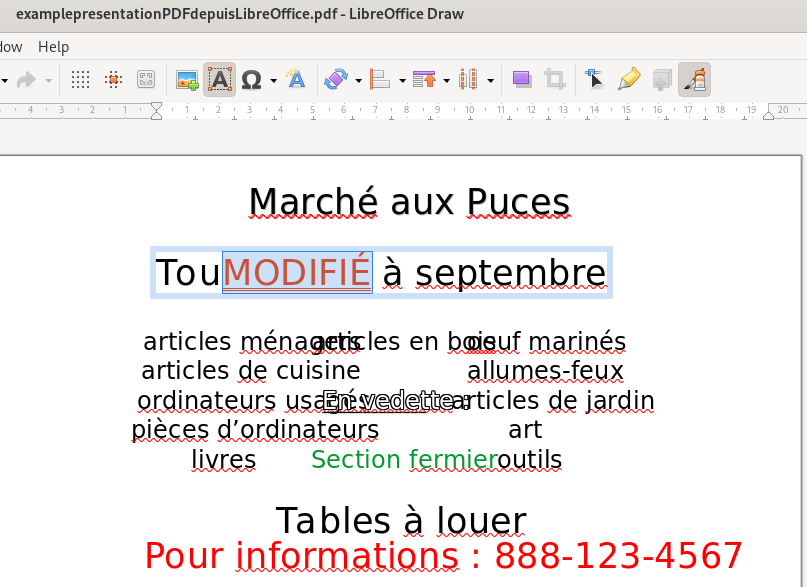
Importing and editing a PDF in LibreOffice Draw (note the imperfect import):
Editing a PDF in LibreOffice Draw
In the case of my example PDF, LibreOffice Draw allows for some direct editing of the text (Notice the word “MODIFIÉ” with a brick-red text colour replacing some of the text):
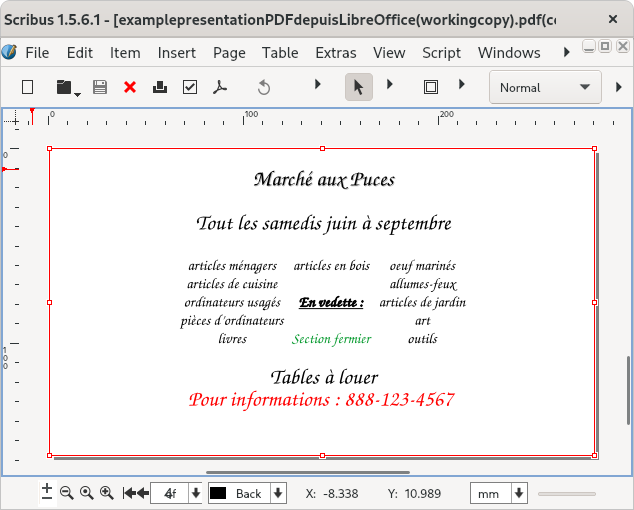
Importing and editing a PDF in Scribus, a desktop publishing programme:
Editing a PDF in Scribus
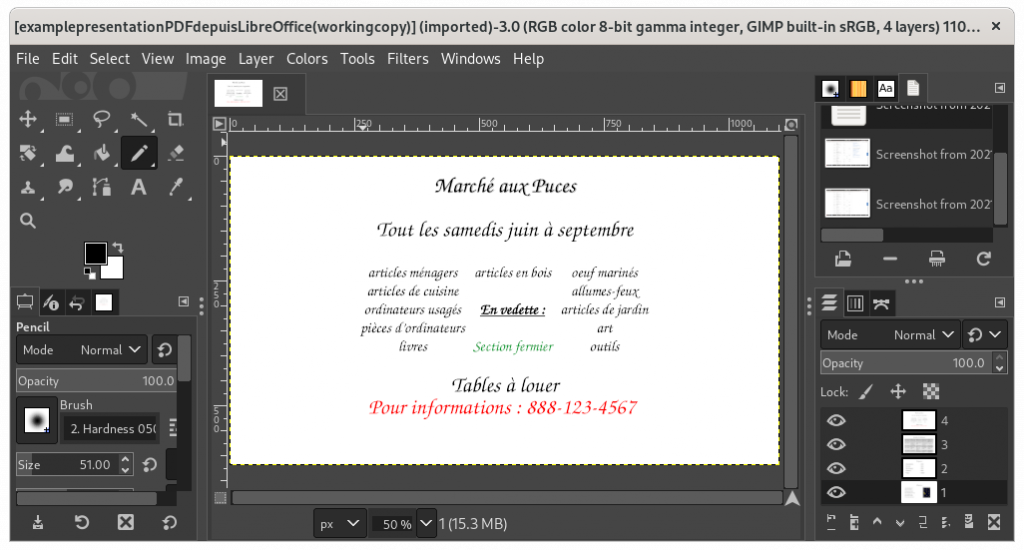
The Gimp can insert text zones into a PDF, and which text zones themselves may be edited within The Gimp; however, its strengths lie in dealing with a PDF as an image, and editing image characteristics, while editing the text as one might in a word processor might be more challenging.
Importing a PDF file into The Gimp, image manipulation software:
Editing a PDF in The Gimp
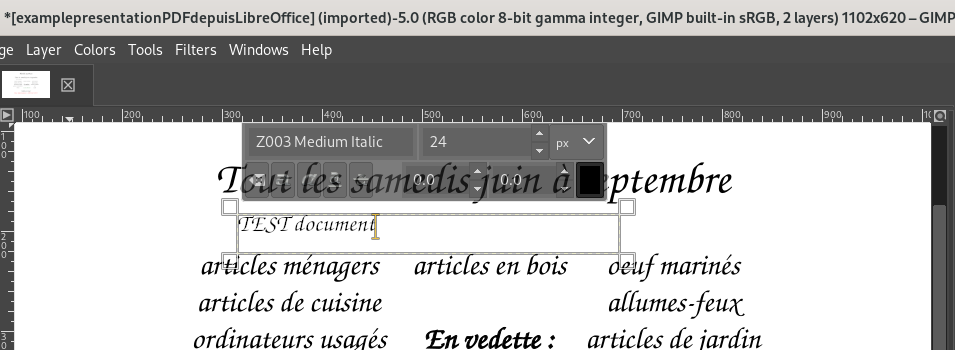
Adding a text zone to a PDF in The Gimp:
Note the insertion of a text zone under the first line, saying “TEST document”
Exporting Text, Cut & Paste, and .odt File Creating
Depending on the source PDF and its nature, “cut & paste” may work (as opposed to not working at all), and may even “work well”, although this may be wildly variable according to the source PDF document. However, even in the best case, this method will normally only copy the actual text, and some of the images, from your PDF document; it may not usually be particularly useful in actually replicating the PDF document formatting.
As for other document and content formats, such as drawings, pictures, and text rendered into images, other sections of this post should be consulted (ie. using LibreOffice Draw or The Gimp for drawings; optical character reading (OCR), including OCRFeeder, etc.)
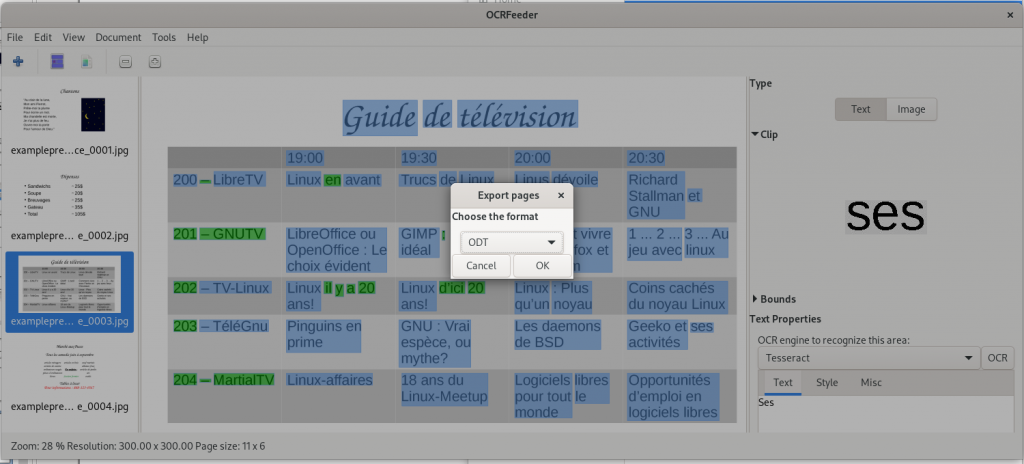
In addition to the mention of LibreOffice above, OCRFeeder is software that acts as a front end to optical character recognition software, and is able to import PDF files, and then export in HTML, plain text, OpenDocument (.odt) format, and of course PDF. Again depending on the source file, results may be variable, although the results are usable.
OCRFeeder in action and ready to export a page of the example PDF to ODT format
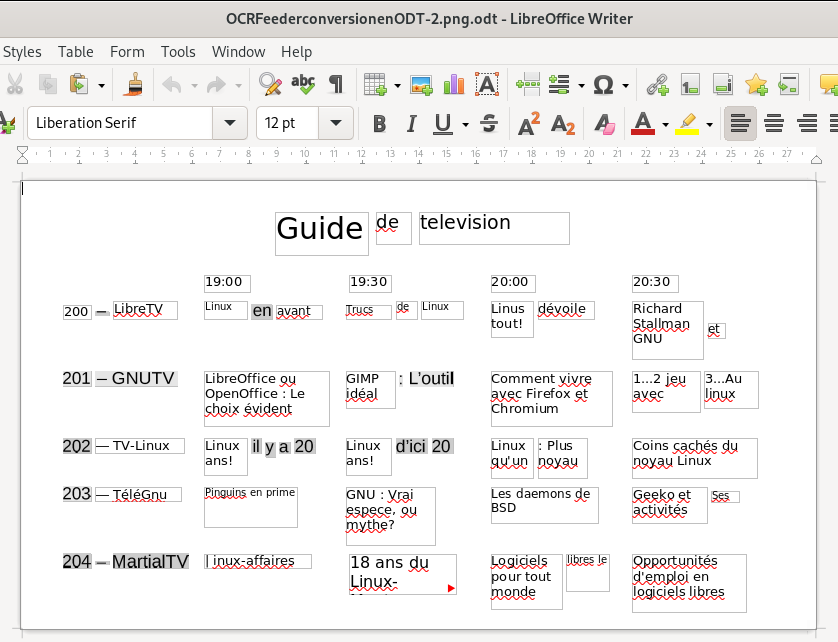
… and here is an image of the exported .odt file (word processor file) of the page viewed and created in OCRFeeder, then opened in my word processor (LibreOffice):
Exported word processor file
Ironically, as this case shows, the changes (or lack of adequate recognition and / or translation of the original layout) can be as great or even more as can occur by simply sharing documents between not-fully-compatible-though-similar software suites. However, though far from perfect, it is arguably usable, depending, of course, on how much effort you are willing to devote to replicating the original document layout — and then making your desired changes, and finally creating a new PDF document.
Exporting to other file formats:
As has been (indirectly) demonstrated several times throughout this post, PDF files can be imported into software that isn’t specifically dedicated to PDFs, and then allow for the resulting imported file to be exported into other formats. For example, The Gimp was used to create most of the working images for this post: In the case where PDF files were to be displayed, the PDF files were imported into The Gimp, and then exported in jpeg or png formats. This type of conversion — from PDF to another given format — can often be done by other pieces of software (to varying degrees) according to their strengths or weaknesses.
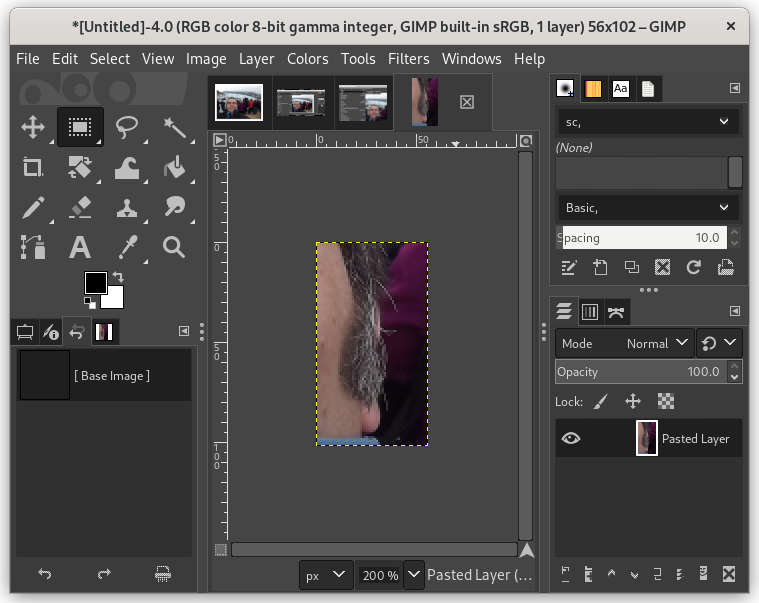
Photo Editing with PDFs
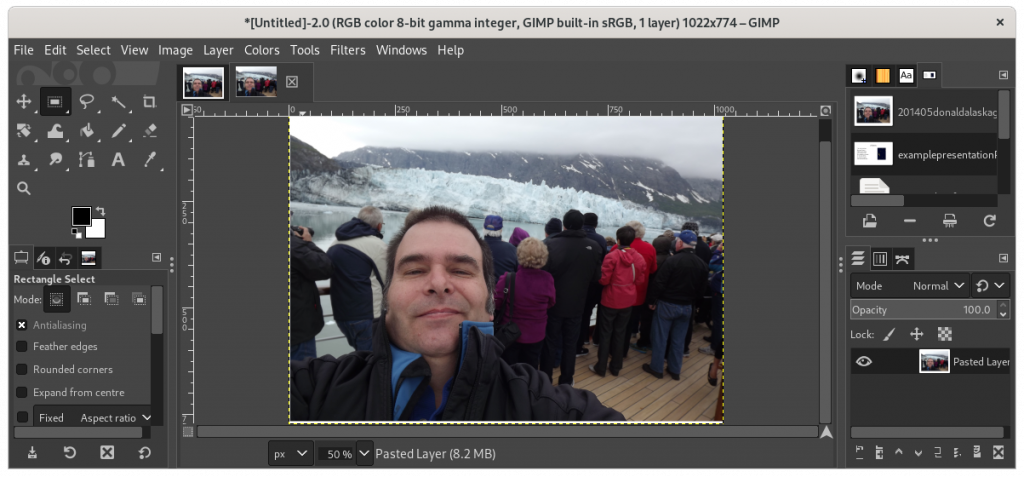
The Gimp is fully functional image processing software, very similar to — but, unfortunately, not fully compatible with nor a perfect drop-in replacement of — Photoshop. Using The Gimp, you can import a PDF and edit the image(s) directly, or extract photos and other images through a variety of means, such as selecting the area of the photo, copying the selected area, and creating a new document from the clipboard.
Here is a The Gimp having imported a PDF of a photo of myself on a cruise:
PDF of a photo of the author imported into The Gimp
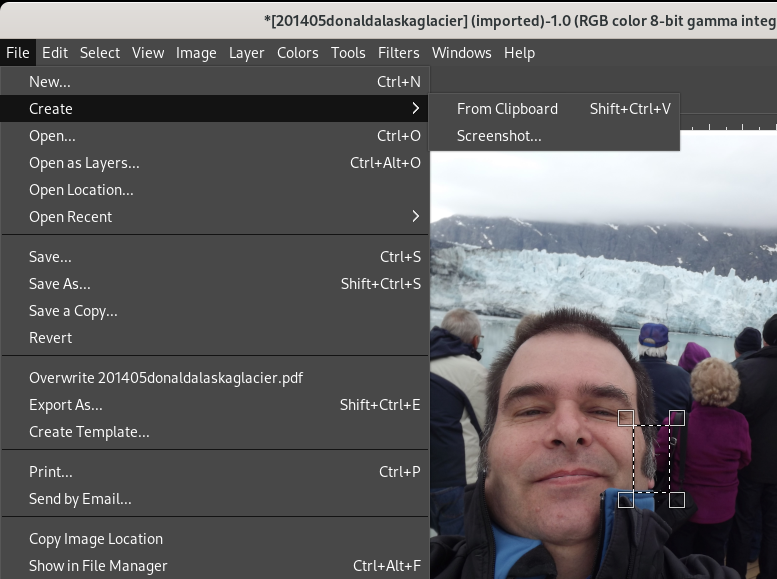
During the live presentation, I gave the hypothetical example — for the sake of levity — of a barber who particularly likes sideburns, and seeing mine in a PDF, decided to clip out one of my sideburns from the photo …
Selecting a region of the photo and creating a new document therefrom
… and then notice on how I was starting to go grey at the time :
The beginnings of some greying in my sideburns
It is taken as an understood that use of The Gimp to manipulate the photo can be continued at this point — such as how my sideburns might look after a colouring, or to compare side-by-side against other people’s sideburns — and then the result exported as a PDF.
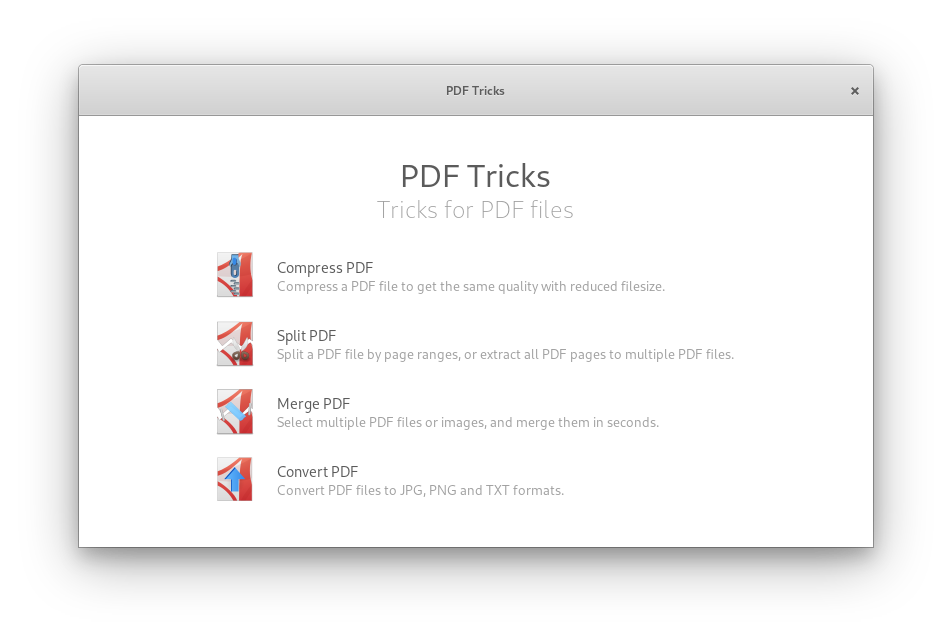
PDFTricks allows for resizing of images in PDFs, principally compressing and reducing the file size to the order of “large”, “medium”, “small”, and “extra-small”, as well as image exporting to .jpg / .png / .txt formats, and file merging and splitting.
PDF Tricks menu of options
During the presentation, the PDF document above composed of the photo of myself on a trip was run through the software’s “extreme compression” option. The following is a clip from a screenshot from a file manager, showing the size difference between the the original file, and the newly created compressed file:
File size difference before and after processing file with PDFTricks
LibreOffice Draw allows for some image manipulation.
LibreOffice Draw being used to manipulate an embedded image
In this particular situation, the night sky drawing in the karaoke page of the example PDF I created was selected, and the various options directly available were shown. However, as mentioned earlier, I have imported PDF documents of building plans and modified them to include notes showing were works were performed, or to add signatures to documents.
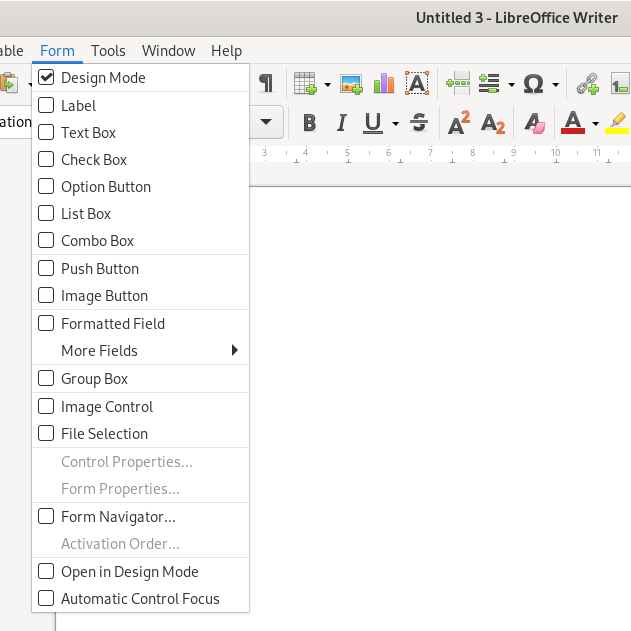
PDF Forms
PDF Form Creation
LibreOffice Writer and Calligra Suite are fully-featured for the creation of forms. Unfortunately, I am not particularly adept at creating forms.
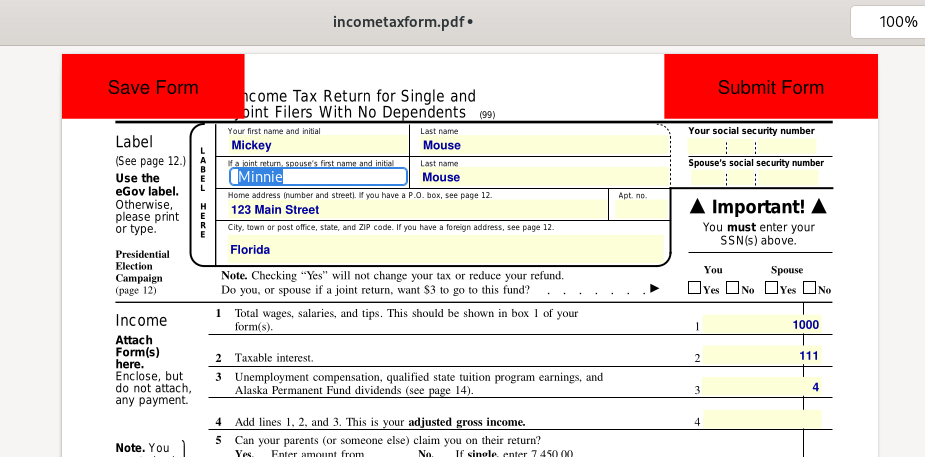
Filling PDF Forms
Evince — if the PDF form was designed to be interactively filled
Okular — if the PDF form was designed to be interactively filled
The Gimp — allows for text areas to be inserted, as well as photos, drawings, and the like
LibreOffice Draw — allows for text areas to be inserted, as well as photos, drawings, and the like
Fillable form being filled with the names of Mickey and Minnie Mouse
Final Choices:
Viewing / displaying PDF files : User’s choice (usually a system’s default PDF viewer is adequate, or a web browser)
Combining and splitting PDF files : PDFMixTool
Editing PDF files : User’s choice (depends on objectives and source file; The Gimp and LibreOffice Draw are good contenders)
Adjusting PDF file size : PDFTricks
Form creation : User’s choice
Form filling : User’s choice (usually a system’s default PDF viewer is adequate, or a web browser)
Exporting PDF to other formats : OCRFeeder (for .odt); LibreOffice Draw (Photos and images); The Gimp (photos and images)
Note on Linux availability of the above software:
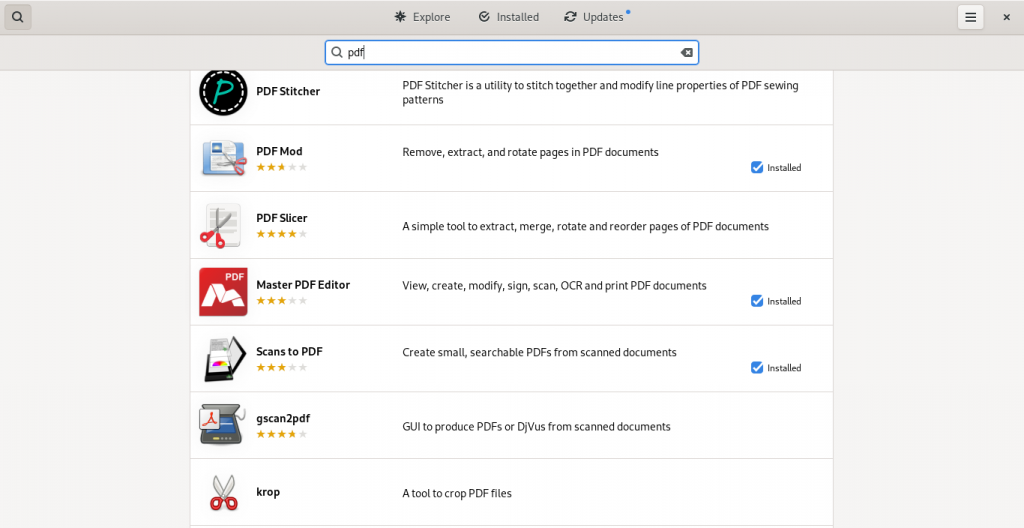
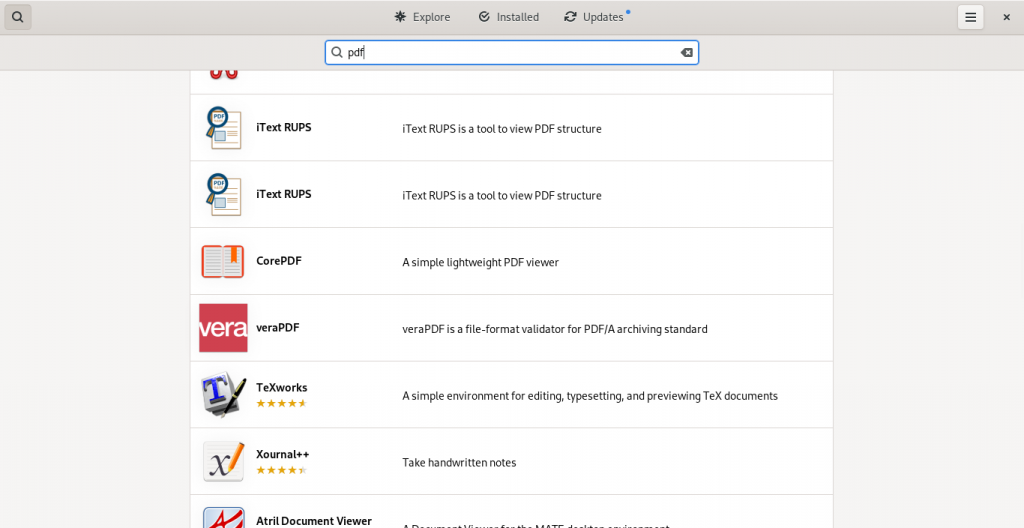
Here are some screen shots from my system’s installed repositories (Fedora Stable; Fedora Updates; rpmfusion.org — free and non-free)
PDF software easily accessible from my computer’s software repositories (“App Stores”):
Gnome Software list of available PDF software from various software repositories on Fedora Linux
Gnome Software list of available PDF software from various software repositories on Fedora Linux
Gnome Software list of available PDF software from various software repositories on Fedora Linux
As this list suggests, there is lot of software available which have varying PDF abilities, ranging from being dedicated PDF software of various kinds, to other pieces of software with other principal functions but with PDF functions ranging to simple importing from and exporting to the format, to being useful within the limits of the software’s main functions to manipulate PDF files in some way(s).
Summary:
This presentation’s goals are to highlight:
how PDF files are well supported most of the time on most systems, while the various pieces of software, between two versions, typically a well-known closed source project and an open-source counterpart, for document production, are not as compatible with each other as we may want;
free software while avoiding the security risks inherent to using unknown and potentially dangerous websites, as well as software which is easily available for routine tasks as well as to reduce costs;
the possibility of editing PDF files with various pieces of free software which are easily available in most Linux distributions’ repositories — as well as often easily available for other platforms — albeit occasionally with variable success.
Questions taken during the presentation:
A question asked midway through the presentation expressed a certain surprise that The Gimp can be used to edit PDFs. As mentioned earlier, The Gimp is able to import PDF files, and perform various functions on the file according to its strengths (image manipulation).
A participant asked at the end during a question period about a recommendation for software to affix signatures to documents. I replied that I was not aware of any open source official signing software with digital traceability, simply because that I had not done any research on that subject; however, an image of a scanned signature can usually be inserted in a document using The Gimp or LibreOffice Draw, or as a document is being created in a word processor.
A final comment recommended the use of LibreOffice Draw, based on the commentor’s frequent use of it to perform a number of the functions listed here, to which I’d commented that I had asked my employer’s IT department to install LibreOffice on my work-issued Windows-based laptop computer in order to be able to perform some drawing-modification functions as part of my employment.
Enjoy sharing and editing PDF files!
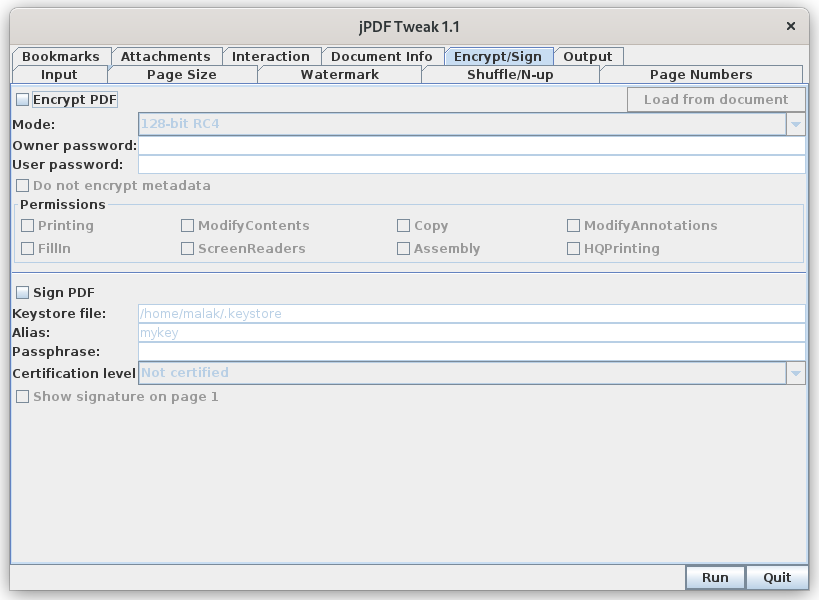
UPDATE 20220407:
Signing PDFs can be performed with jPDF Tweak.
JPDF Tweak can also encrypt and add passwords to a PDF.
One of my mom’s perennial holiday dinner treats was her roast potatoes, something I figured it was time to learn how to make. As such, I asked her how to do it — it is fairly easy — and adjusted the basic recipe to two generous servings, which can be multiplied and adjusted according to the number of people to be served.
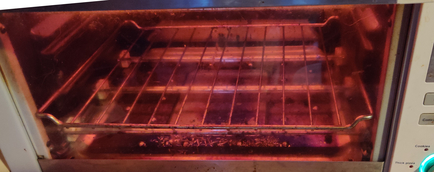
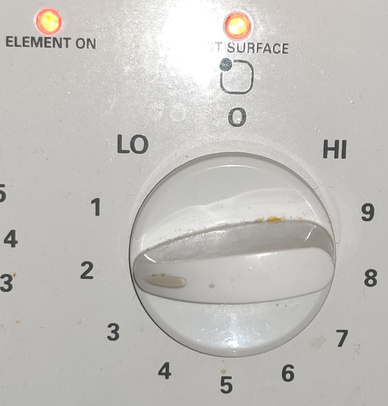
Note that the recipe as presented can be easily made in a countertop convection oven — as was the case in the following series of photos at the cottage — but there may be some minor variations when scaling up to larger amounts cooked in a conventional oven.
Making the roast potatoes:
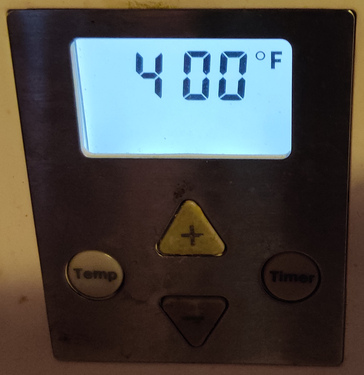
First, the oven was pre-heated to 400F:
Oven preheated to 400F
Oven preheating
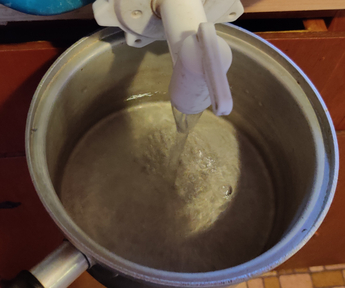
Water was poured into a pot:
Water poured into a pot
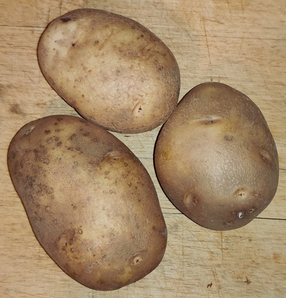
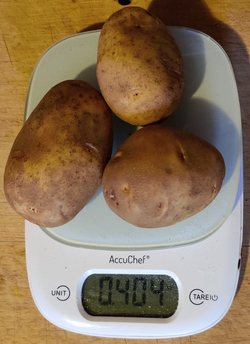
Potatoes were taken out, in this case, about 400g or 3/4lb to 1lb of potatoes:
Potatoes taken out
Potatoes weighed
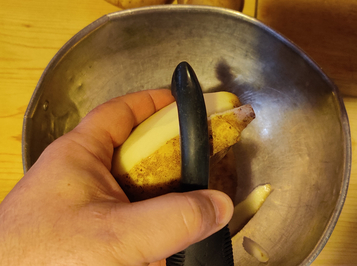
The potatoes were peeled:
Potatoes peeled
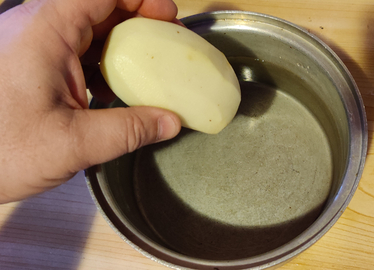
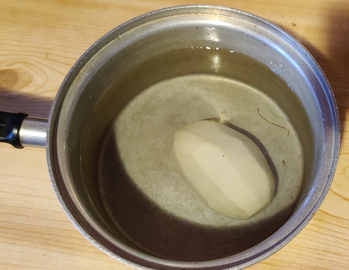
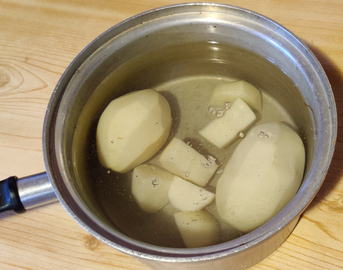
Peeled potatoes were placed in the water:
Peeled potatoes placed in water
Peeled potatoes placed in water
Peeled potatoes placed in water
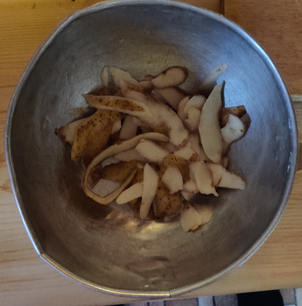
Potato peels were collected, and in this case burned in the fireplace, since it was heating season:
Potato peels collected to place in the fireplace
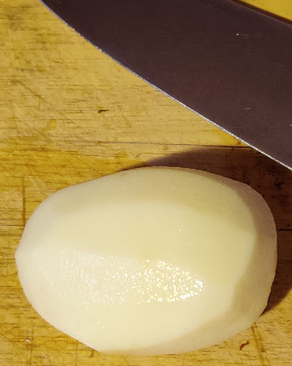
Peeled potatoes were taken out one by one to slice:
Peeled potato to be sliced
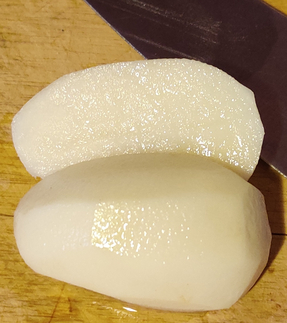
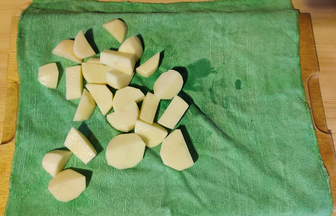
Potatoes were sliced in half lengthwise:
Potato sliced in half lengthwise
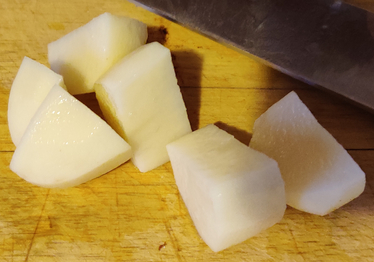
… and then sliced into pieces:
Potato cut into pieces
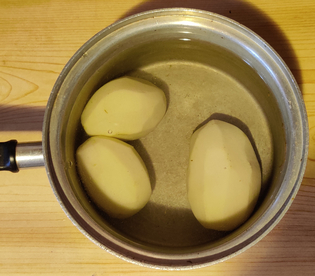
The potato pieces were placed back into the water:
Potato pieces placed back into water
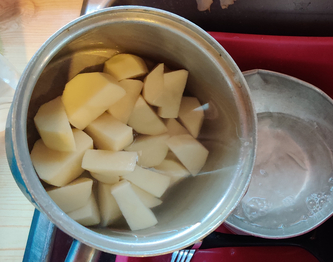
The rest of the potatoes were similarly cut up:
Potato pieces in water
The water was drained from the potatoes:
Water drained from potatoes
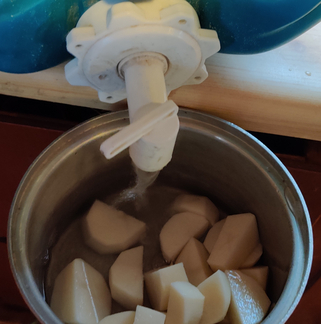
… and fresh water was poured in the pot to rinse the potatoes:
Fresh water poured into pot
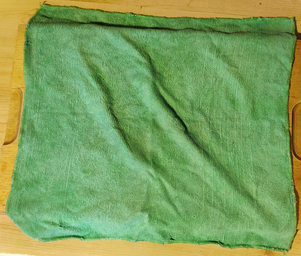
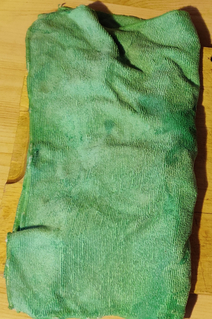
A clean, dry towel was laid out on a cutting board:
Clean dry towel laid out
The drained potatoes were placed on the clean dry towel:
Drained potatoes placed in dry towel
The towel was folded over in order to pat dry the potatoes:
Towel folded over to pat dry the potatoes
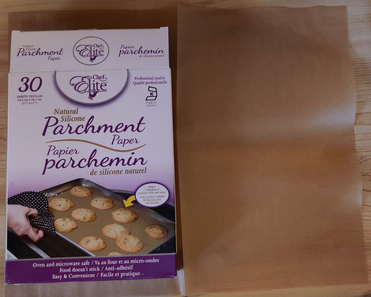
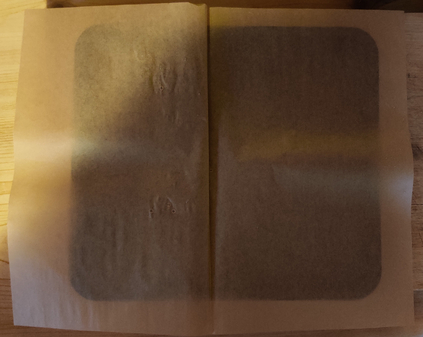
Parchment paper was taken out:
Parchment paper taken out
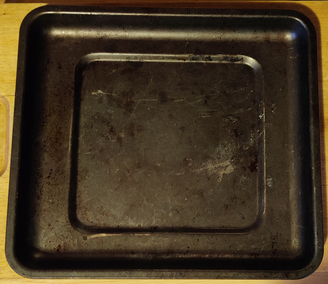
An oven tray was taken out:
Oven tray taken out
The parchment paper was placed on the oven tray:
Parchment paper placed on oven tray
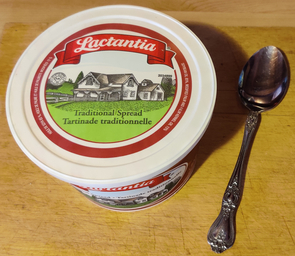
Margarine was taken out:
Margarine taken out
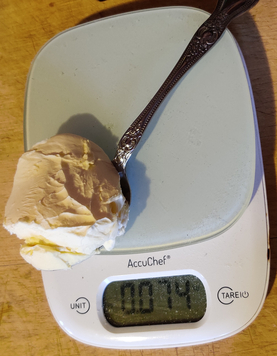
The kitchen scale was set to zero with an empty spoon on it, and then margarine was weighed out:
Margarine weighed out
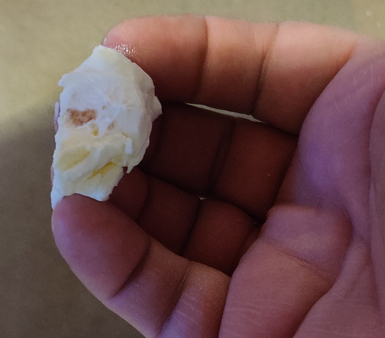
A bit of margarine was picked up with my fingers:
Margarine picked up with fingers
Pat dried potato pieces were picked up one at a time and slathered with margarine and placed on the oven tray:
Potato pieces picked up and slathered with margarine
Potato pieces slathered with margarine and placed on baking tray
Potato pieces slathered with margarine and placed on baking tray
Potato pieces slathered with margarine and placed on baking tray
And as can be seen, the roughly 75g / 3oz of margarine were used up:
Measured out margarine used up
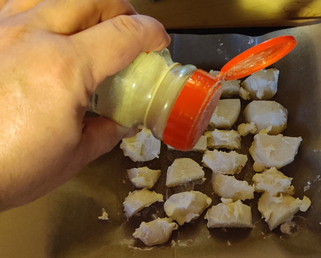
Onion salt was taken out:
Onion salt taken out
Onion salt was shaken somewhat liberally over the margarine covered potatoes:
Onion salt shaken over the potatoes
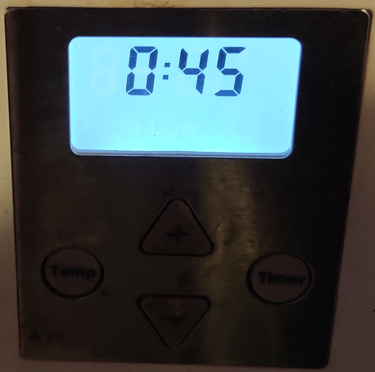
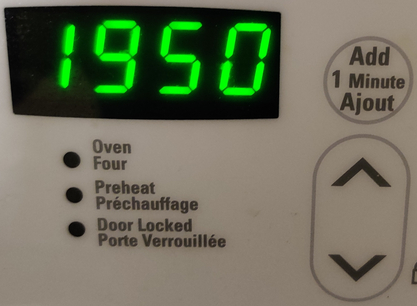
The timer on the oven was set to about 45 minutes:
Oven timer set
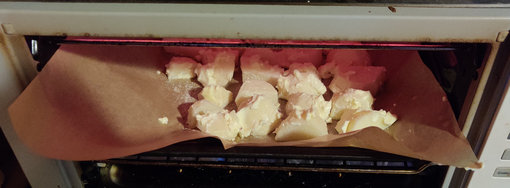
The tray of potatoes was placed in the oven:
Tray of potatoes placed in oven
Tray of potatoes in oven
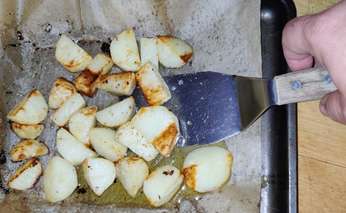
Here is a shot of the roasting potatoes after about 25 minutes:
Partly roasted potatoes
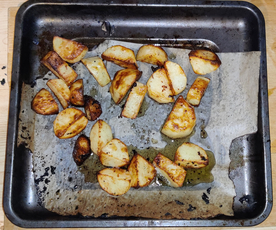
The potatoes were turned over at this point:
Potatoes turned over
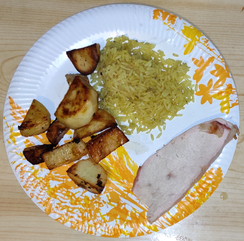
The potatoes were taken out just before 45 minutes, ready to eat:
Roast potatoes ready to eat
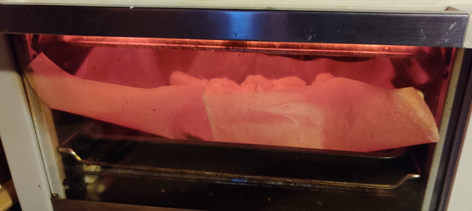
(Note that because of the excessive amount of parchment paper used, yes, I did have to deal with some burning parchment paper!)
My version of my mom’s stuffed butternut squash is a new addition to my collection of recipes, although it is a dish that my dear mom has been making for years. Yummilly, it very closely tracks my mom’s version.
It is actually a fairly easy recipe, and is fairly easy to scale up to feed a larger crowd than the two to four servings to which this recipe is tailored.
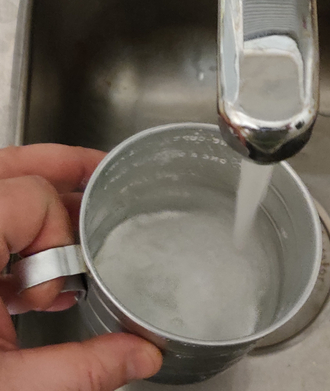
Beyond being a tasty dish, Mom used to make it as a way to use up rice she’d already made earlier in a larger, more conveniently sized batch, or as a way to have rice in the fridge to use later in the week; for this post, I show the photos making rice, to have more rice for later. Conversely, I do not show the cooking of the ground beef, already having some previously cooked and frozen ground beef on hand.
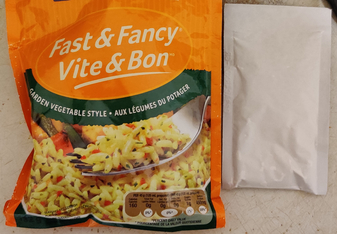
Also with regard to the rice used in the photos below, I used a commercial flavoured rice I like; however, the point of the recipe lies in using any rice that suits your tastes.
Note: This post uses photos from two separate cooking sessions, as I was working out some of the required specific amounts of each ingredient and techniques. As such, in some cases, one may notice slight discrepancies between two or more photos showing the progression of steps the narrative identifies as sequential, when in fact in some cases the photos may switch between two separate sessions which may have inadvertently involved slight differences.
Making the stuffed butternut squash:
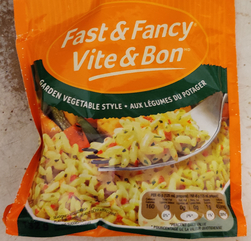
I began by taking out a commercial packet of a flavoured rice I like:
Flavoured rice package taken out
The flavouring packet was taken out of the package:
Flavour packet (on right) taken out
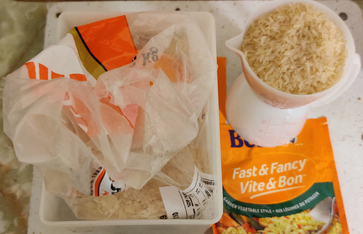
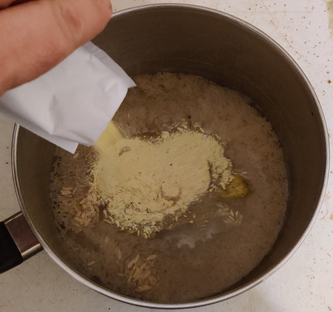
The rice in the packet was measured out, and a matching amount was measured out from a bag of plain rice, since I find the amount of flavouring in the packet too strong when the rice is made with the amount of rice as packaged:
Rice measured out
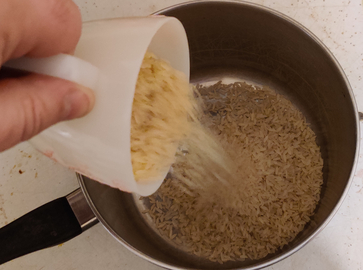
The rice was added to a pot:
Rice added to pot
Rice added to pot
Rice added to pot
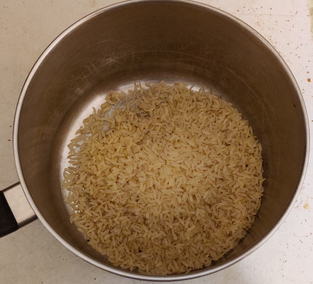
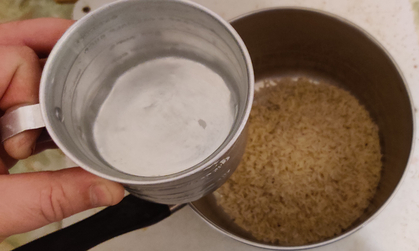
Water was measured out:
Water measured out
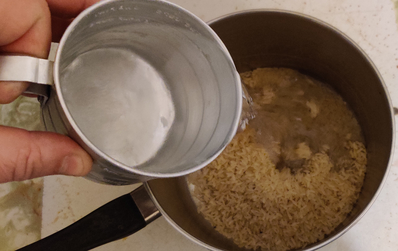
The water was added to the rice:
Water added to rice
Water added to rice
The contents of the flavour packet was added to the rice:
Flavour packet added to rice
Flavour packet added to rice
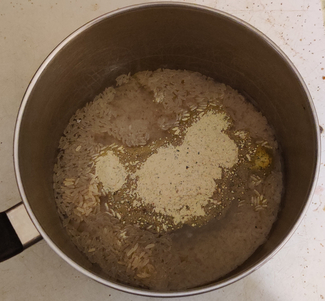
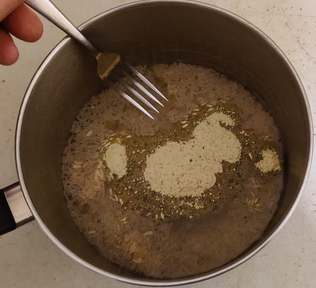
The rice, flavouring, and water were mixed with a fork:
Rice, water, and flavouring mixed with fork
Rice, water, and flavouring mixed with fork
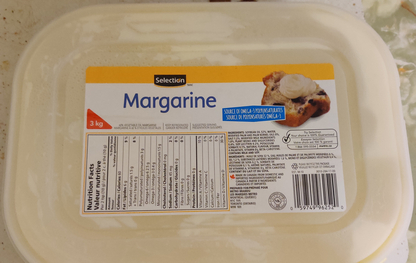
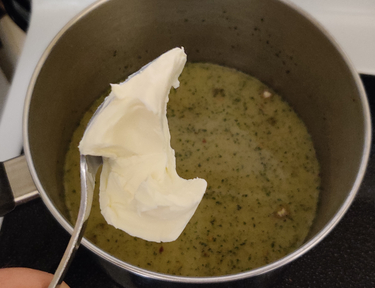
Margarine was taken out:
Margarine taken out
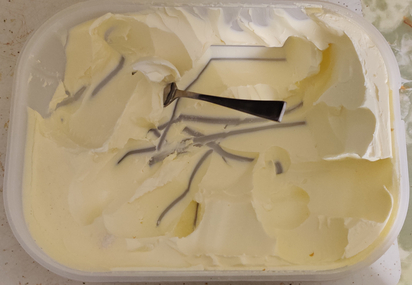
Margarine was spooned out of the tub …
Margarine spooned out
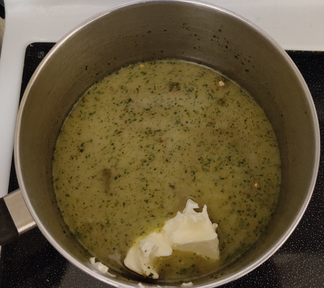
… and transferred to the pot with the rice:
Margarine transferred to pot of rice
Margarine transferred to pot of rice
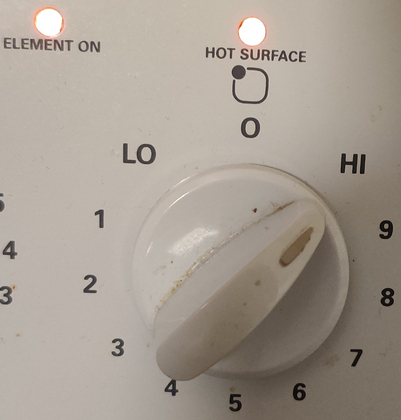
The stove burner was turned on …
Stove turned on
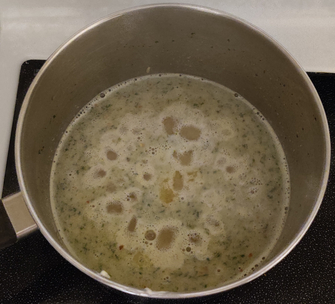
… and the rice was brought to a boil …
Rice brought to a boil
… at which point the stove was turned down to a low setting …
Stove turned down to a low setting
… and a timer set to twenty minutes:
Timer set to 20 minutes
The rice was simmered for 20 minutes:
Rice simmering for 20 minutes, partway through
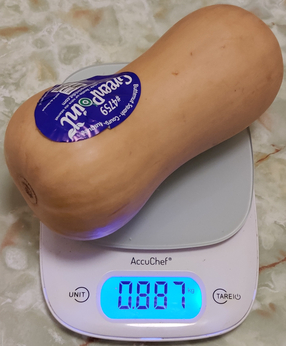
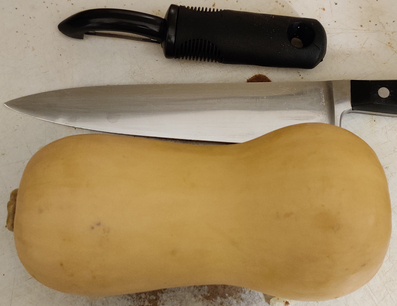
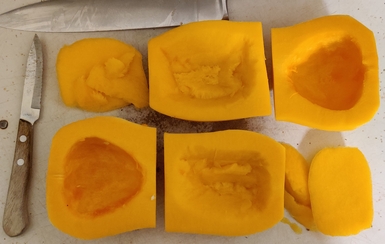
While the rice was still simmering, a butternut squash of approximately 2lbs was taken out:
(Approximately) 2lb squash taken out
Squash taken out
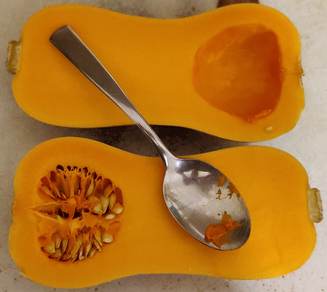
The squash was cut in half along its length:
Squash cut in half along its length
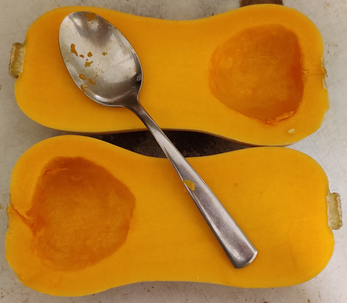
The seeds were removed from the squash:
Seeds removed from squash
Seeds removed from squash
The squash halves were peeled and trimmed:
The squash halves were peeled
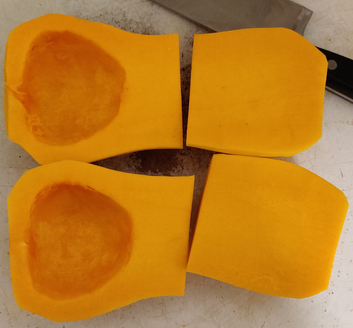
The squash halves were cut in two:
Squash halves cut in two
The halves without a natural hollow were hollowed out, and the extra kept:
Squash halves hollowed out
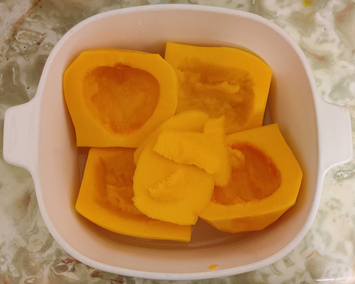
About an inch’s worth of water was added to the microwave-safe cooking vessel:
Water added to cooking vessel
The squash pieces, including those cut out from the solid pieces of squash, were placed in the cooking vessel:
Squash placed in cooking vessel
The squash was covered and placed in the microwave oven:
Squash placed in microwave oven
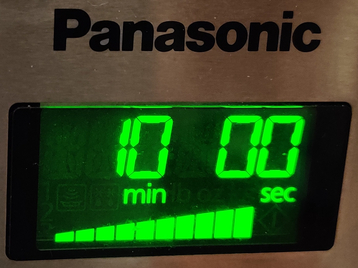
The microwave oven (1200 watts) was set to 10 minutes:
Microwave oven set to 10 minutes
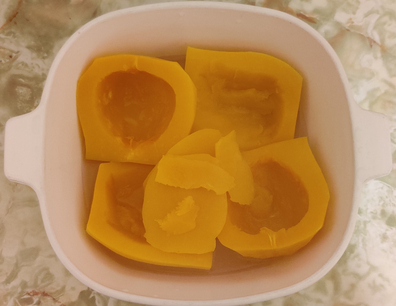
The cooked squash was taken out of the microwave oven:
Cooked squash taken out of the microwave oven
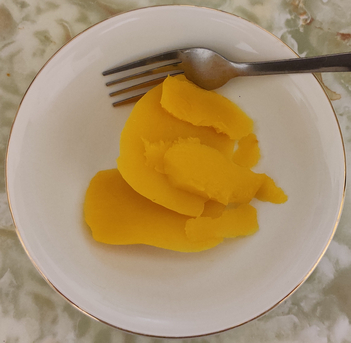
The water was drained from the cooking vessel, and the pieces cut out to hollow out two of the pieces were transferred to a bowl (while the rest was put aside for the moment) …
Cooked pieces transferred to bowl
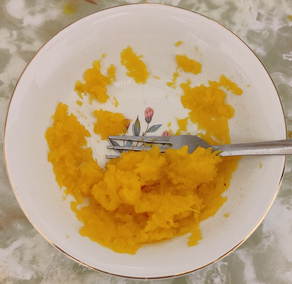
… and the squash pieces were mashed with a fork:
Squash pieces mashed with a fork
The mashed squash was put aside for a few moments.
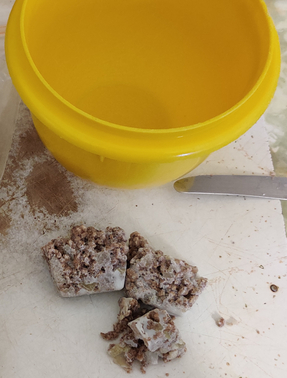
Normally, I cook ground beef and onions in advance, and freeze it in ice cube trays, which conveniently hold roughly an ounce in each well. Earlier, two and a half cubes, about two and half ounces, were taken out of the freezer, and allowed to defrost on the counter:
Cooked ground beef and onions taken out of freezer
Cooked ground beef and onions taken out of freezer
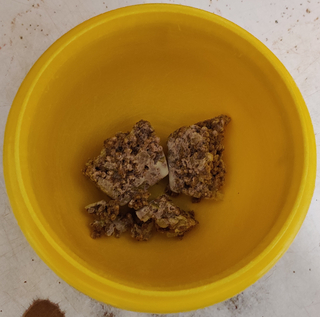
The ground beef cubes were broken up with a fork:
Cooked ground beef broken up with fork
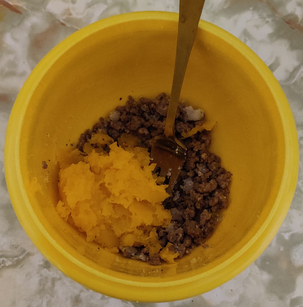
The mashed squash was added to the beef:
Mashed squash added to cooked ground beef
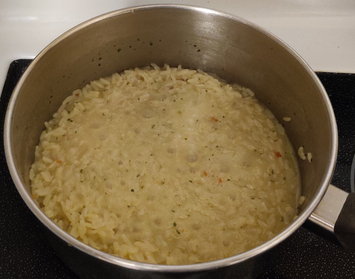
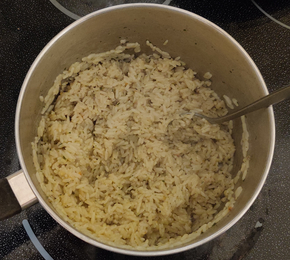
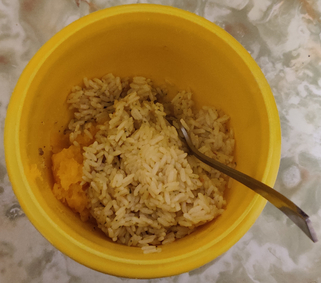
At this point, the rice was cooked:
Cooked rice
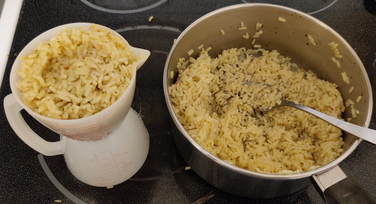
A cup of rice was measured out, while the rest was placed in a container to freeze and eat later:
Rice measured out
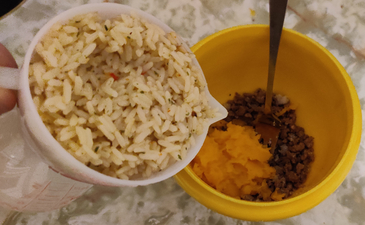
The cooked rice was added to the cooked beef and mashed squash:
Rice added to cooked ground beef and mashed squash
Rice added to cooked ground beef and mashed squash
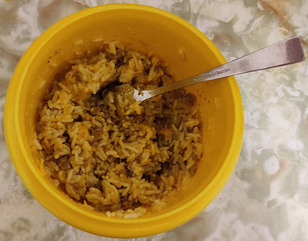
The cooked ground beef, mashed squash, and rice were mixed together with a fork:
Cooked ground beef, mashed squash, and rice mixed together
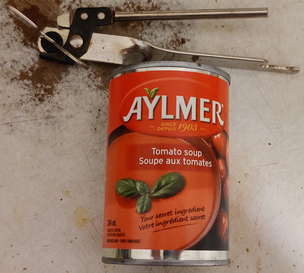
The rice mixture was put aside, and a can of condensed tomato soup was taken out:
Condensed tomato soup taken out
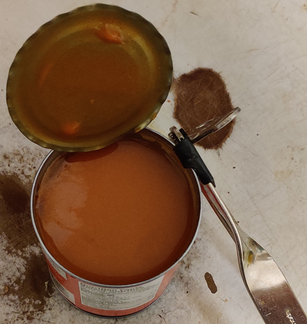
The can of condensed tomato soup was opened:
Condensed tomato soup opened
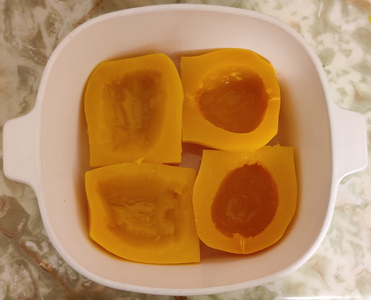
The cooked hollowed out squash pieces were taken out again:
Hollowed out cooked squash taken out
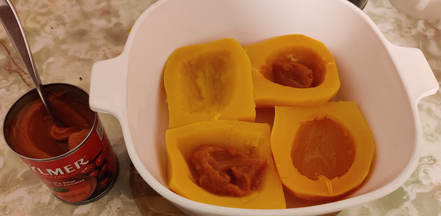
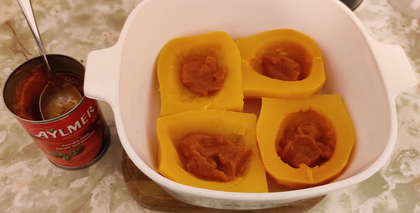
A small amount of the condensed tomato soup was placed in the bases of each hollowed-out piece of squash:
Condensed tomato soup spooned into hollowed-out squash
Condensed tomato soup spooned into hollowed-out squash
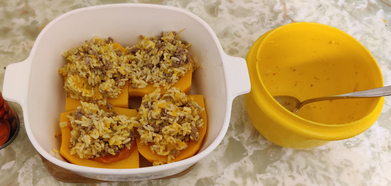
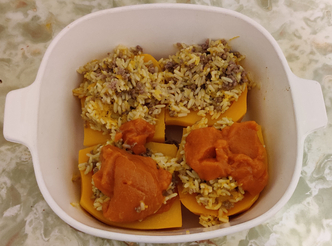
The rice, cooked ground beef, and mashed squash mix was spooned into the squash:
Rice, cooked ground beef, and squash mix added to squash
Rice, cooked ground beef, and squash mix added to squash
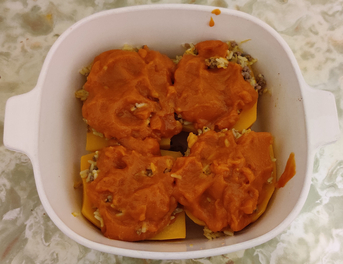
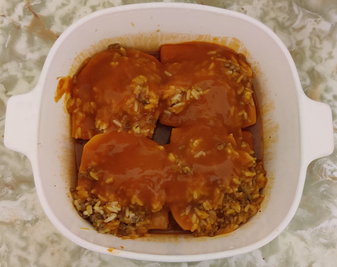
The rest of the condensed tomato soup was spooned onto the top of the rice, beef, and squash mix:
Condensed tomato soup spooned onto the rice, cooked ground beef, and squash mix
Condensed tomato soup spooned onto the rice, cooked ground beef, and squash mix
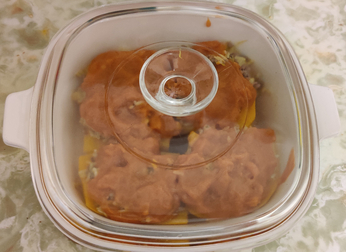
The cooking vessel was covered …
Dish covered
… and the dish was placed in the microwave oven again:
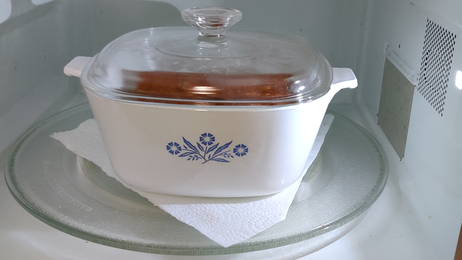
Dish placed in microwave oven again
The microwave oven (1200 watts) was set to seven minutes:
Microwave oven set to seven minutes
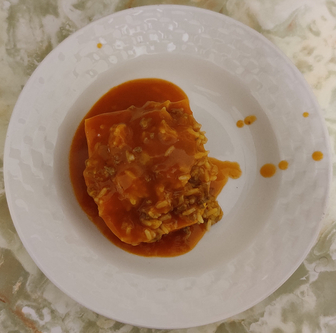
After seven minutes of cooking, the stuffed squash was ready to eat:
Cooked stuffed squash
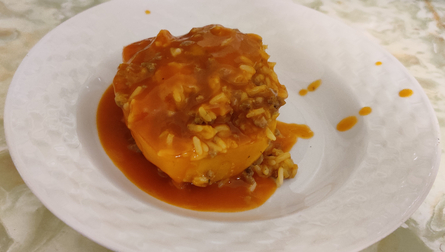
… and the stuffed squash was served:
Cooked stuffed squash served
Cooked stuffed squash served
It was, of course, yummy, and of course, Mom approved.
(… and, at the risk of sounding like I’m bragging, putting aside that, well, I *had* cooked it, I couldn’t tell whether I’d cooked it, or whether Mom had cooked it!)
The various steps were performed over several sessions during the week (mostly cubing and drying bread), however, for the sake of narrative, the photos are listed, largely, as though it could have been done in two sessions. And, despite stating in the recipe that its cooking in a turkey is beyond the scope of the recipe, I do indeed show at the end of this post the cooking of the stuffing with the Christmas turkey, in response to a conversation with, and comment from, my brother: “If you get a trailer, you want to see it hooked up to a truck.“
Making the turkey stuffing:
Although the following picture was taken this past week as part of preparing for making the stuffing, normally, throughout the year I collect bread bits and bread crusts …
Collected bread crusts
… and as I collect them I cube them and dry them, to add to a container of dried bread cubes:
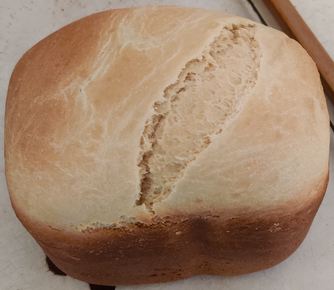
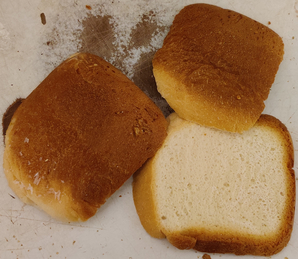
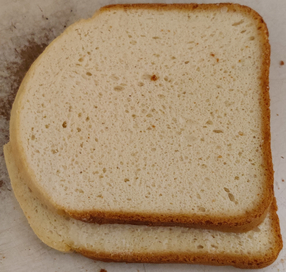
The loaf of bread was sliced for freezing, and some slices were put aside:
Bread slices taken out
Bread slices taken out
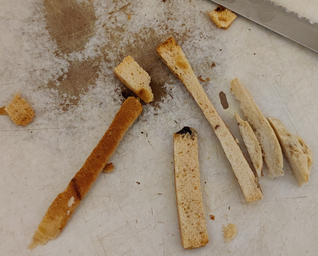
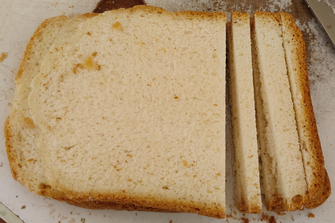
Bread slices were sliced into spears:
Bread sliced into spears
Bread sliced into spears
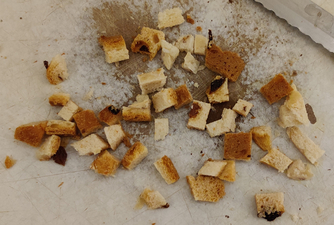
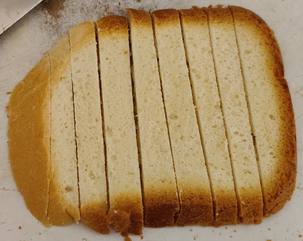
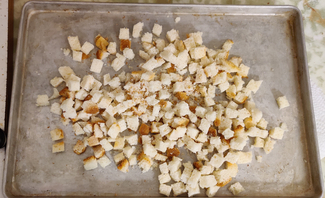
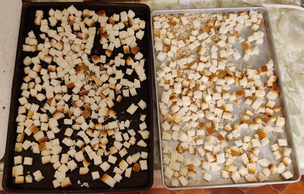
The bread spears were cut into cubes and placed on a tray to dry:
Bread cubes placed on a tray to dry
Bread cubes placed on trays to dry
Once dried, the bread cubes were placed in a container I fill over time with dried bread cubes:
Container with dried bread cubes
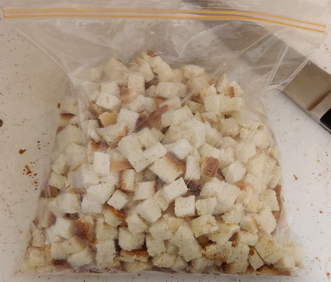
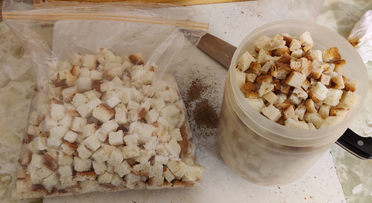
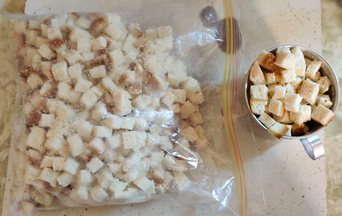
Fresh bread cubes were also put aside in a freezer bag and frozen, to be used later in the week when I made the turkey stuffing:
Fresh bread cubes in a freezer bag put aside for later in the week when I made the stuffing
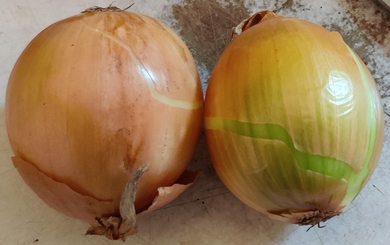
On the day I made the turkey stuffing, onions were taken out:
Onions taken out
The onions were cleaned and trimmed:
Onions cleaned and trimmed
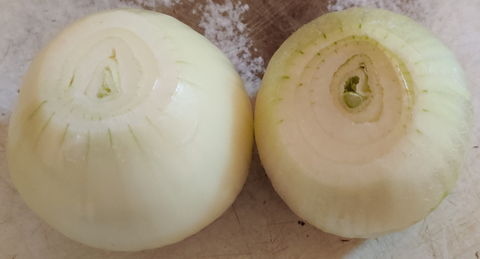
The onions were cut in half:
Onions cut in half
The onion halves were sliced into half coins:
Onions sliced into half coins
The onions were somewhat finely chopped:
Onions somewhat finely chopped
The chopped onions were transferred to a microwave oven safe cooking vessel, and put aside for a few moments:
Chopped onions transferred to microwave oven safe cooking vessel
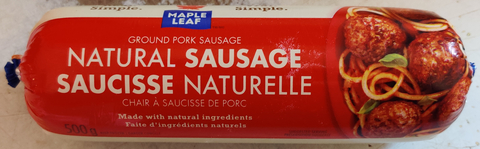
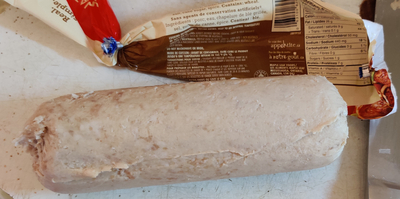
Bulk sausage meat was taken out:
Bulk sausage meat taken out
… and removed from its packaging:
Bulk sausage meat removed from its packaging
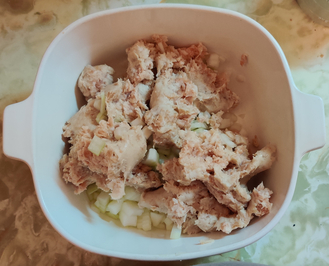
The sausage meat was broken up by hand and placed in the microwave oven safe cooking vessel along with the chopped onions:
Bulk sausage meat broken up by hand and placed in microwave oven safe cooking vessel along with chopped onions
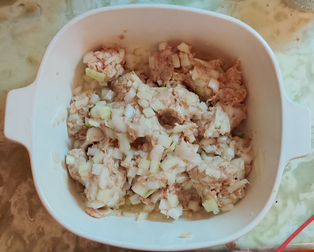
The sausage meat and onions were mixed together by hand:
Sausage meat and chopped onions mixed together
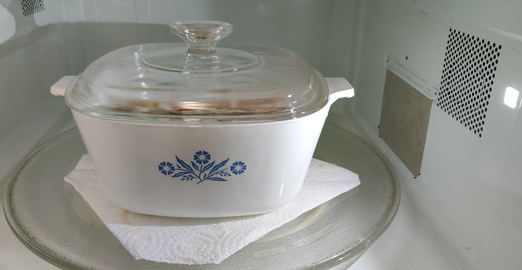
Time was set on my microwave oven:
Time set on microwave oven
The microwave oven safe cooking vessel was placed in the microwave oven:
Microwave oven safe cooking vessel placed in microwave oven
Microwave oven safe cooking vessel in microwave oven
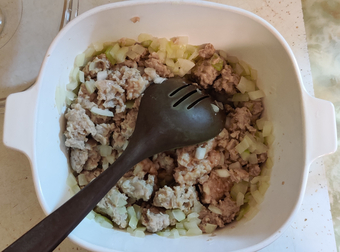
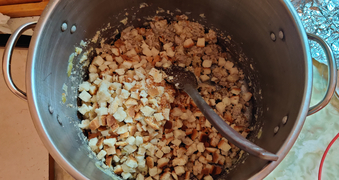
Part way through cooking the sausage meat and onions, they were taken out and large pieces were broken up with a large spoon:
Sausage meat and onions broken up with large spoon
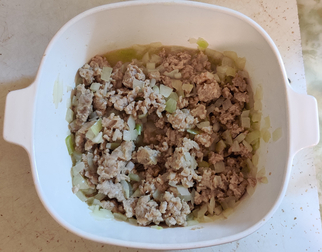
Mostly cooked sausage and onions:
Mostly cooked sausage meat and onions
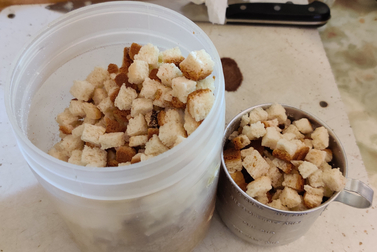
The fresh and dried bread cubes were taken out:
Fresh and dried bread cubes taken out
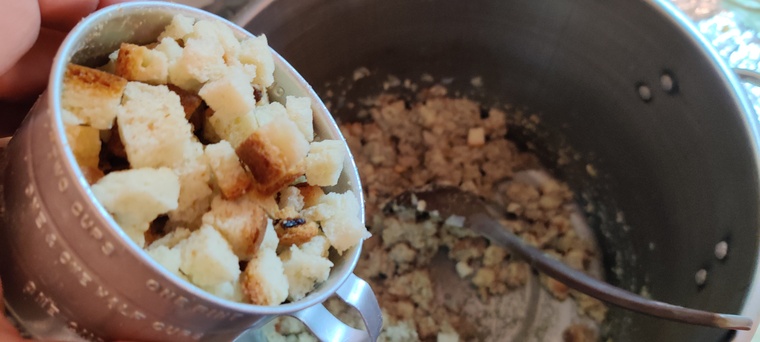
Fresh bread cubes were measured out:
Fresh bread cubes measured out
Fresh bread cubes were transferred to a large mixing vessel, in this case, my 16 litre soup pot:
Fresh bread cubes transferred to large mixing vessel
Fresh bread cubes in large mixing vessel
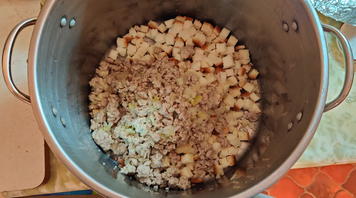
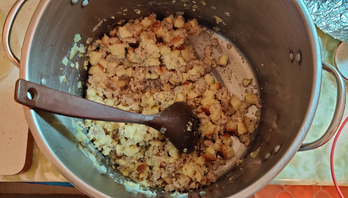
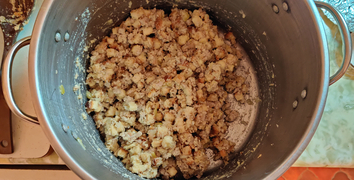
The cooked sausage meat and onions were added to the bread cubes
Cooked sausage meat and onions added to bread cubes
The bread cubes and the cooked sausage meat and onions were mixed with a large mixing spoon:
Ingredients mixed with large mixing spoon
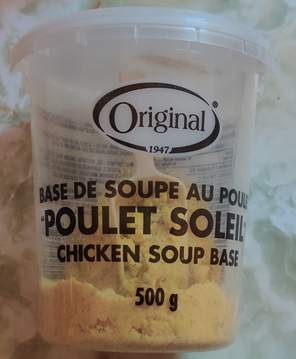
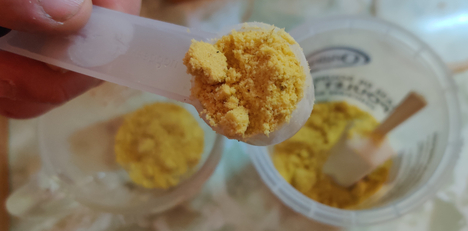
Chicken soup base was taken out:
Chicken soup base taken out
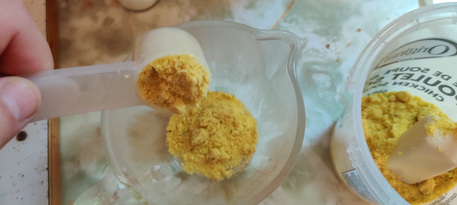
Chicken soup base was measured out:
Chicken soup base measured out
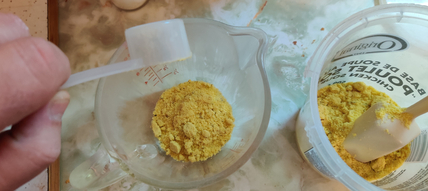
The chicken soup base was added to a measuring cup:
Chicken soup base added to measuring cup
Chicken soup base added to measuring cup
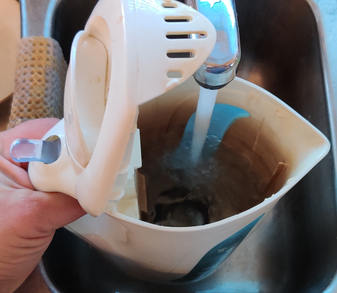
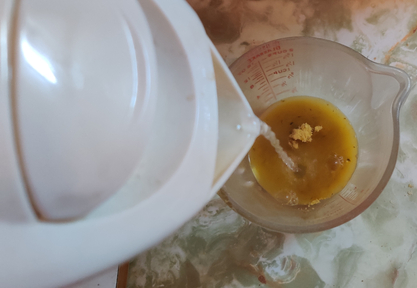
Water was added to an electric kettle:
Water added to electric kettle
The kettle was turned on:
Kettle turned on
Kettle turned on
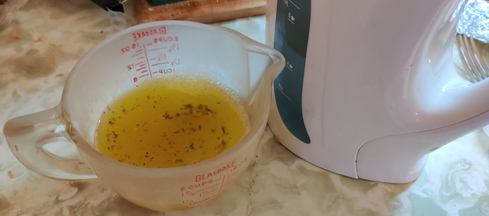
Once boiled, boiling water was added to the measuring cup with the chicken soup base:
Boiling water added to measuring cup with chicken soup base
The chicken soup base and the boiling water were mixed together:
Chicken soup base and boiling water mixed together
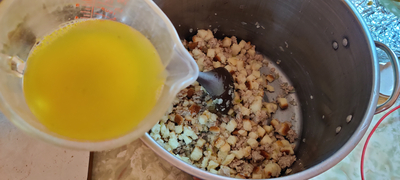
The chicken soup was added to the rest of the ingredients:
Chicken soup added to rest of ingredients
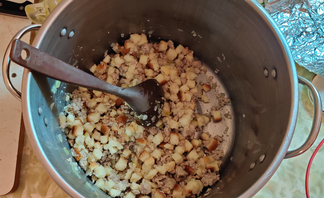
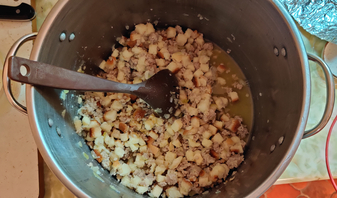
The ingredients were mixed together again with the large spoon:
Ingredients mixed with large spoon
Ingredients mixed with large spoon
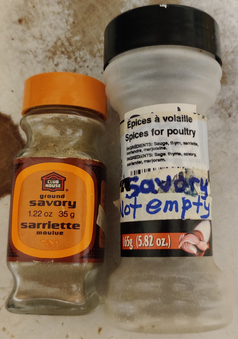
Savoury (spice) was taken out:
Savoury taken out
The savoury was sprinkled over the ingredients, and the ingredients were mixed again:
Savoury sprinkled over ingredients
Dry bread cubes were measured out:
Dry bread cubes measured out
The dry bread cubes were added to the rest of the ingredients:
Dry bread cubes added to rest of ingredients
The ingredients were yet again mixed together with the large spoon:
Ingredients mixed again
Ingredients mixed again
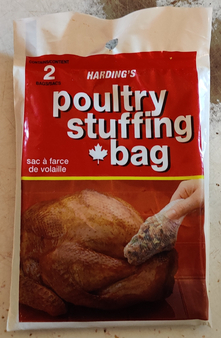
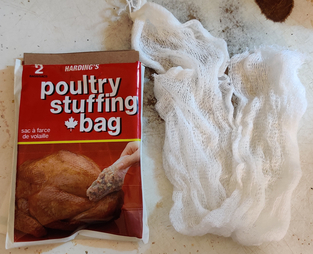
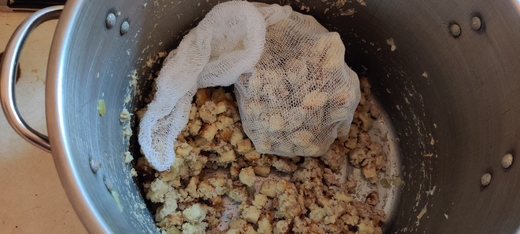
Gauze poultry stuffing bags were taken out:
Gauze poultry stuffing bags taken out
Gauze poultry stuffing bags taken out
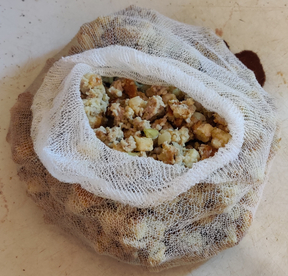
A gauze bag was filled with the stuffing:
Gauze bag filled with stuffing
Gauze bag filled with stuffing
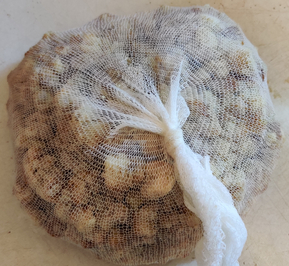
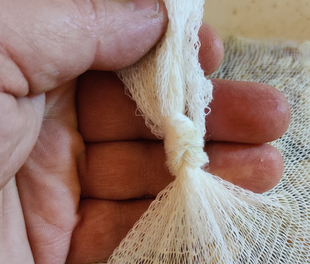
The gauze bag was tied off:
Gauze bag tied off
Gauze bag tied off
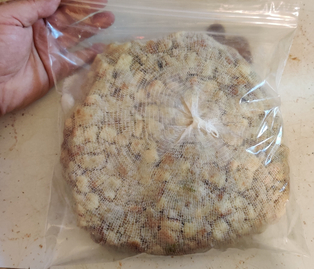
The gauze bag was placed in a sealable freezer bag and placed in a fridge for use later, on Christmas day:
Stuffing placed in a plastic bag for later use
And in the spirit of seeing the “trailer hooked up to a truck”, here are photos from Christmas day, cooking the turkey and stuffing:
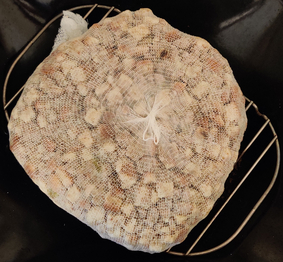
On Christmas day, the gauze bag with the stuffing was taken out of the freezer bag, and placed on a baking rack in a roasting pan:
Stuffing on baking rack in baking tray
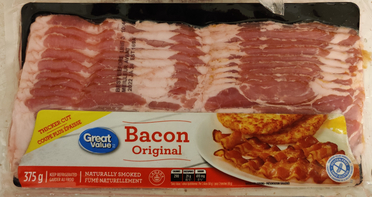
Bacon was taken out:
Bacon taken out
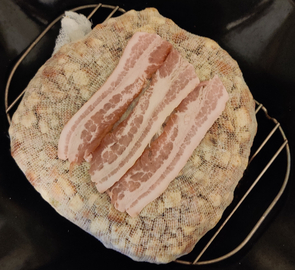
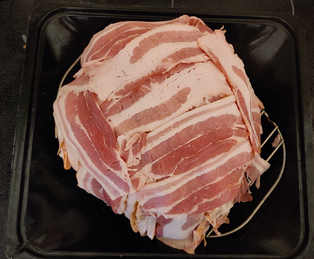
Slices of bacon were placed on top of the stuffing:
Bacon placed on top of stuffing
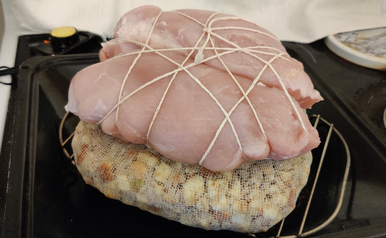
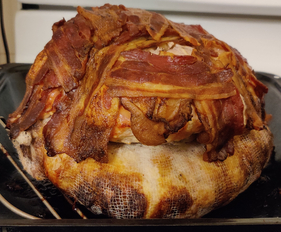
Two turkey breasts, tied together with butcher’s string, were placed on top of the stuffing:
Turkey breast place on top of stuffing
Bacon was liberally wrapped over and around the turkey and stuffing:
Turkey and stuffing wrapped with bacon
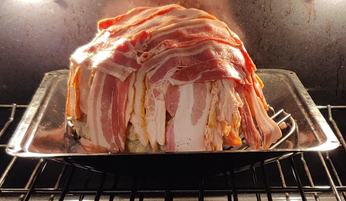
The Christmas turkey was placed in the oven:
Christmas turkey placed in oven
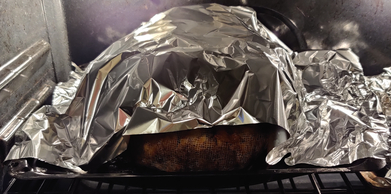
After some cooking, basting, and browning, aluminum foil was placed on top of the turkey partway through cooking the turkey in order to avoid burning on the outside and drying out of the turkey, while the inside of the turkey and stuffing continued to cook (a meat thermometer was critical):
Aluminum foil placed on top of turkey
The fully cooked turkey and stuffing were taken out of the oven:
Fully cooked turkey and stuffing
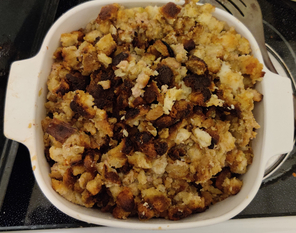
The turkey stuffing was taken out of the gauze bag and transferred to a serving vessel, ready for Christmas dinner:
Stuffing transferred to serving vessel ready for Christmas dinner
It has been several months since I’ve done an entry on a recipe from my collection of recipes, mostly just because last winter and spring, I’d run through most of the recipes that I regularly make and which at the time I had considered to be of “sufficient” note to highlight here, save for the recipe which is the subject of this post (but yes, there is a small number more which may eventually be featured!) As such, many of my recipes from my collection of recipes have since been made at least once, and in many cases, several times, over the past few months.
Over the past couple of weeks alone, I did a lot of cooking at the cottage while on holidays, making:
Yes, that’s a lot of potatoes, ground beef, chicken, onions, carrots, eggs, flour, cheese, olive oil, and other secondary ingredients prepared, as well as beer consumed, during the multiple cooking sessions! And, yes, this is how I like to spend winter holidays at the cottage!
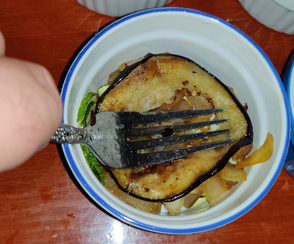
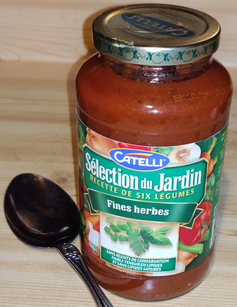
Note that this recipe is vegetarian of the lacto-vegetarian variety (basically, meatless) if the tomato sauce used does not contain meat.
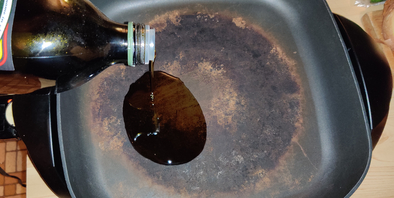
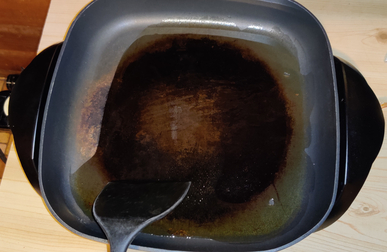
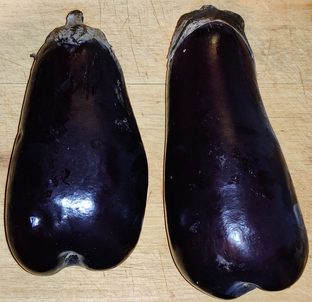
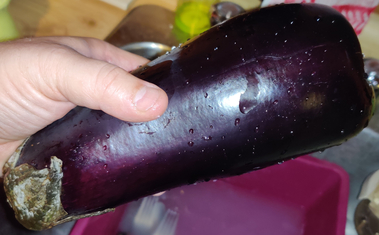
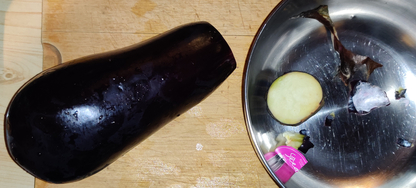
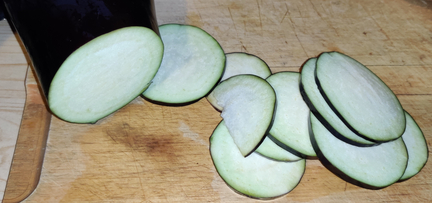
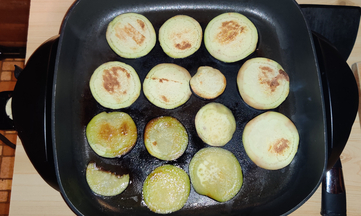
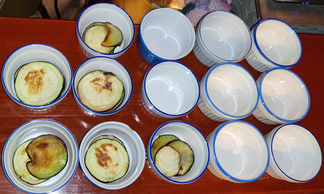
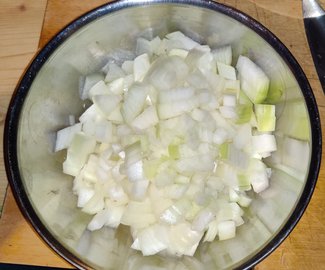
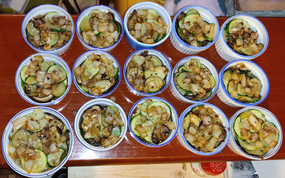
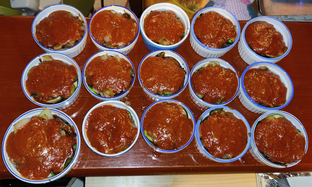
Making the Eggplant au gratin:
First, a nice beer was taken out — Brune d’Achouffe, a Belgian brown ale 8,5% alc/vol in a 750mL bottle, brewed under licence from the Brasserie d’Achouffe by Brasseurs RJ in Montréal, Québec.
Beef taken out
Next, the beer was poured into a glass:
Beer poured out
… and of course, right away I had to do a bit of quality control on the beer:
Yes, this is a good beer!
Now to the cooking of the eggplant au gratin, really, this time:
Ramekins were set out — as it turns out, another ramekin was needed to be added later on:
Ramekins set out
An electric skillet was taken out and plugged in:
Electric skillet taken out
The skillet was turned on
Olive oil was added to the skillet:
Olive oil added to skillet
The olive oil was spread out in the skillet with a plastic spatula / egg flipper:
Olive oil spread out in skillet
A couple of eggplants were taken out:
Eggplants taken out
An eggplant was rinsed with water:
Eggplant rinsed with water
The eggplant was trimmed:
Eggplant trimmed
Coins were sliced off the eggplant:
Coins sliced off eggplant
Slices of eggplant were placed in the hot skillet:
Eggplant slices in skillet
After a few minutes of frying, the slices of eggplant were turned over:
Eggplant slices turned over
The fried slices of eggplant were placed in ramekins:
Eggplant slices placed in ramekins
The rest of the first eggplant was sliced, the resulting eggplant slices fried, and the fried eggplant slices were placed in the rest of the ramekins, such that the fried eggplant slices were roughly equally distributed amongst the ramekins:
Eggplant equally distributed amongst the ramekins
Half of the zucchinis were taken out:
Zucchini taken out
The zucchinis were rinsed with water:
Zucchinis rinsed with water
The zucchinis were trimmed:
Zucchinis trimmed
In order to quickly slice the zucchinis, a food processor with the slicing blade attachment was taken out:
Food processor with slicing blade taken out
The zucchinis were fed into the running food processor in order to slice them:
Zucchinis fed into food processor
Sliced zucchinis
Zucchini slices were placed in the electric skillet with more olive oil:
Zucchini slices frying
The zucchini slices were turned over:
Frying zucchini slices turned over
Fried zucchini slices were placed in ramekins:
Fried zucchinis placed in ramekins
The rest of the first half of the zucchini slices were fried:
More zucchinis frying
More zucchinis frying
The rest of the fried zucchini slices were placed in the rest of the ramekins, such that the zucchini slices were roughly equally distributed amongst the ramekins:
Fried zucchinis placed in ramekins
Onions were taken out:
Onions take out
The onions were cleaned and trimmed:
Onions cleaned and trimmed
The onions were sliced in half:
Onions sliced in half
The onions were sliced into thick half coins:
Onion half sliced into thick half coins
The onions were roughly chopped:
Onions roughly chopped
The chopped onions were placed in a bowl:
Chopped onions placed in bowl
About half the chopped onions were placed in the electric skillet with more olive oil, and salt was added:
Chopped onions in skillet with more olive oil and salt
The chopped onions were fried:
Chopped onions fried
The fried chopped onions were roughly equally distributed amongst the ramekins:
Fried chopped onions spread in ramekins
At this point, my beer chalice was empty and needed refiling:
Beer chalice refilled
It was time to repeat the process, and the second eggplant was sliced and fried the same way. When the eggplant slices were placed in the ramekins, the contents were patted down with a fork, in order to get rid of deadspace in the ramekin:
Ramekin contents patted down with a fork
The rest of the steps were repeated with the zucchinis, and the chopped onions, and both were placed in the ramekins in the same order as above, after the second layer of fried eggplant. Note that at this point, another ramekin was added to accommodate what proved to be more ingredients than I originally estimated that I’d had:
Ramekins filled with all fried ingredients
A jar of commercial (meatless) tomato sauce was taken out:
Tomato sauce taken out
The tomato sauce was spread over the ingredients in the ramekins:
Tomato sauce spread over ingredients in the ramekins
A block of mozzarella cheese was taken out:
Mozzarella cheese taken out
Mozzarella cheese was sliced off the block of cheese:
Mozzarella cheese sliced off the block
Cheese slices were placed on top of the ingredients in the ramekins:
Mozzarella cheese slices placed on top of ingredients in the ramekins
Mozzarella cheese slices placed on top of ingredients in the ramekins
Zipper bags were taken out and identified:
Zipper bags taken out and identified
Filled ramekins were individually placed in bags for freezing:
Filled ramekins placed in identified zipper bags
The bags were placed in a freezer (in this case the freezer door) for future eating:
Bagged eggplant au gratin in the freezer
A few days later, an eggplant au gratin was taken out, defrosted, baked, and eaten; of course it was yummy!
I love halloween, and for over twenty years, I have been serving candies to the local ghosties and ghoulies.
Over the years, I have been trying to do my part to make my street a destination for ghosties and ghoulies, including marquis and costumes.
Over the past few years, inflatable decorations have become the rage in my area, and I’m no exception in having fallen for their charms.
This year, things on my street have gone into overdrive; maybe some people have been organizing with each other unbeknownst to me, and maybe the pandemic has had people wanting to do *anything* to raise spirits, no pun intended.
The first house to start decorating for Halloween started, best I could tell, on the last weekend of September. As of mid October, there are fourteen of the twenty two houses on the two block stretch I can see from my house (however, there is another block of street beyond my view, with some decorations too!)
I have taken pictures for your viewing pleasure:
This is the furthest house I can just see from home, and they are also the most decorated!
Most decorated house
This haunted house is easily visible from my house, despite being at the second furthest house from me.
Very visible haunted house decoration
The inflatables in this house have flickering lights, as well as other decorations on the other side of the house.
Inflatable decorations with flickering lights
More decorations at the same house
The ghost on this lawn is actually covering an old tree stump; there are also other decorations at the door on the side of the house, and in the windows out front.
Ghost covering an old tree stump
Here is another house needing two pictures for their decorations:
Ghosts up the stairs and a large spider’s web
Gravestones and skeletons
This is the house had the first decorations this year, first set up over the last weekend of September:
First house decorated for Halloween this year
At this house, Dracula is ready to welcome ghosties and ghoulies!
Dracula ready to welcome ghosties and ghoulies
This house has a piglet dressed as a witch inflatable, and a witch who can’t fly too well on her broom!
Piglet witch, and witch in tree
Here’s a baby Frankenstein, and an x-ray dinosaur!
Baby Frankenstein and x-ray dinosaur
I’m not sure is this a Halloween decoration, or just a cute fall / harvest themed garden decoration.
Garden decoration
Here is the lawn at my house — a ghost, a headless person holding up a pumpkin, an x-ray pumpkin head person, a funny Frankenstein, a cute monster, another ghost, a happy witch, and a frankenstein, and — UPDATED PHOTO 20211024 — a bat in the tree. Three Four are new this year!
Decorations at my house
Decorations at my house in the dark
Here is another house with their decorations:
One of my close neighbours likes zombies:
Zombies
And, so far the last house on the street (I live on a cul-de-sac), this house has an alien visiting, and being a little confused as to whom the real locals are:
Alien
UPDATE 20211024: Another house set up their decorations this weekend, and it merits three pictures!
Inflatables at one of my neighbours
Walkway up to their door
Walkway up to the door
UPDATE 20211025: Another house set up their decorations this weekend! Check the little lights around the tree, and the pumpkins on the steps up to the door.
Pumpkin and ghost lights around a tree, and pumpkins on the steps up to the door
More pics will be added if, as, and when other houses are decorated.