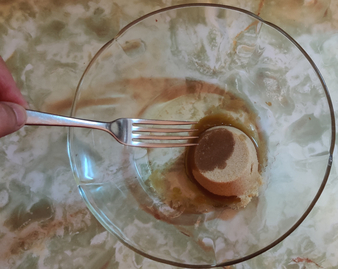
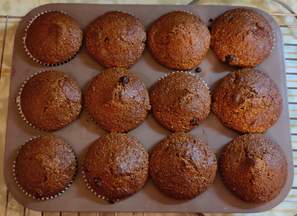
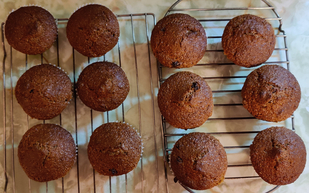
This week’s cooking projects from my collection of recipes included bran muffins for mom using her recipe, some more bread in my bread machine, chocolate buttercrunch, cooked ground beef and onions frozen in ice cube trays, my breakfast sandwiches, and the subject of this post, my version of a favourite dish my mom has made for me almost all my life, a corned beef hash using a commercial, canned, corned beef luncheon meat.
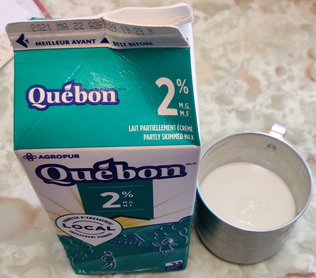
The principal differences between this version and mom’s version is that she has always used, and continues to use, commercial frozen hash brown potatoes purchased at the supermarket frozen goods section, instead of making and cooking them from fresh potatoes, and, she uses margarine instead of olive oil. She also noted the importance of not using cheap quality onion salt; my personal experiences so far in making the dish have indicated the value that onion salt itself brings to the dish. All this being said, though, my efforts have largely replicated mom’s dish to the point that my version is rather close to mom’s.
It should be noted that in this post, there is a very small number of photos which were taken either later in the evening after cooking, or the following morning, either as retakes, or to outright take some photos which I forgot to take the evening before during the cooking of the dish. Also, I made the dish at the cottage.
Making the corned beef hash:
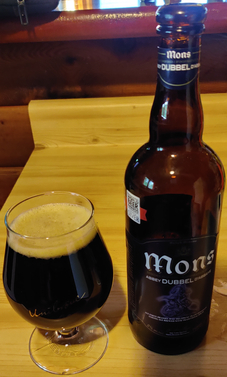
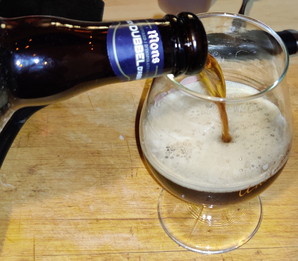
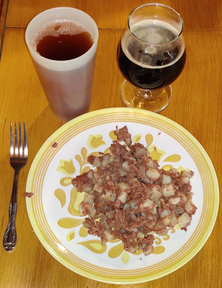
First, a nice beer was taken out — Mons Dubbel, a Belgian-style Dubbel 8% alc/vol in a 750mL bottle, from the Belgh Brasse Brewery, in Amos, Québec:
Beer taken out
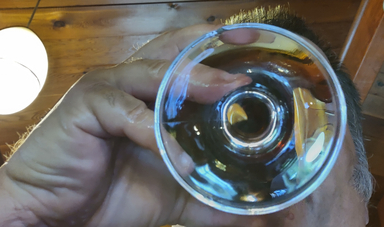
Next, the beer was poured into a glass:
Beer poured out
… and of course, right away I had to do a bit of quality control on the beer:
aaaaahhhhh ….
Now to the cooking of the corned beef hash, really, this time:
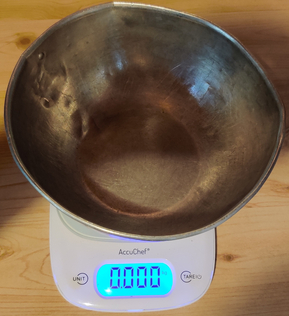
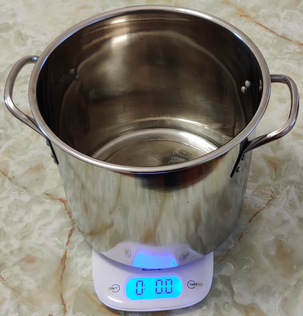
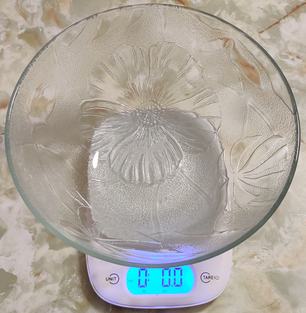
A bowl was placed on a kitchen scale, and the scale was set to zero:
Bowl placed on kitchen scale, and scale set to zero
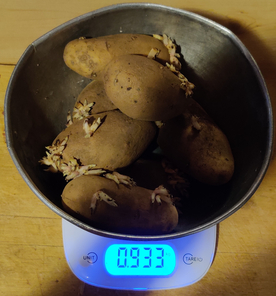
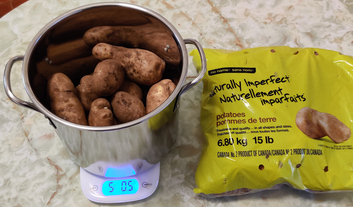
About 900 grams, or about two pounds, of potatoes were measured out in the bowl:
About 900g of potatoes measured out
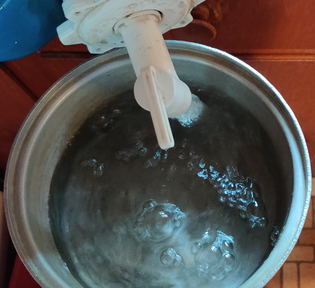
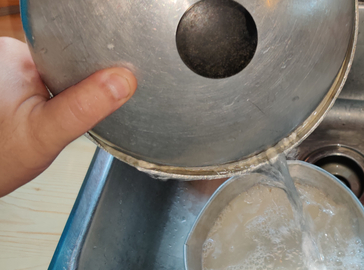
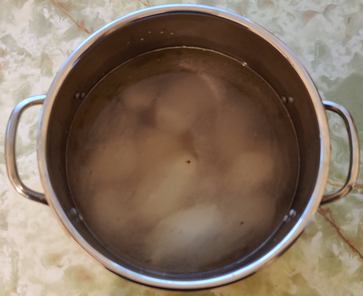
Water was placed in a pot:
Fresh water added to pot
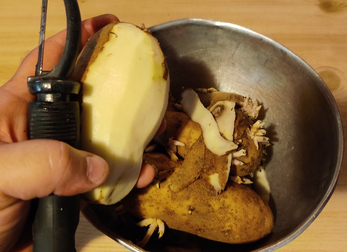
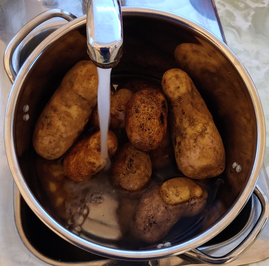
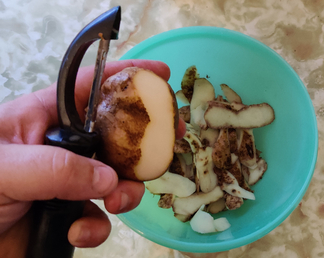
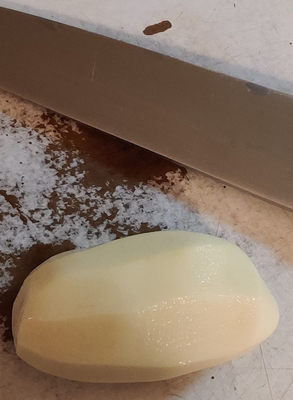
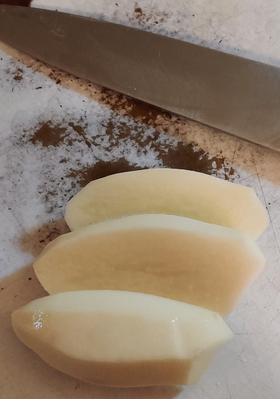
The potatoes were peeled:
Potatoes peeled
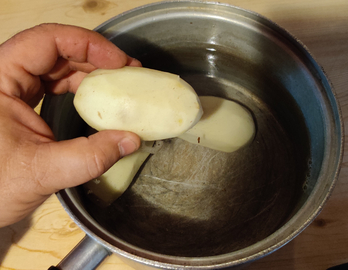
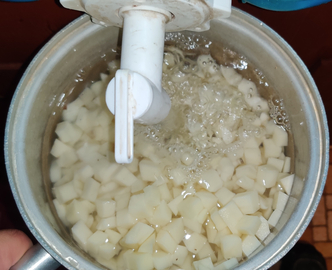
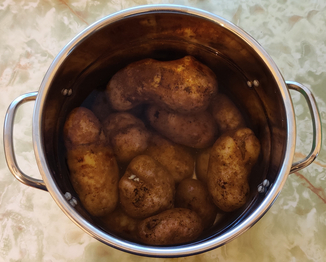
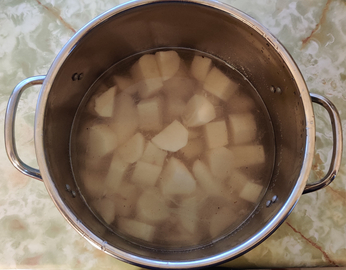
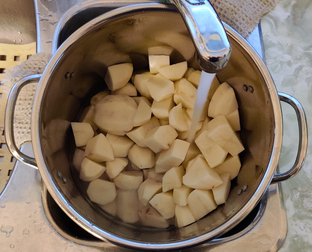
The peeled potatoes were placed in the pot of water:
Peeled potatoes placed in pot of water
Peeled potatoes placed in pot of water
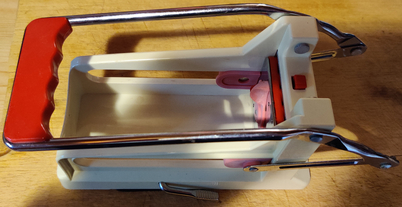
A French-fry cutter was taken out:
French-fry cutter taken out
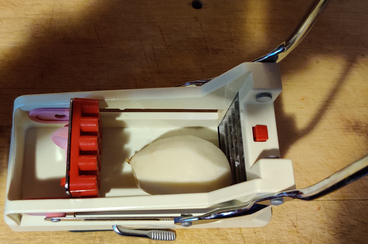
Potatoes were placed in the French-fry cutter:
Potato placed in the French-fry cutter
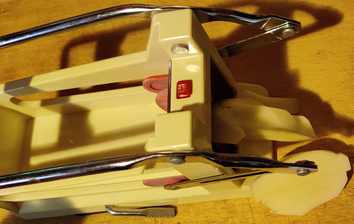
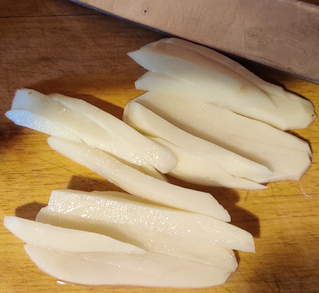
The potatoes were sliced with the French-fry cutter:
Potatoes sliced with the French-fry cutter
If you don’t have a French-fry cutter, you can slice the potatoes lengthwise with a kitchen knife:
Potatoes sliced lengthwise with a kitchen knife
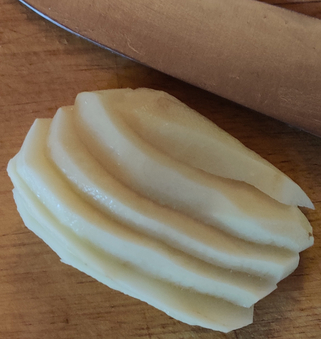
… and then slice the potatoes again lengthwise to make French fries:
Potatoes sliced lengthwise again to make French fries
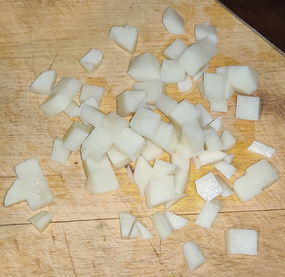
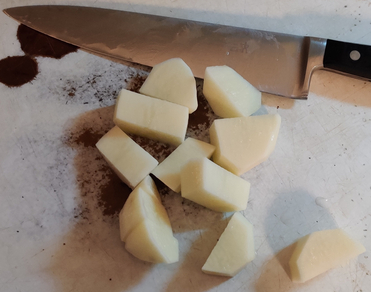
The French fries were cut into cubes, about half an inch in all dimensions:
French fries cut into half inch cubes
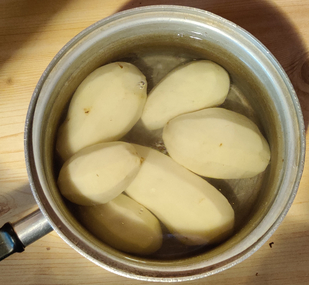
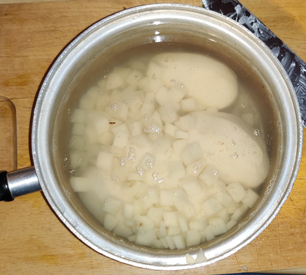
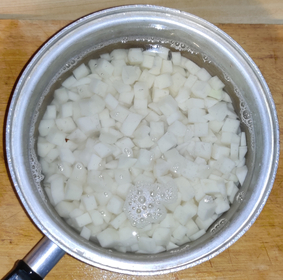
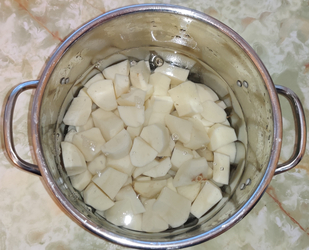
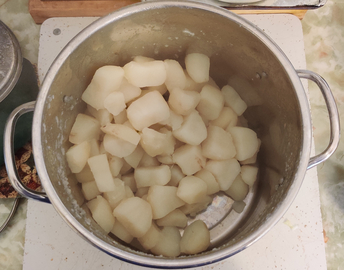
The potato cubes were placed back in the pot of water:
Potato cubes placed back in pot of water
Potato cubes placed back in pot of water
The water was drained from the potato cubes:
Potato cubes drained
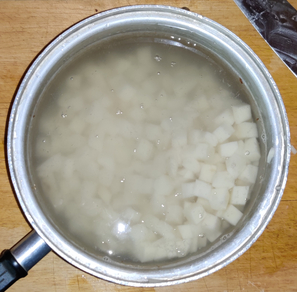
The potato cubes were again covered with fresh water, for rinsing the potatoes:
Potato cubes covered with fresh water
Potato cubes covered with fresh water
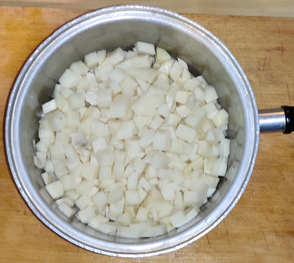
The water was again drained from the potato cubes, and the potato cubes were put aside:
Potato cubes drained again
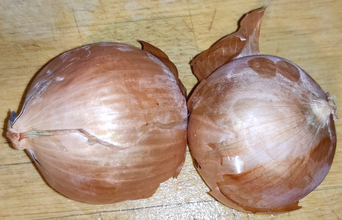
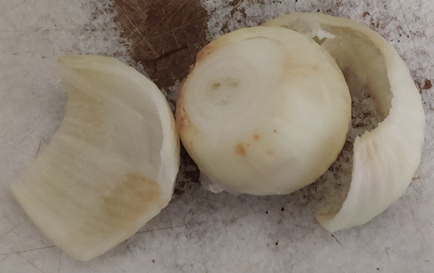
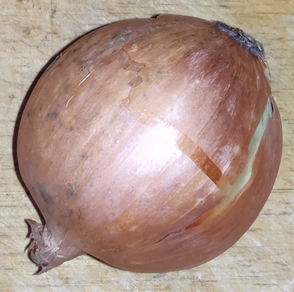
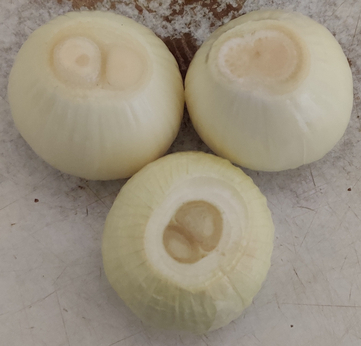
Onions were taken out:
Onions taken out
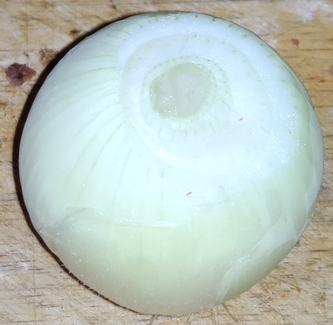
The onions were cleaned and trimmed:
Onions cleaned and trimmed
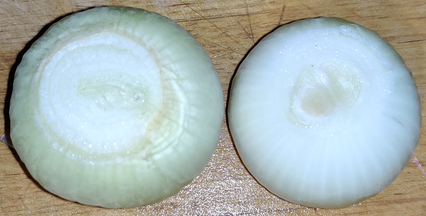
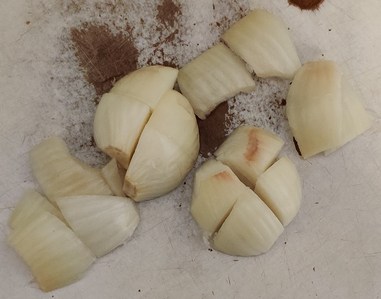
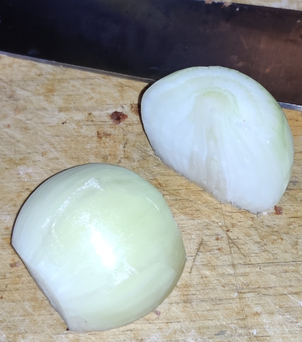
The onions were sliced into halves:
Onions sliced into halves
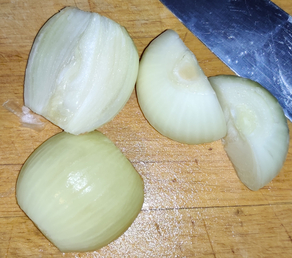
The onion halves were sliced into half-coins …
Onions sliced
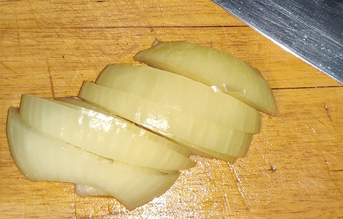
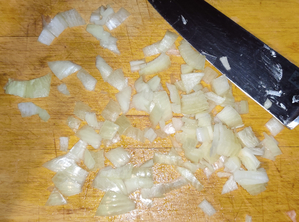
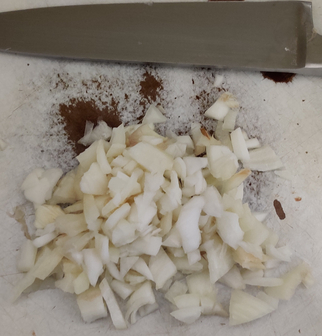
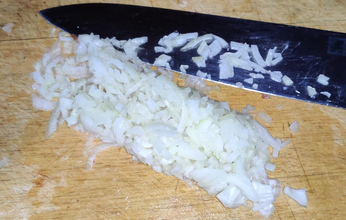
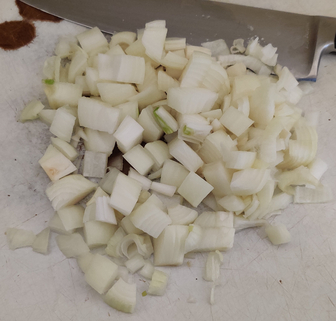
… and then the onions were coarsely chopped:
Onions coarsely chopped
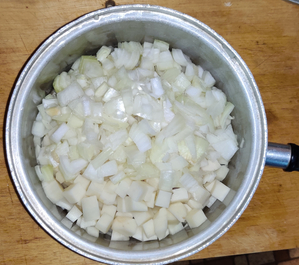
The onions were added to the potatoes:
Onions added to potatoes
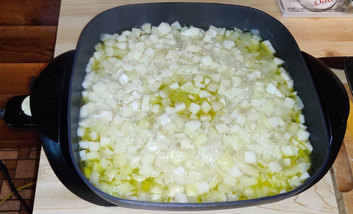
The onions and potatoes were transferred to an electric skillet:
Onions and potatoes transferred to electric skillet
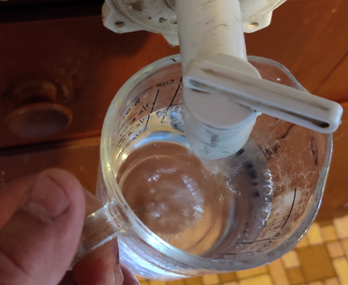
Water was measured out:
Water measured out
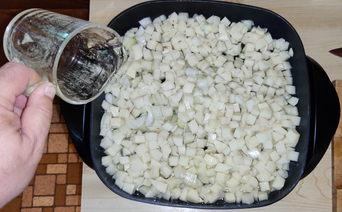
The water was transferred to the skillet with the onions and potatoes:
Water transferred to skillet with onions and potatoes
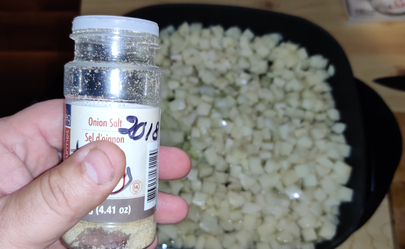
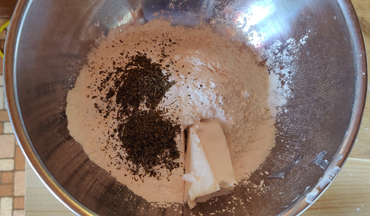
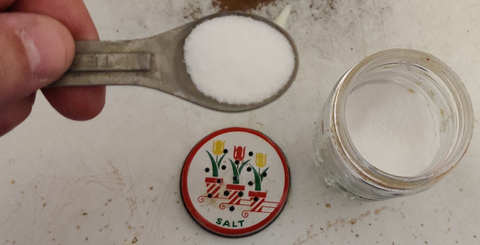
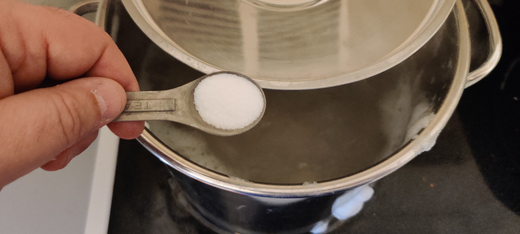
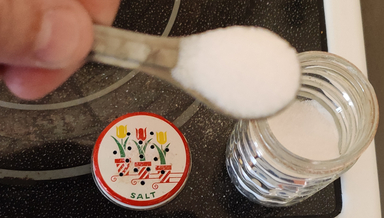
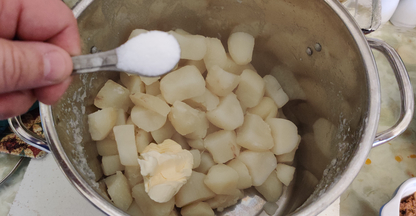
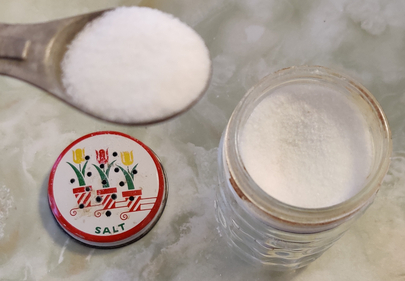
Onion salt was added to the ingredients:
Onion salt added to ingredients
Onion salt added to ingredients
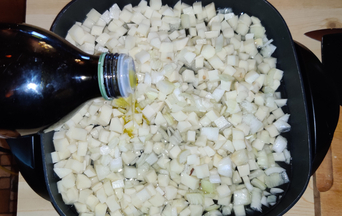
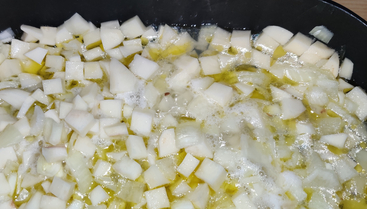
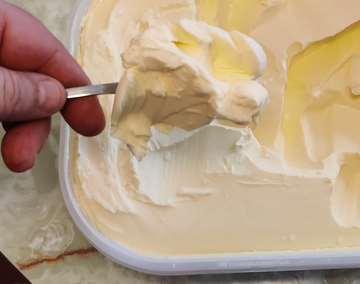
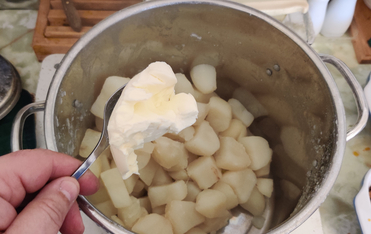
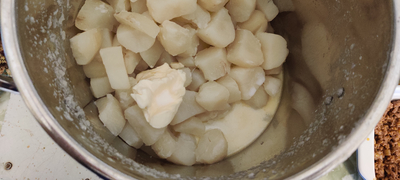
Olive oil was added to the ingredients:
Olive oil added to ingredients
Olive oil added to ingredients
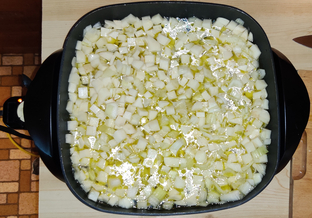
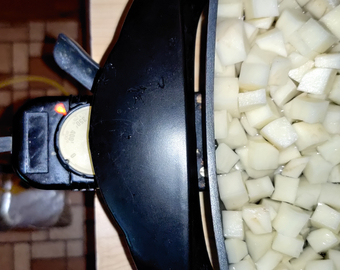
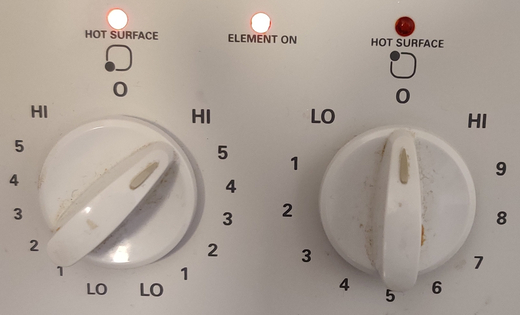
The electric griddle had been turned on by this point:
Electric skillet turned on
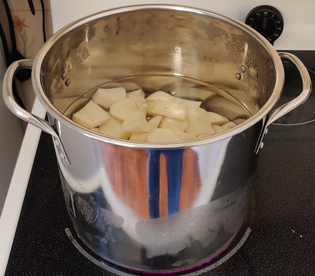
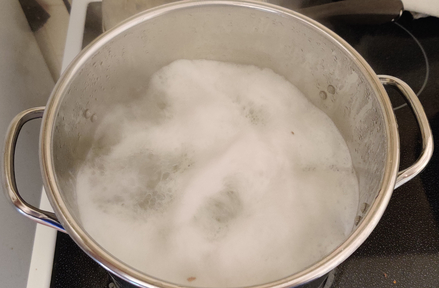
The water was brought to boiling:
Water brought to a boil
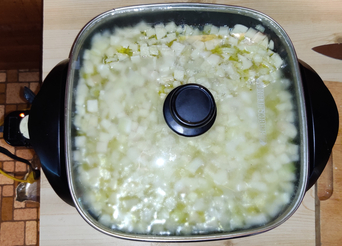
The electric skillet was covered:
Electric skillet covered
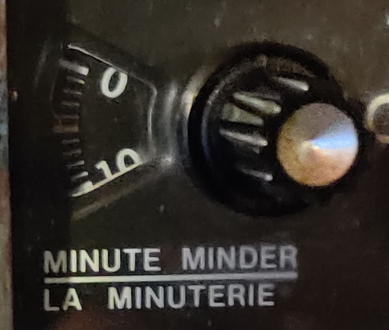
A timer was set to five minutes:
Timer set to five minutes
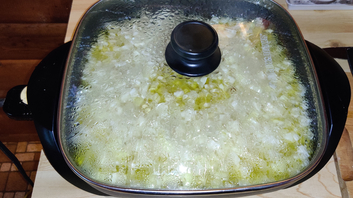
The potato and onion mix was boiled for five minutes:
Potatoes and onions boiled for five minutes
After five minutes, the cover was removed:
Cover removed
At this point, my beer glass was empty, so I refilled it with the rest of the yummy beer from the double bottle:
Beer glass refilled
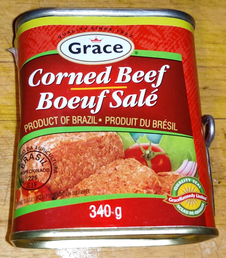
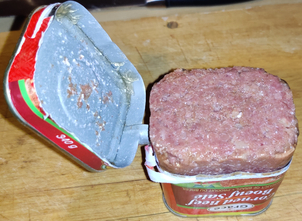
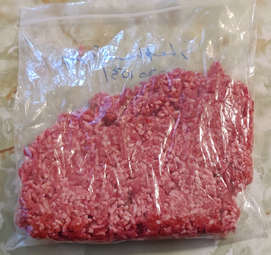
While the water fraction was boiling off in the electric skillet, a can of corned beef luncheon meat was taken out:
Corned beef taken out
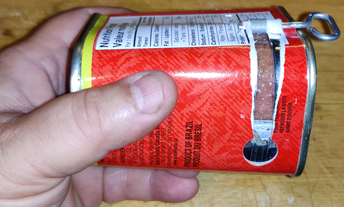
The can of corned beef was opened:
Can of corned beef opened
Can of corned beef opened
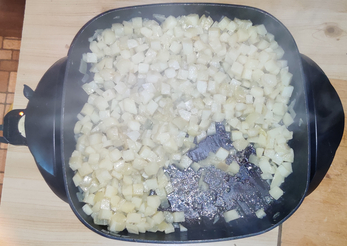
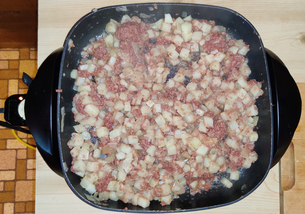
After a few minutes, the water fraction had begun to boil off, and the potatoes and onions began to fry:
Water fraction boiled off
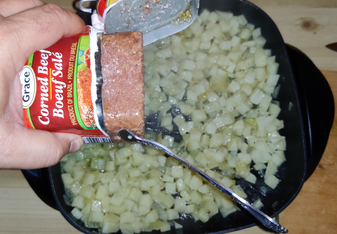
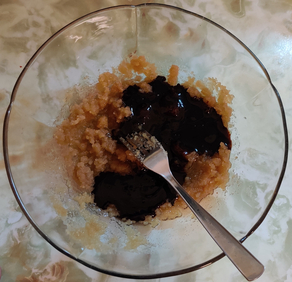
The corned beef was added to the frying potatoes and onions:
Corned beef added to frying potatoes and onions
Corned beef added to frying potatoes and onions
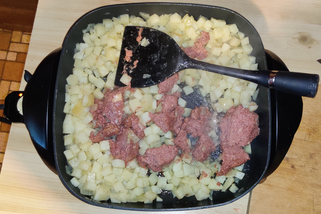
The corned beef was broken up with a spatula / egg flipper:
Corned beef broken up with a spatula / egg flipper
The corned beef, potatoes, and onions were mixed together:
Corned beef broken up and mixed with the potatoes and onions
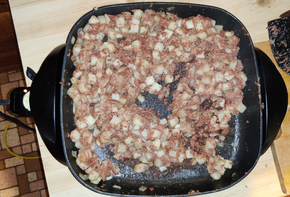
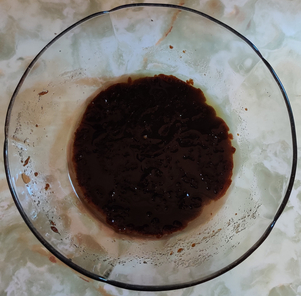
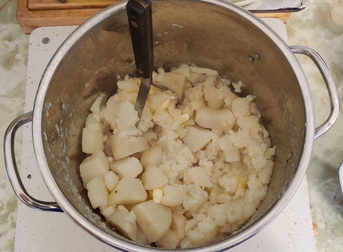
The corned beef hash continued to be fried and mixed:
Corned beef hash continuing to be fried and mixed
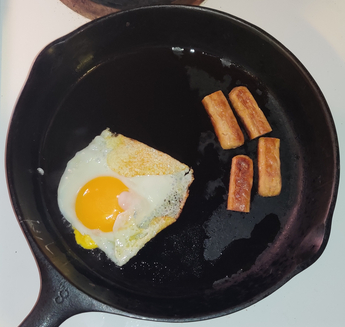
The corned beef hash was just about ready:
The corned beef hash just about ready
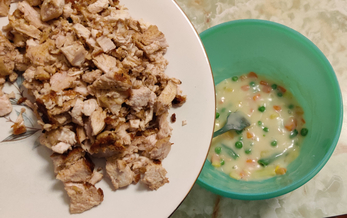
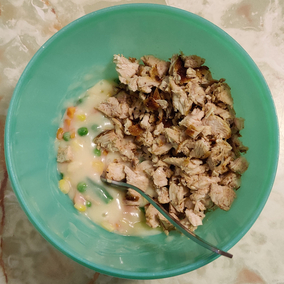
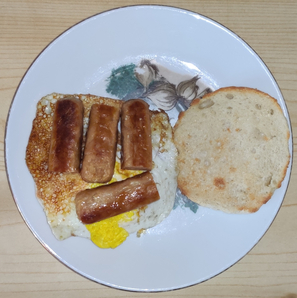
Once the potatoes began browning, a yummy supper was served on a plate, while the rest was placed in a container to freeze and have a lunch:
This past week was again a busy week with no cooking projects from my collection of recipes; however, I took advantage of this past weekend to both develop my version of a favourite dish my mom continues to this day to make for me, a corned beef hash, but for which, strictly speaking, she doesn’t have a formal recipe, and, prepare a future post on firestarters. 🙂
I am therefore posting the photos I’d taken of cooking sausages a few weeks ago at the cottage and which I’d kept in reserve. The subject of cooking sausages would normally not qualify for a post in this cooking series, since I am “only” highlighting the cooking of (admittedly somewhat large quantities of) commercially prepared breakfast sausages — for which I of course do not have a recipe — as opposed to highlighting a non-existent hypothetical recipe for making sausage from scratch. However, I am including this post since several of my recipes call for cooked breakfast sausages, such as my stuffed potato skins, my breakfast sandwiches, and my english muffin breakfast sandwiches.
Note that these photos were taken in the month of May 2021, at the cottage, not this past weekend.
Cooking the sausages:
First, an electric skillet was taken out:
Electric skillet taken out
The electric skillet was turned on:
Electric skillet on
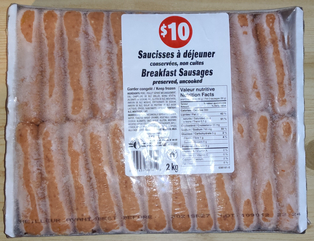
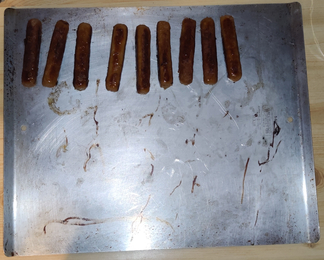
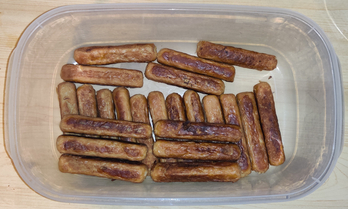
A frozen, two kilogram store-bought flat of breakfast sausages was taken out:
Package of commercial breakfast sausages taken out
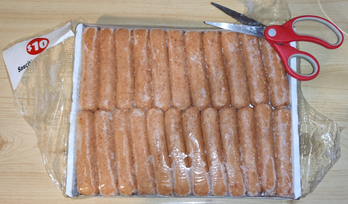
The package of sausages was unsealed:
Package of sausages unsealed
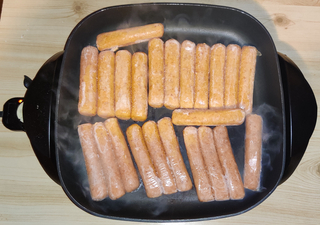
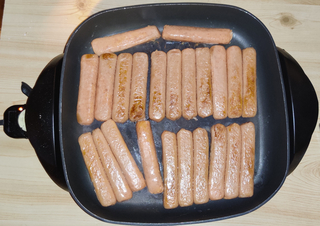
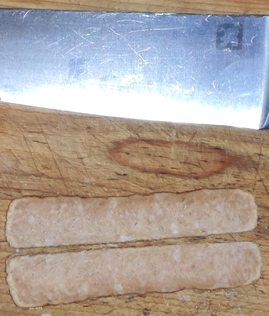
Sausages were taken out and placed in the electric skillet — in this case, half of the package, or the top layer of two layers of sausages:
Sausages placed in the electric skillet
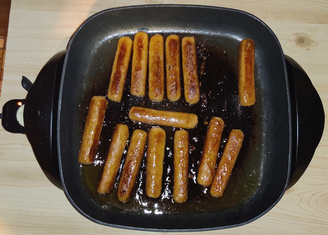
I turned over the sausages after a few minutes:
Sausages turned after a few minutes
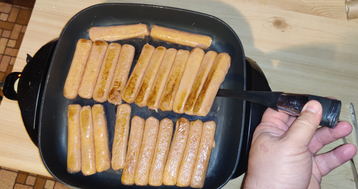
Sometimes, a flipper is needed to loosen the sausages in order to turn them over:
Using a flipper to lift and turn over sausages
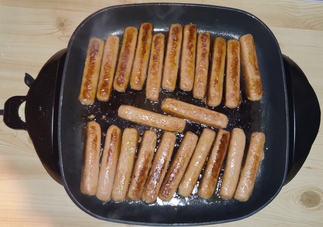
The sausages were turned again and were beginning to brown:
Sausages turned again after a few minutes
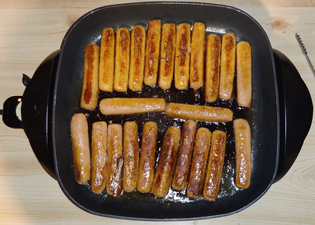
The sausages were turned yet again and continued to brown:
Sausages turned yet again after a few minutes
At this point, a cookie baking tray was taken out:
Cookie baking tray taking out
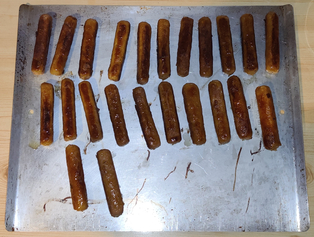
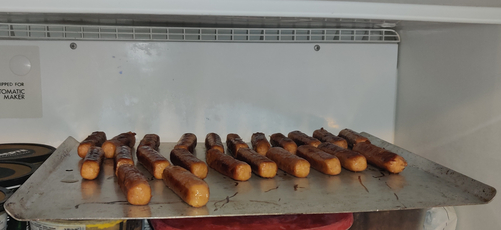
As the sausages began to be cooked, they were taken out of the electric skillet and placed on the cookie baking tray …
Cooked sausages placed on cookie baking tray
… while the rest of the sausages were kept in the skillet to continue cooking …
Finishing cooking the rest of the sausages
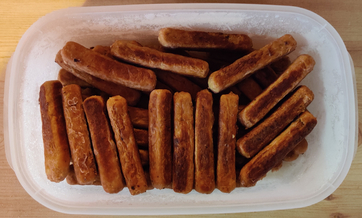
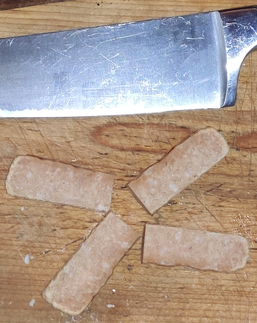
… and once all of the sausages were cooked, they were all placed on the cookie baking tray:
First half of the cooked sausages on the cookie baking sheet
The cookie baking tray of sausages were placed in the freezer:
Cookie tray of cooked sausages placed in freezer
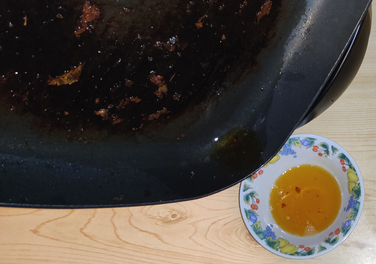
The grease was drained from the electric skillet:
Grease drained from electric skillet
The process was repeated and the rest of the package of sausages was also cooked in the skillet the same way.
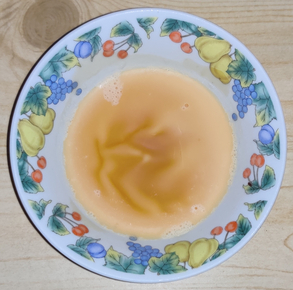
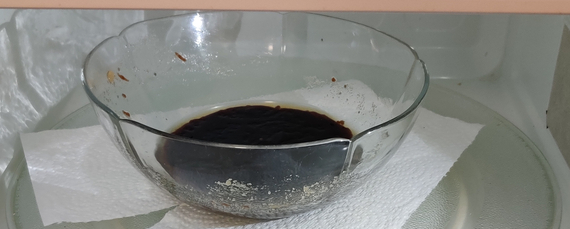
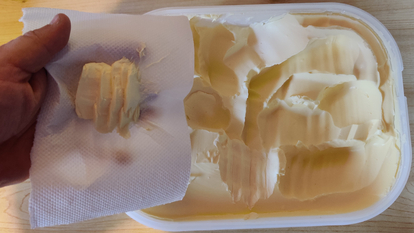
The grease was allowed to cool, and when it had solidified, it was wrapped up with the other kitchen wastes from the weekend’s other cooking projects, and brought home to place in the curbside kitchen waste brown box for municipal composting:
Grease allowed to solidify
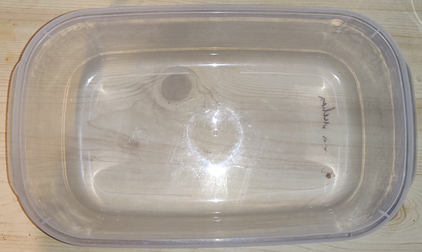
A plastic container was taken out:
Plastic container taken out
The first round of cooked sausages, now partly frozen, were placed in the plastic container, and placed back in the freezer:
Cooked sausages placed in plastic container
When the second half of the sausages were all cooked and frozen, they too were placed in the plastic container, and placed back in the freezer:
Cooked sausages placed in plastic container
I now have several months’ worth of yummy, cooked sausages in the freezer, and I have indeed already eaten some!
This post is a double length feature because both recipes are very similar to the point of just having different fillings. As such, the narrative shows the concurrent preparation of both recipes, just as they were actually prepared.
Making the barbecup and chicken cup fillings:
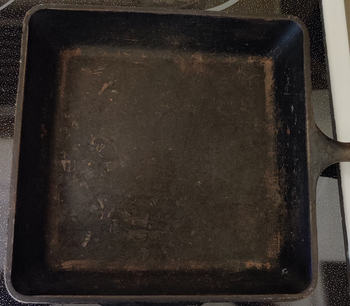
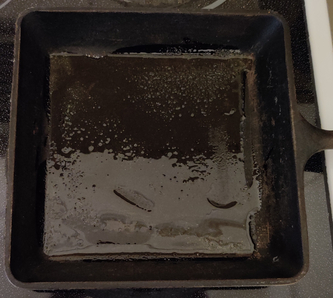
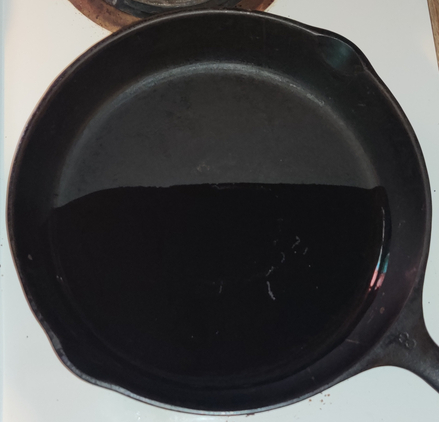
First, a cast iron skillet was taken out, and placed on the stove:
Cast iron skillet taken out and placed on stove
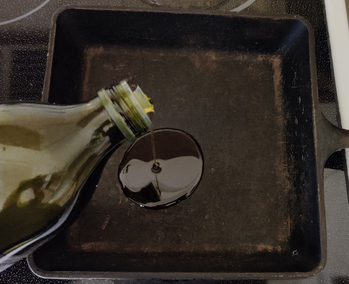
A bit of olive oil was poured in the cast iron skillet:
Olive oil poured in cast iron skillet
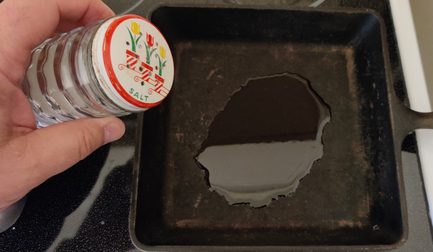
Salt was added to the cast iron skillet:
Salt added to the cast iron skillet
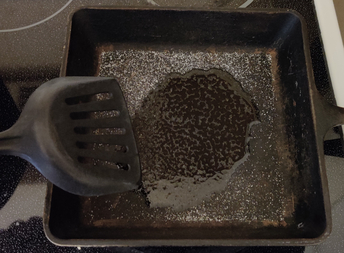
The olive oil and the salt were spread around the cast iron skillet:
Olive oil and the salt spread around the cast iron skillet
Olive oil and the salt spread around the cast iron skillet
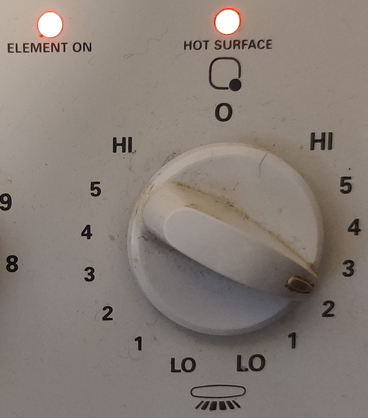
The stove was turned on:
Stove turned on
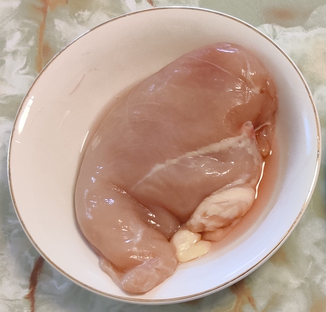
A chicken breast — this one in the 200g to 225g range — was taken out:
Chicken breast taken out
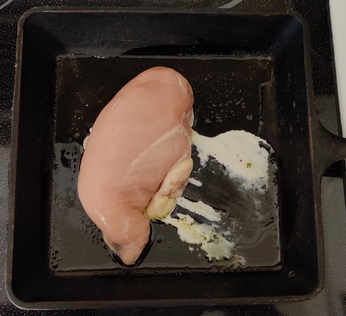
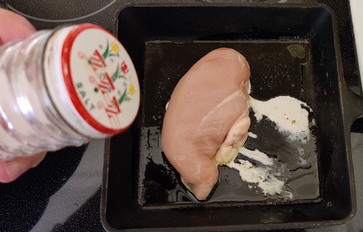
The chicken was placed in the cast iron skillet:
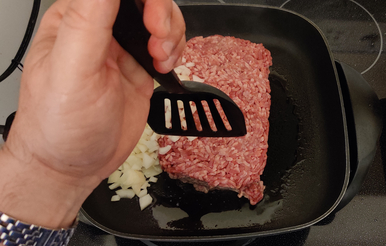
Chicken placed in cast iron skillet
Chicken placed in cast iron skillet
A bit more salt was added to the top of the chicken:
More salt added to chicken
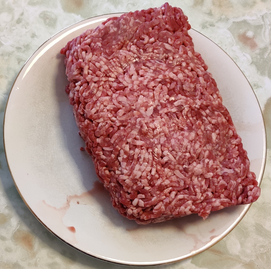
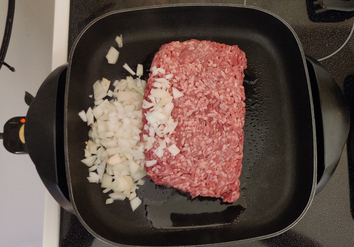
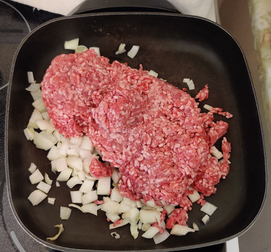
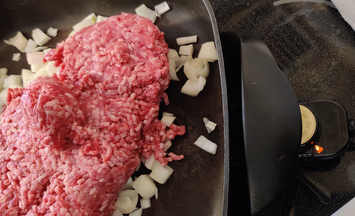
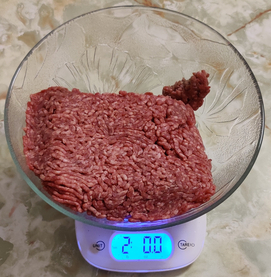
Ground beef was taken out — in this case, about two pounds of ground beef instead of only one pound of ground beef, as specified in the recipe, because in addition to making barbecups, I wanted to freeze some cooked ground beef and onions in an ice cube tray (see later):
Ground beef taken out
An electric skillet was taken out:
Electric skillet taken out
The electric skillet was turned on:
Electric skillet turned on
The ground beef was placed in the electric skillet:
Ground beef placed in electric skillet
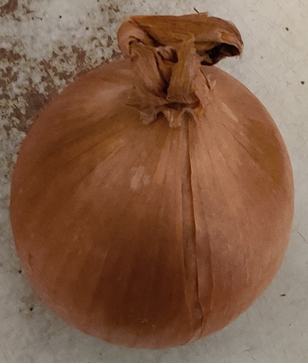
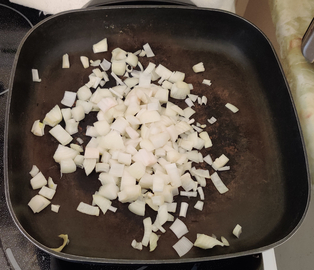
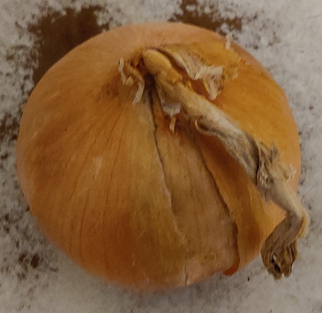
An onion was taken out:
Onion taken out
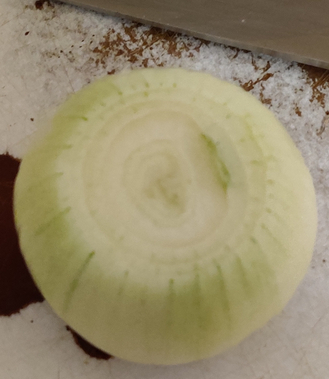
The onion was trimmed — yes, I know that this onion is definitely on the older side:
Onion taken out
The onion was quartered:
Onion quartered
The onion was coarsely chopped:
Coarsely chopped onion
The chopped onion was added to the electric skillet with the ground beef:
Chopped onion added to electric skillet with ground beef
The ground beef was broken up:
Ground beef being broken up
Gound beef partly broken up
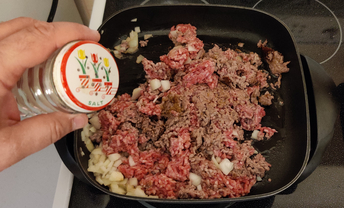
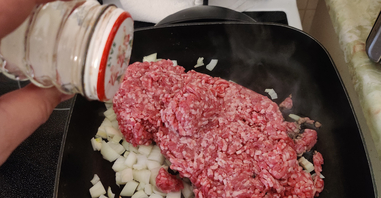
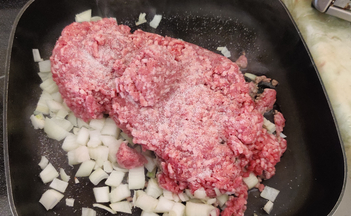
Salt was added to the ground beef and chopped onions:
Salt added to ground beef and chopped onions
The ground beef was broken up some more as it was cooking, mixing in the chopped onions and salt:
Ground beef broken up some more
It was time to pay attention to the frying chicken, which was picked up with an egg flipper:
Chicken picked up with egg flipper
… and was turned over in the cast iron skillet:
Chicken turned over in cast iron skillet
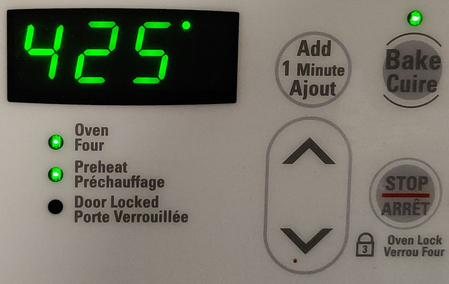
At this point, an oven rack transferred to the top slot in the oven, and the oven was preheated to 425F:
Oven preheating to 425F
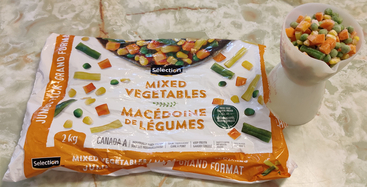
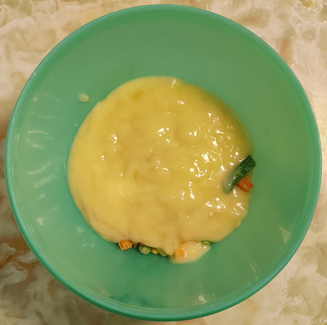
Frozen mixed vegetables were measured out:
Frozen mixed vegetables measured out
The mixed vegetables were transferred to a mixing bowl:
Mixed vegetables transferred to mixing bowl
Mixed vegetables transferred to mixing bowl
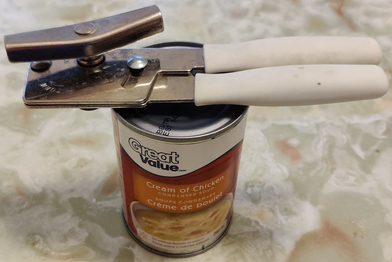
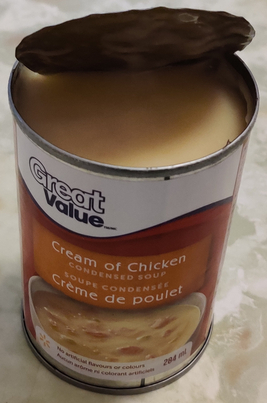
A can of condensed cream of chicken soup was taken out:
Can of condensed cream of chicken soup taken out
The can of condensed cream of chicken soup was opened:
Can of condensed cream of chicken soup opened
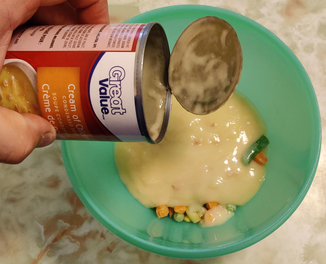
The condensed cream of chicken soup was added to the mixing bowl with the frozen mixed vegetables:
Condensed cream of chicken soup added to mixing bowl with frozen mixed vegetables
Condensed cream of chicken soup added to mixing bowl with frozen mixed vegetables
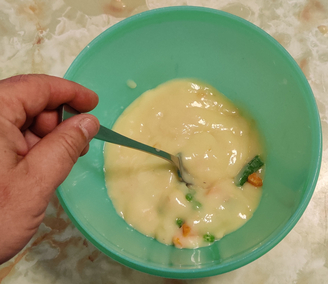
The condensed cream of chicken soup and mixed vegetables were mixed together with a fork:
Condensed cream of chicken soup and mixed vegetables mixed together with a fork
Condensed cream of chicken soup and mixed vegetables mixed together with a fork
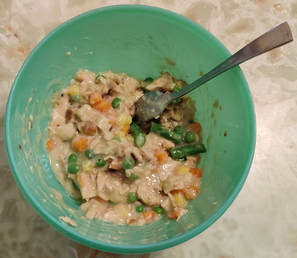
The condensed chicken soup and mixed vegetables were put aside.
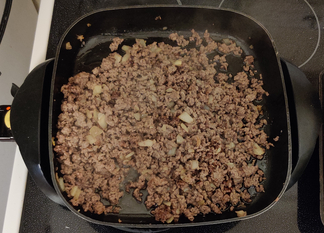
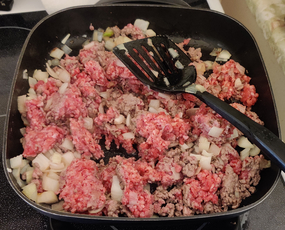
The ground beef was broken up well and well mixed with the onions, and was coming along to being fully cooked:
Ground beef and onions well mixed, and almost cooked
Once cooked, the ground beef and onions were covered and put aside.
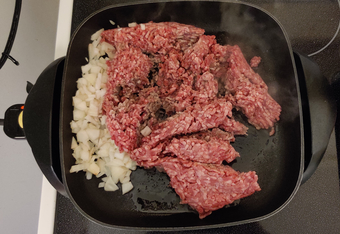
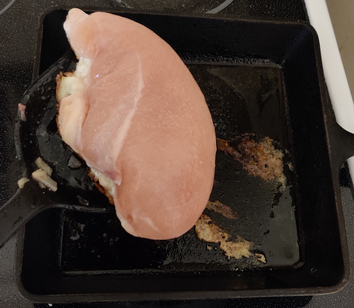
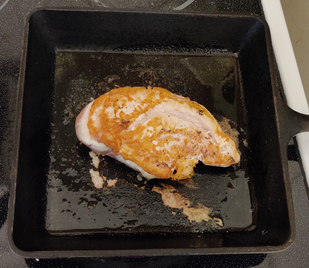
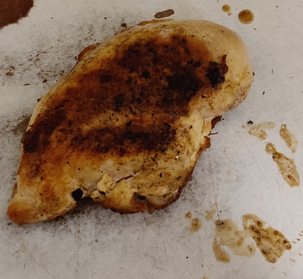
At this point, the chicken was cooked and taken out of the cast iron skillet, and placed on a cutting board:
Cooked chicken placed on cutting board
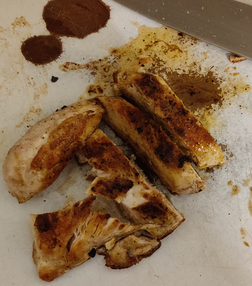
The chicken was sliced:
Sliced cooked chicken
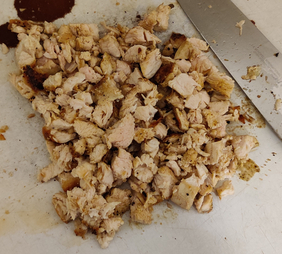
The cooked chicken was then chopped coarsely:
Coarsely chopped cooked chicken
The chopped chicken was added to the mixture of condensed cream of chicken soup and mixed vegetables:
Chopped chicken added to mixture of condensed cream of chicken soup and mixed vegetables
Chopped chicken added to mixture of condensed cream of chicken soup and mixed vegetables
The chopped cooked chicken and mixture of condensed cream of chicken soup and mixed vegetables were all mixed together again with a fork:
Chopped cooked chicken and mixture of condensed cream of chicken soup and mixed vegetables all mixed together with fork
The chicken cup filling was put aside.
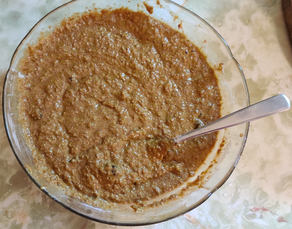
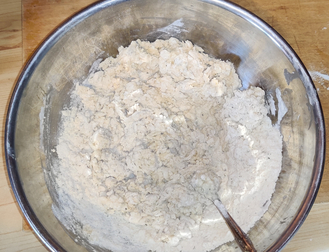
Making the biscuit dough cup part:
I was taught that the base recipe I use for the biscuit dough does not double well, so I started off making the dough for one of the recipe’s worth, and then repeated the process afterwards for the second recipe’s worth.
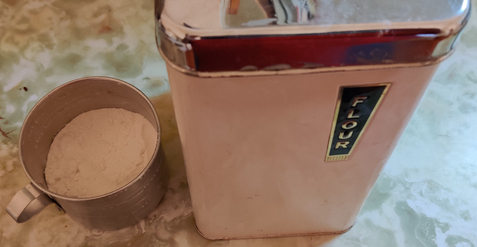
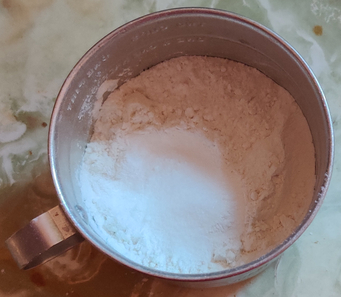
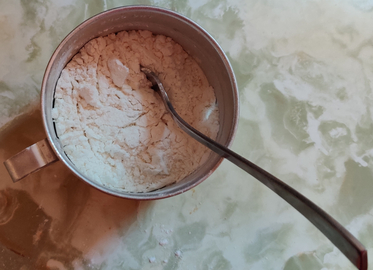
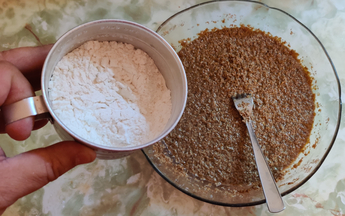
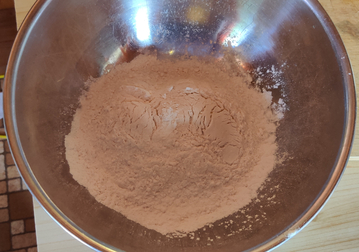
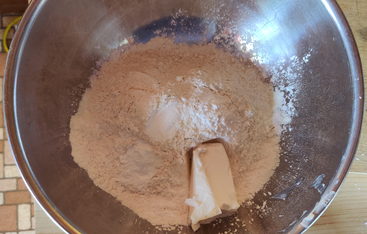
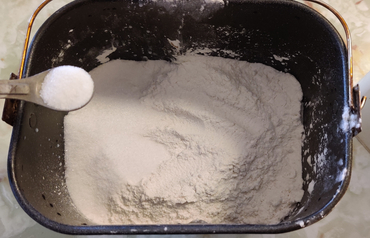
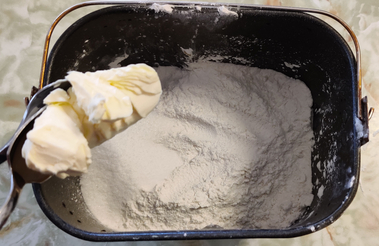
The flour was measured out:
Flour measured out
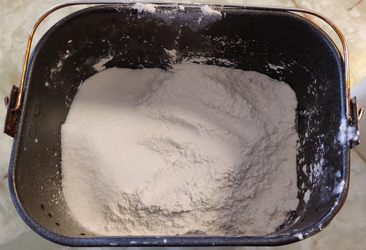
The flour was transferred to a mixing bowl:
Flour transferred to mixing bowl
Flour transferred to mixing bowl
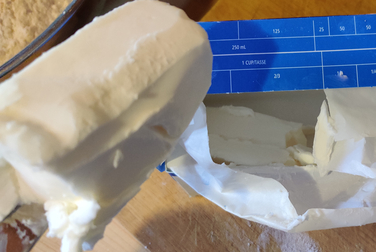
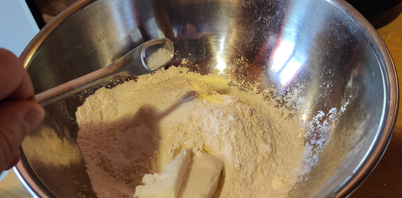
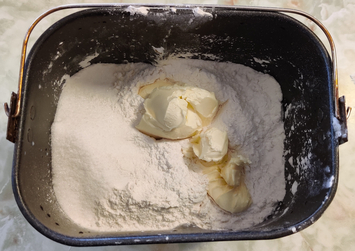
Shortening was measured out:
Shortening measured out
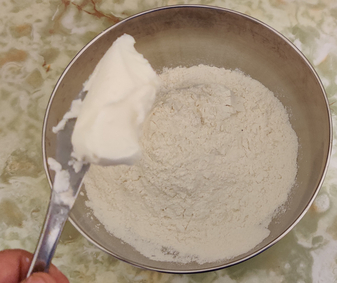
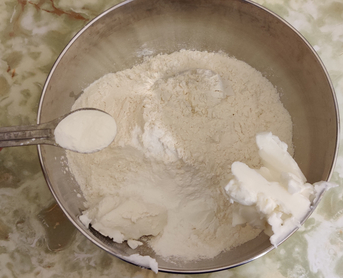
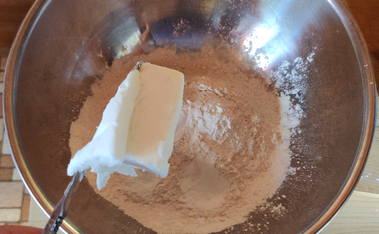
The shortening was added to the flour in the mixing bowl:
Shortening added to flour in mixing bowl
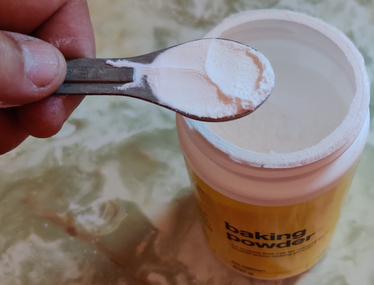
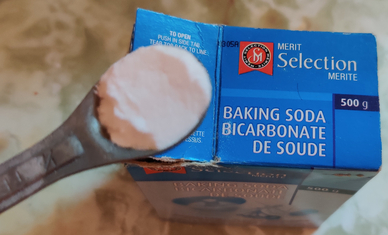
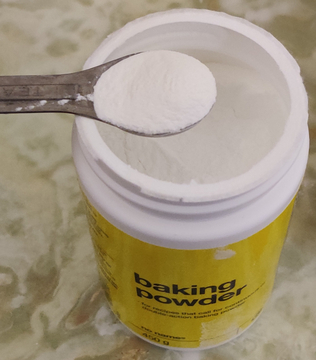
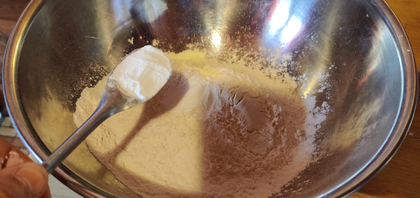
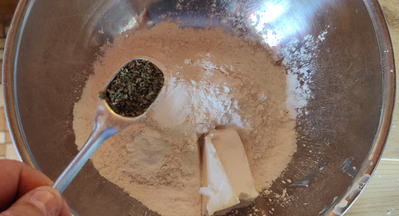
Baking powder was measured out:
Baking powder measured out
The baking powder was added to the mixing bowl with the flour and the shortening:
Baking powder added to mixing bowl with flour and shortening
Baking powder added to mixing bowl with flour and shortening
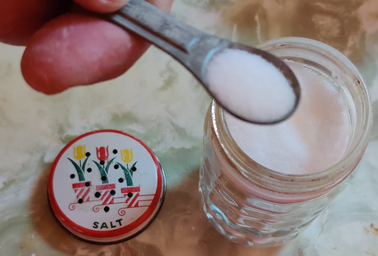
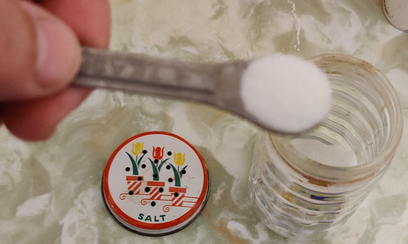
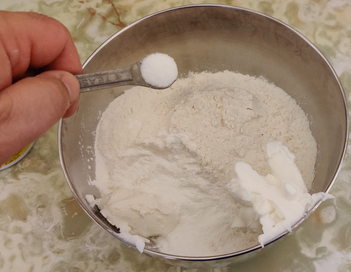
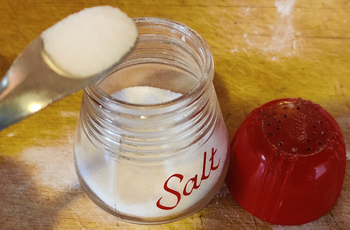
Salt was measured out
Salt measured out
The salt was added to the mixing bowl with the flour, shortening, and baking powder:
Salt added to mixing bowl with flour, shortening, and baking powder
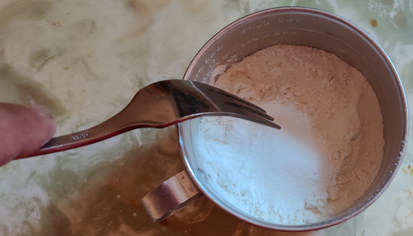
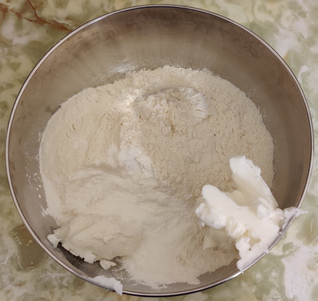
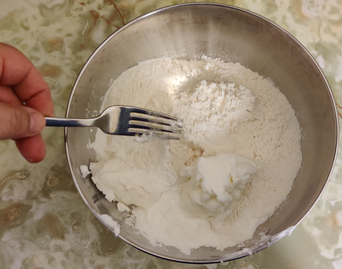
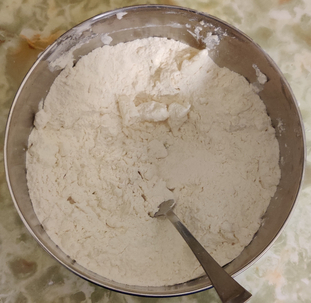
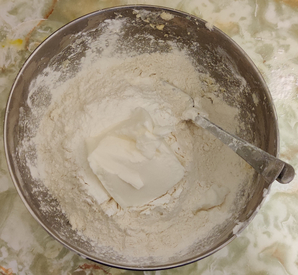
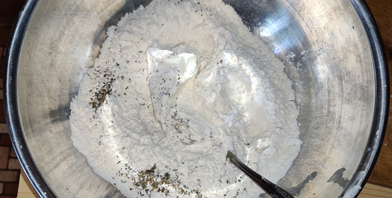
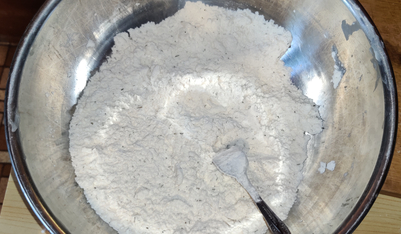
The shortening was broken up with a fork, roughly to the size of peas:
Shortening broken up with a fork to the size of peas
Shortening broken up with a fork to the size of peas
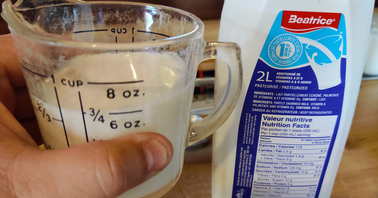
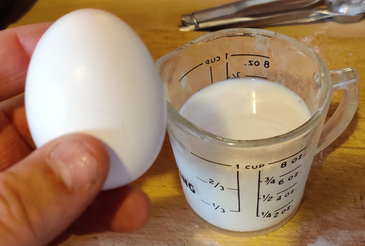
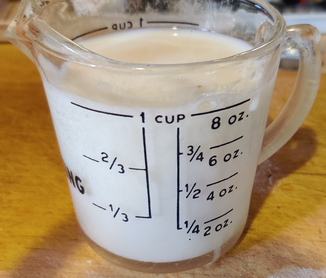
Milk was measured out:
Milk measured out
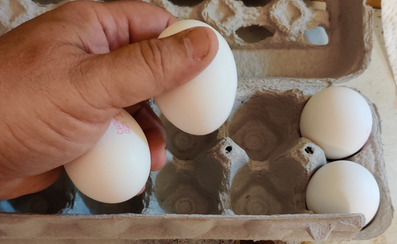
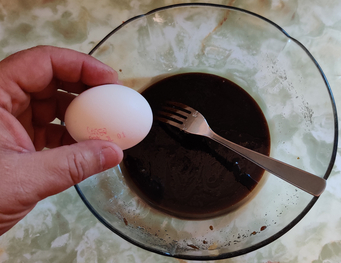
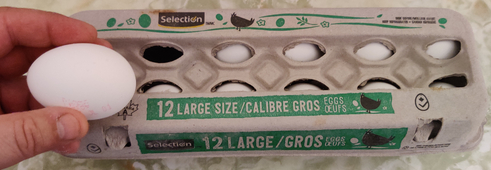
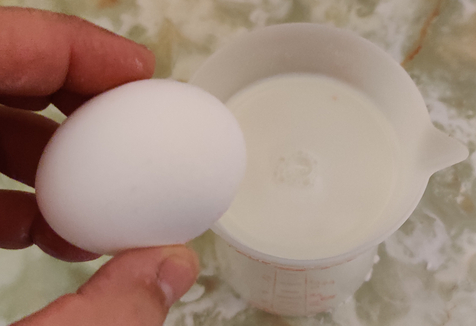
An egg was taken out:
Egg taken out
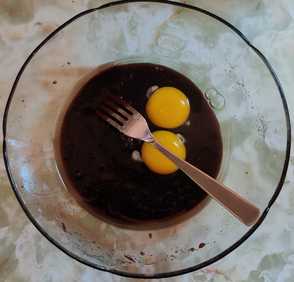
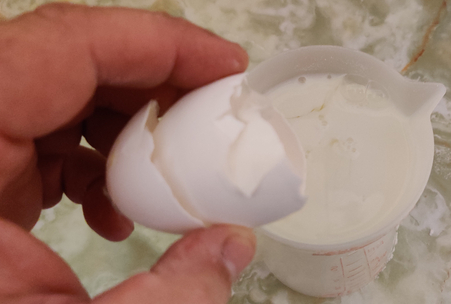
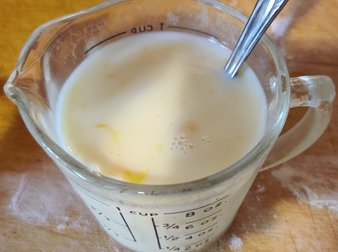
The egg was cracked into the measuring cup with the milk:
Egg cracked into measuring cup with milk
Egg cracked into measuring cup with milk
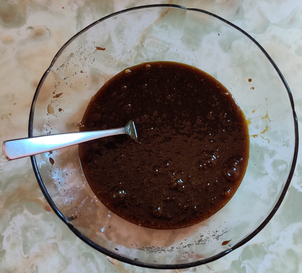
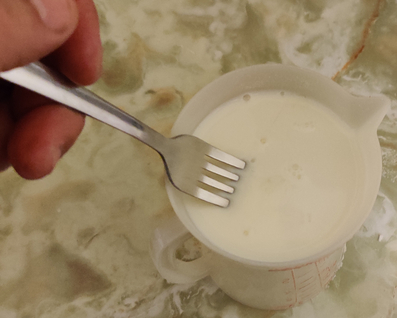
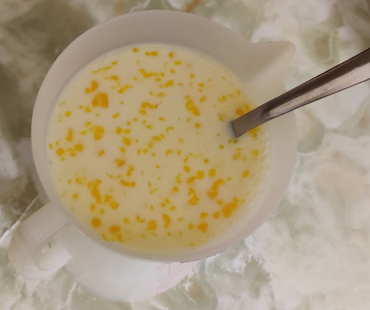
The egg and milk were mixed together with a fork:
Egg and milk mixed together with fork
Egg and milk mixed together with fork
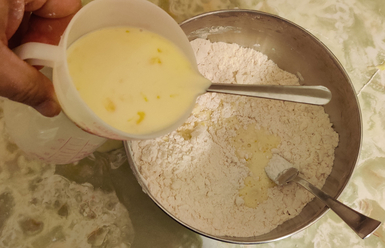
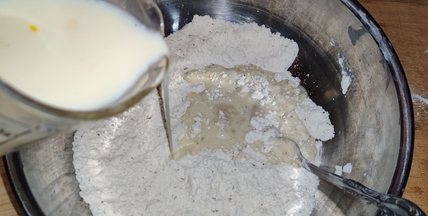
About a third of the egg and milk mixture was added to the mixture of dry ingredients:
A third of egg and milk mixture added to mixture of dry ingredients
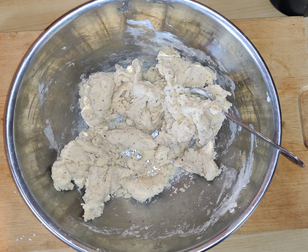
The ingredients were mixed with a fork, well at this point two forks:
Ingredients were mixed with fork
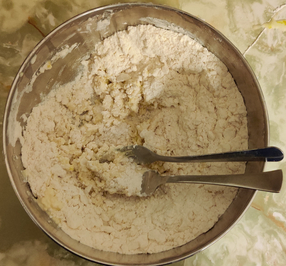
The rest of the egg and milk mixture was added to the dough and the ingredients mixed.
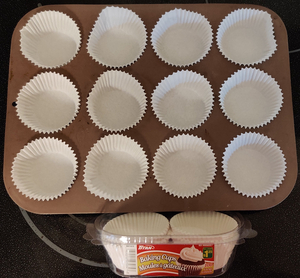
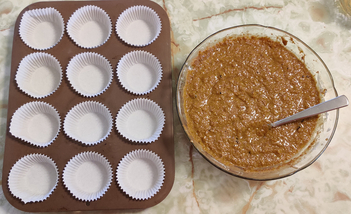
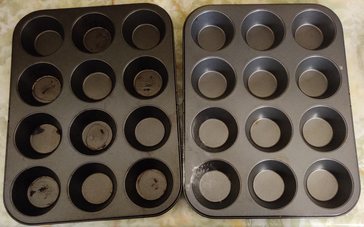
A couple of muffin baking tins were taken out:
Muffin baking tins taken out
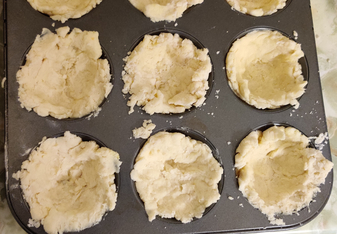
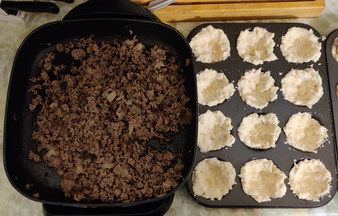
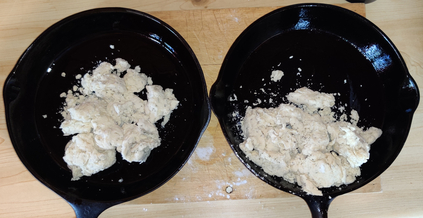
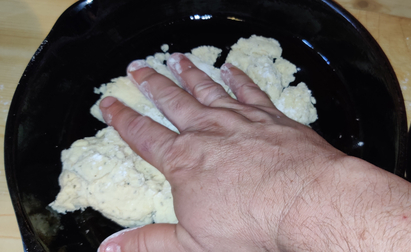
Balls of dough were placed in the wells, and formed into cups around the form of the wells:
Balls of dough transferred to muffin tin wells and formed into cups
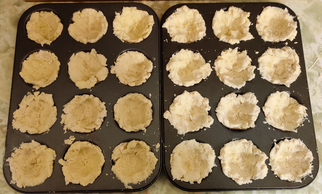
The rest of the dough was transferred to the muffin baking tin and a dough cup was formed in each well:
Dough cups formed in each well of a muffin baking tin
Dough cups formed in each well of a muffin baking tin
A second batch of dough was prepared for the second muffin baking tin, this picture showing the shortening just having been added to the flour (see above for the whole process):
Second batch of biscuit dough, shortening added to flour step
… and the dough from the second batch was used to form more cups in the second muffin baking tin’s wells:
Two muffin tins’ worth of dough cups
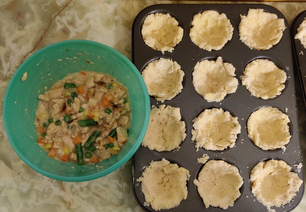
The chicken filling mixture was taken out:
Chicken filling mixture
The chicken filling mixture was spooned into the dough cups of one of the muffin baking tins:
Spooning chicken filling mixture into dough cups
Chicken filling in the dough cups
The chicken filling-filled dough cups were put aside for a few moments.
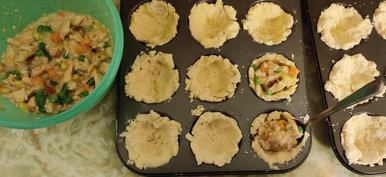
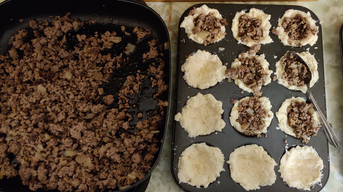
The cooked ground beef and onion mix was taken out:
Cooked ground beef and onion mix taken out
The cooked ground beef and onion mixture was spooned into the dough cups of one of the muffin baking tins:
Spooning cooked ground beef and onion mixture into dough cups
Cooked ground beef and onion mix in the dough cups
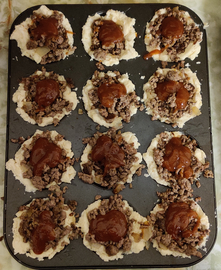
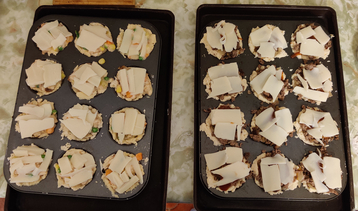
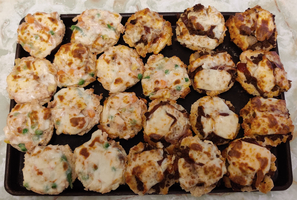
And here is what all the filled dough cups looked like:
24 dough cups filled with cooked ground beef and chicken mixture
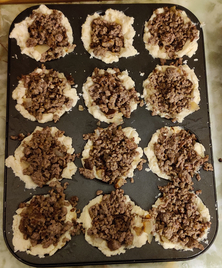
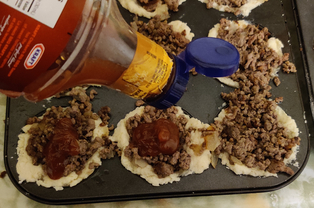
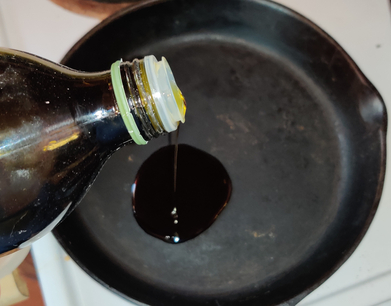
Commercial barbecue sauce in a squeeze bottle was taken out, and barbecue sauce was squeezed onto the cooked ground beef and onion mix:
Barbecue sauce squeezed onto cooked ground beef and onion mix
Barbecue sauce squeezed onto cooked ground beef and onion mix
The filled cups of both varieties were put aside for a moment.
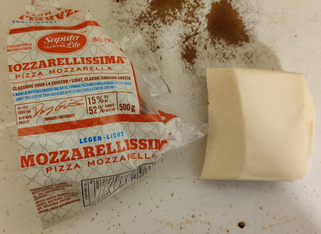
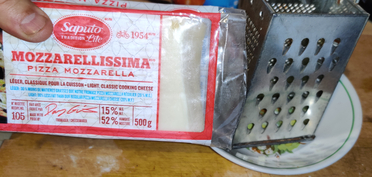
Mozzarella cheese was taken out:
Mozzarella cheese taken out
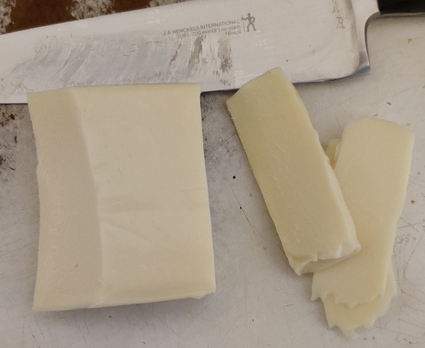
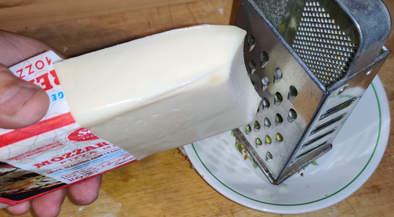
Mozzarella cheese was sliced off the block:
Mozzarella cheese sliced off the block
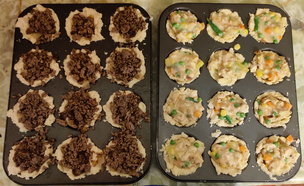
Slices of mozzarella cheese were placed on top of the filled dough cups:
Slices of mozzarella cheese placed on top of filled dough cups
The mozzarella cheese was sliced until there was enough to cover all the filled dough cups:
Slices of mozzarella cheese placed on top of filled dough cups
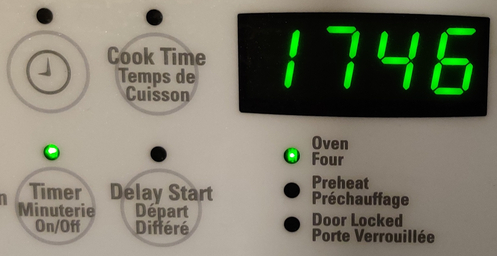
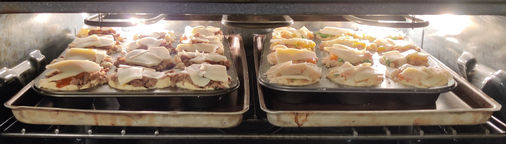
The barbecups and chicken cups were placed in the preheated oven on the top rack:
Barbecups and chicken cups placed in preheated oven on top rack
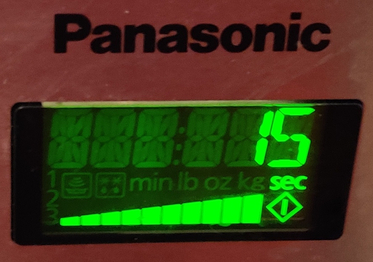
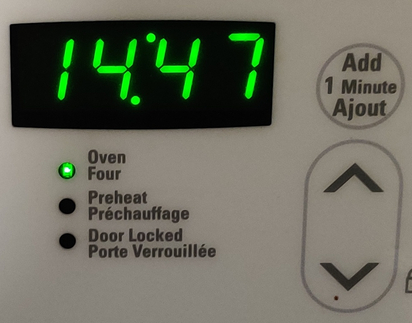
The oven timer was set to fifteen minutes:
Oven timer set to 15 minutes
While the barbecups and the chicken cups were baking, the remaining cooked ground beef and onion mixture was transferred with a spoon to an ice cube tray:
Remaining cooked ground beef and onion mixture transferred with spoon to ice cube tray
Remaining cooked ground beef and onion mixture transferred with spoon to ice cube tray
The ice cube tray with the cooked ground beef and onion mixture was placed in the freezer. When the ground beef and onion mixture was frozen, the individual cubes were placed in a freezer bag and placed back in the freezer, ready for future meal cooking.
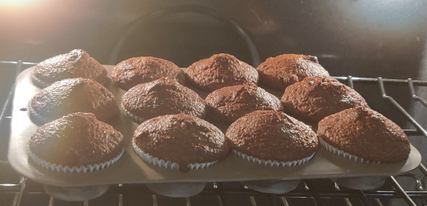
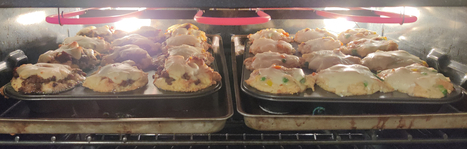
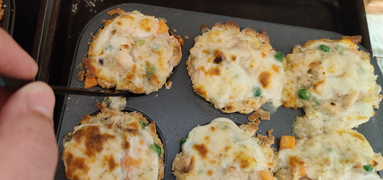
At this point, the barbecups and chicken cups were cooked, the broil cycle was turned on for a couple of minutes to brown the cheese on top:
Broil cycle turned on to brown the cheese
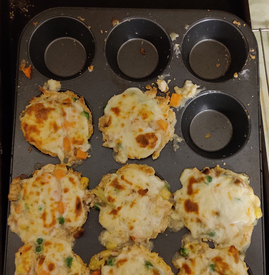
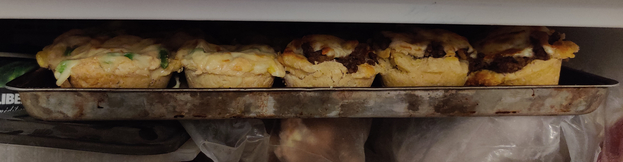
When the barbecups and chicken cups were fully baked, they were taken out of the oven and placed on cooling racks:
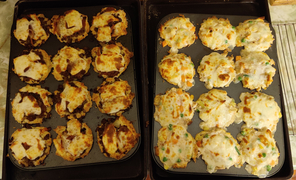
Barbecups (on left) and chicken cups (on right) taken out of oven and placed on cooling racks
The chicken cups were loosened with a plastic knife:
Chicken cups loosened with plastic knife
The chicken cups were removed from the muffin baking tin, and placed on cooling racks:
Chicken cups removed from muffin baking tin
Chicken cups removed from muffin baking tin
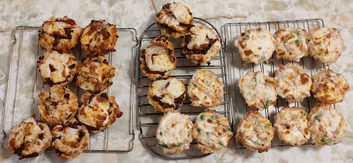
The barbecups (on the left, photo above as well as photo below) were then removed from the muffin baking tin, and placed on a cooling rack alongside the chicken cups:
Barbecups and chicken cups placed on cooling racks
The chicken cups (now on the left in the photo below) and the barbecups (now on the right in the photo below) were placed on a cookie baking tray:
Chicken cups (on left) and barbecups (on right) placed on a cookie baking tray
The tray of chicken cups and barbecups was placed in the freezer:
Tray of chicken cups and barbecups placed in freezer
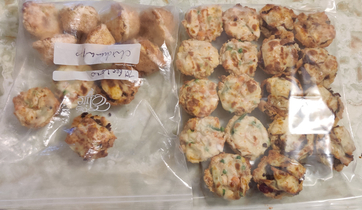
Once the barbecups and the chicken cups were frozen, they were placed in freezer bags, including one that still had some from the last time I cooked these recipes:
Frozen barbecups and chicken cups placed in freezer bags
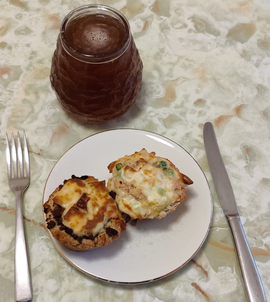
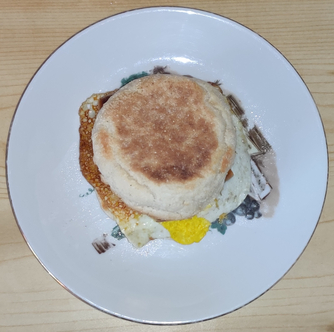
A barbecup (left) and a chicken cup (right) were kept aside for supper, and reheated in a countertop toaster oven:
This week’s single cooking project from my collection of recipes was yet more pickled eggs; this week has been busy, so, I took the photos from one of the extra projects I did last weekend while I was still at the cottage, cooking a large number of breakfast sausages for the freezer, and the subject of this post, English muffin breakfast sandwiches.
This is a bit of a no-brainer of a recipe, since as I was mounting this post, I saw a photo of a virtually identical sandwich printed on the bag of English muffins!
If you don’t cook breakfast sausages in advance to keep in the freezer, begin with the cooking of some sausages in the number of sandwiches you will be making for breakfast. You may also use the resulting grease, appropriately drained and wiped up from the skillet, later when the egg will be fried, instead of the specified olive oil.
Making the sandwiches:
First, a frozen, cooked sausage was taken out, and allowed to partly defrost:
Frozen, cooked sausage was taken out
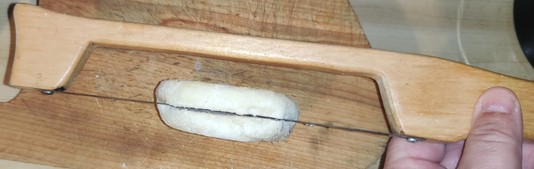
The sausage was sliced along its length:
Sausage sliced along its length
The two sausage halves were then cut in half crosswise, and then put aside for a moment:
Sausage halves cut in halves crosswise
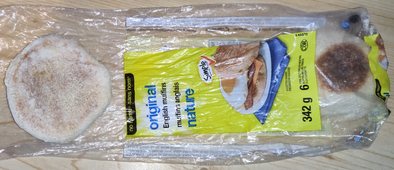
An English muffin was taken out (notice the picture of this recipe on the label):
English muffin taken out
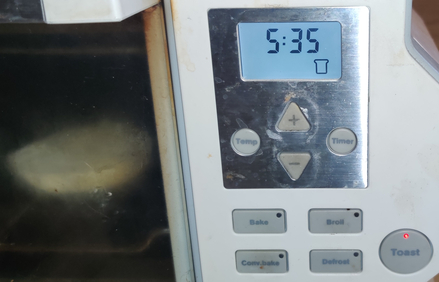
Since I keep English muffins in the freezer, I placed the English muffin in the microwave oven …
English muffin placed in the microwave oven
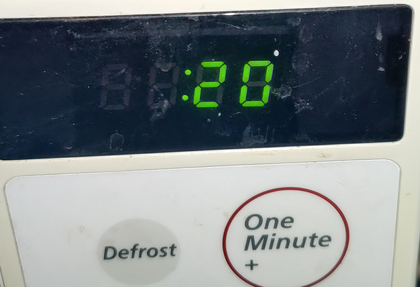
… and the microwave oven was set to a short time period to partly defrost the English muffin:
20 seconds set on microwave oven to partly defrost English muffin
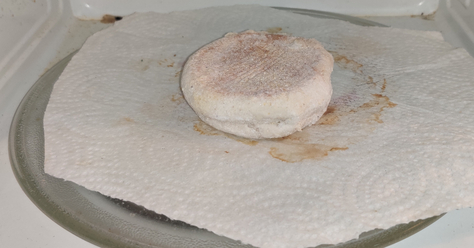
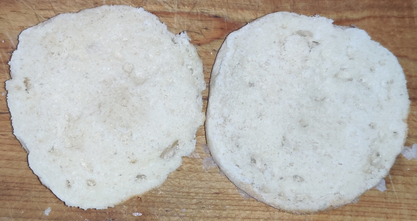
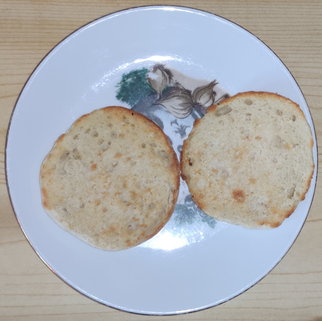
The English muffin was sliced into two halves, and put aside for a moment:
English muffin sliced into two halves
English muffin sliced into two halves
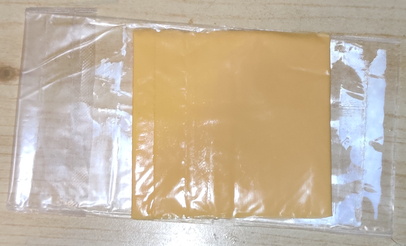
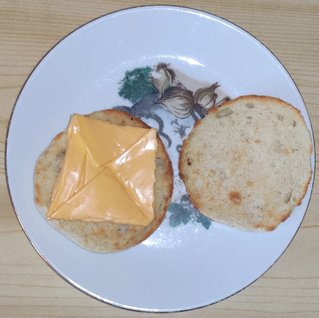
A slice of processed cheese was taken out and unwrapped, and placed on the counter to warm up to room temperature (note that natural cheese sliced off the block may also be used):
Processed cheese taken out
The corners of the slice of cheese were folded over toward the centre, to resize the cheese to the English muffin, and then put aside for a moment:
Corners of the cheese folded over toward centre
Olive oil was poured into a cast iron skillet on the stove:
Olive oil poured into a skillet
The olive oil was spread over part of the surface of the skillet:
Olive oil spread over part of the surface of the skillet
The stove was turned to a medium heat:
Stove burner set to a medium setting
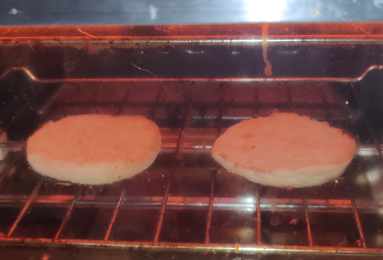
While the skillet was heating up, the English muffin halves were placed in the toaster oven:
English muffin halves placed in the toaster oven
The toast oven was set to the time setting required to toast English muffins:
Toaster oven set to toast English muffins
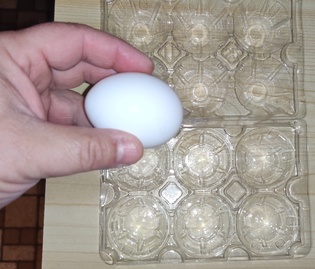
An egg was taken out:
Egg taken out
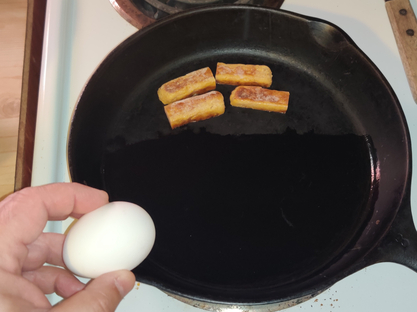
The sausage pieces were placed in the skillet, and the egg was cracked into the skillet:
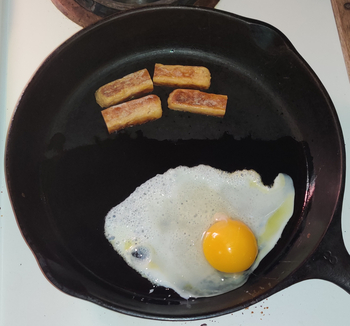
Sausage pieces placed in the skillet, and egg cracked into the skillet
Egg and sausage in skillet
The egg was fried, and edges folded into the centre to resize the frying egg to the English muffin:
Egg frying and edges folded inward
I like fried eggs turned over, so the egg was flipped over:
Frying egg flipped over
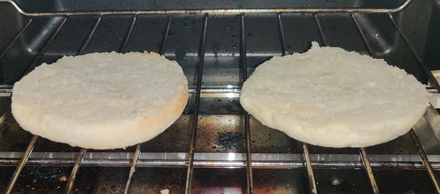
At this point, the English muffins were almost toasted:
English muffins toasting
The toasted English muffins were taken out of the toaster oven:
Toasted English muffin taken out of toaster oven
The folded over processed cheese slice was placed on one of the English muffin halves:
Processed cheese slice placed on English muffin half
The fried egg was transferred on top of the processed cheese:
Fried egg transferred on top of processed cheese
The sausage pieces were placed on top of the fried egg:
Sausage pieces placed on top of fried egg
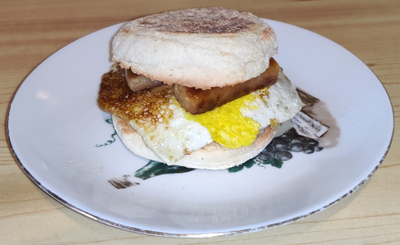
The other half of the English muffin was placed on top of the sausage pieces:
Second English muffin half placed on top of sausage pieces
I was pleased to have on hand the pictures from making the crisped rice treats I made last weekend at the cottage!
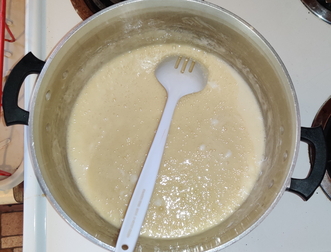
Making the Crisped Rice Treats:
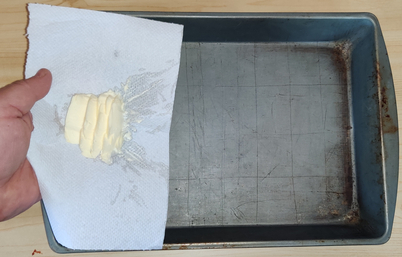
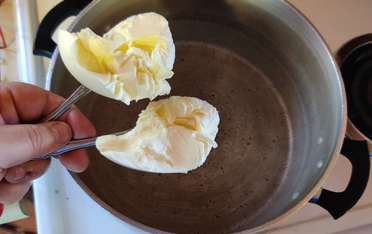
First, margarine was taken out, and some margarine was picked up on a paper towel:
Margarine picked up by hand with a paper towel
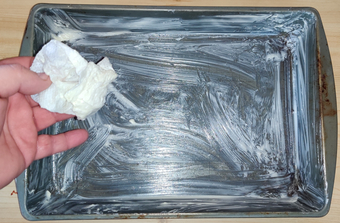
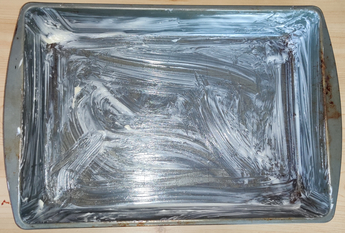
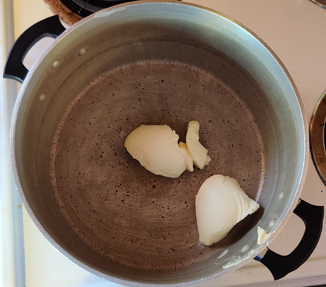
The margarine was spread in a 13″ x 9″ x 2″ cake pan:
Greasing a 13″ x 9″ x 2″ baking pan
Greasing a 13″ x 9″ x 2″ baking pan
Greased 13″ x 9″ x 2″ baking pan
The greased pan was then put aside.
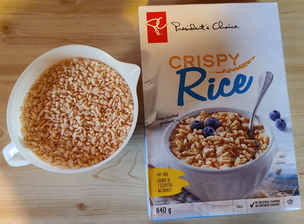
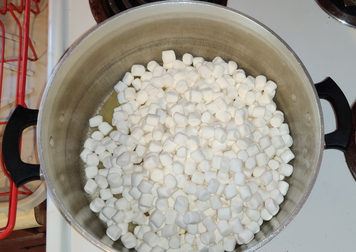
6-1/2 cups of crisped rice breakfast cereal were measure out:
Crisped rice cereal measured out
The crisped rice cereal was transferred to a mixing bowl and put aside:
Crisped rice cereal transferred to a mixing bowl
Crisped rice cereal transferred to a mixing bowl
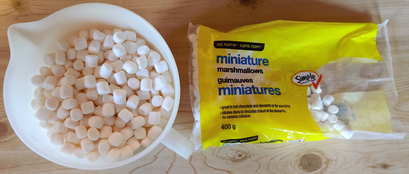
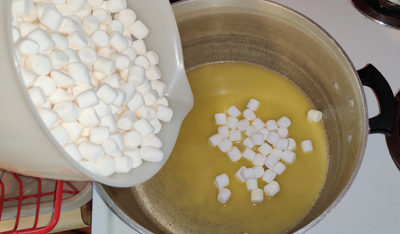
5-1/2 cups of mini marshmallows were measured out:
Mini marshmallows measured out
The marshmallows were put aside.
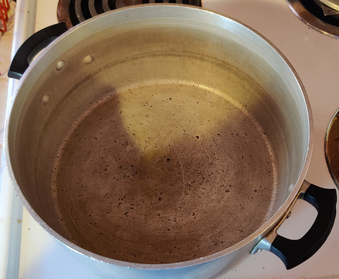
A large, heavy pot was taken out:
Large, heavy pot taken out
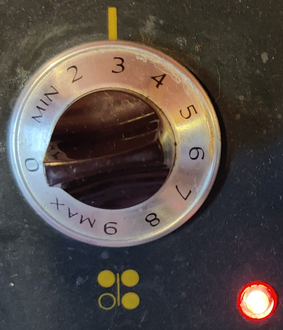
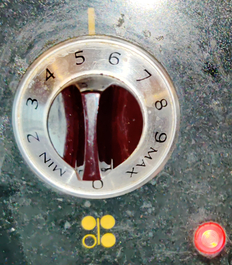
The stove burner was set to a low heat:
Stove set to a low heat
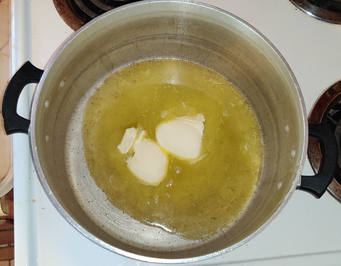
Two dollops of margarine were “measured” out:
Two dollops of margarine “measured” out
The margarine was transferred to the heavy pot:
Margarine transferred to the heavy pot
Margarine transferred to the heavy pot
The margarine was melted in the heavy pot:
Margarine melting in the heavy pot
Once the margarine was fully melted, the mini marshmallows were added to the heavy pot with the melted margarine:
Mini marshmallows added to the melted margarine
Mini marshmallows added to the melted margarine
The stove setting was raised to medium heat:
Stove setting raised to medium
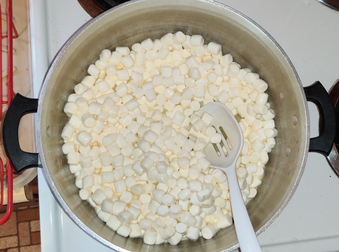
The marshmallows were constantly stirred while melting, to avoid burning:
Constantly stirring the marshmallows while melting to avoid burning
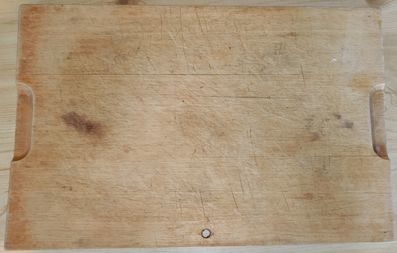
While the marshmallows were melting a few feet away and being constantly watched, a cutting board was taken out, to use as a trivet a few moments later:
Cutting board taken out to be used as a trivet
Very soon, the marshmallows were completely melted, and well mixed with the margarine:
Melted marshmallows and margarine mix
The pot of melted mini marshmallows and margarine mix was transferred to the cutting board:
Pot of melted marshmallows and margarine mix transferred to cutting board
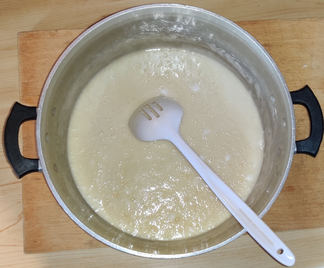
The crisped rice cereal was transferred to the melted marshmallow and margarine mix:
Crisped rice cereal transferred to melted marshmallow and margarine mix
Crisped rice cereal transferred to melted marshmallow and margarine mix
The crisped rice cereal and melted marshmallow and margarine mix were thoroughly mixed together:
Crisped rice cereal and melted marshmallow and margarine mix thoroughly mixed together
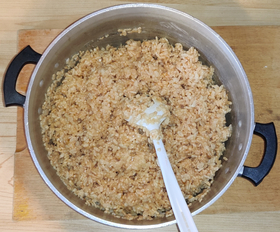
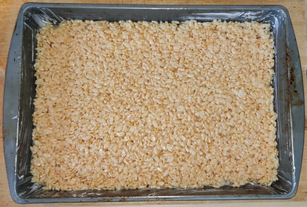
The mixture was transferred to the greased 13″ x 9″ x 2″ cake pan:
Mixture transferred to greased 13″ x 9″ x 2″ cake pan
Mixture transferred to greased 13″ x 9″ x 2″ cake pan
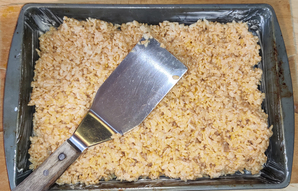
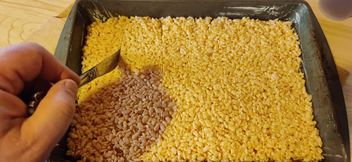
The mixture was allowed to slightly cool, but while still warm, it was spread out evenly in the baking pan with a stiff stainless steel egg flipper:
Mixture spread out evenly in the baking pan with an egg flipper
Mixture spread out evenly in the baking pan
After cooling completely, the contents of the pan were cut into various bite-sized pieces:
Cooled crisped rice and marshmallow mix cut into pieces
Finally, the treats were transferred to a sealable plastic container:
Treats transferred to a sealable plastic container
This past week’s cooking projects from my collection of recipes included yet again more bran muffins for mom, crisped rice treats (which will be the subject of a future post since I also took photos of the process, to keep for future use), and the subject of this post, my pepperoni pizza.
A post that is an ancestor to my current project of creating photo posts of my personal recipes was for my pepperoni pizza, the same recipe for this post; however, it was a simple posting with only some photos of a few of the steps, and the post was created more on a dare after I randomly texted said photos to my brother, who replied “A blog post, perhaps?”
Note that in this post, while some photos below may betray the order in which they were actually taken relative to the others (although all were taken in the same session), some ingredients’ preparation steps are presented at the beginning as part of the mise-en-place steps for the sake of the narrative. Also note that these pizzas were made at the cottage, hence the use of different kitchen equipment.
Making the pizza:
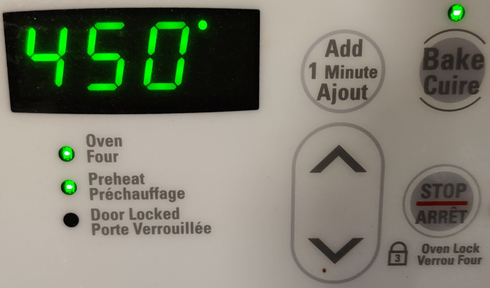
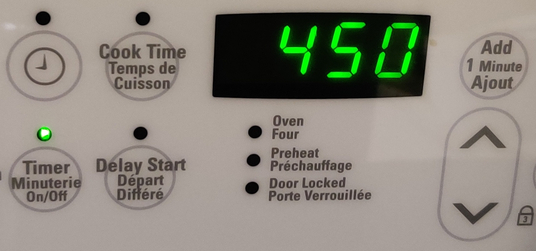
An oven rack was placed on the top position in the oven, and the oven was preheated to 450F:
Oven preheated to 450F
Olive oil was added to two #8 cast iron skillets:
Olive oil added to a cast iron skillet
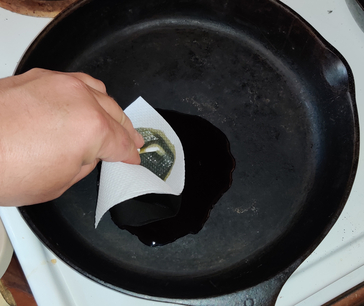
… and the olive oil was evenly spread over the skillets’ surfaces with a paper towel:
Spreading the olive oil with a paper towel
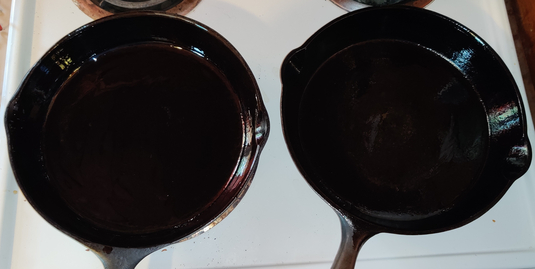
Two oiled cast iron skillets
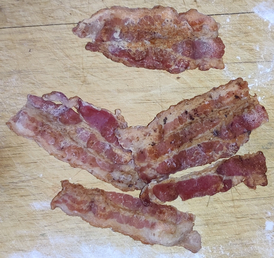
I keep cooked bacon in the freezer; a few slices of which were taken out (or at this point, cook some bacon):
Bacon cooked in advance taken out
The cooked bacon was sliced:
Cooked bacon sliced
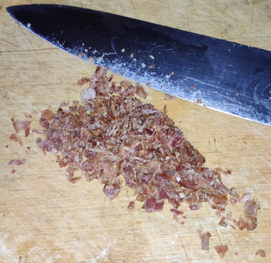
… and then the bacon was chopped finely:
Bacon finely chopped
The finely chopped bacon was transferred to a bowl and kept at hand:
Finely chopped bacon placed in a bowl
An onion was taken out:
Onion taken out
The onion was trimmed:
Trimmed onion
The onion was halved:
Onion halved
The onion was then sliced thinly:
Onion sliced thinly
And the onion was chopped finely:
Onion sliced finely
Then, the onion was transferred to the bowl with the chopped bacon:
Chopped onion transferred to bowl with chopped bacon
And the chopped onion and chopped bacon were mixed together:
Chopped onion and chopped bacon mixed together
The bowl of chopped onion and chopped bacon was then put aside.
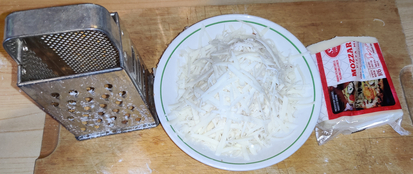
Mozzarella cheese, a grater, and a bowl were taken out:
Mozzarella cheese, grater, and bowl taken out
The mozzarella cheese was grated:
Grating mozzarella
Grated mozzarella cheese
… and the mozzarella cheese was put aside.
I use pre-sliced pepperoni purchased at the store; if you are slicing your own pepperoni, now would be a good time to slice 30 slices of pepperoni, and place the sliced pepperoni on a plate or in a bowl, to be put aside.
Sliced pepperoni
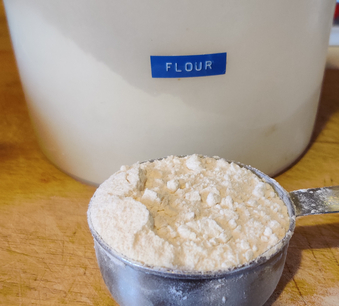
Flour was measured out:
Flour measured out
The flour was placed in a mixing bowl:
Flour placed in mixing bowl
Flour in mixing bowl
Baking powder was measured out:
Baking powder measured out
The baking powder was added to the flour in the mixing bowl:
Baking powder added to mixing bowl
Shortening was measured out:
Shortening measured out
The shortening was added to the flour and baking powder in the mixing bowl:
Shortening added to mixing bowl
Shortening in mixing bowl
Salt was measured out:
Salt measured out
The salt was added to the flour, baking powder, and shortening in the mixing bowl:
Salt added to other ingredients
“Italian style seasoning” was measured out:
Italian seasoning measured out
The Italian seasoning was added to the flour, baking powder, shortening, and salt in the mixing bowl:
Italian seasoning added to other ingredients
Italian seasoning added to other ingredients
The shortening was broken up with a fork …
Breaking up the shortening with a fork
… until the shortening was broken up to roughly the size of peas, and the rest of the ingredients were well mixed:
Shortening broken up to the size of peas
Milk was measured out:
Milk measured out
An egg was taken out:
Egg taken out
The egg was cracked into the measuring cup of milk:
Egg cracked into milk
The egg and milk were mixed together with a fork:
Egg and milk mixed together with a fork
About a third of the liquid was added to the flour mix:
Egg and milk mixture added to the flour mix
The wet and dry ingredients were mixed together:
Wet and dry ingredients mixed
The rest of the liquid was added half at a time, mixing after each addition of liquid, resulting in a sticky to somewhat stiff dough:
Wet and dry ingredients mixed to make a dough
The dough was divided between the two oiled cast iron skillets:
Dough divided between the two oiled cast iron skillets
The two dough balls were lightly floured:
Dough balls lightly floured
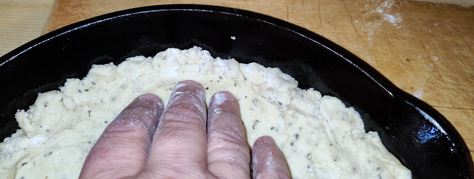
The dough was flattened out in the skillets by hand, covering the entire surface of the bases of the skillets:
Dough flattened out by hand
Edges were formed in the dough along the edges of the skillets:
Edges formed in dough along edges of skillets
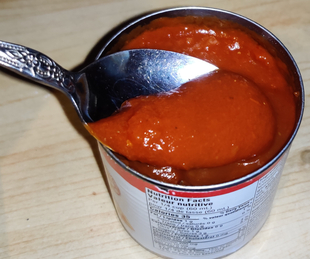
Pizza sauce was taken out:
Pizza sauce taken out
The sauce was spooned out of the can:
Sauce spooned out
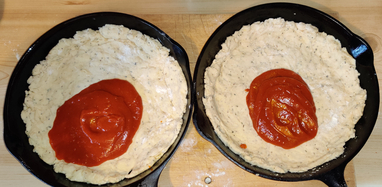
The sauce was transferred to the pizzas:
Sauce transferred to pizza
… and evenly split between the two pizzas:
Sauce split between pizzas
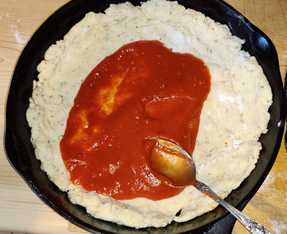
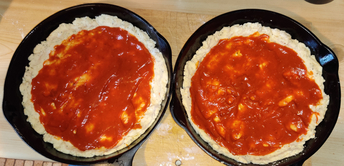
The sauce was evenly spread over the two flattened dough in each skillet, within the edges created around the pizzas:
Sauce evenly spread over dough
Sauce evenly spread over dough
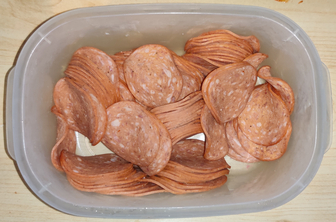
The pepperoni was taken out:
Pepperoni taken out
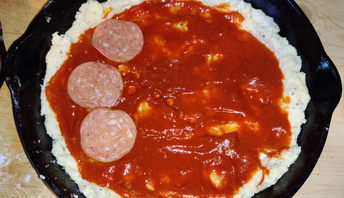
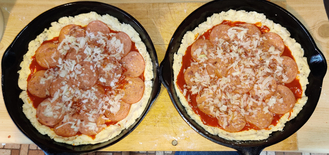
Pepperoni slices were layered on top of the sauce, generally not overlapping over each other:
Pepperoni layered on top of the sauce
Pepperoni layered on top of the sauce
The chopped onion and chopped bacon mix was divided between the pizzas:
Chopped onion and chopped bacon mix divided between the pizzas
The chopped onion and chopped bacon mix was evenly spread over the surface of the pizzas:
Chopped onion and chopped bacon mix evenly spread over the surface of the pizzas
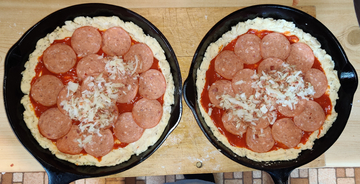
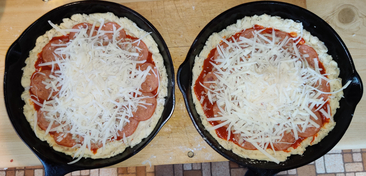
The grated mozzarella cheese was divided between the two pizzas:
Grated mozzarella cheese divided between the two pizzas
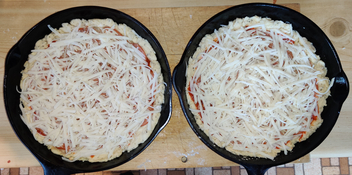
The grated mozzarella cheese was evenly spread over the surface of the pizzas
Grated mozzarella cheese evenly spread over the pizzas
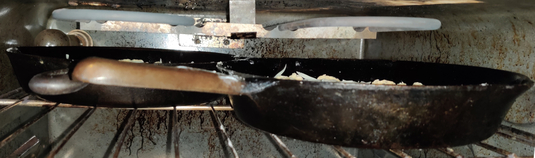
The two pizzas, skillets and all, were placed on the top rack of the preheated oven:
Pizzas placed on the top rack of the preheated oven
A timer was set to 23 minutes:
Timer set to 23 minutes
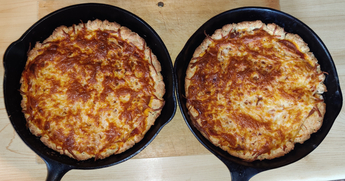
The pizzas’ positions in the oven were switched partway, and after 23 minutes, the baked pizzas were removed from the oven using oven mitts — the skillets are VERY HOT! — and placed on a cutting board:
Baked pizzas removed from oven
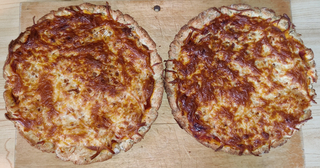
The pizzas were removed from the skillets using an egg flipper, and returned to the cutting board:
Pizzas removed from cast iron skillets
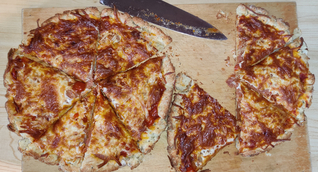
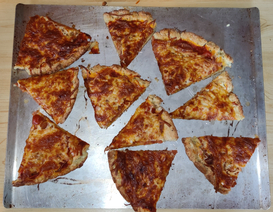
The pizzas were sliced (in this case, in six pieces each):
Pizzas sliced
A yummy lunch is served:
Lunch is served!
Lunch was yummy!
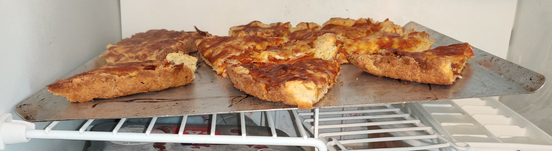
The rest of the pizza slices were placed on a cookie sheet:
Pizza slices placed on cookie sheet
The cookie sheet was placed in the freezer:
Tray with pizza slices placed in freezer
Once frozen, the extra pizza slices were placed in a freezer bag and returned to the freezer, to eat during future lunches:
Frozen pizza slices in a freezer bag and returned to the freezer
This week’s cooking project from my collection of recipes was a half-batch of my version of what in English-speaking Canada we call shepherd’s pies, while in French-speaking Canada, we call it paté chinois; in the UK, it would be properly considered a cottage pie.
I developed this version in the very early 1990’s after working in a summer camp kitchen, where we made camp-sized quantities of a basic version with cooked ground beef, cream-style corn, and mashed potatoes; I liked the dish but added onions, ketchup, peas, and carrots, and kept to the spirit of large quantities in order to cook for the freezer.
Note that in the text below, while there may appear to be a distinct sequence of separate steps to be taken one after the other, presented as such for the sake of the narrative, many steps were actually performed simultaneously and / or heavily overlapping with each other as given steps were finished and new steps begun. This was all the more the case given that I had performed a number of mise-en-place activities in advance: Ground beef was measured out and bagged separately, a week in advance on the day that I’d bought several packages of ground beef on sale, and before all of it was put in the freezer; potatoes were measured out, peeled, and cubed the night before the main cooking day; and carrots were prepared and sliced the night before the main cooking day.
Making the pies:
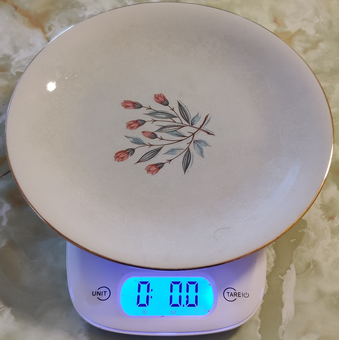
Last week, after stocking up on ground beef on sale, I set up my kitchen scale, putting a plate on the scale and setting the scale to zero:
Plate on kitchen scale and scale set to zero
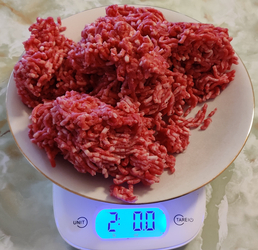
I measured out two pounds of ground beef …
Two pounds of ground beef measured out
… and the ground beef was placed in a separate bag and placed in the freezer, ready for this week’s cooking project:
Measured out ground beef in a freezer bag
The night before I did the main cooking, I set a pot on the kitchen scale, and set the scale to zero:
Pot placed on kitchen scale and scale set to zero
Five pounds of potatoes were measured out:
Five pounds of potatoes measured out
The pot of potatoes was filled with water:
Pot of potatoes filled with water
Pot of potatoes filled with water
The potatoes were peeled:
Potatoes peeled
As the potatoes were peeled, they were placed back into the pot of water:
Peeled potatoes placed back in pot of water
The peeled potatoes were then individually taken out and placed on a cutting board:
Peeled potato taken out for slicing
The peeled potatoes were sliced lengthwise:
Sliced potato sliced lengthwise
… the potatoes were then cut into large cubes:
Potatoes cut into large cubes
… and the potato cubes were placed back into the pot of water as they were cut:
Potato cubes placed back in the pot of water
The water in the pot of potato cubes was drained:
Water in pot drained
Fresh water was put in the pot of potato cubes to rinse the potato cubes:
Rinse water put in pot of potato cubes
The rinse water was drained, and the pot filled again with fresh water, covering the potato cubes:
Third round of fresh water covering the potato cubes
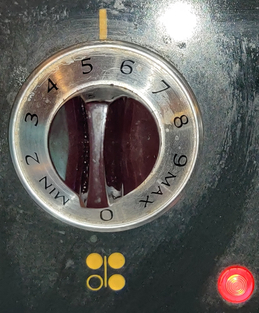
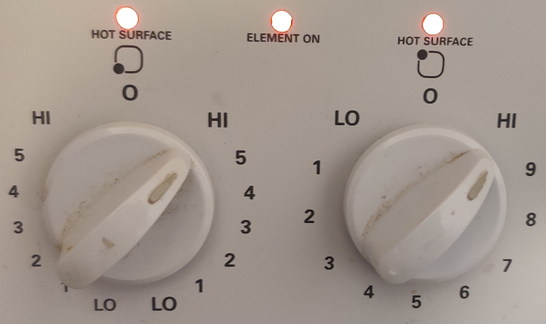
On the main cooking day, the stove was turned on:
Stove turned on (dial on the left)
… the pot of potatoes was placed on the stove:
Pot of potatoes placed on stove
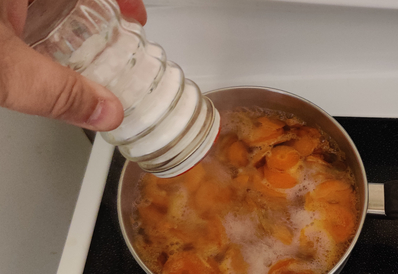
Salt was measured out:
Salt measured out
… and put into the pot of potatoes being brought to a boil:
Sat added to the pot of potatoes being brought to a boil
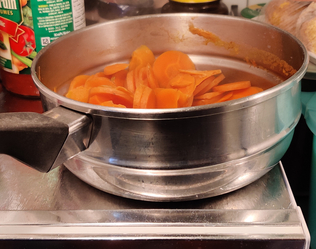
The potatoes were brought to a boil:
Potatoes brought to a boil
A timer was set to 20 minutes, the time the potatoes were boiled:
Potatoes boiled for 20 minutes
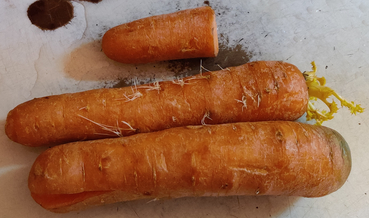
The night before I did the main cooking, carrots were taken out:
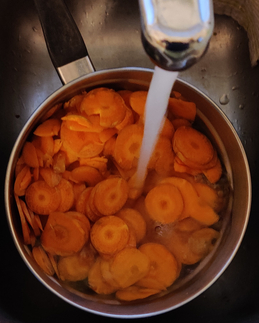
Carrots taken out
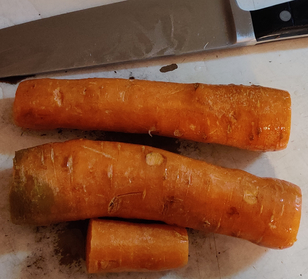
The carrots were cleaned and trimmed:
Carrots cleaned and trimmed
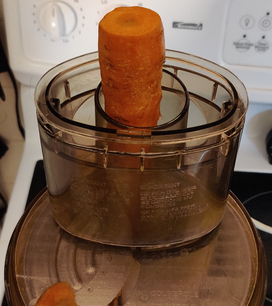
The carrots were run through a food processor with the slicing blade tool:
Carrots run through food processor with slicing tool
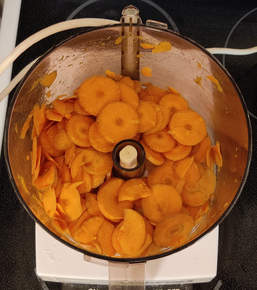
Sliced carrots
The sliced carrots were transferred to a pot:
Sliced carrots transferred to a pot
Sliced carrots transferred to a pot
Water was added to the pot of carrots, covering the carrots:
Water added to the pot of carrots
Water covering carrots in pot
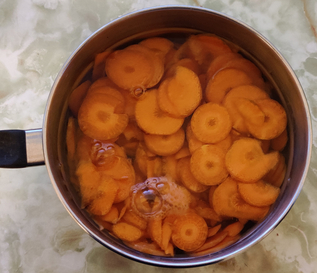
On the main cooking day, a second burner on the stove was turned on:
Second burner on the stove turned on (dial on the right)
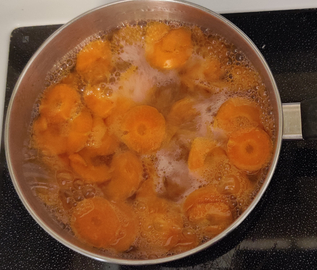
The carrots were put on the stove and brought to a boil:
Carrots brought to a boil
A timer was set to five minutes:
Sliced carrots boiled for five minutes
… and at this point I remembered to add salt to the pot of boiling carrots:
Salt added to pot of boiling carrots
After five minutes of boiling, the carrots were drained, and the pot was placed in the fridge to help cool down the carrots:
Carrots cooling in the fridge
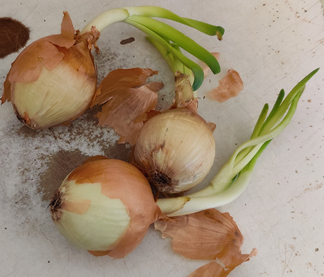
On cooking day, onions were taken out:
Onions taken out
The onions were trimmed:
Onions trimmed
The onions were chopped coarsely:
Coarsely chopped onions
The onions were placed in an electric skillet:
Onions placed in electric skillet
The ground beef, which was measured out and frozen last week, and defrosted beginning the day before cooking day, was placed in the electric skillet with the chopped onions:
Ground beef placed in electric skillet with the onions
The electric skillet was turned on:
Electric skillet turned on
Salt was added to the beef and onions in the electric skillet:
Salt added to beef and onions
Salt added to beef and onions
The beef was broken up and mixed together with the onions and salt, while all the ingredients were frying:
Beef broken into smaller pieces and mixed with onions
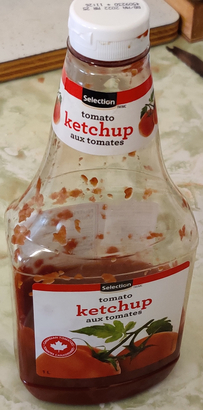
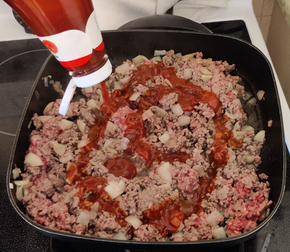
Part way through the cooking of the beef and onions, ketchup was taken out …
Ketchup taken out
… and ketchup was added to the frying beef and onion mixture part way through:
Ketchup added to frying beef and onion mix
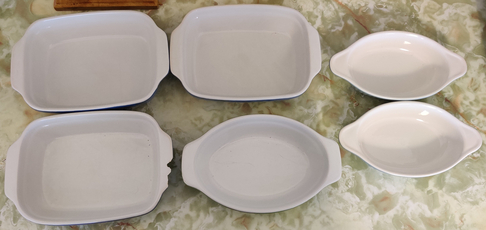
At this point, some oven proof baking pans were laid out:
Baking pans laid out
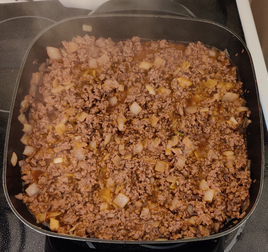
And once the beef, onion, and ketchup mixture was fully cooked …
Fully cooked beef, onion, and ketchup mixture
… the cooked beef, onion, and ketchup mixture was transferred to the various oven-proof baking pans:
Cooked beef, onion, and ketchup mixture transferred to the baking pans
The baking pans with cooked beef, onion, and ketchup mixture were put aside until later.
At this point, the potatoes had been boiling for twenty minutes, and the pot was drained:
Drained boiled potatoes
Margarine was taken out, and a dollop of margarine was scooped out with a spoon:
Dollop of margarine scooped out with a spoon
The margarine was added to the boiled potatoes:
Margarine added to the boiled potatoes
Salt was again measured out:
Salt measured out
And the salt was added to the boiled potatoes and margarine:
Salt added to boiled potatoes and margarine
Milk was measured out:
Milk measured out
And the milk was added to the boiled potatoes, margarine, and salt:
Milk added to boiled potatoes, margarine, and salt
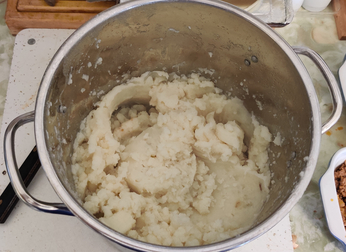
The boiled potatoes, margarine, salt, and milk were mashed together with a hand masher:
Boiled potatoes, margarine, salt, and milk mashed together
Mashed potatoes
The mashed potatoes were put aside until later.
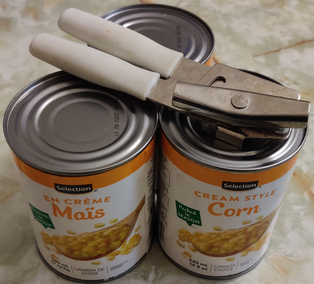
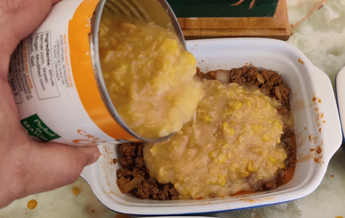
The night before, cans of cream style corn and a can opener were taken out:
Cream style corn and can opener taken out
On cooking day, the cream-style corn cans were opened, and the cream style corn was spread over the cooked beef, onion, and ketchup mixture in the baking pans:
Cream-style corn poured over the cooked beef, onion, and ketchup mixture
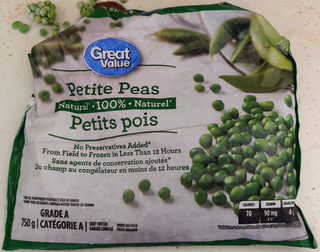
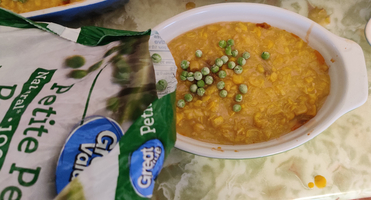
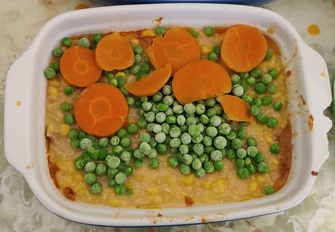
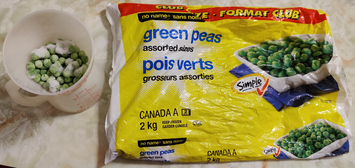
Frozen peas were taken out:
Frozen peas taken out
Frozen peas were sprinkled over the cream corn layer in the baking pans:
Frozen peas were sprinkled over the cream corn layer
Frozen peas were sprinkled over the cream corn layer in the baking pans
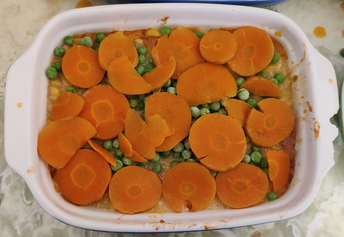
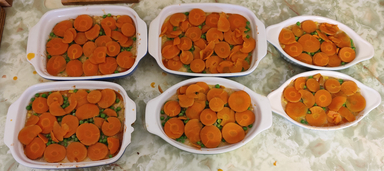
The pot of cooled carrots was taken out of the fridge, and the carrot slices were layered on top of the peas:
Carrots layered on top of the peas
Carrots layered on top of the peas
Carrots layered on top of the peas
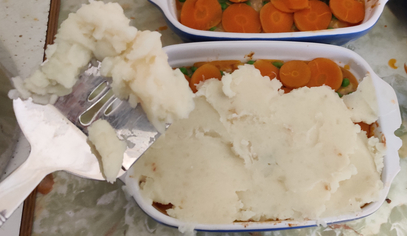
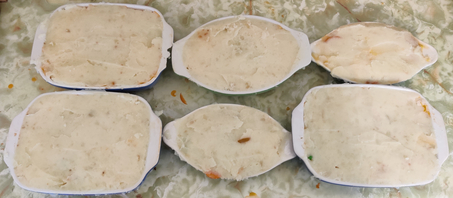
The still warm mashed potatoes were spread on the top of the pies in the baking pans:
Mashed potatoes spread on the top of the ingredients in the baking pans
Mashed potatoes spread on the top of the ingredients in the baking pans
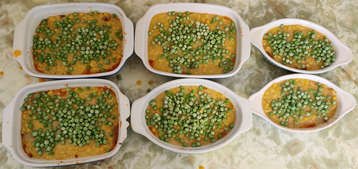
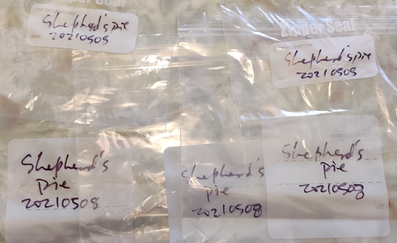
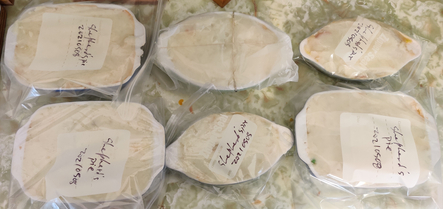
Freezer bags were labelled:
Freezer bags labelled
The shepherd’s pies were placed in the freezer bags, save one (top row, centre), which was covered in wax paper so that I could put it in the fridge for supper later in the day:
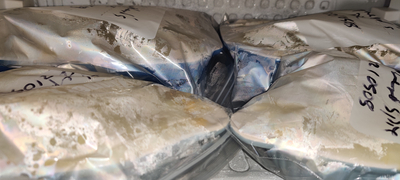
Casseroles placed in freezer bags
The shepherd’s pies destined for the freezer were placed in a freezer:
Casseroles placed in the freezer
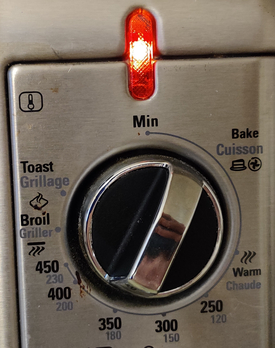
Later on, when it was time to make supper, my countertop convection oven was set to 350F:
Countertop convection oven set to 350F
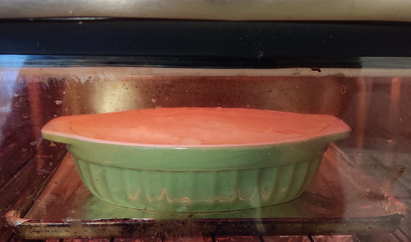
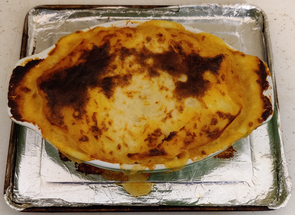
The shepherd’s pie which was put aside earlier was placed in the countertop convection oven:
Shepherd’s pies placed in the countertop convection oven
Once the shepherd’s pie was baked and the mashed potato top browned, the shepherd’s pie was taken out of the countertop convection oven:
Cooked shepherd’s pie taken out of countertop convection oven
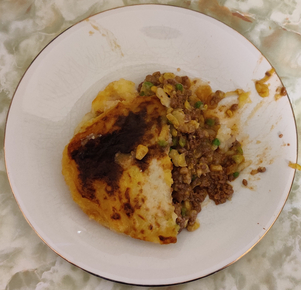
And finally, the yummy shepherd’s pie was served and eaten!
A white bread cycle producing the same product using the same ingredients has been default programme and the first baking programme in all my bread machines. However, please check the settings on your bread machine to be certain to choose the white bread setting.
This recipe closely tracks the recipe for plain white bread that came with the first bread machine I purchased in 2001.
An important aspect this recipe is to add the ingredients in the order listed, particularly the water and milk mix first, then the flour, and then the rest, especially if you will be using the delayed baking function. Also, the original source recipe stressed the importance of keeping a certain distance between the salt and the yeast.
Note that in making this recipe for this post, I turned on the bread machine to run right away on the standard white bread cycle that takes three hours; however, many machine models offer a delayed start function, for instance to allow for the preparation of the ingredients the night before, and having the bread ready at a later time the following morning.
Making the bread:
Six ounces of water were measured out in a measuring cup:
Water measured out
Water measured out
Six ounces of milk were measured out, and added directly to the water in the measuring cup:
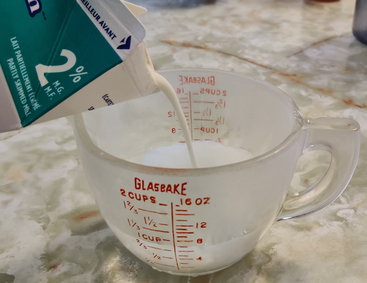
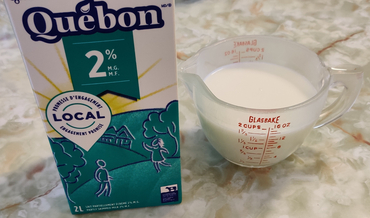
Milk measured out and mixed with water
Milk measured out and mixed with water
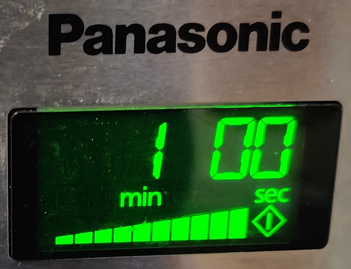
The microwave oven (1200W) was set to one minute:
Microwave oven set to one minute
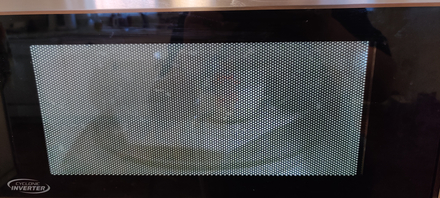
… and the water and milk mixture was warmed up in the microwave oven:
Water and milk mixture warmed up in microwave oven
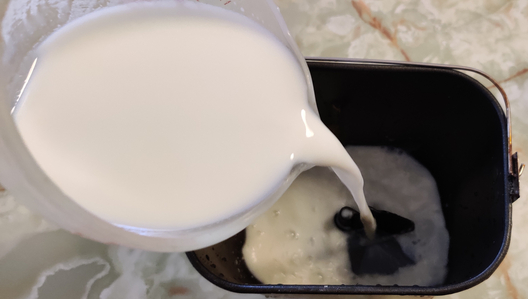
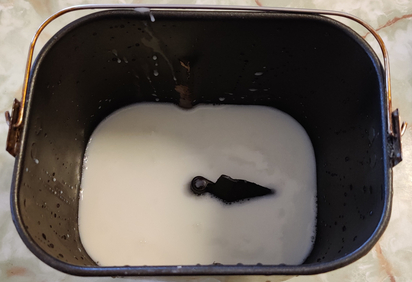
The warmed up water and milk mixture was transferred to the (cleaned) bread machine basket:
Water and milk mixture transferred to the bread machine basket
Water and milk mixture transferred to the bread machine basket
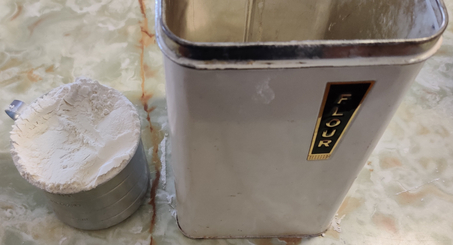
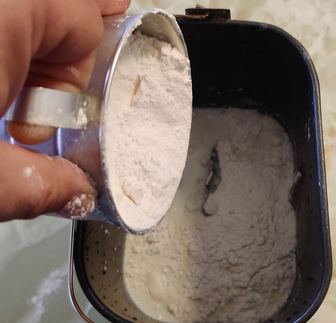
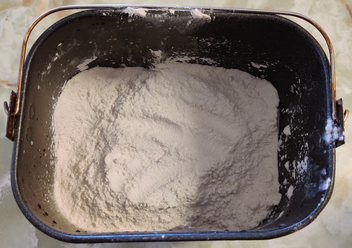
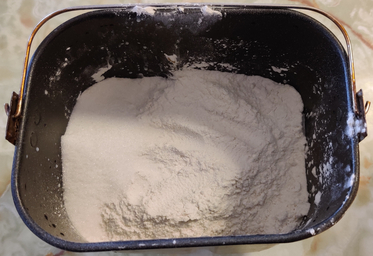
Four cups of flour were measured out:
Flour measured out
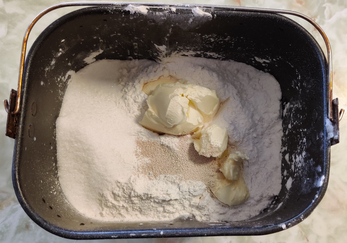
… and the flour was transferred to the bread machine basket, fully covering the water and milk mixture:
Flour transferred to the bread machine basket
Flour transferred to the bread machine basket
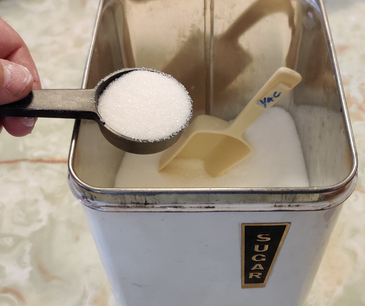
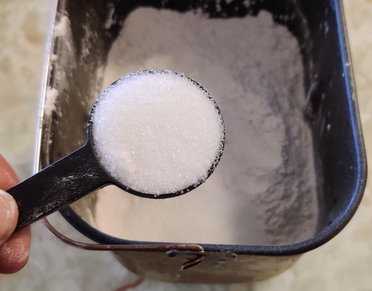
Four tablespoons of sugar were measured out:
Sugar measured out
… and the sugar was transferred to the bread machine basket, on top of the other ingredients:
Sugar transferred to the bread machine basket
Sugar transferred to the bread machine basket
A teaspoon and a half of salt were measured out:
Salt measured out
… and the salt was transferred to the bread machine basket with the other ingredients:
Salt transferred to the bread machine basket
Salt transferred to the bread machine basket
Margarine was taken out, and two dollops of margarine were spooned out of the container:
Margarine spooned out of the container:
The margarine was transferred to the bread machine basket with the other ingredients:
Margarine transferred to the bread machine basket
Margarine transferred to the bread machine basket
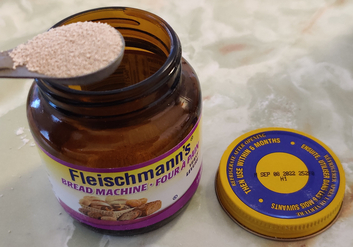
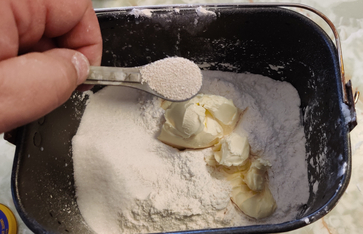
Three quarters of a teaspoon of bread machine yeast was measured out …
Bread machine yeast measured out
… and the bread machine yeast was transferred to the the bread machine basket:
Bread machine yeast transferred to the the bread machine basket
Bread machine yeast transferred to the the bread machine basket
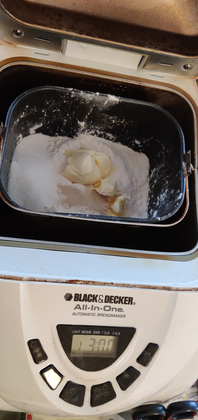
At this point, all the ingredients were in the bread machine basket, and the bread machine basket was placed in the bread machine:
Bread machine basket placed in the bread machine
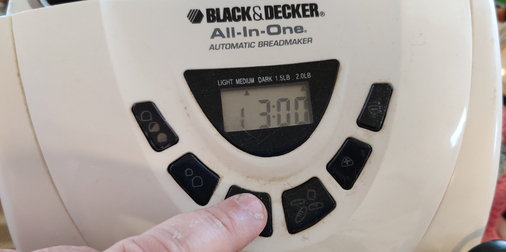
The white bread setting was chosen (programme #1 on my bread machine), and for a two pound loaf; the programme was started, without delay:
White bread setting chosen, for a two pound loaf, and the programme started
The lid was shut, and the bread machine was allowed to do its work.
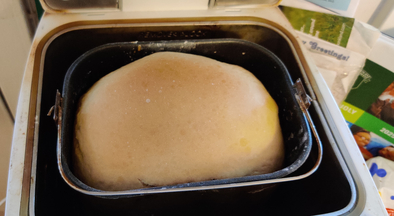
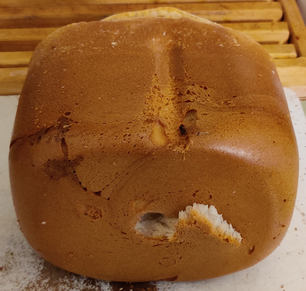
Three hours later, the bread was ready …
End of baking cycle on the bread machine
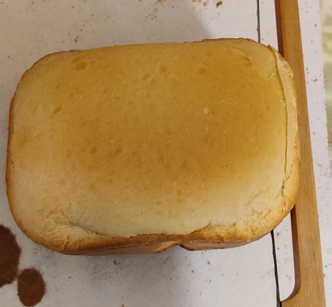
Baked bread in the bread machine
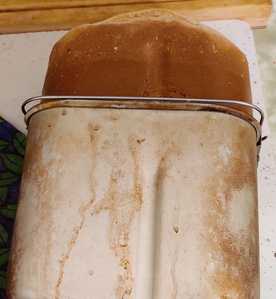
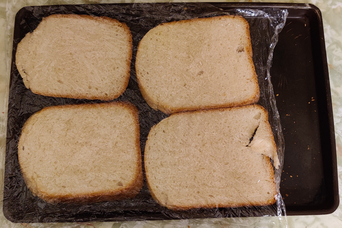
The baked bread was gingerly shaken out of the bread machine basket:
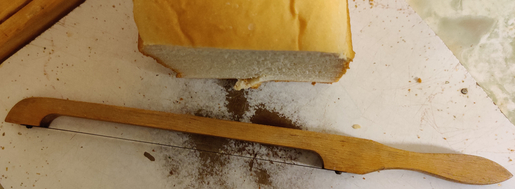
Baked bread gingerly shaken out of the bread machine basket
Baked bread on its side, taken out of the bread machine basket (the tear in the base is from the bread machine kneading paddle)
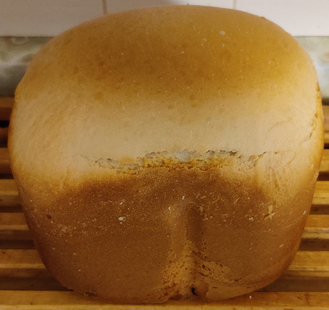
The baked bread loaf was placed upright on a trivet to allow it to cool:
Bread cooling on a trivet
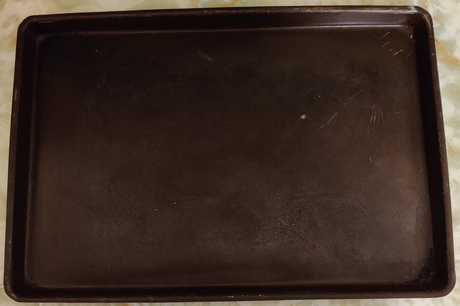
A baking tray was taken out:
Tray taken out
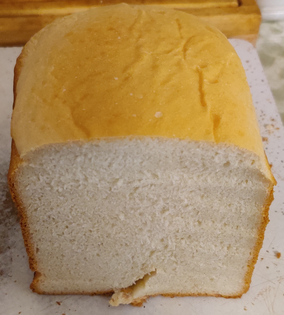
Once the bread had cooled, I began slicing the loaf of bread …
Slicing cooled loaf of bread
… using a bread slicer with a guide, to allow for consistent slices of bread:
Bread sliced with a bread slicer with a guide
Partly sliced loaf of bread
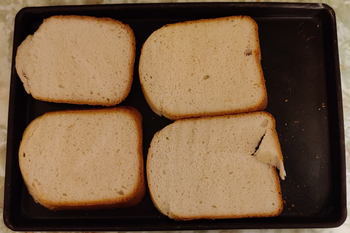
The bread slices were placed on the baking tray:
Bread slices on tray
A sheet of plastic wrap was placed on top of the layer of sliced bread:
Plastic wrap placed on top of bread slices
The loaf was fully sliced, and the bread slices alternated with plastic wrap:
Alternating layers of bread slices and plastic wrap
The tray of bread slices was placed in the freezer:
Tray of sliced bread placed in the freezer
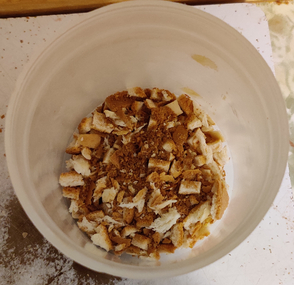
The crumbs created from the slicing were placed into a container with other bread crumbs and dried bread pieces, for future use in other recipes:
Bread crumbs placed in a container for future use
… and when the bread was frozen, I placed the bread slices in freezer bags:
Frozen bread slices in freezer bags
The bags of bread slices were placed back in the freezer to have for when I want to make sandwiches and the like.
I normally keep cooked meatballs in the freezer for use with pasta dishes such as spaghetti, or eat them on their own along with other foods.
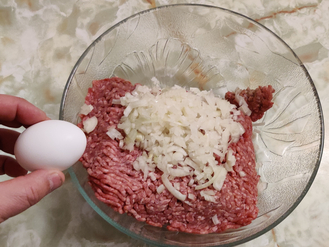
I have no recollection of why I chose to add peas, corn, or rice to the mix when I began making these meatballs many years ago, other than presumably at the time I thought that their addition was a good idea, and that incidentally doing so helped make more meatballs with the same amount of ground beef; as for the onions and egg, I have always liked onions with ground beef, and the egg acts as a binding agent to help keep the meatballs together, especially while cooking.
Making the meatballs:
A mixing bowl was placed on a kitchen scale, and the kitchen scale was set to zero:
Mixing bowl on a kitchen scale, which was set to zero
Two pounds of ground beef were measured out:
Two pounds of ground beef measured out
The bowl of ground beef was put aside for a moment.
An onion was taken out:
Onion taken out
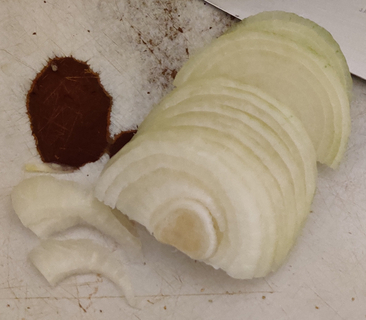
The onion was cleaned and trimmed:
Onion cleaned and trimmed
The onion was sliced thinly:
Onion sliced thinly
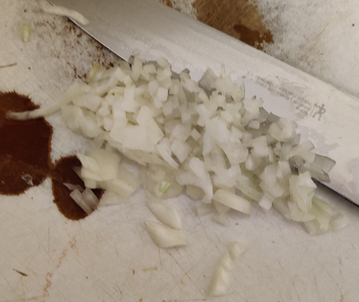
The onion was then chopped somewhat finely:
Onion chopped somewhat finely
The chopped onion was transferred to the mixing bowl with the ground beef:
Chopped onion added to the mixing bowl with the ground beef
Chopped onion added to the mixing bowl with the ground beef
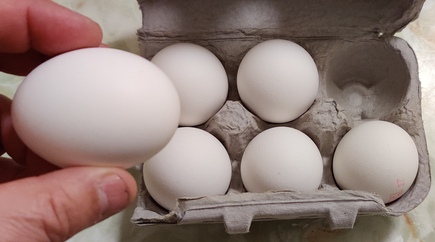
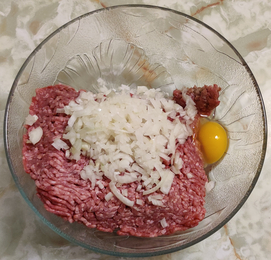
An egg was taken out:
Egg taken out.
The egg was cracked into the mixing bowl:
Egg cracked into the mixing bowl
Egg cracked into the mixing bowl
Frozen peas were measured out:
Frozen peas measured out
The frozen peas were added to the mixing bowl:
Frozen peas added to the mixing bowl
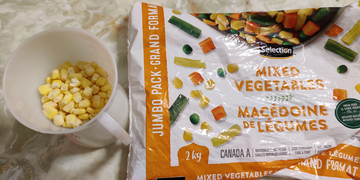
Since I didn’t have any frozen corn kernels on hand, I separated out some corn kernels from a bag of frozen mixed vegetables:
Frozen kernel corn measured out
The frozen kernel corn was added to the mixing bowl:
Frozen kernel corn added to mixing bowl
Frozen kernel corn added to mixing bowl
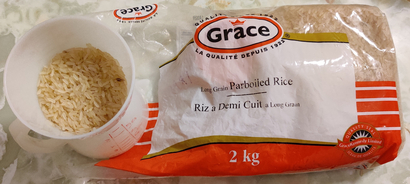
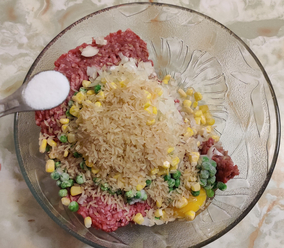
Rice was measured out:
Rice measured out
The rice was added to the mixing bowl:
Rice added to the mixing bowl
Rice added to the mixing bowl
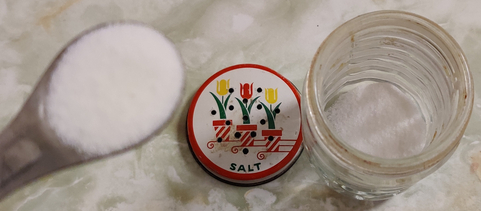
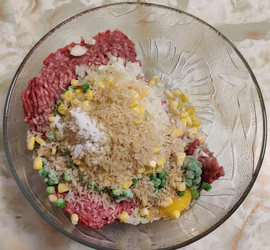
Salt was measured out:
Salt measured out
…. and the salt was added to the mixing bowl:
Salt added to the mixing bowl
Salt added to the mixing bowl
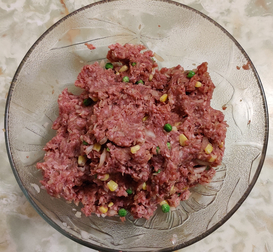
The ingredients were thoroughly mixed together by hand:
Ingredients mixed by hand
An electric skillet was turned on (as well as a stove burner for my cast iron skillet for the meatballs that wouldn’t fit in the electric skillet):
Electric skillet turned on
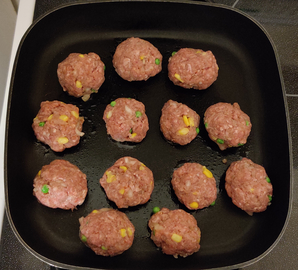
The meat mix was formed into balls from 1-1/2″ to 2″ in diameter, which were placed in the electric skillet (as well as a cast iron skillet off camera), with enough spacing between them to allow for easier manipulation later when turning them over:
Balls of meat mix formed and placed in an electric skillet
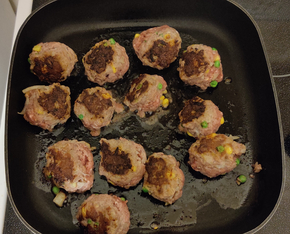
As each side of the meatballs were cooked, the meatballs were turned over to cook on another side …
Meatballs turned over to cook on another side
… and the meatballs were turned over again to cook yet on another side:
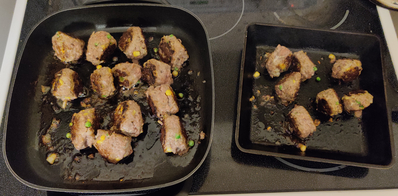
Meatballs tuned over yet again; note second skillet of cooking meatballs
When the meatballs were fully cooked …
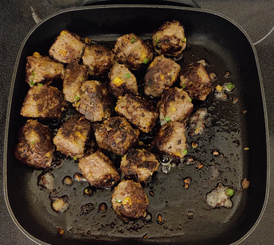
Fully cooked meatballs
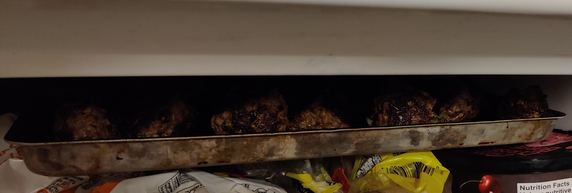
… the meatballs were transferred to a cookie baking sheet, somewhat spread apart from each other to allow for quicker cooling in the freezer …
Cooked meatballs placed on cookie baking sheet
… and the cookie baking sheet with the meatballs was placed in the freezer to cool the meatballs and begin to freeze the meatballs:
Cookie baking sheet of meatballs placed in freezer
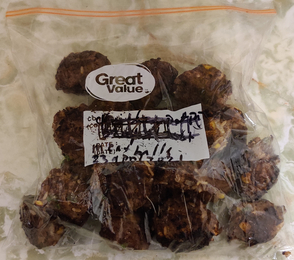
A clean, resealable freezer bag was re-labeled to reflect the new contents, meatballs of course:
Freezer bag re-labelled
Once partly frozen, the meatballs were placed in the freezer bag:
Meatballs placed in freezer bag
… and the bag of yummy meatballs was placed in the freezer for future eating.