Desktop Linux: Unveiled is a series of posts that show how to start using Linux.
In this post, Linux will be briefly explained and briefly compared to other common desktop computer operating systems.
First, what is an operating system?
An operating system (OS) is the software that makes a computer run, like Microsoft Windows, or MacOS. It is typically able to provide a way for users to operate the computer, and translate the instructions so the computer can run them. It also coordinates all the computer’s resources such as its CPU (central processing unit), memory, hard drive, and other components of the computer, as well as coordinate the user’s programs and data.
What is Linux?
Most people understand “Linux” to be a complete operating system like Windows or MacOS. However, strictly speaking, “Linux” is in fact just a part of the operating system, the central part called the kernel. Common usage has had “Linux” to informally refer to the whole operating system.
“Distributions”, (usually) complete and integrated collections of software built around the Linux kernel, can be legally built and distributed by anyone with the abilities and inclination because of the way the Linux kernel and the other software usually used with it are licensed, although most people choose to use an established distribution.
Distributions vs. Operating Systems
Linux distributions usually contain full linux-based operating systems, as well as extra software often not traditionally included in operating systems, such as office suites, media players, graphic design software, educational software, games, various apps, as well as other software such as server software. Although not all of the software is installed at the same time, they are typically all easily available in central locations called “repositories”, similar to app stores on MacOS and Windows; much is available free of charge, too!
Free Software vs. Proprietary Software
A lot of software available under Linux — and a growing amount under Windows and MacOS as well — is called Free Software, or sometimes Open Source Software. As a contrast, a substantial amount of Windows and MacOS software is called Proprietary Software.
Many people hear the expression “Free Software” and assume that it means that it is free of monetary charge. Some may even question its quality on the basis of such a lack of price.
Although free software is often (though not always) given away free of charge, and most common free software is of very high quality, the expression “Free Software” in fact refers to “freedom”, specifically various freedoms granted to the users of the software. These freedoms include the freedom to run the software for whatever purpose you wish, the freedom to study how the program works as well as make any changes that you wish, the freedom to share the software with others, and the freedom to share software you’ve modified with others.
Some of these freedoms require that the source code, or “recipes” that people can read and understand, be available to anyone and everyone.
The various licences used to allow this often tend to foster cooperation between various parties, often allowing groups who might sometimes be competitors to also cooperate with each other, creating common software that each group can then package together to present according to their own vision. Within this cooperation, software sometimes is developed quickly, and often many programming bugs are found and corrected quickly.
Some common free software licences are the GPL and the LGPL, which specifically give the recipient of the software the above freedoms, and require the sharing of the source code to the software, and any changes you may have made to it, when distributing the software. Other common free software licences are the BSD licence, the MIT licence, and the Apache licence, which have very few requirements but which permit users to use, modify, and distribute the software, while retaining copyright and some disclaimers notices.
In contrast, proprietary software is usually controlled by very restrictive licenses that keep the source code hidden, doesn’t allow users to distribute the software to whomever they please, doesn’t allow users to modify it or fix bugs even if they are able to were they to have access to the source code, and may even dictate how the software may or may not be used.
Next Chapter
Chapter 2 will list some popular Linux distributions that people use on their computers.
It is titled “Deux frères, deux serveurs” (yes, it’s in French, and means “Two Brothers, Two Servers”), and the presentation represents my part of a double presentation with my brother.
Just a little note to say that some minor updates to the malak.ca site were added this week:
there is a new (and fun, at least to me) feature to the main page at https://www.malak.ca : A random recipe link that randomly serves up a recipe (thanks to my brother!), including some of my recipes using my old format resembling a more traditional recipe card, while of course also serving up my recipes in my current, very detailed format;
a number of my recipes have been updated, ranging from minor details (such as for blondies), to correcting some spelling and grammatical errors, to adding the occasional missing instruction (such as with my bread machine white bread), to the addition of half-batch measurements (such as for my mom’s raisin bran muffins, and the plain yoghurt muffins), a result of playing with the new random recipe link on the main page;
I have five active computers, all which were ready to update to Fedora 39 in November, 2023: Three were running on Fedora 37, and two were running Fedora 38. Normally, I try to keep to the same version of Fedora on my fleet of computers — although I will format with the current version of Fedora mid-stream when I format a new or a new to me computer, or a new hard drive or ssd, and try to use a version (that of the majority of computers) until end-of-life, usually roughly 12 to 13 months. I settled on odd numbered versions several years ago, on Fedora 15, by happenstance, and a desire not to be reformatting different computers every six months depending on when their end of life fell.
As such, I proceeded to upgrade my computers.
Since the recommended method of update for Fedora is by the command line DNF upgrade command (here’s my archive), or to use the graphical method in the “Software” “App Store”, I proceeded to upgrade my machines on the command line.
(Note: Some of the screenshots and photos used in this post were created during the various upgrades, while some were re-created ex post facto for the sake of mounting this narrative.)
Note that the upgrade plugin was already present on the server, hence my having omitted the step of installing the plugin. Important note, minor in my head although critical to my experience, is that my webserver uses the Workstation Edition, not the Server edition.
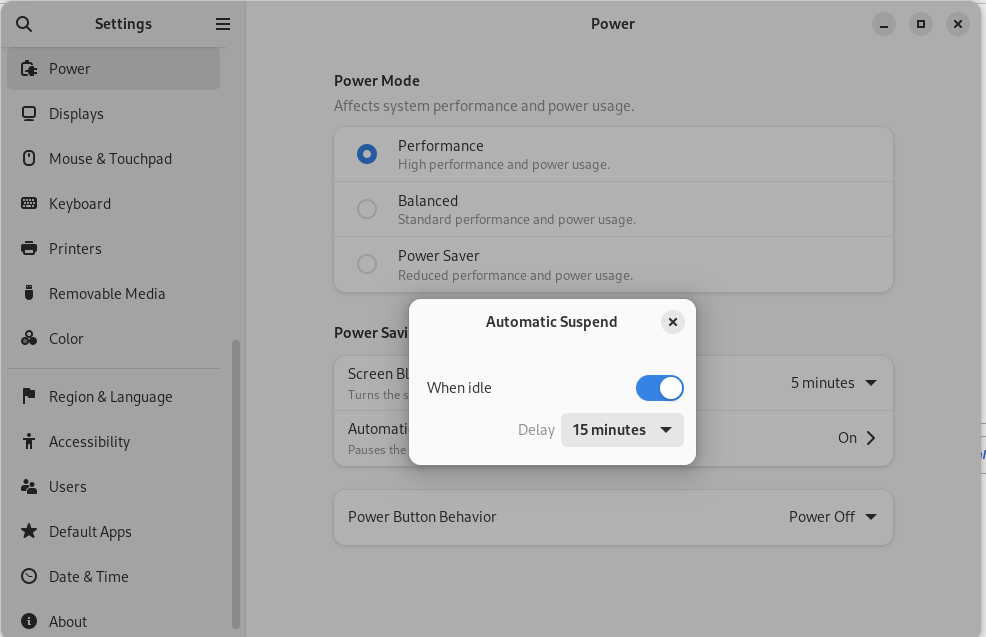
All went smoothly, with one small quirk: After the upgrade and later that evening while at a restaurant, I wanted to check my website for something, and it was down. I thought little of it beyond the frustration in the moment. When I got home, I let my brother know in the hopes he might help … but in the process, I saw that the machine’s light in the power button was amber, and I had an idea that there was a software power management issue. I pressed the button, and the machine popped to life; I then went into the power management part of the settings in the gnome settings, and found the “automatic suspend” setting had been turned on to “when idle”.
VPN Server: Fedora 38, Server Edition, Legacy BIOS (HP Compaq dc7700 Small Form Factor)
My next upgrade was also fairly simple and straightforward. It was on a machine I found in a building slated for demolition in about 2016, and is a P4-3.4GHz single core machine, which I had been using as a world community grid node for years, but which had been inactive for months, after there having been little work for it for months when WCG moved from IBM to the University of Toronto. (I also suspect that the UofT may have decided to shift most of its tasks to GPUs, which I don’t think the machine possesses, and in any case I did not properly research let alone confirm this, beyond the apparent lack of work units being sent to it.)
A problem I’d been having for years with this machine was that it would not reboot without manual intervention, apparently due to a time error; this suggested a dead bios battery. I tolerated this for years, but this summer I finally installed a new battery in the machine, resolving the issue.
I reformatted the machine with Fedora 38 Server Edition given its age and lack of memory, and I renamed the machine, having some misgivings about its former name. I offered its use to my brother, who uses it as a VPN server for the household here, particularly to simplify assisting our mother in her computer use. I generally leave the machine alone: VPNs are a nebulous thing I don’t understand very much at all; I understand SSH filesystem tunnelling, and the parts between that and VPNs are too nebulous for me to understand.
But to wit: Up to this point I was neglecting the machine, letting my brother deal with it, but as a result the machine would often go unupdated for weeks at a time. In mentioning that I’d embarked upon the process of upgrading my computers all to Fedora 39, I mentioned that I liked to keep my fleet of computers all aligned on the same version of Fedora; I mentioned that at that time, due to new installs, I had two out of five computers on Fedora 38, while the rest were still on Fedora 37. With the comment that I wanted to keep my fleet on the same version, my brother encouraged me to maintain responsibilities for updates and yes indeed to upgrade this machine in particular, to keep it in line with the rest of my computers.
Which, of course, I did. (There were indeed some firmware updates to be installed.)
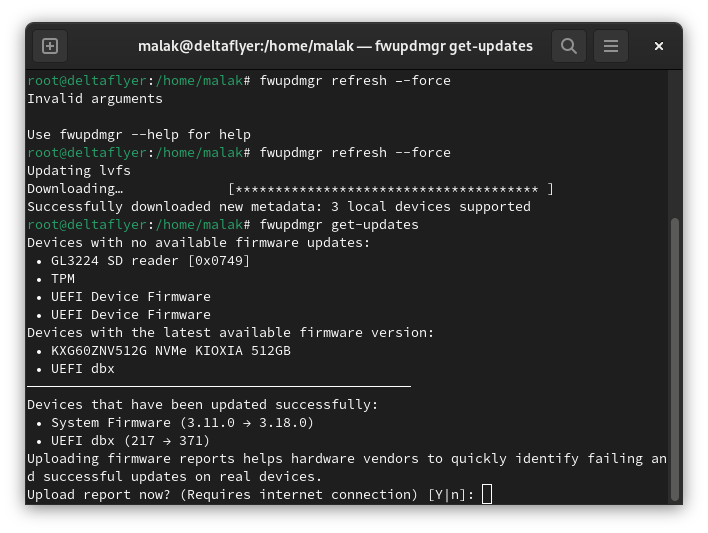
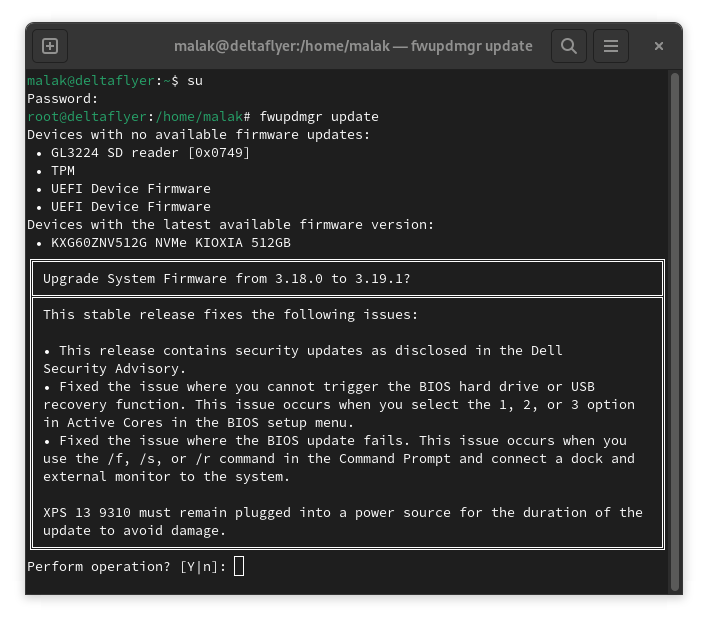
Here’s what the process looks like on my XPS13 (Screenshots and photos taken after the fact, on a subsequent series of firmware updates):
Firmware updates a few weeks after upgradeFirmware updates a few weeks after upgradeFirmware updates a few weeks after upgrade
At this point, I was invigorated by being able to perform firmware updates on my XPS 13 laptop (which admittedly had not been the first time I had done so under linux, but no matter.)
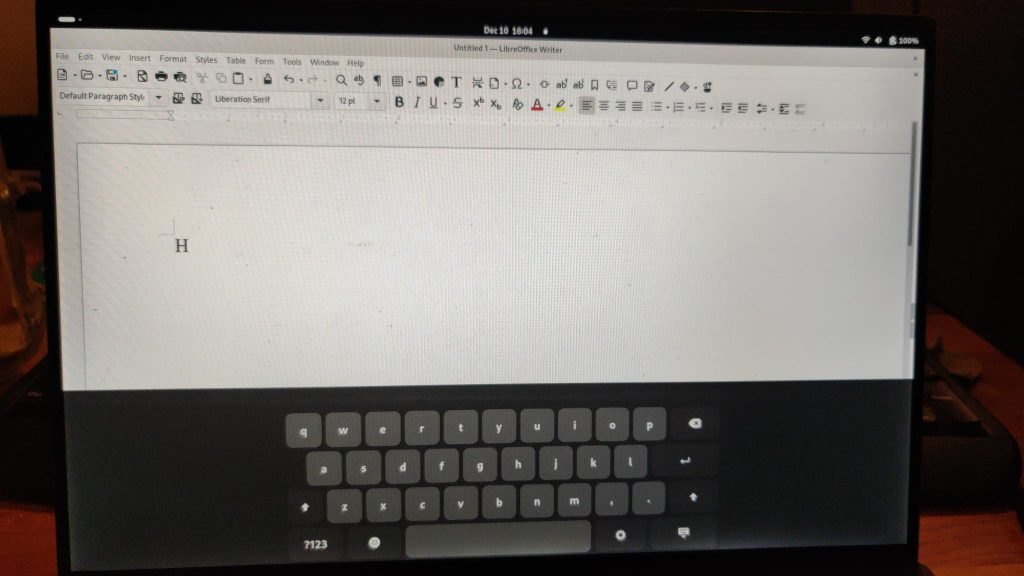
However, a couple of weeks later, I noticed that an extension wasn’t working: My XP13 has a touchscreen display, and Gnome has an onscreen keyboard that pops up contextually when text is to be entered, occupying a major amount of screen space; I had been using the “disable-touch-osk” extension by sulincix, which stopped working with the upgrade to Fedora 39.
On screen keyboard disabling extension not working
This leads to a gripe I have for the Gnome developers: Stop breaking extensions with each new version of Gnome, or provide *some* kind of stable API or environment or whatever is needed so that the extension developers don’t decide to abandon their extensions because Gnome keeps on shifting so much that they have to work excessively hard every six months just to maintain their extension.
This led to the next two computers I have, which are a 2015 Acer laptop, and a 2014 Dell Inspiron desktop.
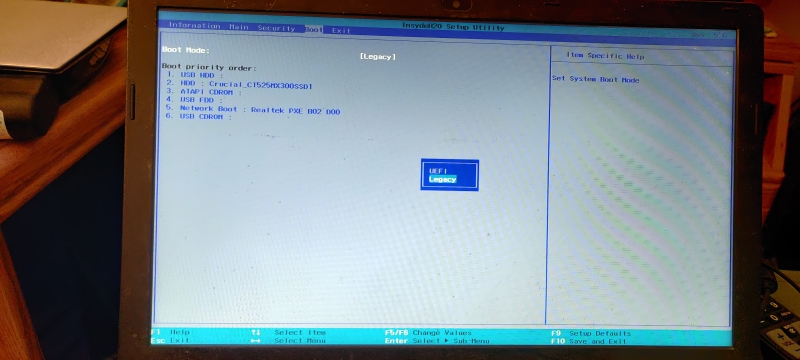
Acer Laptop: Fedora 37, Workstation Edition, UEFI — but using Legacy BIOS
I have been having problems using UEFI in my Acer laptop since I received it new in 2015; the Fedora live media would boot up, and I could install Fedora under UEFI; however, it would never boot up afterwards. My only solution seemed to be to use legacy bios. Nonetheless, hope springs eternal, this was the time to try again to install under UEFI.
I should note at this point, as mentioned above, that my home server (2008) and my VPN server (2007) are both rather old computers and pre-date UEFI and use legacy BIOS, while my XPS 13, Acer laptop, and Dell Inspiron desktop, are all UEFI machines. I make these distinctions because of conversations I had in which on the one hand, it was suggested that I perform a baremetal reformat of the Acer laptop in order to sidestep a problem I had been experiencing when I’d allowed the battery to drain completely, forcing a reset to defaults in the BIOS and hence to UEFI boot, making my setup with legacy-BIOS unbootable; on the other hand, I concluded “It’s 2023; it’s absurd not to be using UEFI on UEFI machines.” (Of course, the use of older, legacy machines predating UEFI are a different issue altogether, and for them, said point is moot.)
In addition to this comment about using UEFI, and the potential to have any UEFI firmware upgrades as discussed above, I decided that my Acer laptop needed to receive a baremetal format, given the accumulation of a lot of software on the system that I didn’t use (many though hardly all installed because of a presentation I gave in 2021); I decided that instead of package hunting and manually uninstalling them all — including dependencies that decide not to uninstall — it seemed more efficient and effective to do a clean install.
Fast forward to this round of upgrades, I upgraded the installation using a downloaded Fedora 39 image, and I went through various upgrades and setups, such as Gnome extensions, and some software installations. Suddenly I remembered that I had not changed the boot sequence from legacy bios to UEFI, so … I started over.
Several installation attempts later, including trying Fedora 36 (with an intention of upgrading through to version 39) based on some advice playing around with the various BIOS settings trying to get just “the right” settings, none worked, and I finally resigned to reinstalling yet again under, and continuing to use, legacy BIOS. Sigh.
Setting the Boot sequence to Legacy BIOS
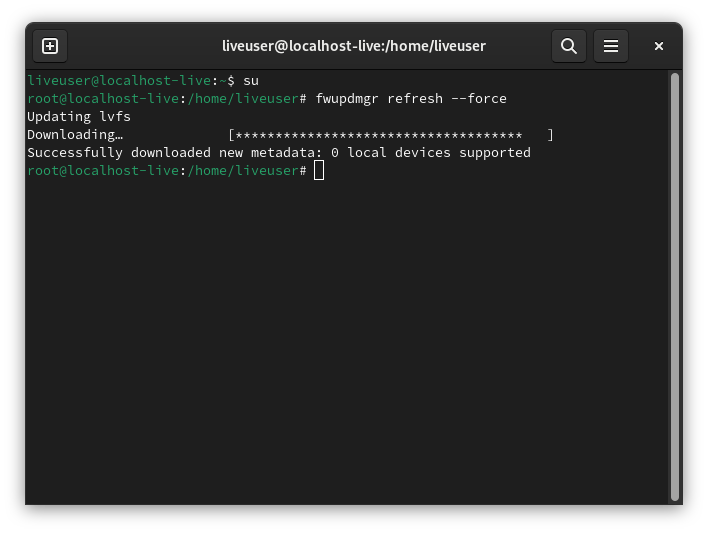
Before setting up in legacy mode, I had a flash of inspiration: Since I was nonetheless able to boot the live media under UEFI (which I knew wouldn’t otherwise be used afterwards), I attempted a firmware update as per the above. To my mild disappointment, there weren’t any firmware updates for my Acer Laptop:
I continued with the installation under Legacy BIOS mode, and set up the desktop with the various Gnome Extensions, installing software not in the base installation, and customizing settings and the like.
I once again faced a few pet peeves I have about how Fedora is set up (incidentally through Anaconda, but by itself not Anaconda issues, best I can tell):
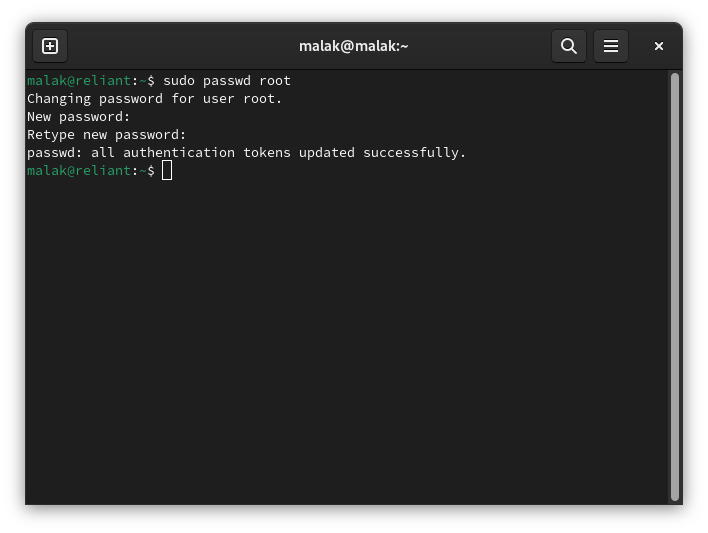
Fedora uses sudo by default, which I don’t like: I go by the notion of “Don’t be afraid of root; respect it, but don’t be afraid of it” — when you have to do root-y stuff, log into root, do what you have to do as root, and then sign out of root. (Yes, I am aware of the advantages of sudo, even beyond its convenience and short term elevations of privileges, such as logging of *who* elevated their privileges to do *what*; I just wasn’t taught that way, and on a single user system, I don’t see much value to it; hey maybe that’s just me.) As such, with each new install I perform, I have to, ironically using sudo under my default user account, assign a password to the root account, and then, remove my default account from the wheel group.
… by removing my user account from the wheel group (highlighted):
The next thing that irked me was that in Fedora Workstation Edition, it seems that Anaconda no longer has an option (read, without the qualifier “it seems”) to set the hostname during the installation. While I understand that it is a trivial enough thing to set as per the following, under the default régime of the default primary user having sudo privileges … it seems to me that this is the kind of thing that should still be in the system installation part. (As in, I wonder how many new users have “fedora” as their machine name for a significant amount of time if not forever, being unaware that it is (only) a default placeholder name, unaware that it can be changed, and unaware of how to change it.)
Fortunately, this is easily set in the Settings / About menu, *if* you don’t remove your default user from the wheel group, or at least haven’t yet, and therefore still have sudo privileges:
Note that in the above screenshot, the option appears shaded out because since I had already removed the primary user from the wheel group, effectively disabling sudo, my (default user) account did not possess the requisite permissions to edit the hostname.
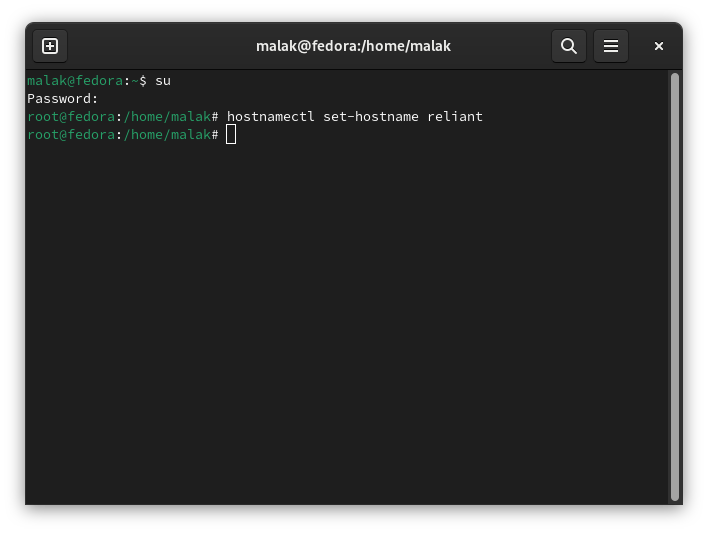
Changing the hostname on the command line is also not particularly difficult, using the command “hostnamectl set-hostname new-name”
… or, editing the /etc/hostname file, by entering the command “nano /etc/hostname” as the at the command line and as the root user:
Then, once in the /etc/hostname file, enter the host name you want (in the case of my Acer laptop, “reliant”, as in the USS Reliant from Star Trek: The Wrath of Khan movie.)
And on this install, I noticed that the extension Vertical Overview by Ralthuis, which among other things, allowed for the dock on the Activities page to remain vertical and on the left edge of the screen, instead of on the bottom of the screen, was broken, something I hadn’t noticed when upgrading my XPS13. Note: Check lower down in the section for my desktop.
Dock moved to the bottom of the activities screen due to a broken extension (note screenshot recreated after the fact)
On this point, I installed a number of Gnome extensions that I like, unfortunately not the one mentioned above, as well as adding apps to the dock, and other optimizations I commonly perform.
After these items, I installed Gnome Evolution, modified the installation’s setup such as pinning apps to the dock, and checked the power management issue listed above. During the install process, I was able to specify that third party repositories could be enabled; after install, I installed the free and non-free repositories from rpmfusion, as well as Rémi’s RPM repository. I transferred my data from the backup I had created earlier onto my laptop. (See next section on my Desktop).
Finally, I had to activate the flathub repository (here’s my archive) in order to be able to install software that I use that is distributed as flatpaks, such as Signal (a secure texting app):
… and then Signal was installed from the Software App:
Minor note: I don’t recall having to enable the flatpak.org repositories before, although I may be wrong.
This leads to my final computer to upgrade, my desktop:
In the summer of 2023, I upgraded the mechanical drive to an SSD, and I had installed Fedora 38 the SSD; the Dell Inspiron had difficulty recognizing Fedora 38 media, so I took an old pre-UEFI computer, inserted the SSD, and installed Fedora on the SSD. I don’t recall if I knew to change to legacy BIOS once I transferred the SSD to the Dell, or after an error or two, I realized the error, and made the change in the setup. The installation worked, although I was slightly irked.
Come time to upgrade to Fedora 39, I performed the command line DNF upgrade covered earlier, dealing with some of the consequences like the power management and idling issue above. Additionnaly, I noticed something else that irked me regarding the power button (changing it from “Suspend” to “Power Off”:
“Power Button Behavior” setting changed from “Suspend” to “Power Off”. Call me old school …
However, in the intervening time I had experienced the UEFI crisis above, so I first performed a backup of my data to my backup folders on my web server, mildly surprised by how much I was behind in my manual backups.
Unfortunately from this point on, my desktop proved to be the most challenging to upgrade properly.
Having downloaded a copy of the install media for Fedora 39 and burned it onto a usb stick, as well as still having the Fedora 38 Server Edition DVD (which I had forgotten was the F38 Server Edition, instead erroneously assuming that I had gone to the trouble of burning the F39 Workstation Edition onto the DVD), and I tried to install Fedora 39 from both media. I tried several settings in the setup menu, to no avail: The motherboard categorically refused to recognize either, simply displaying an error message vaguely communicating a sense that it didn’t like the media. In looking through the internet for pages on the subject, including the Dell website, I was mildly piqued that solutions commonly referenced burning the usb stick using particular software under Windows (to which strictly speaking I have access, but not on the computer in question), and often just assuming that there would be a Windows partition on the computer. Putting aside knee-jerk reactions, I assumed that this would not address the issue since the solutions appeared to assume a conflict with Windows which could not exist on my machine, or that the Fedora media-writing tools were inherently unable to operate correctly.
I gave up for the moment, changed the boot settings back to Legacy BIOS, and used the untouched Legacy BIOS install for roughly a week while dealing with other upgrades and life in general.
After roughly up to a week, I remembered something I’d read a week or two earlier that said that the UEFI shim for Fedora versions 37 and 38 (and I presume, given my experience, Fedora 39 as well), was not working for some motherboards “due to a difficult certification process for this component“, (here’s my archive) and that a workaround was to install Fedora 36, whose shim was known to work, then proceed through the command line upgrades to Fedora 39.
Fedora 36 was downloaded and burned on a usb stick, and the settings in the boot menu were changed back to UEFI. Fedora 36 was installed — successfully! …
… and the updates were performed, after which the command for the version upgrade was performed, to bring it to Fedora 38. However, the system would not reboot on its own; a quick fsck command corrected some “dirty code”, which it corrected, and I changed some boot settings about booting and automatic on at certain dates. Once this was done, the upgrade to Fedora 38 continued:
DNF upgrade command working; yes, my screen is dusty!
I again performed a dnf upgrade to Fedora 39, and had to repeat the fsck command in order for the system to properly reboot.
To correct this rebooting issue, an empty file named “fsck” was created in my home directory.
Backups were restored, and work similar to what I’d performed on my Acer laptop were performed regarding sudo, root, renaming of the box, evolution, extensions, pinning apps to the dock, and the like were performed.
After yet another week or so, I noticed that my backups had not fully been transferred, and began transferring the balance. In the process, my computer indicated that it did not have enough space on the hard drive; I suspected that during the previous install that I had not correctly removed the previous install, so I reformatted yet again.
So I repeated the installation and upgrade process, this time ensuring that all space on the drive was reclaimed, and repeated the above processes, both specific to the computer as well as other things generally required as part of the upgrade.
During the initial setup, I discovered an extension that brings back the vertical view: V-Shell (vertical workspaces) by GdH, and it seems to do what I want, although on the desktop there is a setting that brings up the (vertical) dock, workspaces, and app search space over the workspace; comparison with another setup allowed me to find the setting I wanted.
And, to repeat myself: Gnome, do you hear me? Stop breaking extensions!
Now — so far — the computer seems to be working, but as this whole process over a month has shown, I should give it at least a week to find out if there are any other issues.
Final Thoughts
I don’t read the upcoming changes for new versions, nor do I research in advance problems that people have been having. I discover the problems, changes, and challenges along the way, and as such for me Fedora reveals itself as per my usage and discoveries — no doubt leaving a lot hidden to me — not only over its roughly 13 month lifespan, but also over the first few weeks of using it, and, interestingly, over the installation process itself, especially when it’s over several machines of different eras and manufacturers and technologies.
As this round of upgrades in particular has shown, as well as years of using Fedora Linux, using Fedora Linux is an exercise in bleeding edge.
Now, barring unforeseen changes, additions, and the like, I’m looking forward to roughly a year of Fedora 39 goodness!
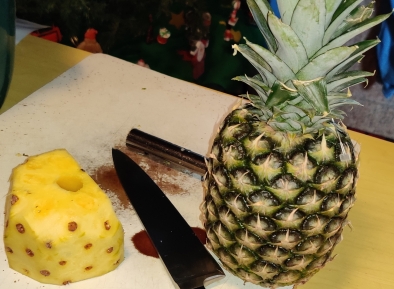
I picked up making stewed rhubarb because my mom always liked using the rhubarb grown in her garden to make stewed rhubarb and rhubarb chutney. (Ironically, for this post, and often enough, I use rhubarb purchased from the grocery store!)
Note that this recipe effectively needs to be done over two days, or at least with a pause of several hours (roughly equivalent to a minimum of “overnight” ) between preparing the rhubarb, and beginning to stew the rhurbarb.
Note that I also am using the “packing in mason jars and heat-processing” method to preserve the stewed rhubarb, and to allow for the making of larger amounts of stewed rhubarb at once; once the heat-processed jars have cooled, the stewed rhubarb is ready to eat.
Making the Stewed Rhubarb:
Day one:
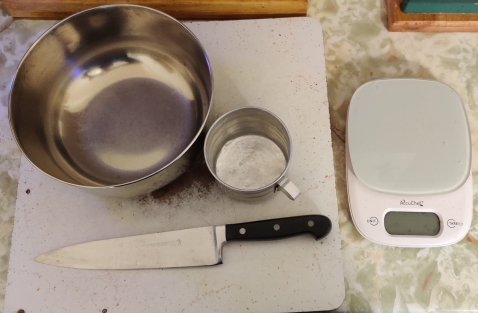
After buying some rhubarb at the grocery store, some mise-en-place was done by taking out a cutting board, a mixing bowl, a measuring cup, a kitchen knife, and a kitchen scale:
Cutting board, mixing bowl, measuring cup, kitchen knife, and kitchen scale taken out
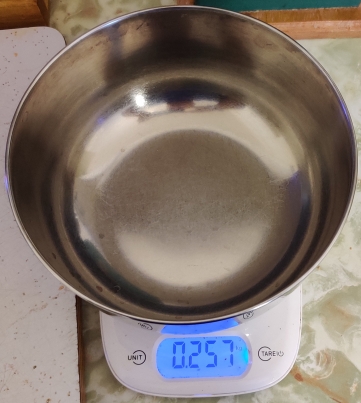
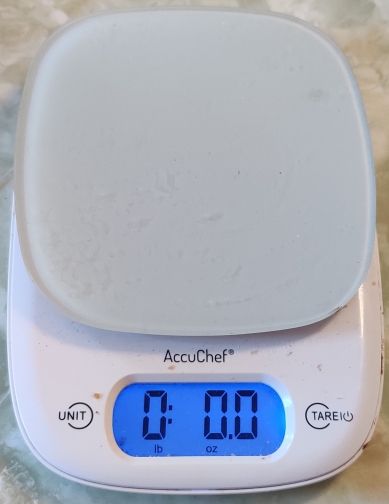
To avoid confusion a bit later on, the tare weight of the mixing bowl was measured and noted (instead of using the tare function on the kitchen scale):
Tare weight of bowl measured
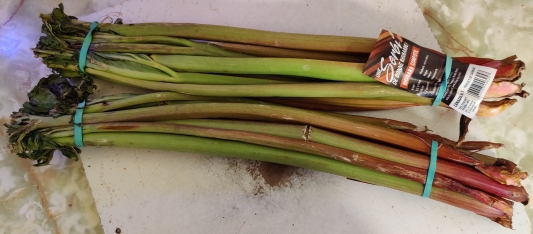
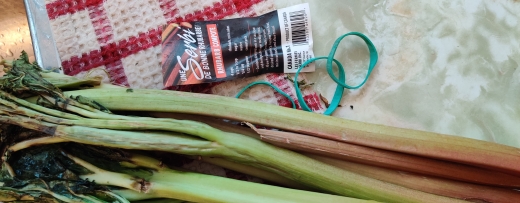
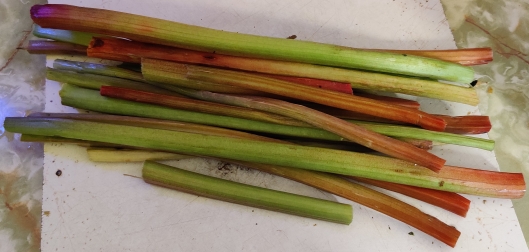
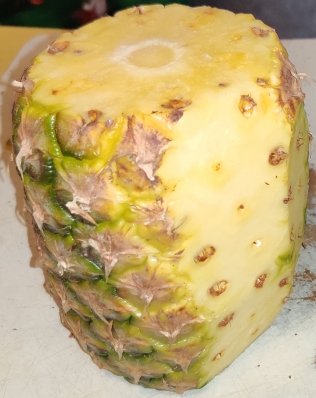
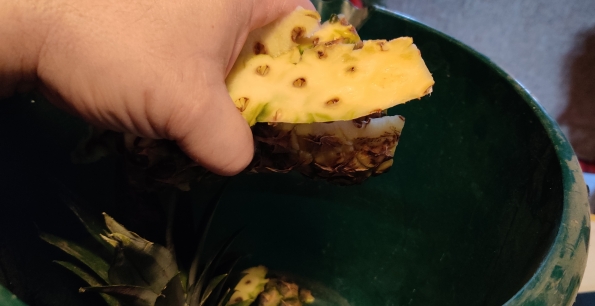
The rhubarb purchased earlier was taken out (yes, it is a bit shabby!)
Rhubarb taken out
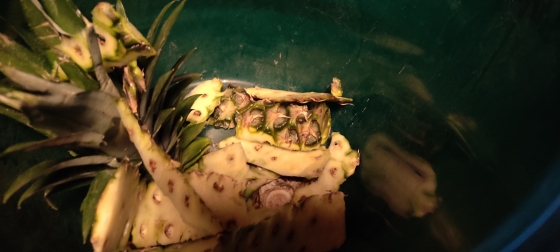
The elastics and labels were removed from the rhubarb bunches:
Elastics and labels removed
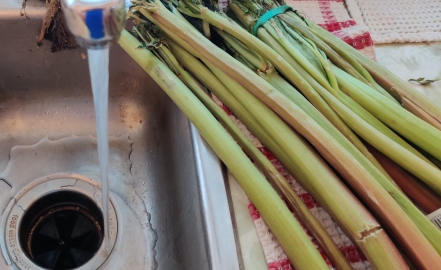
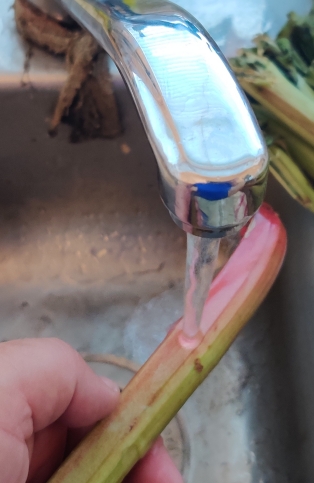
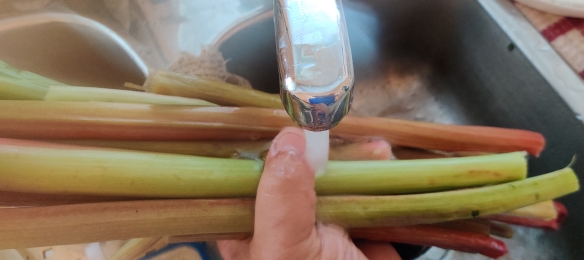
I began to wash and rinse the rhubarb:
Washing and rinsing rhubarb
Washing and rinsing rhubarb
The rinsed rhubarb stalks were brought to the cutting board:
Rhubarb brought to cutting board
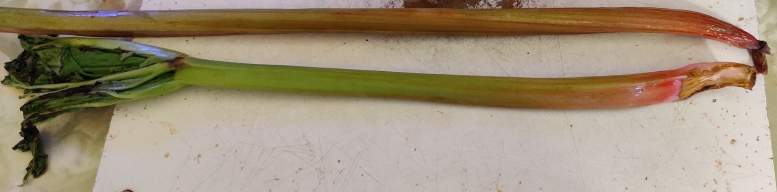
The rhubarb stalks were trimmed:
Trimming rhubarb stalks
Trimming rhubarb stalks
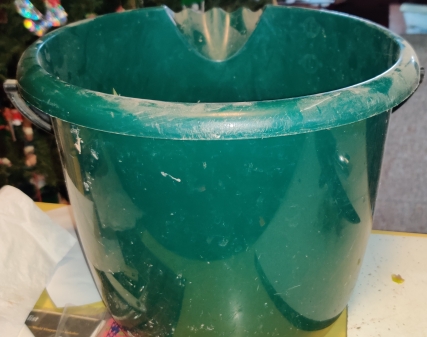
The trimmings were placed in a kitchen waste bucket for later disposal in a municipal composting programme:
Trimmings placed in bucket for composting
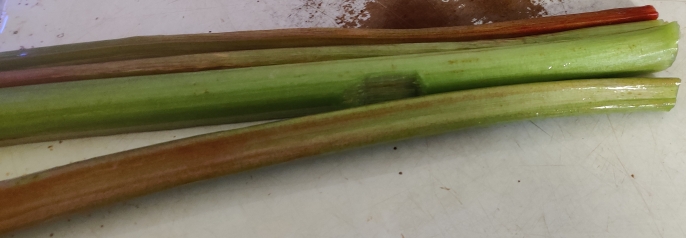
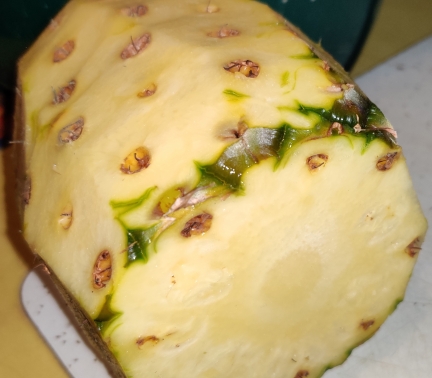
If the rhubarb isn’t completely fresh, or especially typical (in my experience) for commercial rhubarb purchased at the grocery store, sometimes there is some minor damage to the stalks to be removed:
Stalk damage to be removed
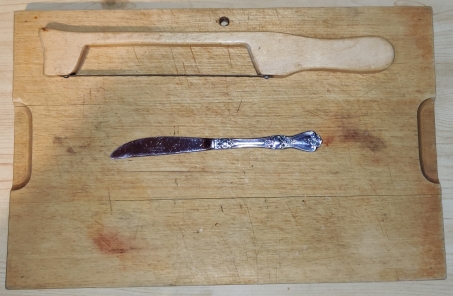
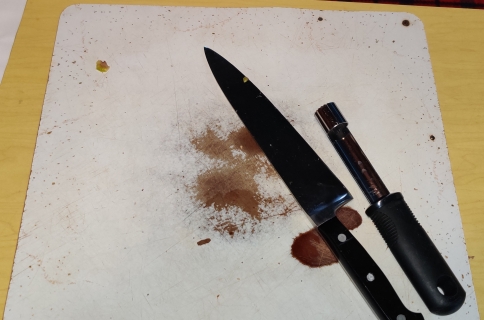
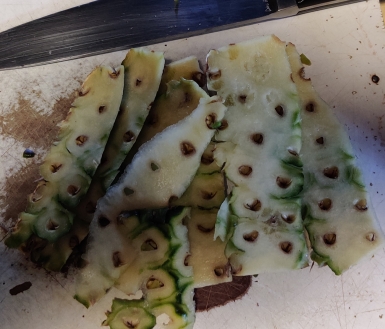
The stalk damage was removed (and while my name can be found on my — this — website in several places, I have blacked it out from my knife, on which I had inscribed my name years ago):
Stalk damage removed
The trimmed rhubarb stalks were piled up …
Trimmed rhubarb
… and the rhubarb stalks were rinsed again to remove the last of the bits:
Rhubarb rinsed again
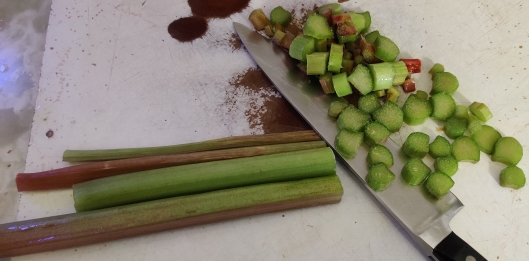
Some stalks were laid on the cutting board for chopping:
Rhubarb laid out for chopping
The rhubarb stalks were chopped using a slicing motion against the grain:
Rhubarb chopped
As chopped rhubarb started piling up on the chopping board, it was transferred to the mixing bowl:
Chopped rhubarb transferred to mixing bowl
The rest of the rhubarb was chopped, and transferred to the mixing bowl as it was produced:
Chopped rhubarb transferred to mixing bowl
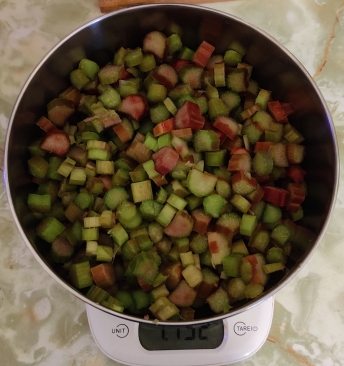
The bowl of chopped rhubarb was placed on the kitchen scale and weighed:
Chopped rhubarb weighed
The weight was noted, to be used in a moment:
Chopped rhubarb weighed
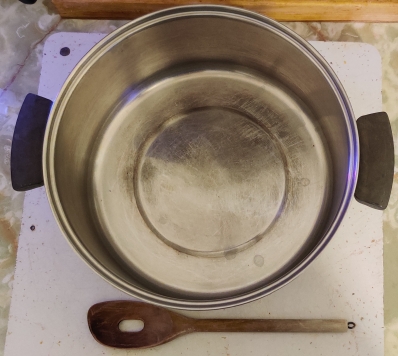
A large pot and wooden mixing spoon were taken out:
Pot and wooden spoon taken out
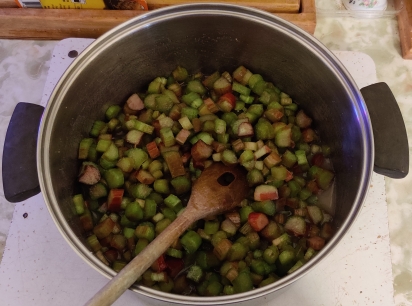
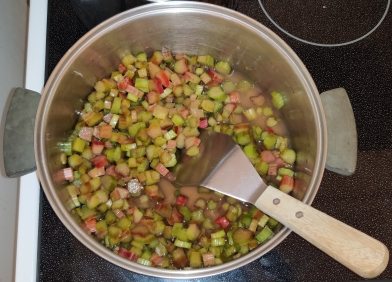
The chopped rhubarb was transferred to the pot:
Chopped rhubarb transferred to pot
Chopped rhubarb transferred to pot
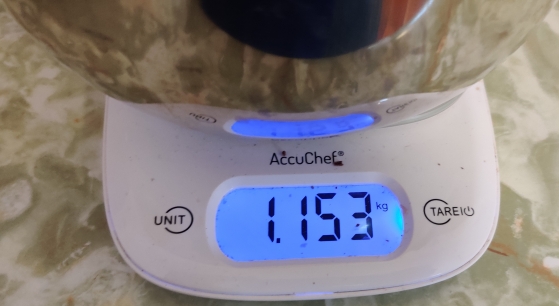
A calculator app was started, and the net weight of chopped rhubarb was calculated by subtracting the bowl tare weight from the weight of the bowl filled with the chopped rhubarb:
Net weight of chopped rhubarb calculated
Since my recipe is based on the Imperial system, the weight of 0.895kg (above) was converted to pounds, giving a result just barely shy of two pounds of chopped rhubarb:
Rhubarb weight converted to pounds
Next, a multiplication factor for how many “recipe units” was calculated by dividing the weight of the chopped rhubarb by the base amount of three quarters of a pound:
Multiplication factor calculated
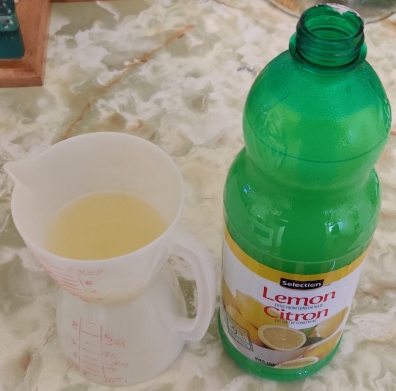
The multiplication factor was multiplied by the required amount of sugar and lemon juice for per “recipe unit” of 3/4 lb of chopped rhubarb: Half a cup of sugar, and half an ounce of lemon juice, resulting in 1-1/3 cups of sugar, and 1-1/3 ounces of lemon juice:
Multiplication factor applied to sugar and lemon juice required
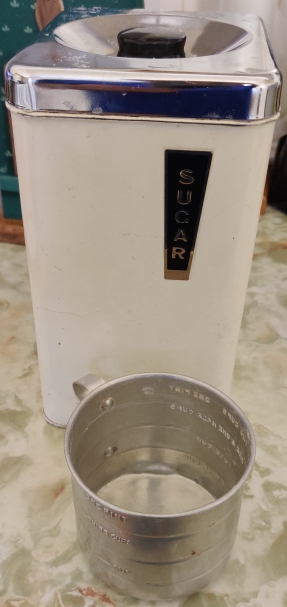
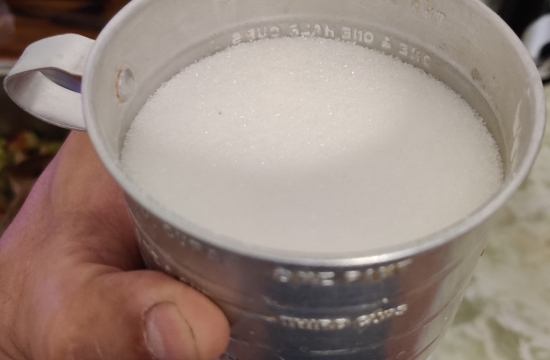
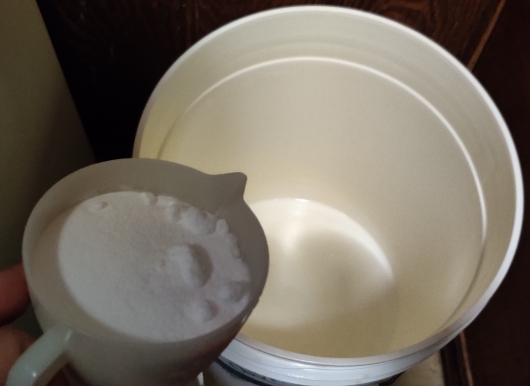
Sugar and a measuring cup were taken out:
Sugar and measuring cup taken out
Measures on measuring cup
Sugar was measured out:
Sugar measured out
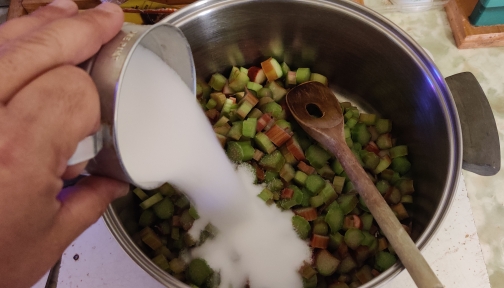
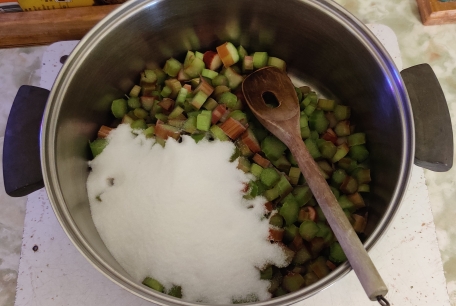
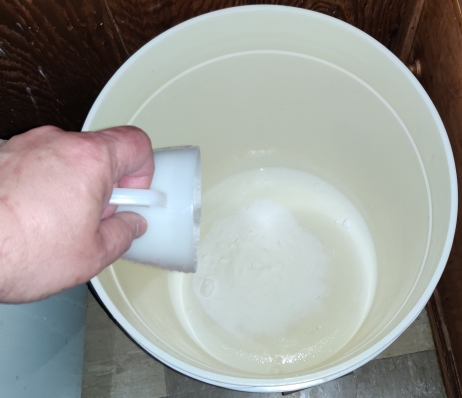
The sugar was poured onto the chopped rhubarb:
Sugar poured into pot of chopped rhubarb
Sugar poured into pot of chopped rhubarb
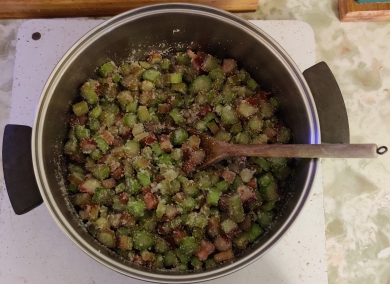
The chopped rhubarb and sugar were mixed with the wooden spoon:
Chopped rhubarb and sugar mixed
Lemon juice was measured out:
Lemon juice measured out
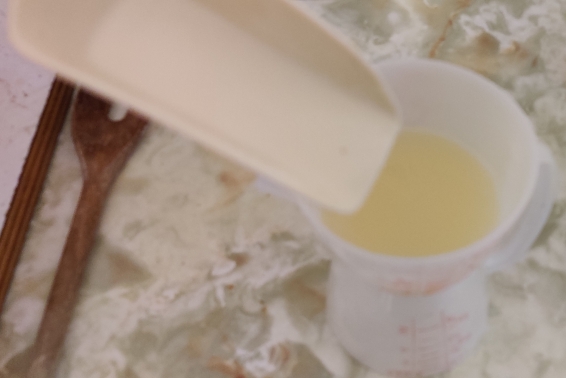
Extra sugar was added to the lemon juice:
Extra sugar added to lemon juice
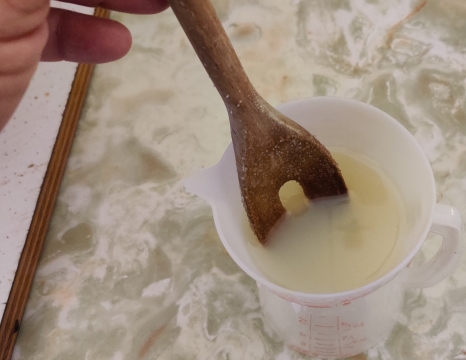
The lemon juice and extra sugar were mixed:
Lemon juice and extra sugar mixed
The lemon juice and sugar mix were added to the chopped rhubarb and sugar:
Lemon juice and sugar added to chopped rhubarb and sugar
The chopped rhubarb, sugar, and lemon juice were mixed some more:
Chopped rhubarb, sugar, and lemon juice mixed
Chopped rhubarb, sugar, and lemon juice mixed
A lid was placed on the pot of rhubarb, sugar, and lemon juice:
Lid placed on pot of chopped rhubarb mix
The pot of chopped rhubarb, sugar, and lemon juice was placed in a fridge overnight:
Pot of chopped rhubarb mix placed in fridge
Day two:
Early the next morning, I checked on the pot of chopped rhubarb:
Pot of chopped rhubarb checked
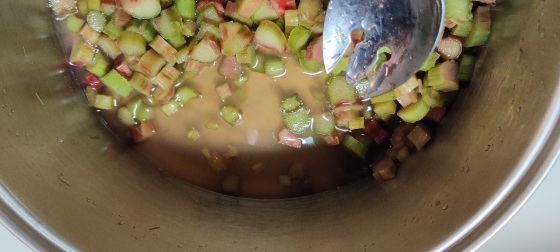
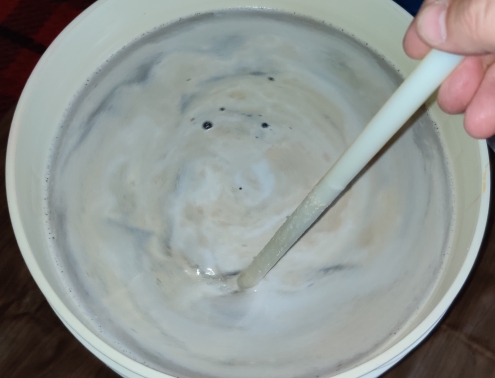
As can be sort of be seen above and better in the following photo, a good amount of liquid had been drawn by the sugar from the pieces of chopped rhubarb:
Liquid drawn from chopped rhubarb
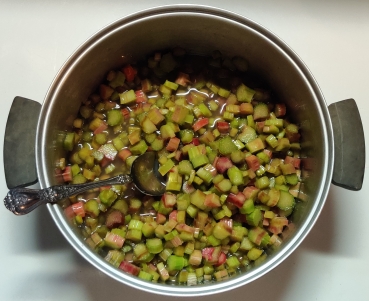
The chopped rhubarb was mixed again with a spoon:
Chopped rhubarb mixed
The pot of chopped rhubarb was returned to the fridge until later that evening (after coming home from work.)
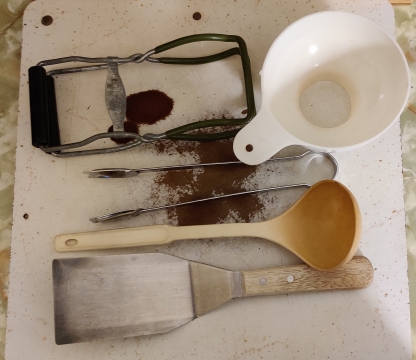
That evening, a jar wrench, a jar funnel, tongs, a ladle, and a stainless steel flipper were taken out:
Jar wrench, jar funnel, tongs, ladle, and stainless steel flipper taken out
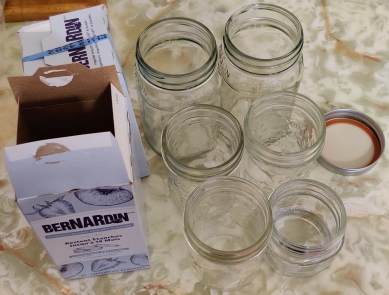
Mason jars, a few more than I expected to need, and new lids and lid rings, were taken out, but kept aside for the moment:
Mason jars and lids taken out
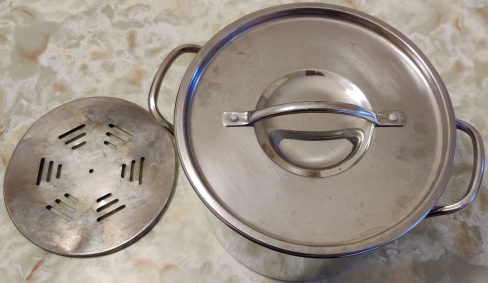
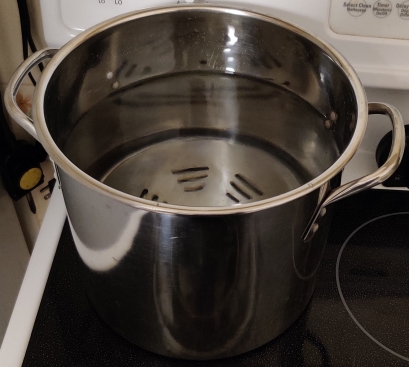
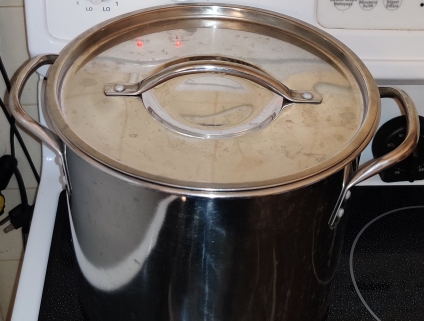
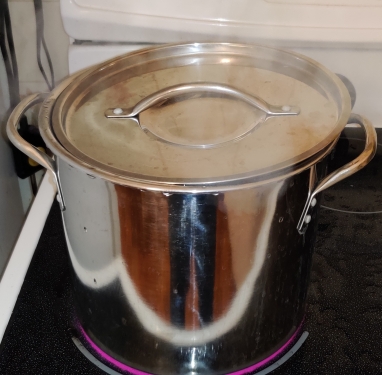
A pot and trivet were taken out, to act as a boiling water bath soon:
Pot and trivet taken out
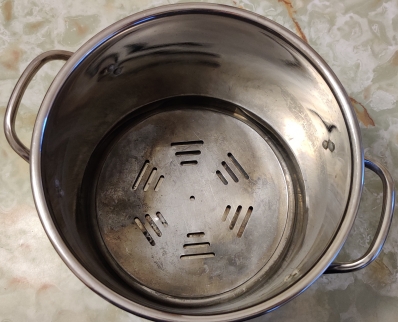
The trivet was placed in the bottom of the pot:
Trivet placed in pot
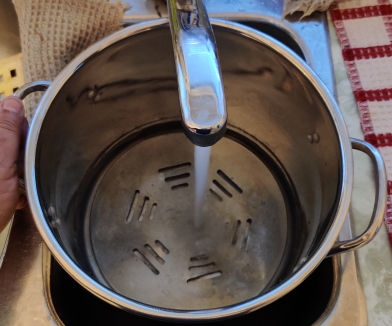
The pot was filled with water:
Pot filled with water
Pot filled with water
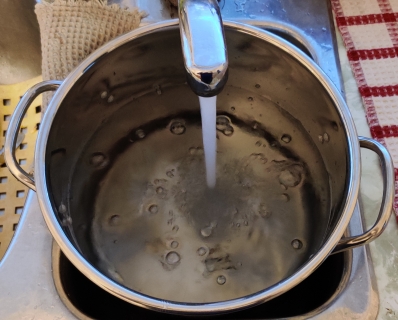
The pot of water was placed on a burner on the stove:
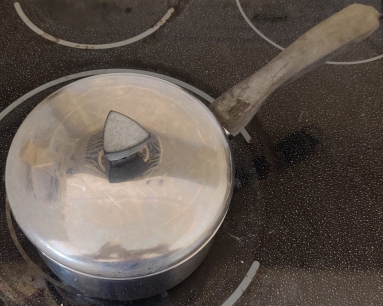
Pot of water placed on stove
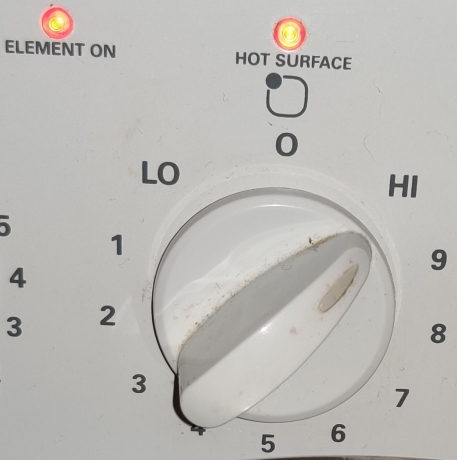
The stove was turned on:
… and the lid was placed back on the pot:
Lid placed on pot of water
Since I had placed the pot of water on a smaller burner, which proved to be a mistake, I still waited a bit before taking out the pot of chopped rhubarb, sugar, and lemon juice, and placing it on the stove:
Pot of Rhubarb, sugar, and lemon juice placed on stove
After waiting a bit more, having gauged the heating up of the pot of water, the burner under the chopped rhubarb mix was turned on:
Burner under chopped rhubarb mix turned on
The lid on the pot of chopped rhubarb mix was removed:
Lid removed from pot of rhubarb mix
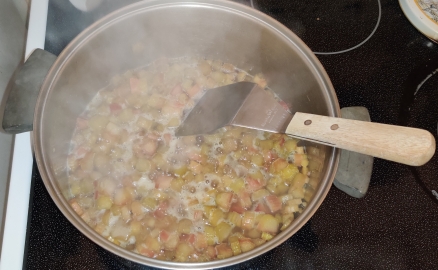
As the rhubarb mix was heating up, I of course mixed it to avoid burning:
Rhubarb mix being mixed while heating
Rhubarb mix being mixed while heating
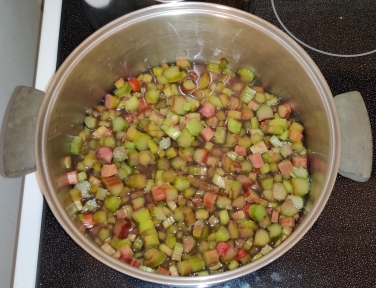
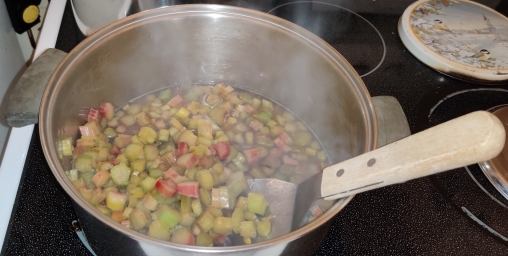
The rhubarb mix began to boil:
Rhubarb mix beginning to boil
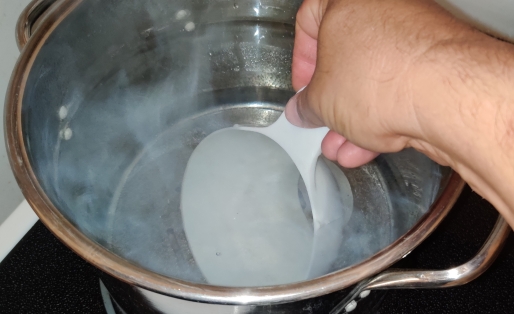
At this point, the rhubarb mix was taken off the burner, and since the water bath had not yet reached the boiling point, I brought it forward to the larger burner to bring it to a boil more quickly:
Water bath brought forward to larger burner on stove
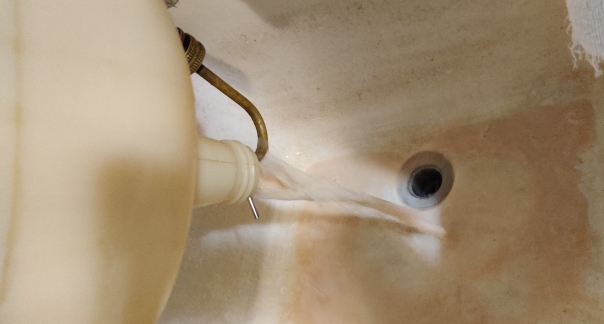
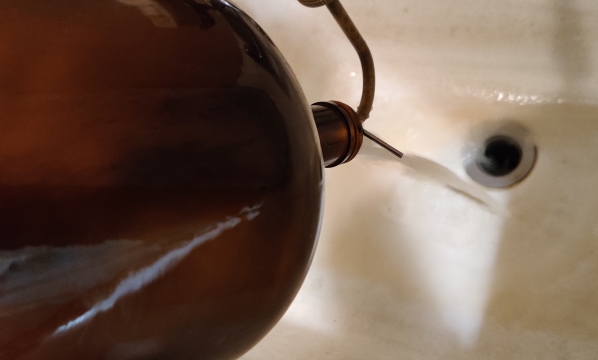
Fortunately, it was obvious that the water bath was “hot enough” to dip the (clean) bottle funnel to sanitize it:
Sanitizing bottle funnel
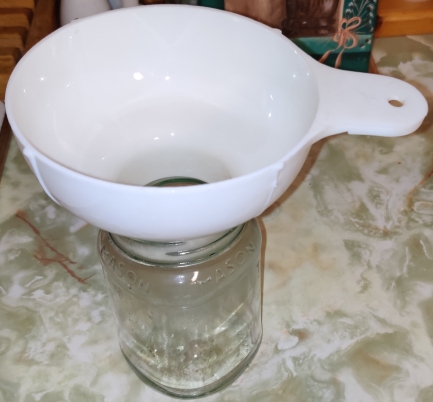
The bottle funnel was placed in the neck of a jar:
Jar funnel placed in neck of jar
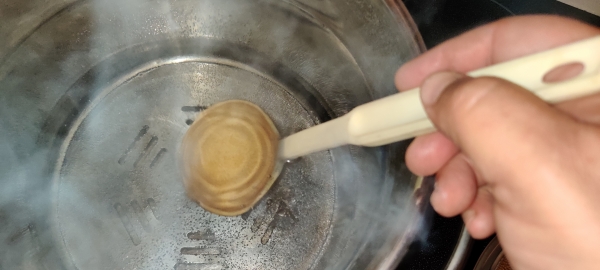
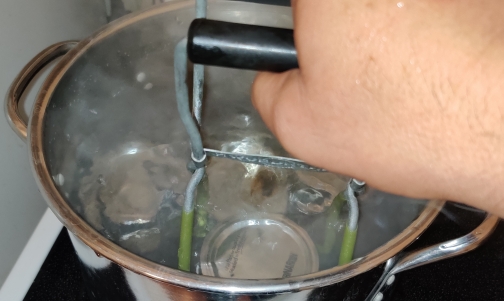
The ladle was dipped in the hot water to sanitize it:
Ladle sanitized
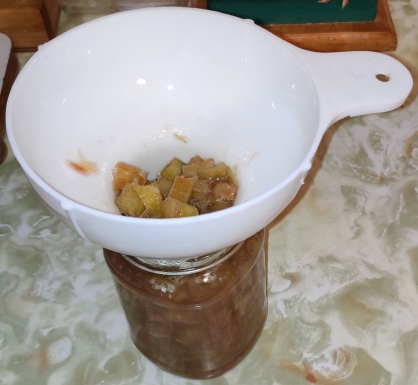
I started ladling the boiled rhubarb mix into the jar until it was filled:
Ladling boiled rhubarb mix into jar
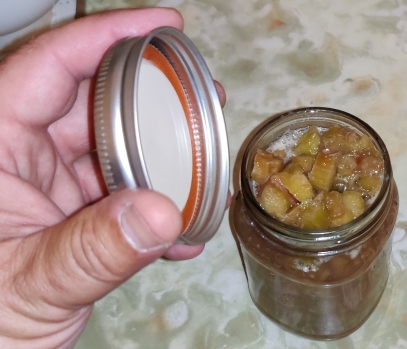
Jar filled
A lid and ring were brought to the jar, and screwed onto the jar (oops, I forgot to take a picture of this second part):
Lid brought to filled jar and screwed on
The rest of the boiled rhubarb mix was transferred into jars, and lids were screwed onto the jars:
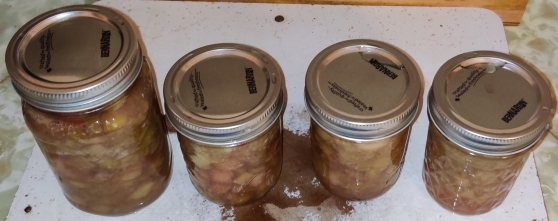
Filled jars with lids screwed on
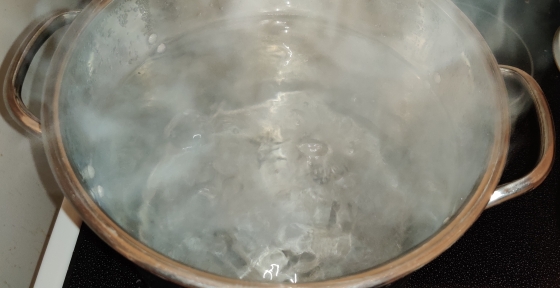
At this point, the water in the water bath was finally starting to boil:
Water bath starting to boil
Using the jar wrench, the filled jars were transferred to the water bath:
Filled jars transferred to water bath
Filled jars transferred to water bath
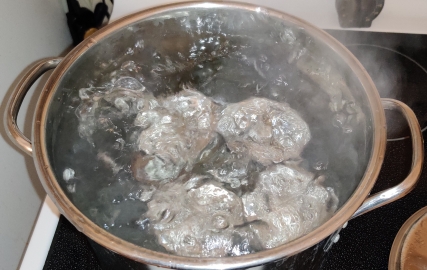
Once the water had come to a rolling boil …
Water bath coming to a rolling boil
… a timer was set to 15 minutes …
Timer set to 15 minutes
… and the lid was placed back on the pot with the water bath and filled jars:
Lid placed on water bath
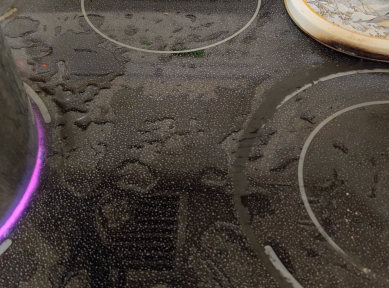
At this point, the water was boiling so vigorously, that water was splashing out of the pot!
Water splashing out of boiling water bath onto stovetop
After 15 minutes had elapsed, the filled jars were removed from the water bath using the jar wrench:
Removing filled jars with jar wrench
The now heat-processed jars were placed on the the cutting board:
Heat-processed jar placed on cutting board
Heat-processed jars placed on cutting board
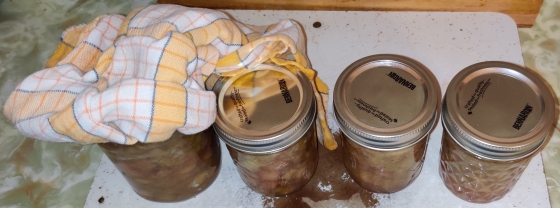
Hot water collecting on the jars was soaked up with a towel:
Water on jars soaked up with towel
The jars were moved apart from each other to allow for some ambient cooling for a few moments:
Jars separated to facilitate ambient cooling
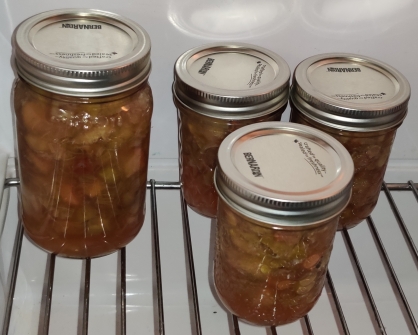
Then, the still-warm jars were moved to a fridge to complete cooling.
Jars moved to fridge
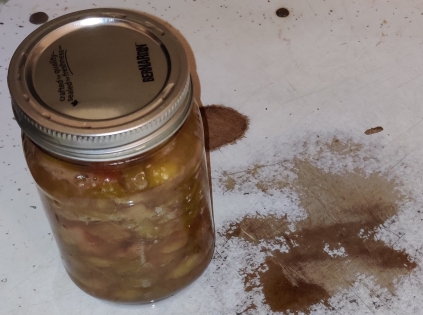
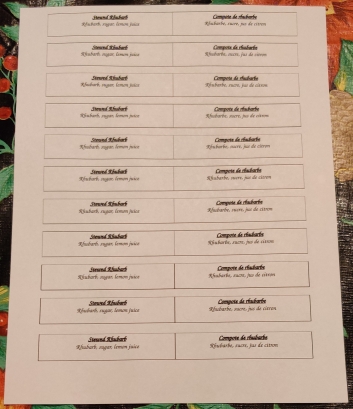
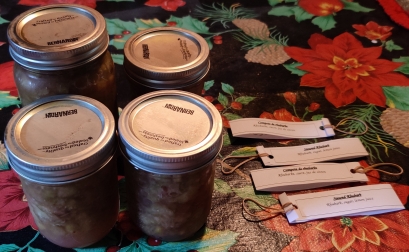
At this point, I changed tack a bit and printed out some labels for the jars, modifying another label template I have for my pickled eggs:
Printed labels for jars of stewed rhubarb
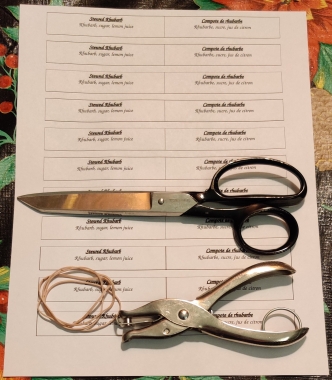
Scissors, a hole punch, and some elastics were taken out:
Scissors, hole punch, and elastics taken out
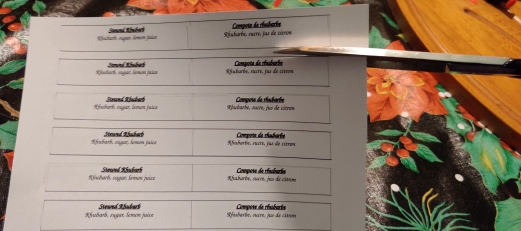
Four labels were cut from the sheet:
Label cut from sheet
Label cut from sheet
Labels cut from sheet
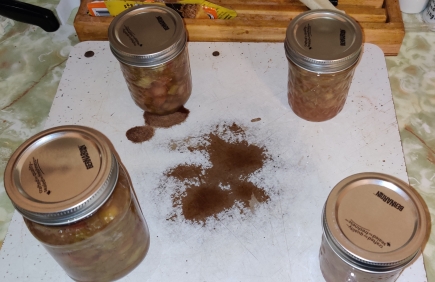
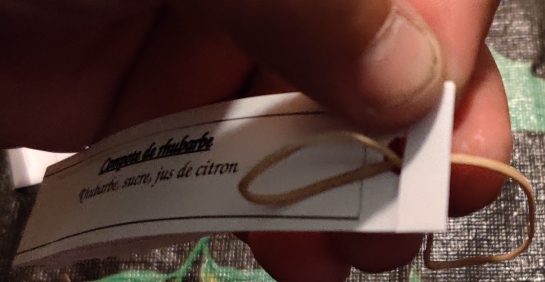
A date code (in this case for 09 August, 2023, the day I filled and processed the jars) was written on the back / inside of each label:
Date code written on backside of label
Date code written on backside of labels
The labels were folded over onto themselves:
Label folded over on itself
Label folded over on themselves
I should note at this point at which the print is more legible, that I live in Montreal, where French predominates, hence the labels are in both English and French. As it happened in the picture above, the folded labels with the English showing were upside down because that’s how I inadvertently happened to flip them over. 🙂
I then picked up the labels, piled them one on another, and crimped the folds:
Labels brought together and folds crimped
A hole was punched through the labels on the end opposite to the fold:
Hole punched through labels
Hole punched through labels
On each individual label, the end near the hole was folded over:
End near hole folded over
Ends near holes folded over
Ah here, the English labels are right side up. 🙂
An elastic was threaded through the hole of a label:
Elastic threaded through hole in label
The elastic was looped into itself, and loosely tightened to allow for it to at once hold the label, as well as have a loop to use to go around a jar’s neck:
Elastic looped into itself
… which was repeated for the other three labels:
Elastics looped into themselves
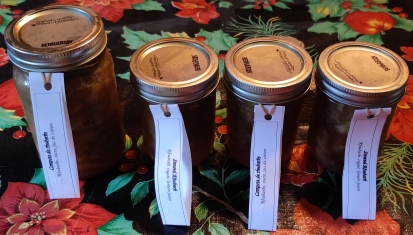
The following morning, the cooled (and fully sealed) jars were removed from the fridge, and brought to the workspace where the labels were:
Cooled bottles brought out
Labels were looped around the jars:
Label looped around jar
Labels looped around jars
These jars will be kept to be donated to my church’s fall fair, along with a few jars of my pickled eggs! (And, Mom will receive any which don’t sell. 🙂 )
This post is a bit of a gratuitous post to pass the time during my holidays, while showing a bit how I leverage freezers as useful tools for day to day cooking and eating, and highlight how, beyond the strictly obvious (or conversely, as an example of the obvious, whichever you prefer 🙂 ), my cooking efforts actually do fit into and serve everyday life — literally!
Yes, the breakfast shown at the end of this post is a very typical daily breakfast for me these days, barring the days, often on weekends or holidays, when I might choose to make other breakfast foods from my collection of recipes (or of course, something else completely.)
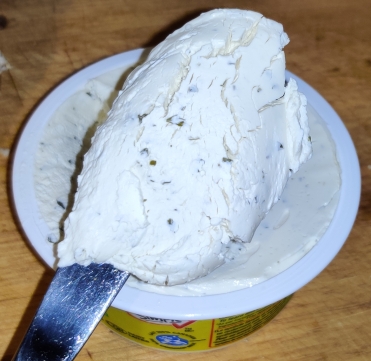
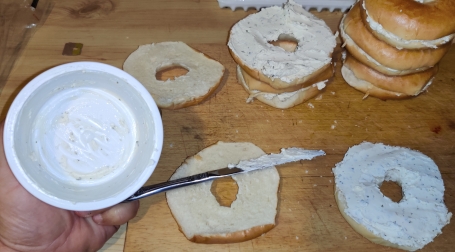
After coming home from the store and having bought bagels and a cream cheese spread flavoured with “herbs” and roasted garlic, I took out a cutting board:
Cutting board taken out
A bagel slicer, basically a serrated edge attached to a wooden guide, and a table knife, were taken out:
Bagel slicer and knife taken out
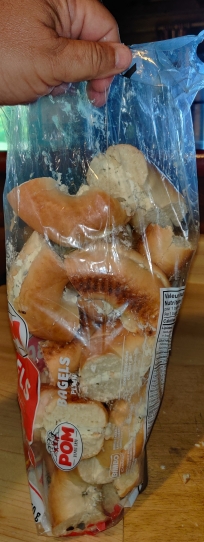
A bag of commercially produced bagels, purchased earlier in the day, was taken out:
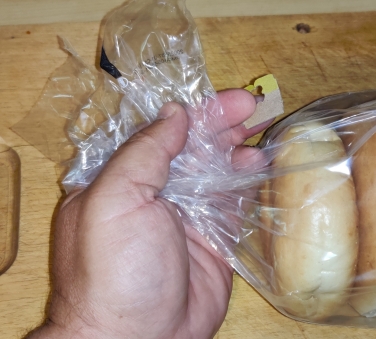
Bag of bagels taken out
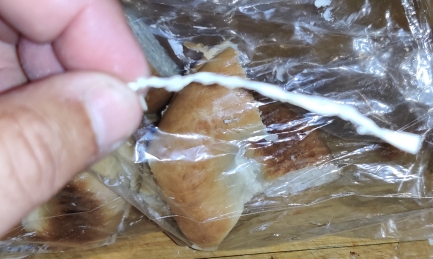
The bag clip was taken off the bag in order to open the bag of bagels:
Bag clip removed from bag
The bagels were taken out of the bag:
Bagels taken out of bag
The empty bag was kept and put aside:
Bag kept and put aside
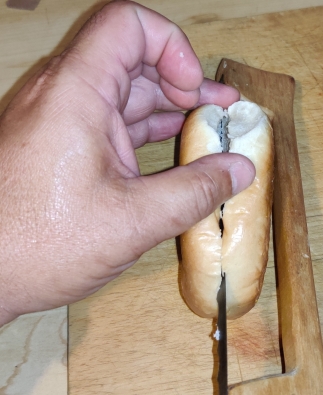
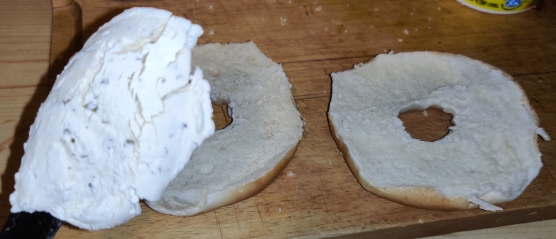
A bagel was sliced (be careful, some industrially produced bagels may be partly pre-sliced):
Bagel being sliced
Sliced bagel
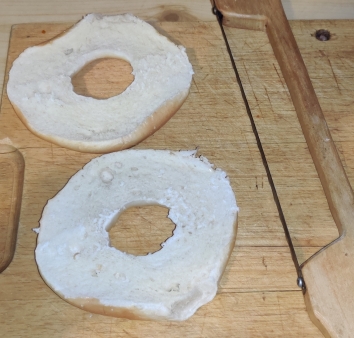
… and the rest of the bagels were sliced:
Bagels sliced
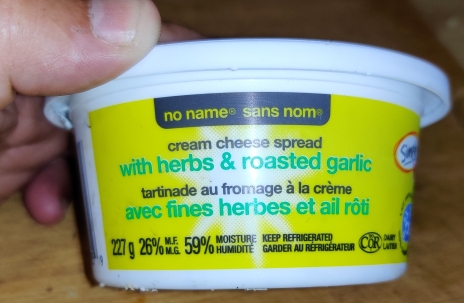
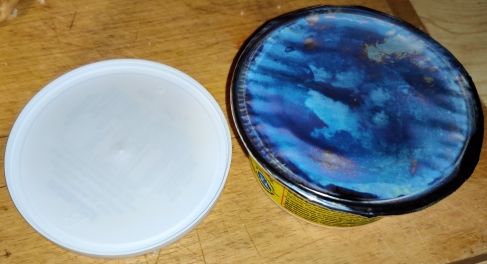
A 227g (8oz) container of a commercially prepared cream cheese spread, in this case flavoured with “herbs” and roasted garlic, purchased earlier in the day, was taken out:
Flavoured cream cheese spread taken out
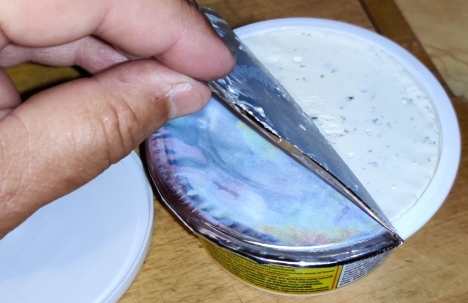
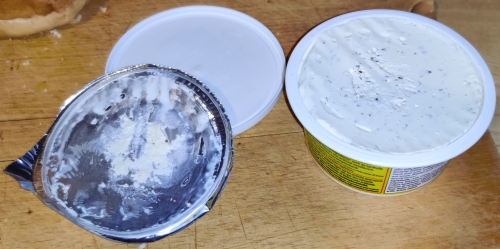
The lid was removed from the cream cheese container …
Plastic seal to be removed from container
… and the plastic seal was also removed from the container:
Plastic seal removed from container
Plastic seal removed from container
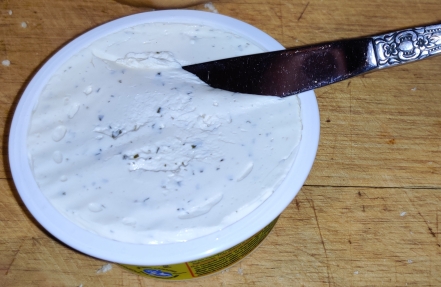
The knife was used to pick up some of the cream cheese:
Picking up cream cheese with knife
Cream cheese picked up with knife
A couple of bagel halves were placed on the cutting board, and the knife holding the cream cheese was brought to them …
Cream cheese brought to bagel halves
… and cream cheese was spread on one of the bagel halves:
Cream cheese spread on bagel half
Cream cheese spread on bagel half
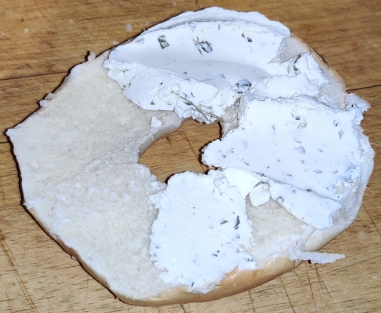
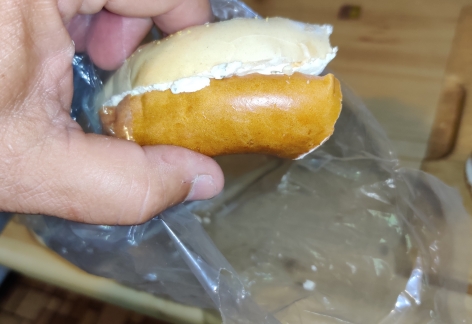
The two bagel halves were put back together:
Bagel halves joined back together
Bagel halves joined back together
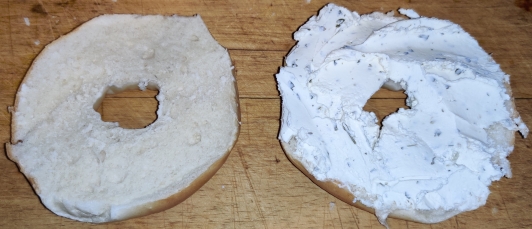
Cream cheese was spread on a few more bagels, and after spreading cream cheese on half of the bagels, the container was about half empty:
I continued to spread cream cheese on the rest of the bagels; I scraped the last of the cream cheese out of the container, and I spread the last of the cream cheese onto the last of the six bagels:
Scraping the last of the cream cheese from the bottom of the container and spread onto last bagel
At this point, all six bagels were filled with cream cheese:
Bagels filled with cream cheese
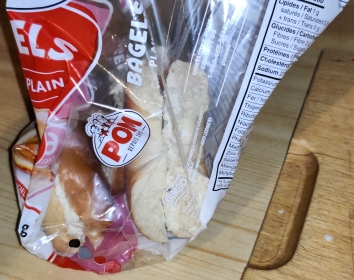
At this point, a clean knife was taken out, and a bagel was cut at a single point:
… and then the bagel was cut in two other places, resulting in three pieces:
The bagel pieces were placed back in the bag:
Piece of bagel placed in bag
Three bagel pieces placed in bag
… and as I continued cutting up the rest of the bagels, I placed the bagel pieces in the bag:
Half the bagel pieces in the bag
… until all the bagel pieces were in the bag:
All bagel pieces in bag
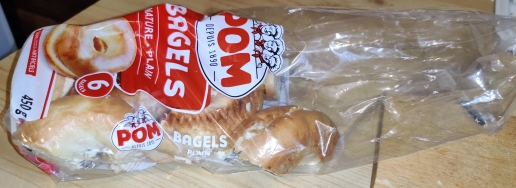
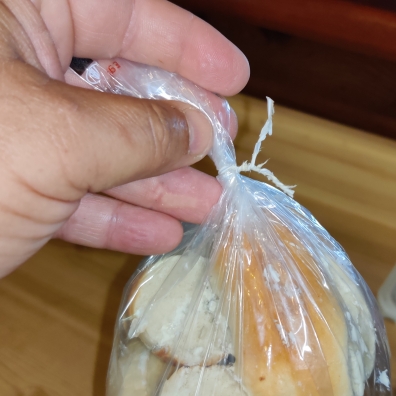
A tie wrap was taken out:
Tie wrap taken out
The tie wrap was used to seal up the bag again:
Bag sealed with tie wrap
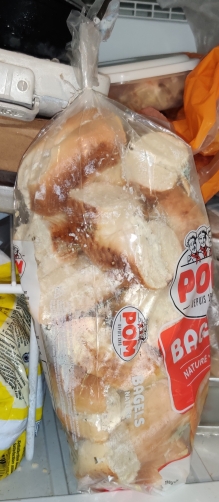
The bag of bagel and cream cheese pieces was placed in the freezer:
Bag of bagel and cream cheese pieces placed in freezer
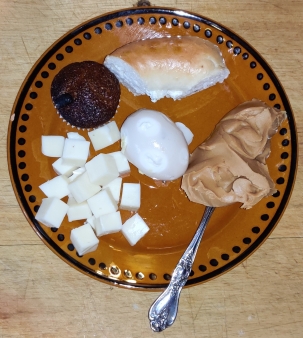
The next morning, I took out a bagel and cream cheese bite, and defrosted it along with a mini raisin bran muffin, made earlier in the week using my mom’s bran muffin recipe, a pickled egg, some cheese, and some peanut butter scooped from the jar:
Incidentally, while this page follows the preparation of beer from beer concentrate kits, the process is almost identical for making wine from wine concentrate kits.
The photos shown below cover a period of nine weeks, starting in early March, 2023, through to bottling the beer three weeks later at the very end of March, and taste testing the beer about six weeks after that — nine weeks total — in mid May, 2023. Normally, my “official” answer to “How long does it take to make beer?” is “A minimum of six weeks. Don’t believe the instructions when they say two, or three, or four weeks. Just don’t.” (Wine from kits takes about eight to nine weeks minimum.)
Making the beer:
The following is showing a very detailed progression of making beer using two kinds of beer concentrates, a blonde beer, and a brown ale. The narrative of this page will be primarily following the preparation of the blonde beer.
Day one:
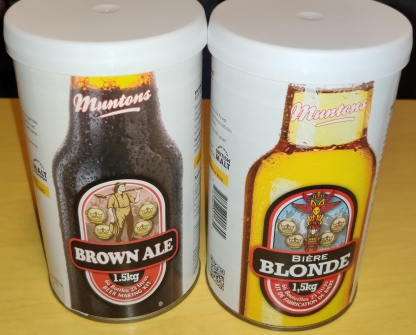
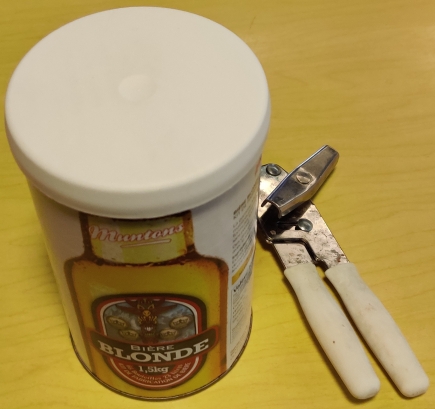
First, a couple of kinds of beer concentrate kits were purchased, for a brown ale, and for a blonde beer.
Two beer concentrate kits purchased
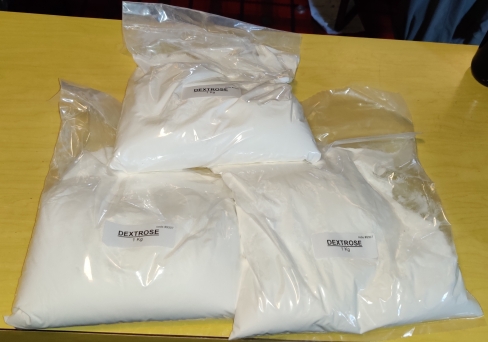
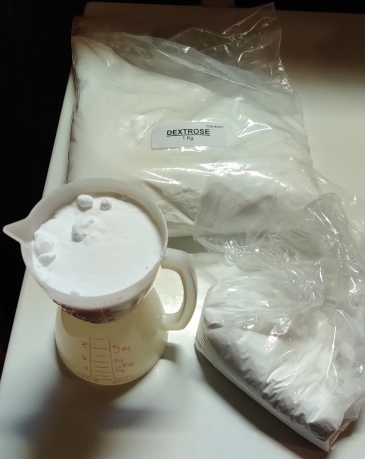
Since beer concentrate kits often do not contain fermentable sugars, 1kg bags of dextrose were also purchased at the same time; in this case, about a bag per batch will be used, to produce a bit less than 5% alc/vol given the amount of beer I will be making (although I am not particular at all on this point beyond not wanting the alcohol content to be significantly different either way.)
Bags of dextrose purchased
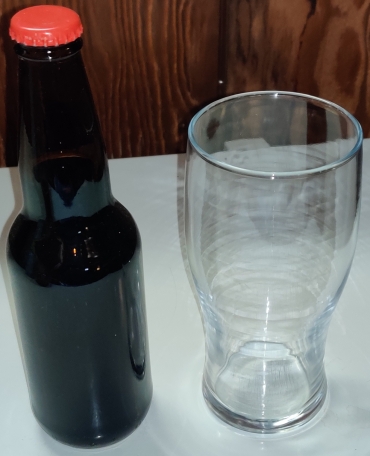
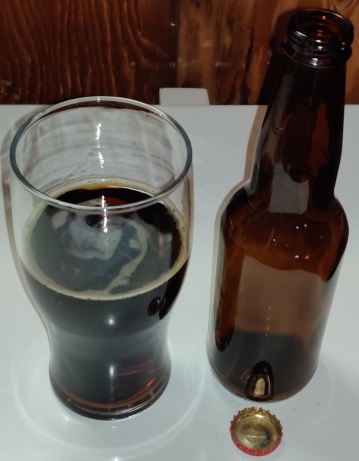
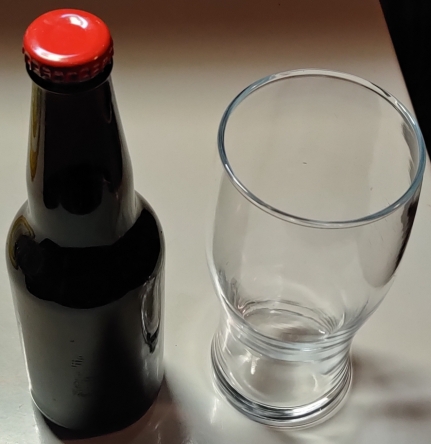
Having brought the beer concentrates and dextrose home, the first thing I did was take out a beer from a previously brewed batch of beer:
Beer and glass taken out
The beer was poured into the glass:
Beer poured into glass
… and the beer was enjoyed:
Beer enjoyed
On to making new beer:
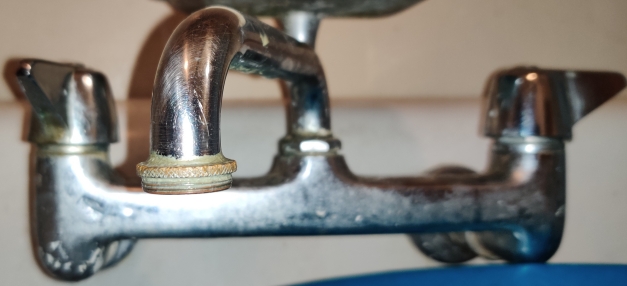
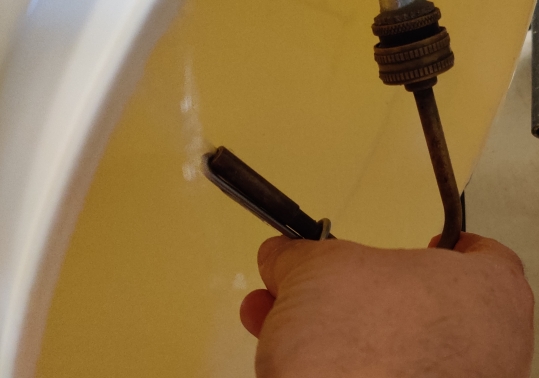
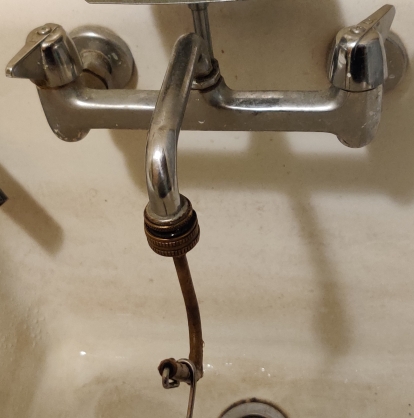
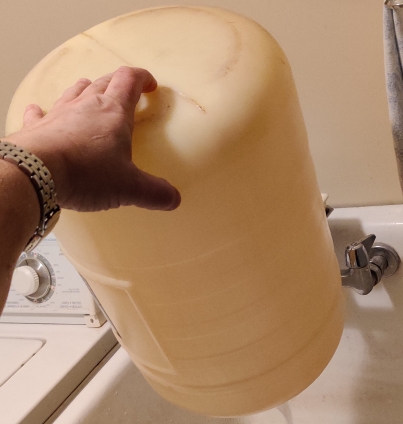
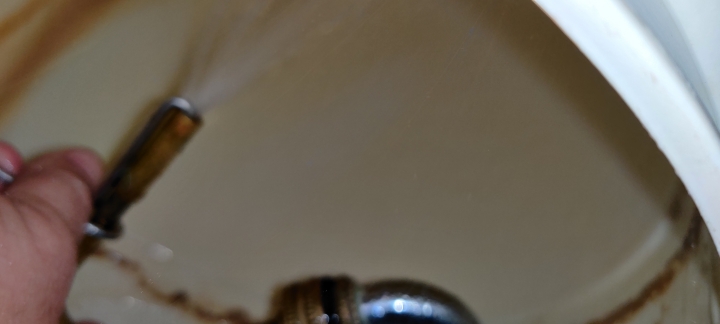
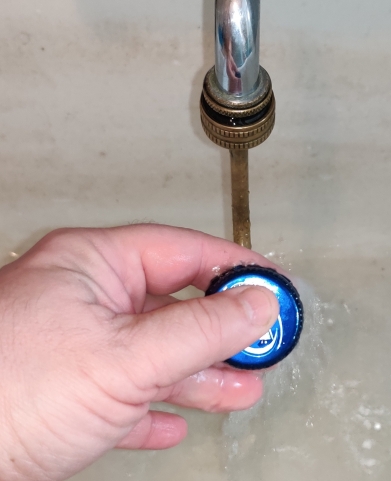
The aerator on the tap in the laundry tub was removed:
Aerator removed from tap
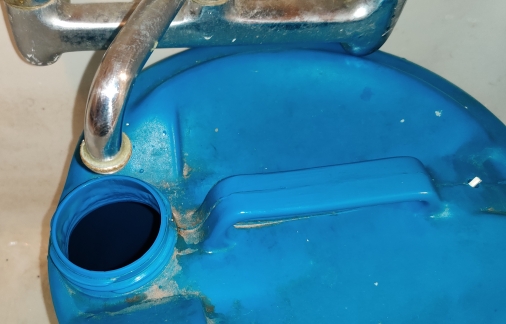
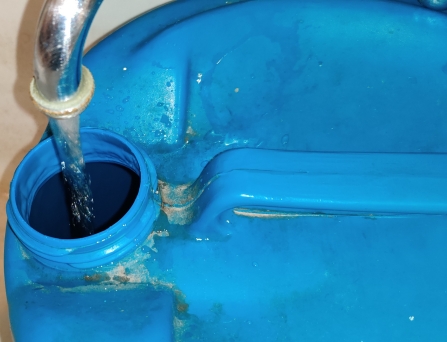
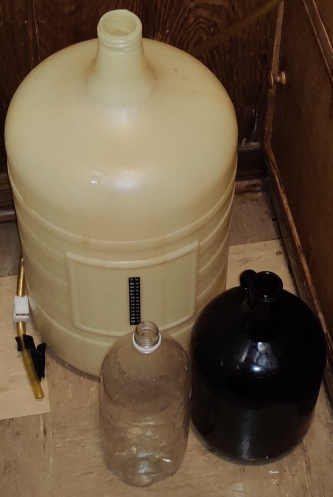
A five (imperial) gallon water jug was placed under the tap:
Water jug placed under tap
The water was turned on, and the jug filled with water …
Filling jug with water
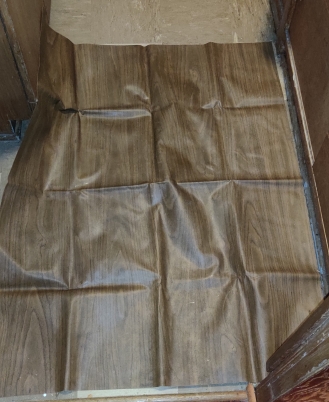
While the jug was filling with water, a plastic cloth was laid out on the floor:
Plastic cloth laid out
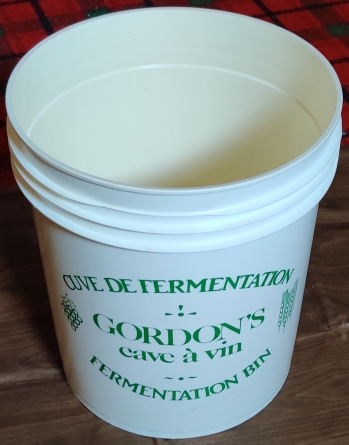
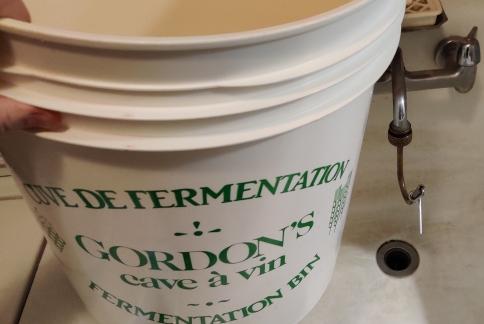
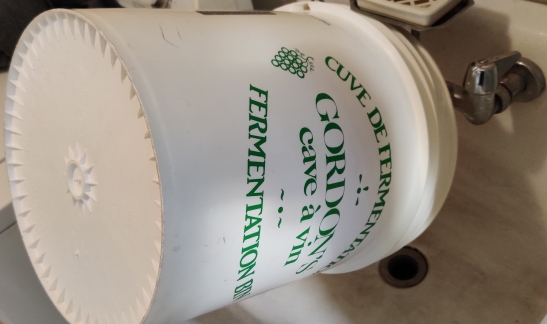
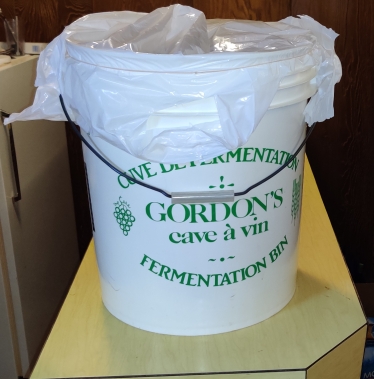
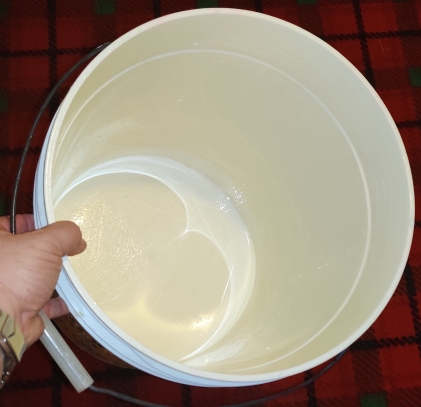
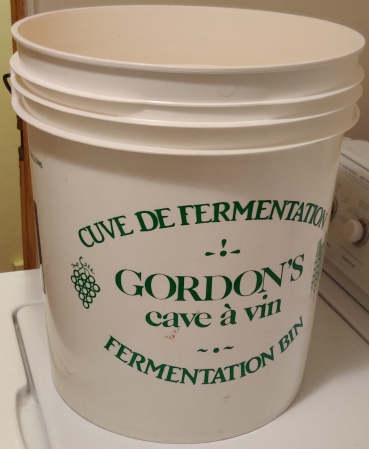
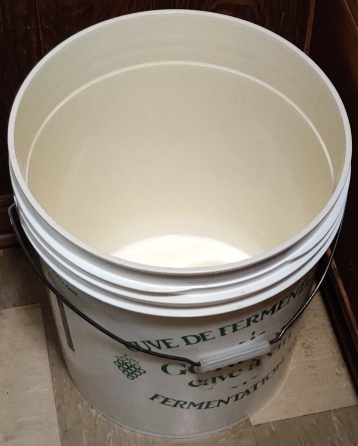
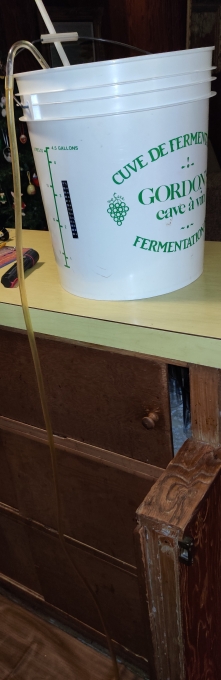
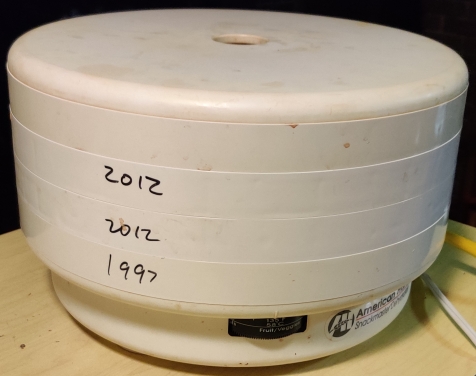
A fermentation bin was taken out (incidentally, the original bin I bought back in late 1990 when I started making wine):
Fermentation bin taken out
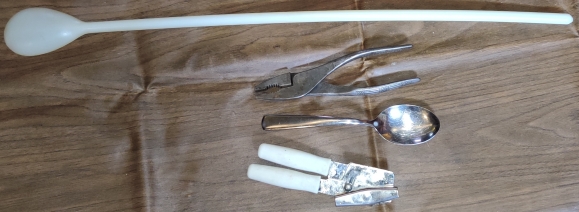
A large stirring spoon, pliers, a large spoon, and a can opener, were taken out:
Tools taken out
The now-filled water container was brought out to the plastic cloth:
Filled water jug brought out
A kettle was filled with water …
Kettle filled with water
… the kettle was plugged in …
Kettle plugged in
… and finally the kettle was turned on:
Kettle turned on
Kettle turned on
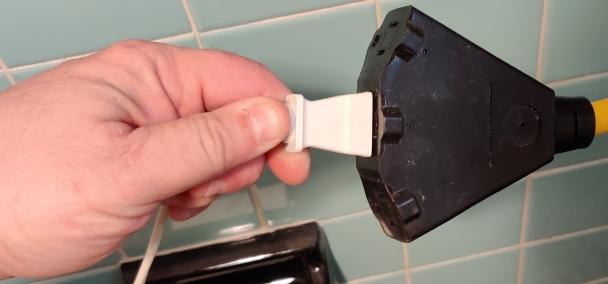
A jet washer was taken out …
Jet washer taken out
… and the jet washer was attached to the tap in the laundry tub:
Jet washer attached to tap
The tap was turned on again:
Tap turned on
The aforementioned fermentation bin was brought to the laundry tub …
Fermentation bin brought to laundry tub
… then the fermentation bin was placed over the jet washer …
Fermentation bin placed over jet washer
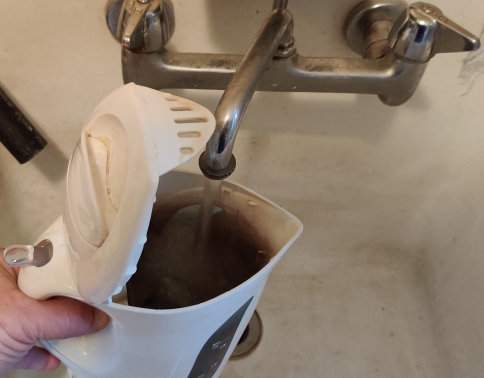
… and I used a finger to activate the jet washer to rinse out the (previously cleaned) fermentation bin:
Fermentation bin rinsed with jet washer
Rinse water draining from fermentation bin
At this point, I took advantage of the moment to jetwash the emptied beer bottle from earlier:
Beer bottle jetwashed
… which was then placed in the dishwasher along with my other dishes, to clean for future bottling purposes (see later on).
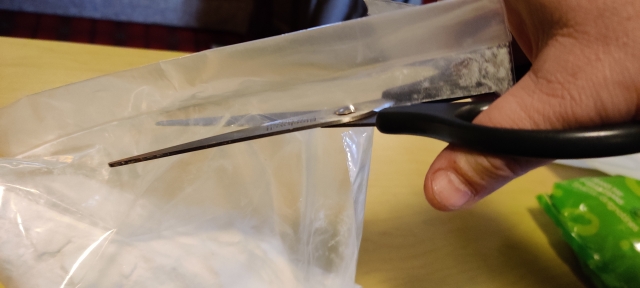
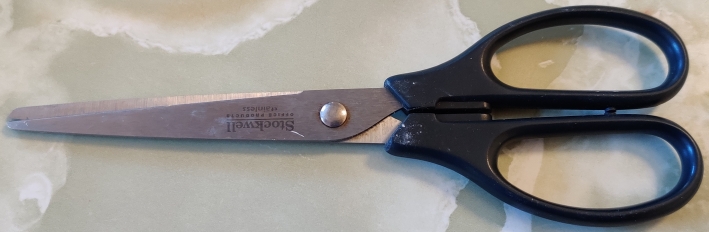
Scissors were taken out:
Scissors taken out
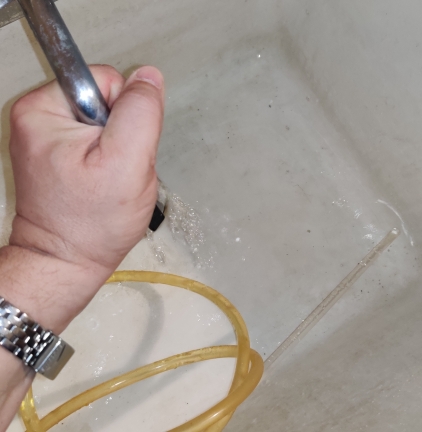
The scissors were used to open a bag of dextrose:
Bag of dextrose cut open
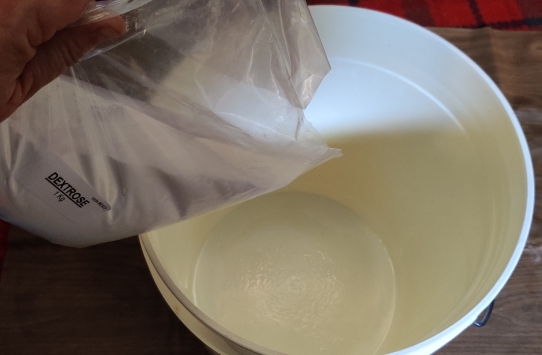
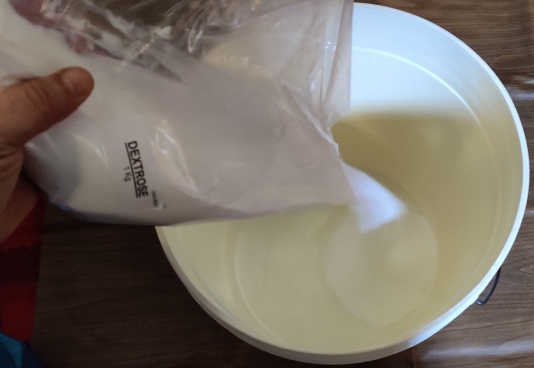
The full contents of a bag of dextrose were poured into the fermentation bin, which was brought back to the plastic cloth:
Dextrose poured into fermentation bin
Dextrose poured into fermentation bin
Dextrose poured in fermentation bin
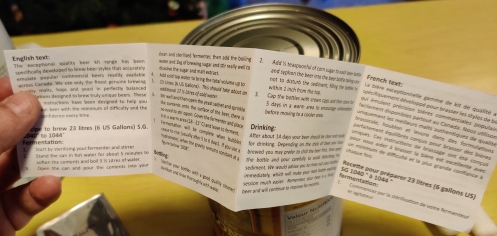
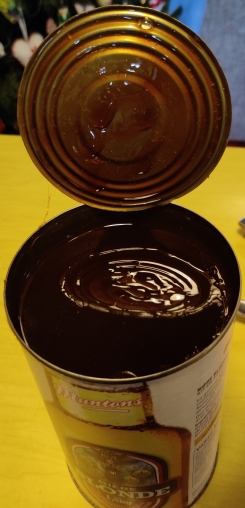
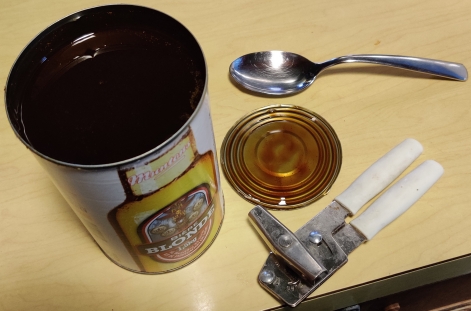
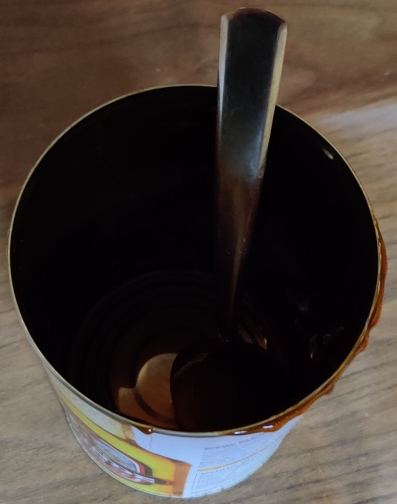
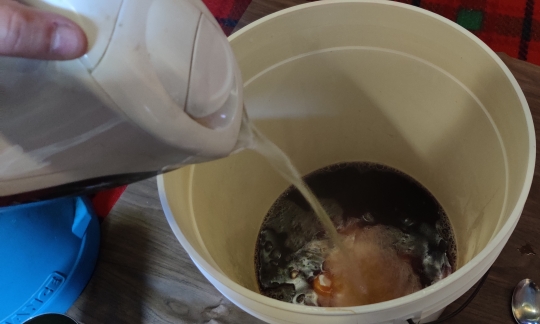
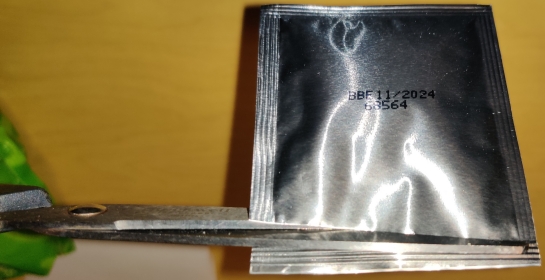
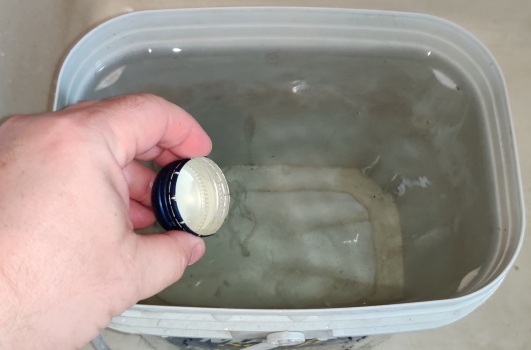
A can of beer concentrate, for the blonde beer, and the can opener, were taken out.
Beer concentrate and can opener taken out
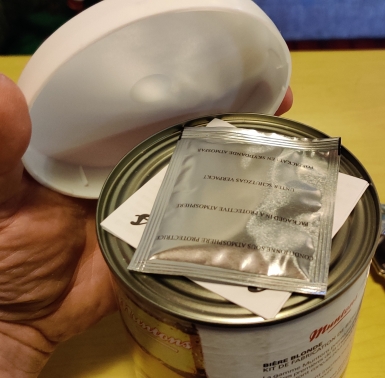
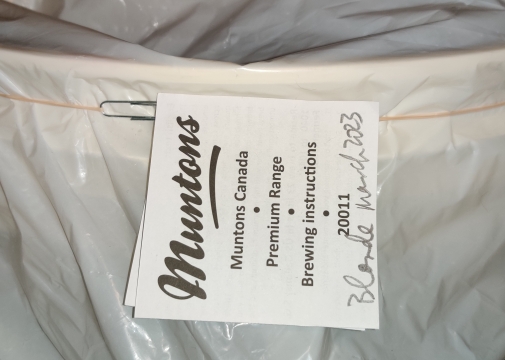
The plastic top was removed from the can, revealing a yeast packet and the kit’s instructions.
Yeast packet and instructions revealed
The yeast packet was taken out …
Yeast packet taken out
… as were the instructions:
Instructions taken out
Instructions opened up
Note that while I generally follow the instructions, I apply my own fine tuned procedures. 🙂
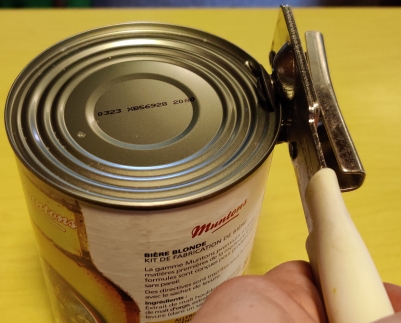
The can opener was used to open the can of beer concentrate:
Beer concentrate can opened with a can opener
Beer concentrate can opened with a can opener
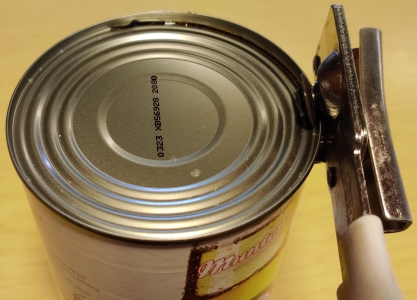
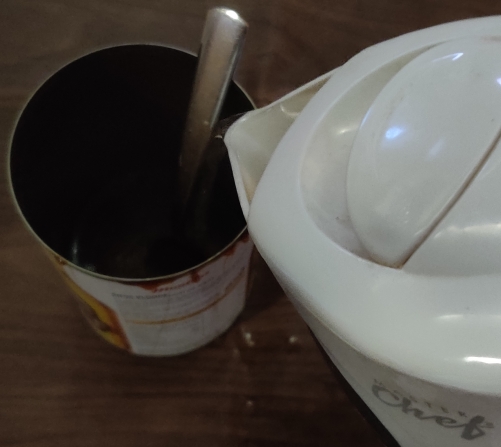
A spoon was used to remove the top of the can:
Spoon used to open can
Can opened up
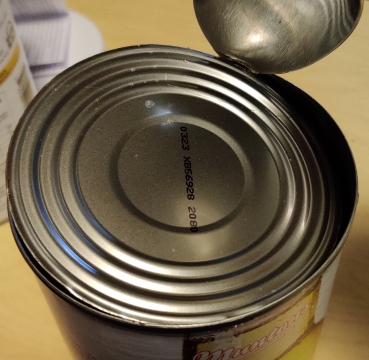
… and the top of the can was finally properly removed:
Can top removed from can
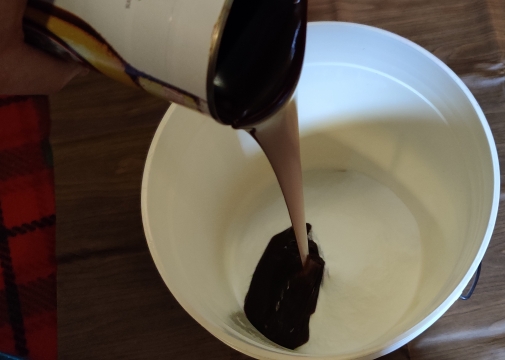
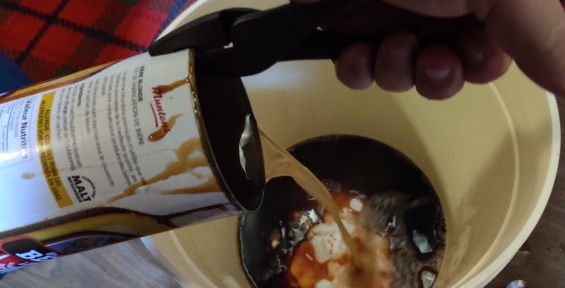
The viscous beer concentrate was poured into the fermentation bin:
Beer concentrate poured into fermentation bin
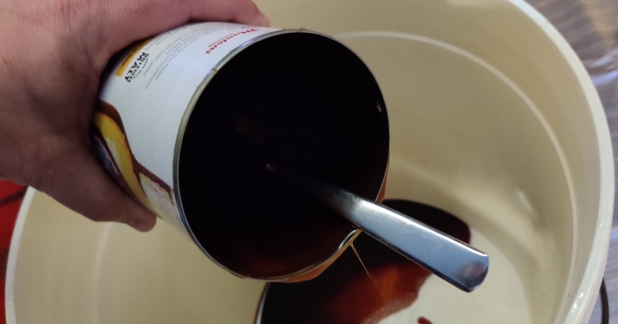
The spoon was used to scrape out the rest of the concentrate from the can:
Beer concentrate scraped out of can
Beer concentrate scraped out of can
The kettle of water, while still hot, was reboiled, and boiling water was poured into the can:
Boiling water poured into beer concentrate can
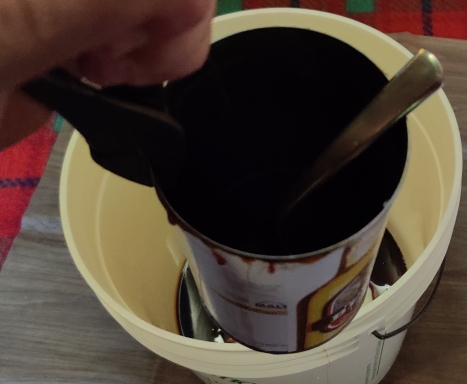
The hot can was picked up with the pliers …
Can picked up with pliers
The hot water was swirled around in the can to dissolved the last of the concentrate from the can walls, and the water was poured out and into the fermentation bin:
Hot water poured out of can into fermentation bin
The rest of the boiling water was poured into the fermentation bin:
Hot water poured into fermentation bin
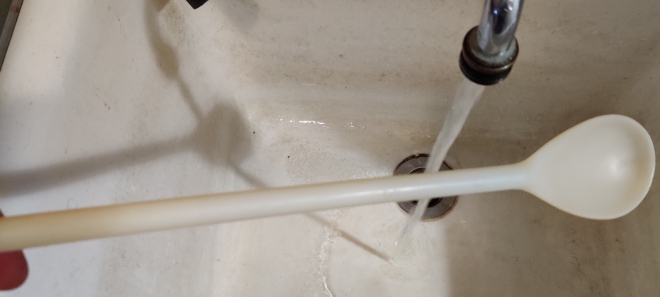
The large plastic stirring spoon was quickly rinsed under the tap at the laundry tub:
Plastic spoon rinsed with water
The spoon was brought to the fermentation bin:
Spoon brought to fermentation bin
… and the hot water, beer concentrate, and dextrose were thoroughly mixed:
Hot water, beer concentrate, and dextrose thoroughly mixed
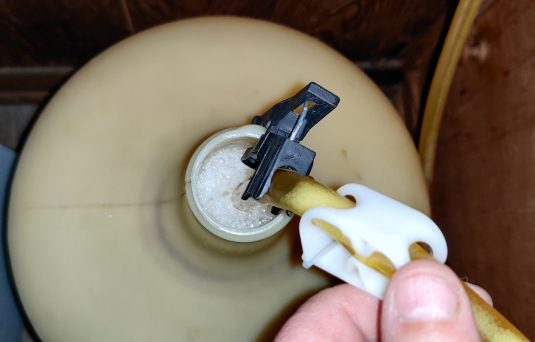
The plastic tap placed on the water jug was removed:
Tap seal removed from water jug
The water in the jug was poured into the fermentation bin with the other ingredients:
Water poured into fermentation bin
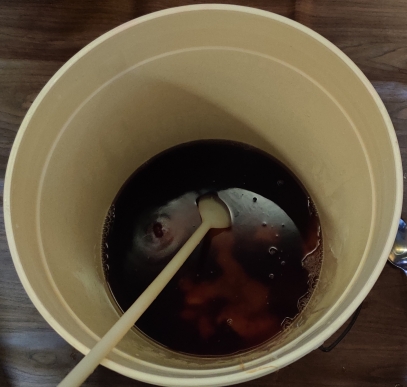
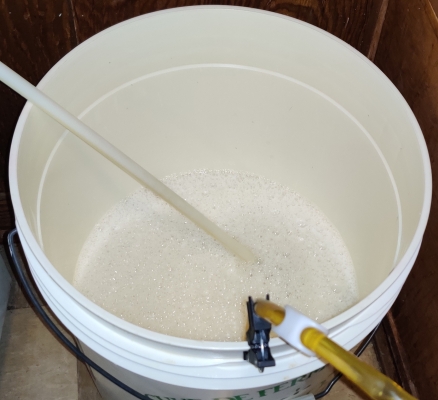
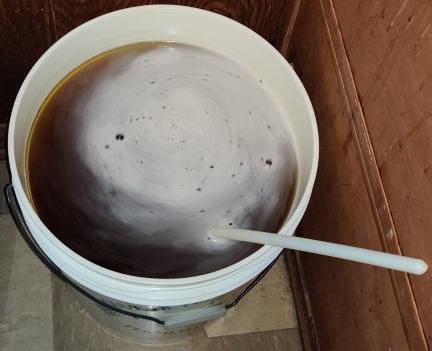
At this point, all the ingredients are called wort (pronounced “wurt”), and the wort was mixed with the big plastic spoon:
Wort mixed
Wort mixed
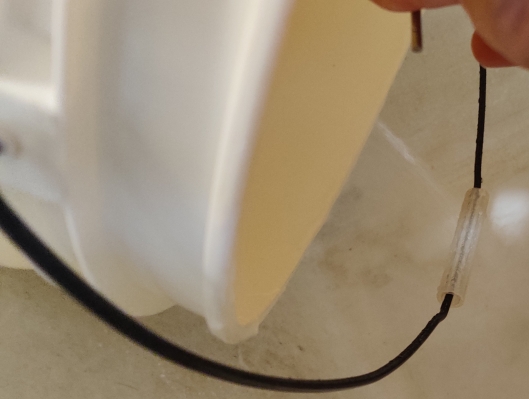
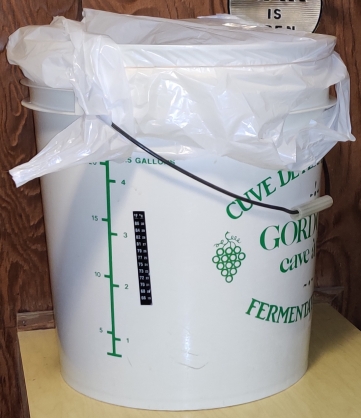
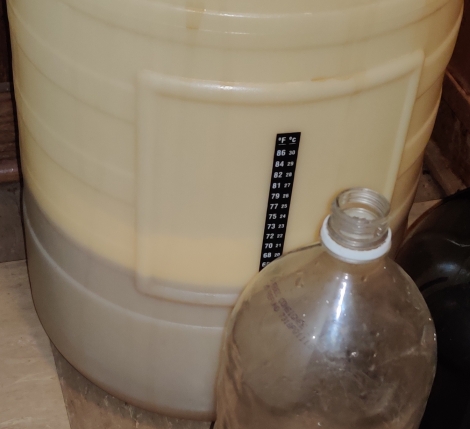
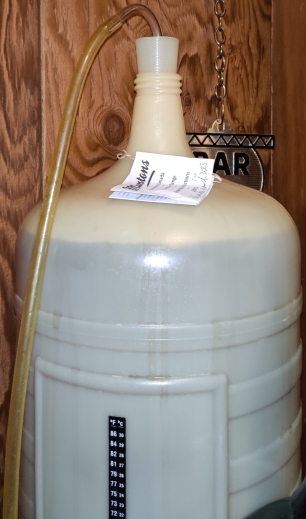
The temperature on the thermometer stuck onto the side of the fermentation bin was checked, and the wort temperature had not yet risen come up to fermentation range (one of the temperature ranges would be highlighted were it the case):
Temperature not yet in range
Despite this, and knowing that the water temperature was below optimum range, as opposed to too warm and dangerous to yeast, the yeast packet was taken out:
Yeast packet taken out
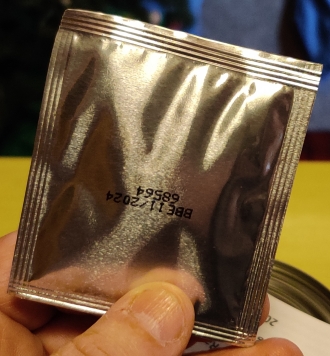
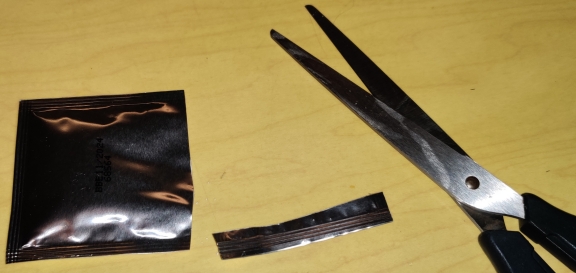
The yeast packet was cut open with scissors:
Yeast packet opened with scissors
Yeast packet opened with scissors
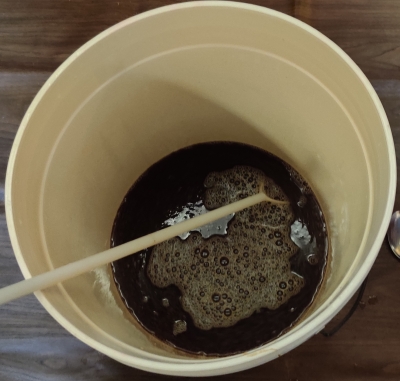
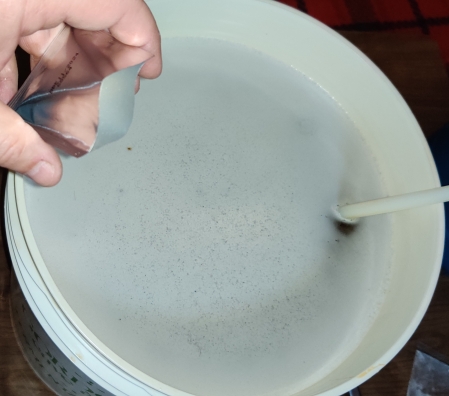
The yeast was pitched into the wort (ie. sprinkled onto the surface of the unfermented beer):
Pitching yeast
Pitching yeast
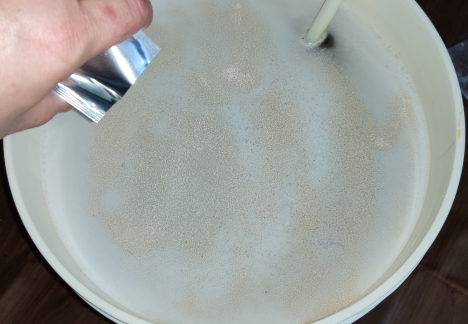
The wort with the yeast was lightly stirred, in order to moisten the yeast and reactivate it:
Wort and yeast lightly stirred
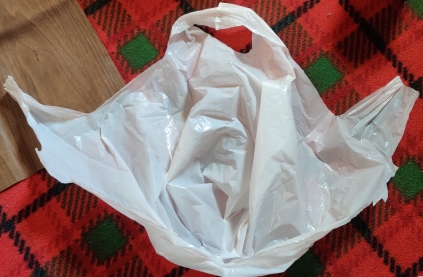
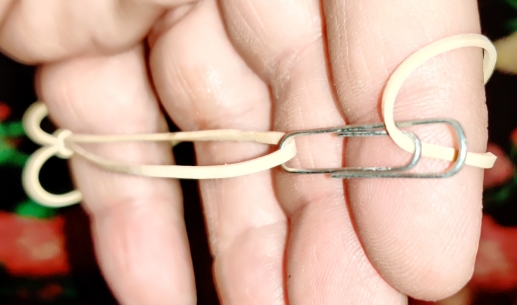
A plastic shopping bag — in fact, one of the bags I’d received when the beer kits had been purchased earlier in the afternoon — was taken out:
Plastic bag taken out
The bag was partially cut so as to allow it to be used as a cover for the fermentation bin:
Bag cut to make plastic cover
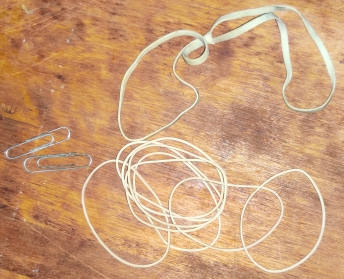
Elastics and paper clips were taken out:
Elastics and paper clips taken out
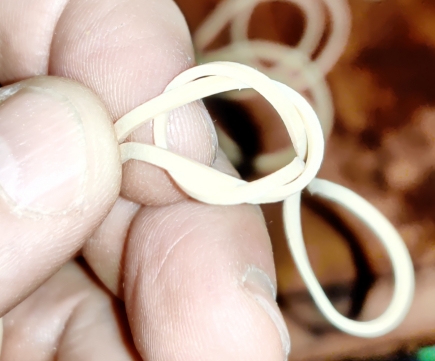
Elastics were looped together:
Elastics looped together
The ends of the looped elastics were joined together with a paper clip to make a “belt”:
Ends of looped elastics joined together
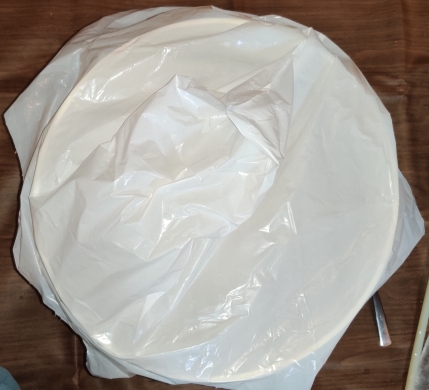
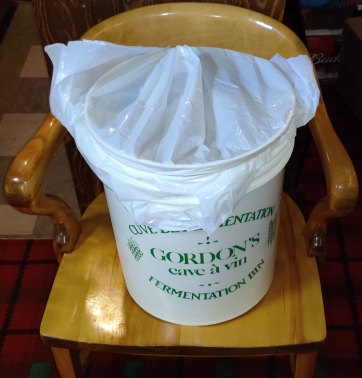
The plastic bag was placed on top of the fermentation bin, covering the wort:
Wort covered with plastic sheet
The elastic loop was wrapped around the plastic sheet to keep it in place on the top of fermentation bin:
Elastic loop wrapped around plastic sheet
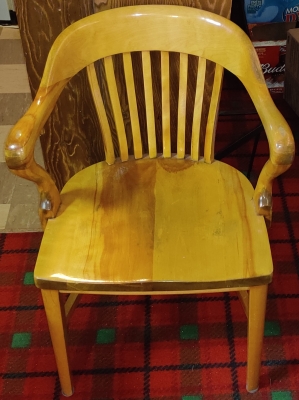
At this point, I had to clear the bar so that I could place the fermentation bin, full of wort, on it:
Bar cleared
A chair was placed beside the bar, so as to help in raising the heavy fermentation bin full of wort:
Chair placed to help lifting the bin full of wort
The heavy fermentation bin full of wort was lifted off the floor and onto the chair, in order to allow me to get a better hold on the bin while lifting it up to the level of the bar:
Fermentation bin full of wort lifted onto chair
The fermentation bin full of wort was then lifted up to the level of the bar:
Fermentation bin full of wort lifted up to bar level
… and finally, the fermentation bin full of wort was moved to the end of the bar, against the wall:
Fermentation bin moved to end of bar
The instructions, principally used as piece of paper on which to identify the type of beer in the fermentation bin, were placed within the elastic loop:
Instructions identifying beer placed in elastic loop
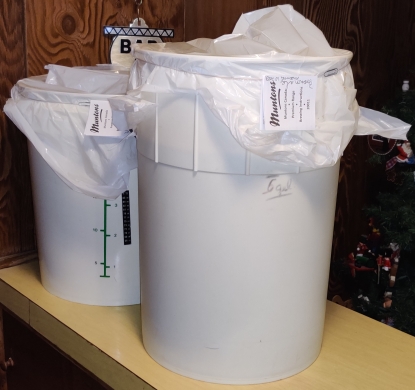
The whole process was repeated for the brown ale beer kit, and producing a second identified fermentation bin filled with wort, placed beside the first bin:
Second fermentation bin filled with wort placed on bar
Day two:
Fourteen hours later (the following morning), I peeked into the fermentation bins, and could see signs of the beginnings of fermentation:
Yeast growth after 14 hours
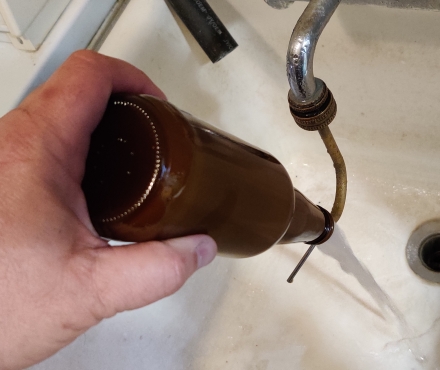
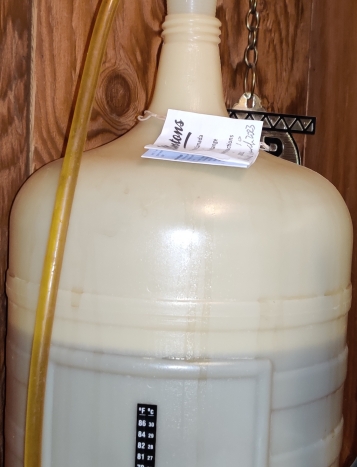
That evening, after about 27 hours had passed, the wort temperature was checked again, and it was barely up to 68F:
Wort temperature up to 68F
… and, at the same time, I peeked again at the wort, noticing more yeast growth:
Yeast growth after 27 hours
Day three:
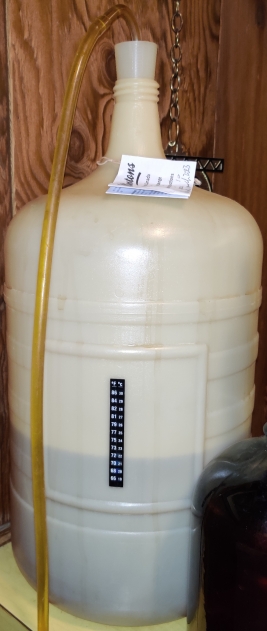
After about 39 hours, I peeked once again at the wort, and the yeast was bubbling away:
Yeast growth after 39 hours
Day six:
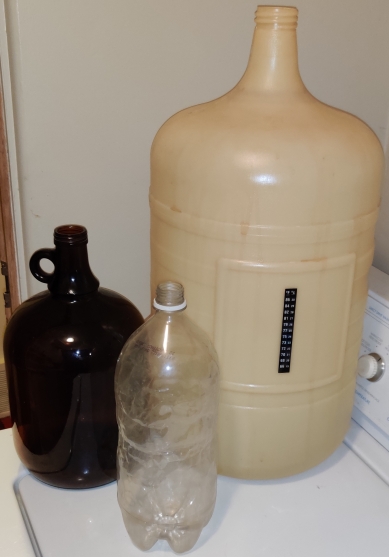
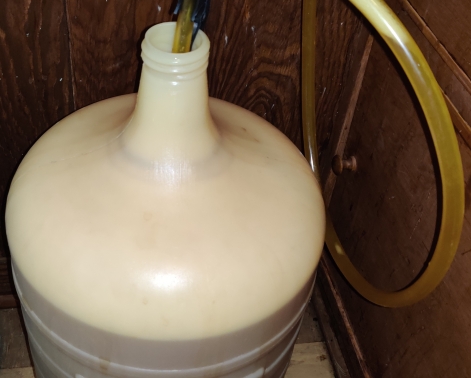
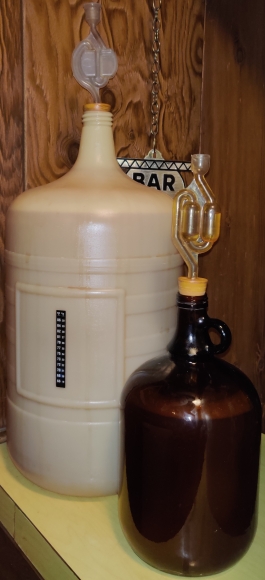
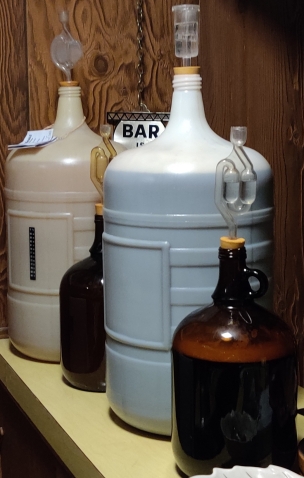
After six days, secondary fermentors were taken out; in this case, a large five gallon plastic bottle, a one gallon jar, and, just in case, a soda bottle for last little bits:
Secondary fermentors taken out
The jet washer was again installed on the tap in the laundry tub:
Jet washer installed again
The secondary fermentors were rinsed out with the jet washer:
Secondary fermentor rinsed
Secondary fermentor rinsed
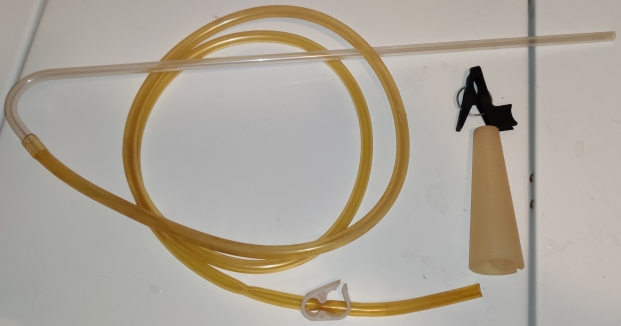
Racking equipment — items used to transfer the now-fermenting liquid easily — were taken out: Plastic tubing, a stiff plastic racking cane, a cone shaped holder to hold the racking cane (including this item was an oops, since I wouldn’t be needing it on this day), and a clip to hold the plastic tubing in place on the edge of the secondary fermentor:
Racking equipment taken out
The racking tubes were rinsed with water:
Racking tube rinsed
The secondary fermentors were placed on the floor of the bar next to where the fermenting beer was located:
Secondary fermentors placed on bar floor
The racking tube was placed in the fermentation bin with the fermenting beer, and leading all the way down to the floor where the secondary fermentors were placed:
Racking tube placed in fermentation bin and leading down to secondary fermentors
The flow of liquid beer was started by sucking on the end of the flexible section of the racking tubing (avoiding to leave any spit!), which was then secured in the neck of the secondary fermentor using the black clip, allowing for the flow of beer from above down below:
Beer flow begun and tubing secured to secondary fermentor neck
Here is the neck of the racking tube in the fermentation bin, with beer flowing through down to the secondary fermentor:
Beer flowing out of the fermentation bin
And here’s a photo of the secondary fermentor as it was filling with fermenting beer:
Secondary fermentor filling up
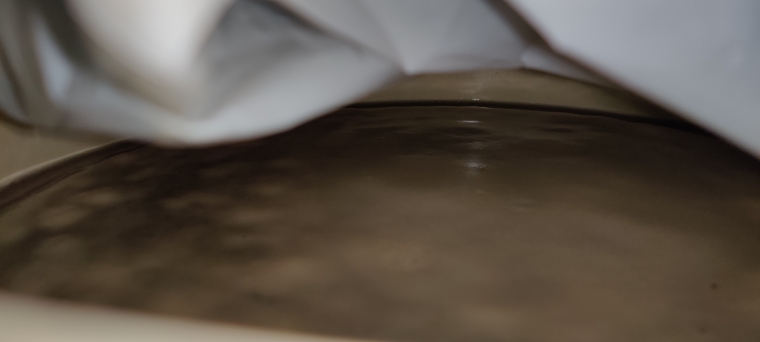
At a certain point when the secondary fermentor was almost full, foam formed up to the top of the secondary fermentor …
Secondary fermentor foaming up
Secondary fermentor foaming up
… and the racking tubing was transferred to the gallon jug:
Racking beer into gallon jug secondary fermentor
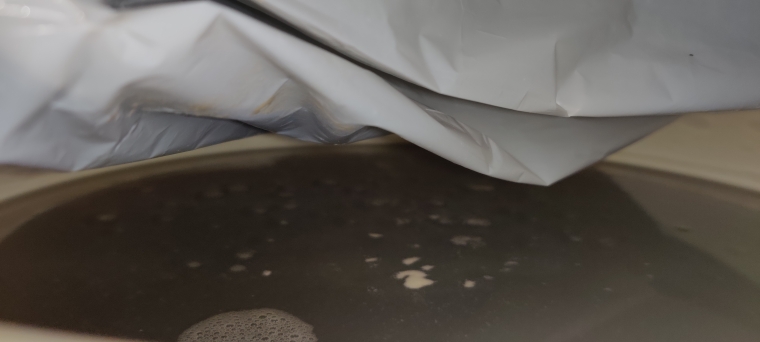
At this point, I should explain that during the primary fermentation, the fermentation was sufficiently vigorous to avoid air getting back in, while during secondary fermentation and the following period during which solids drop to the bottom of the secondary fermentor, the rate of gas production is insufficient to protect the beer from oxidation and contamination from the air outside the fermentor.
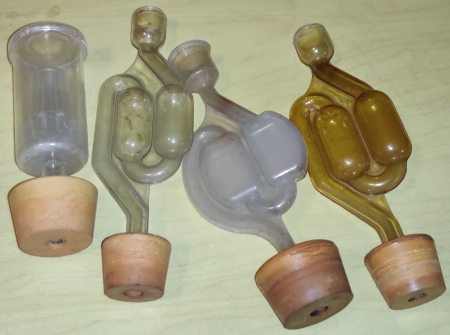
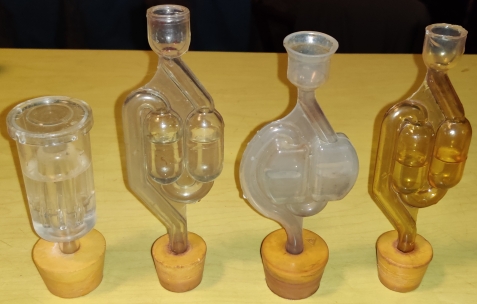
Therefore, airlocks, plugs for the secondary fermentors which allow gas — in this case, carbon dioxide produced by the yeast fermenting the dextrose into alcohol — to escape the secondary fermentors while keeping air from getting back in, were taken out:
Airlocks taken out
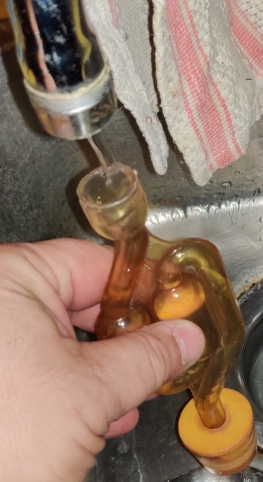
Airlocks were filled with water:
Airlock filled with water
Airlocks filled with water
Water-filled airlocks were fitted onto the now-filled secondary fermentors, which were raised up to the level of the bar:
Airlocks fitted to secondary fermentor
Airlocks fitted to secondary fermentors, and secondary fermentors raised to bar level
At the bottom of the fermentation bin, there was a sediment of dead and dying yeast:
Sediment at bottom of fermentation bin
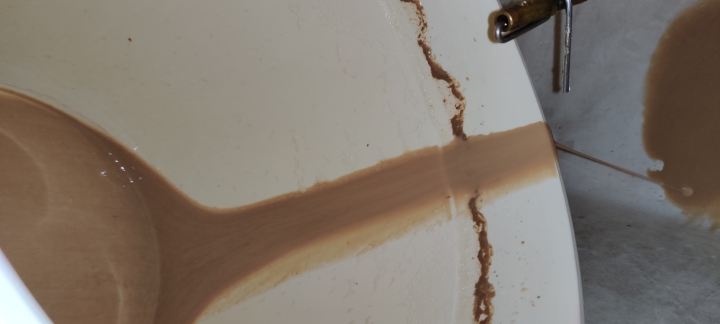
The fermentation bin was brought to the laundry tub, and the sediment was drained out:
Sediment drained from fermentation bin
The fermentation bin was washed and rinsed with the jetwasher and a rag (not shown):
Fermentation rinsed with jetwasher
Washed and rinsed fermentation bin
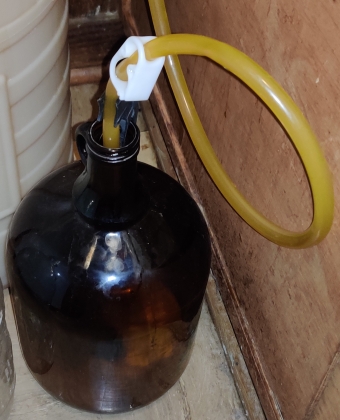
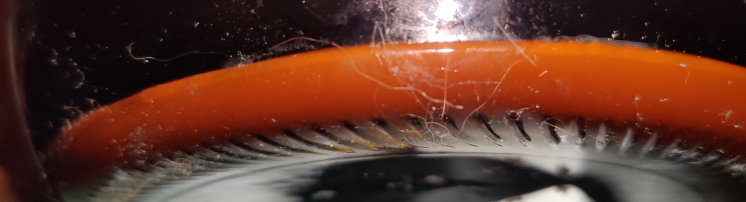
The airlock was already bubbling at this point:
Airlock bubbling
The whole process was repeated for the other beer, the brown ale, and at this point, a second set of identified secondary fermentors filled with beer was placed beside the first set of secondary fermentors:
Two sets of secondary fermentors with two kinds of beer
Day nine:
At this point, sediments had formed in the secondary fermentors:
Sediment in secondary fermentor
You should start this now if you haven’t already:
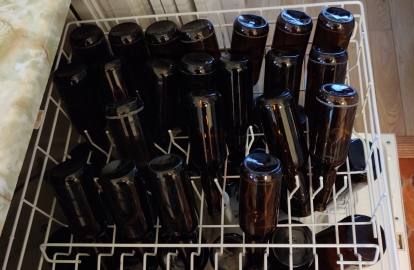
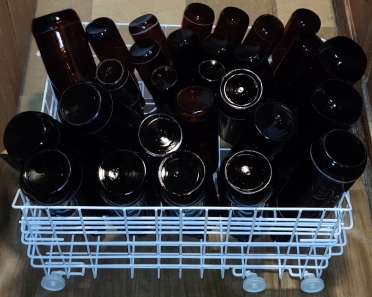
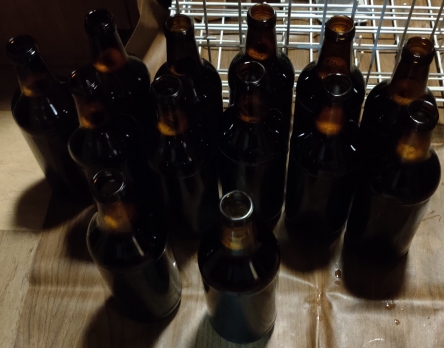
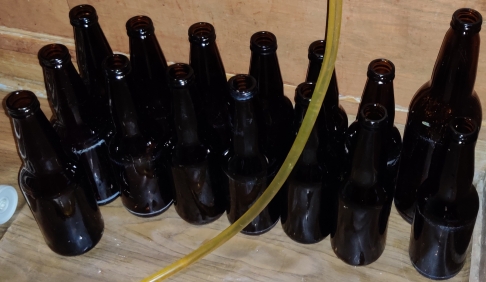
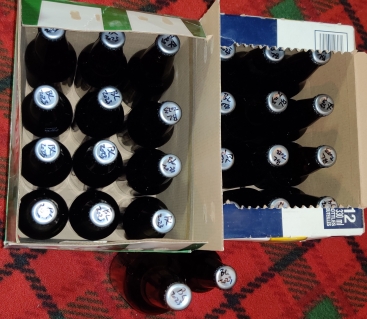
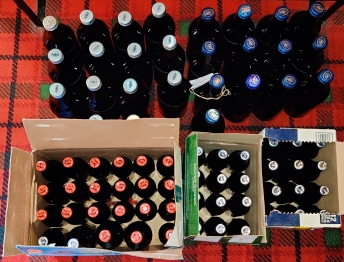
Normally, I have a collection of cleaned and de-labeled beer bottles in storage. Should you not have an adequate number of bottles for bottling your beer — 23 litres requires about 66 or thereabouts 341mL bottles, or equivalent — by now you should begin collecting them.
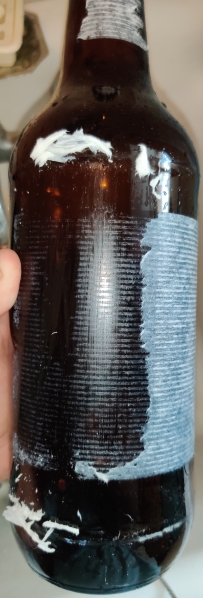
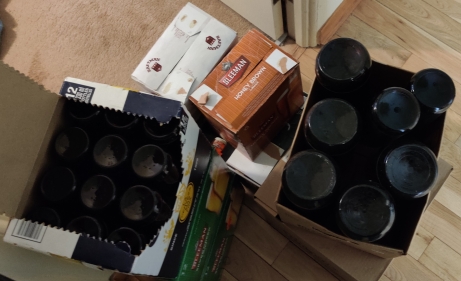
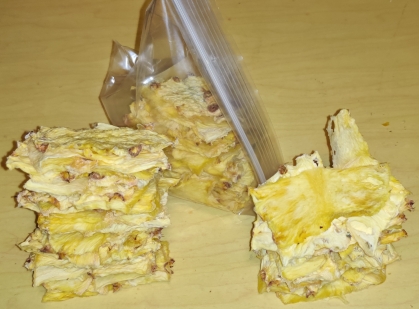
Normally, I get beer bottles from city streets; as I am walking about in the streets, I am continuously on the lookout for empty beer bottles to reuse for my beer; fortunately for brewers like myself, but in more general terms unfortunately, in the general area where I live, they are far more common and abundant than I might want to admit, and, surprisingly, most are in excellent condition! In the following few pictures, I show the cleaning of larger 1.18 litre bottles, since I use them as well as regular 341 mL bottles for beers I produce sometimes.
Other places to get beer bottles are to buy beer at stores, consume the beer, and then clean the bottles; or, ask friends and family to save beer bottles for you; and, be really nice with the bottle return clerk at the store and politely ask them if you may pay the bottle deposits on empty returned beer bottles.
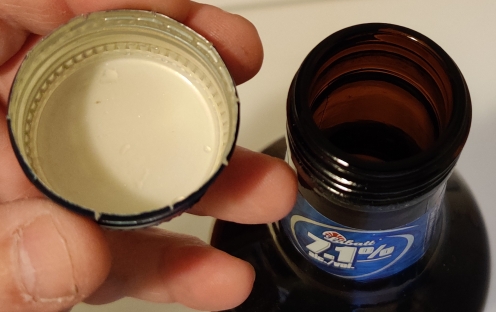
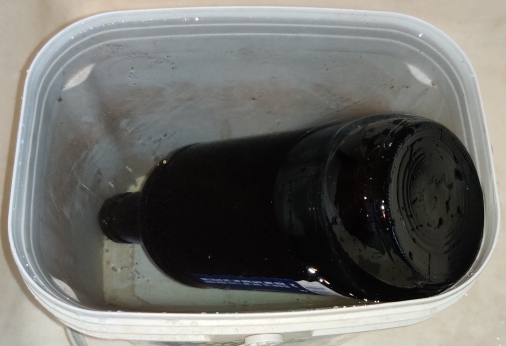
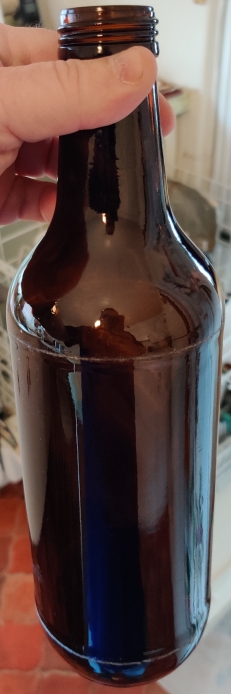
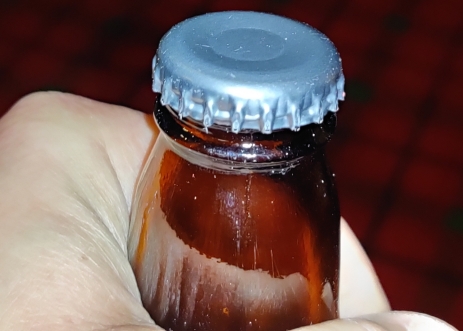
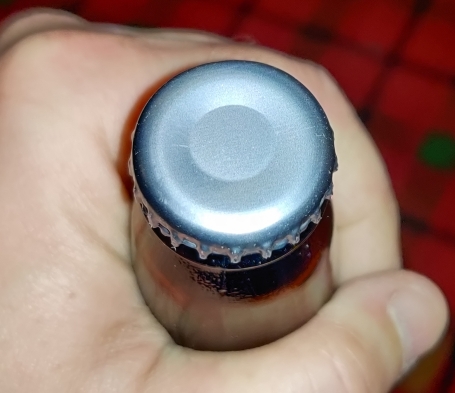
Hence, an empty bottle was taken out:
Empty beer bottle to be cleaned and delabled
The cap was unscrewed from the bottle, and kept:
Cap removed from bottle
The bottle was inspected for chips, cracks, and any other defects:
Bottle inspected for defects
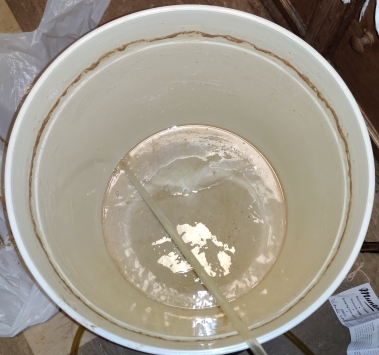
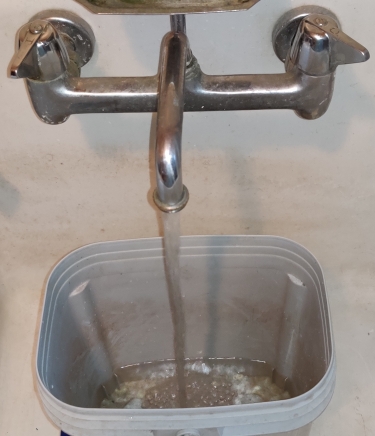
A plastic bucket was partly filled with water for soaking off the labels:
Bucket filled with water for soaking labels
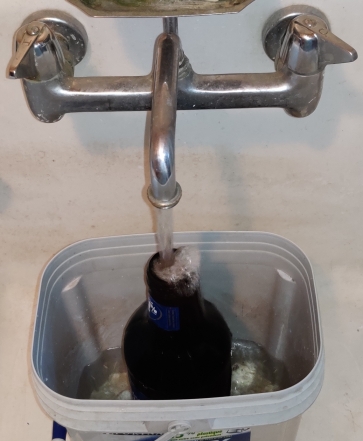
The bottle was placed in the bucket and filled with water …
Bottle filled with water
Once filled, the bottle was turned over (in order to properly soak the label on the neck), and the bucket was almost fully filled with water:
Bottle turned over and bucket filled with water
Bottle turned over and bucket filled with water
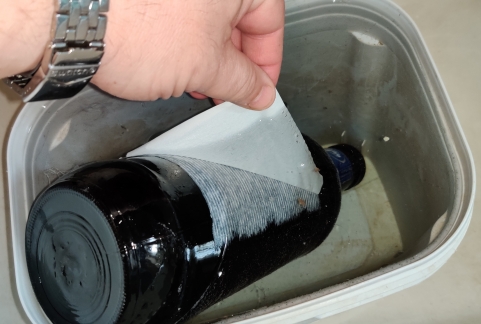
After a while, the label was carefully removed from the bottle:
Label removed from bottle
Label removed from bottle
Label removed from bottle
Label removed from bottle
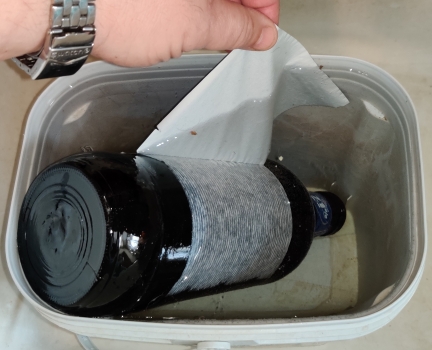
An old vegetable scraping brush was taken out:
Brush taken out
The brush and partially delabeled bottle were brought together …
Brush used to scrape off vestiges of label from bottle
… and the vestiges of the label were removed …
Vestiges of label partly removed from bottle
Vestiges of label mostly removed from bottle
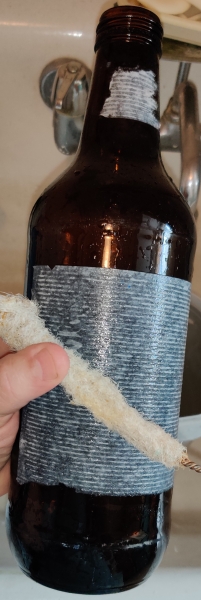
… including the glue:
Vestiges of label glue scraped off
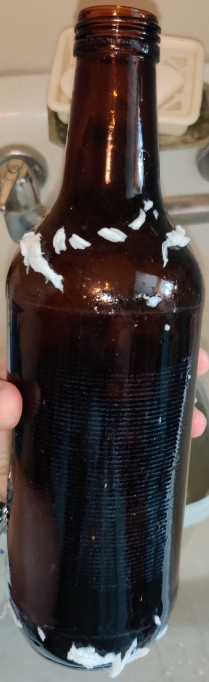
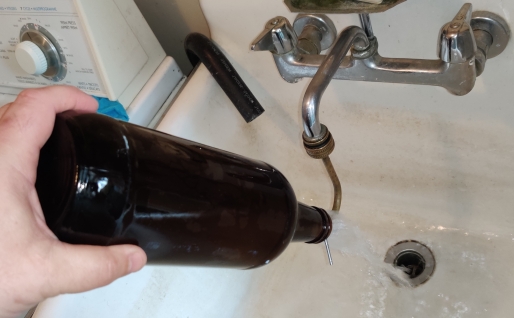
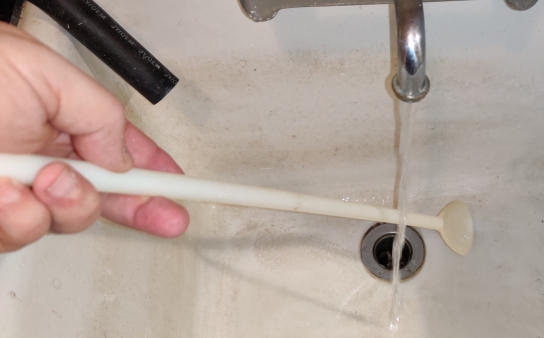
Yet again, the jet washer was installed onto the tap in the laundry tub:
Jet washer installed
… and the bottle’s interior was rinsed with the jet washer:
Bottle interior jet washed
The bottle’s cap, which for these bottles and cap model can be reused if in good condition, was removed from the soaking water:
Cap removed from soaking water
The cap was jet washed:
Jet washing cap
The bottle and cap were placed in the dishwasher with other dishes, to be washed and sanitized before storing for bottling day:
Bottle and cap placed in dishwasher
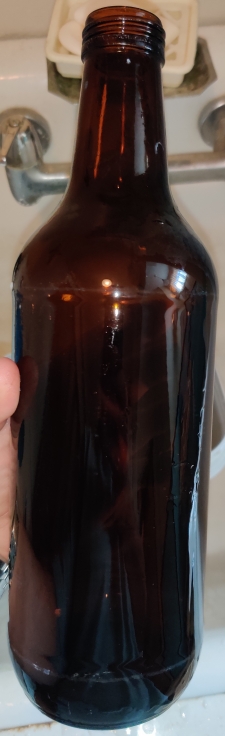
After the dishwasher had been run, the clean bottle was taken out, ready to be stored in anticipation of bottling day:
Clean bottle ready for storage
After three weeks:
On bottling day, clean bottles were taken out to bottle the beer:
Clean bottles taken out
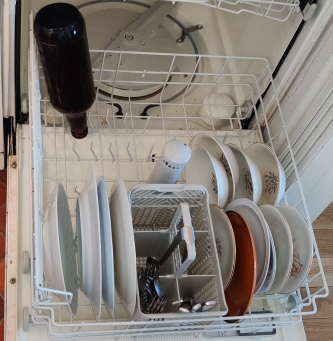
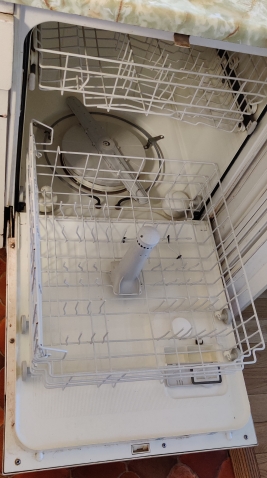
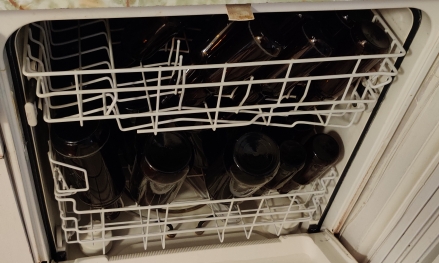
The dishwasher had been previously run to clean dishes, and then the clean dishes were all taken out, leaving an empty and clean dishwasher:
Clean and empty dishwasher
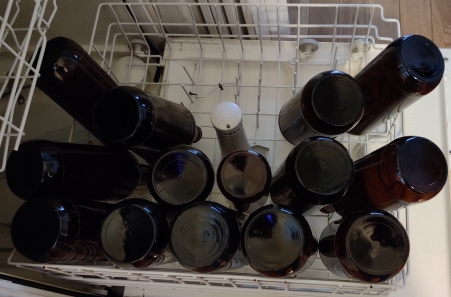
Large, 1.18 litre beer bottles were placed in the dishwasher:
Large bottles placed in dishwasher
Small, 341 mL beer bottles were placed in the lower rack of the dishwasher alongside the larger beer bottles …
Small beer bottles placed in dishwasher
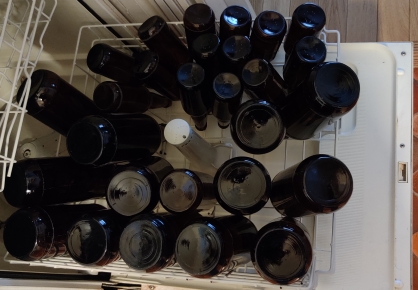
… as well in the dishwasher’s upper rack:
Small beer bottles placed in the dishwasher’s upper rack
The dishwasher racks were rolled into the dishwashwer …
Dishwasher racks rolled into dishwasher
The dishswasher door was closed, and the dial set to start running the dishwashwer (without any soaps):
Dishwasher set to operate
At this point, with the dishwasher running, I took out another beer and glass:
Beer and glass taken out
The beer was poured into the glass:
Beer poured into glass
And the beer was enjoyed:
Beer enjoyed
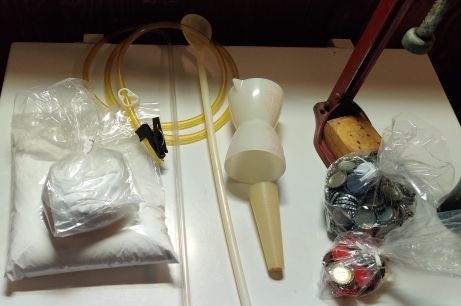
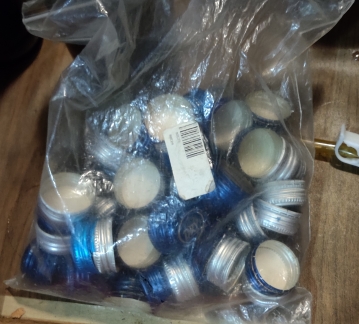
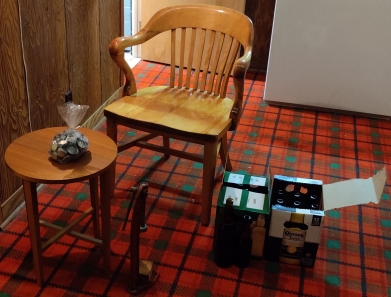
Various supplies and equipment were taken out for bottling, such as more dextrose to mix into the beer (to carbonate the beer once bottled), a racking tube, a large plastic mixing spoon, a measuring cup, a cone used to hold the racking cane in place in the secondary fermentors, a measuring cup to measure out the dextrose, some bottle caps for the smaller bottles, and the bottle capper for securing the caps on the smaller bottles. Missing: Caps used for larger bottles.
Supplies for bottling the beer
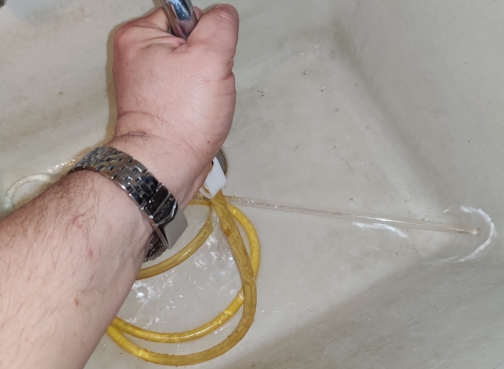
The racking tube and cane were rinsed with water:
Racking tube and cane rinsed
The long plastic spoon was rinsed:
Mixing spoon rinsed
The jet washer was installed again:
Jest washer installed
The original fermentation bin was taken out:
Fermentation bin taken out
The fermentation bin was rinsed with the jet washer:
Fermentation bin rinsed with jet washer
The rinsed fermentation bin was brought over to the bar:
Rinsed fermentation bin brought to bar area
Dextrose was measured out:
Dextrose measured out
The dextrose was brought to the fermentation bin:
Dextrose brought to the fermentation bin
The dextrose was poured into the fermentation bin:
Dextrose poured into fermentation bin
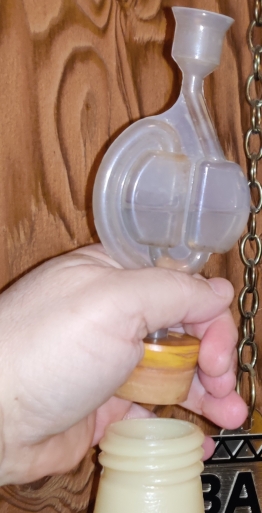
The conical cane holder was placed on the racking cane:
Conical cane holder installed on racking cane
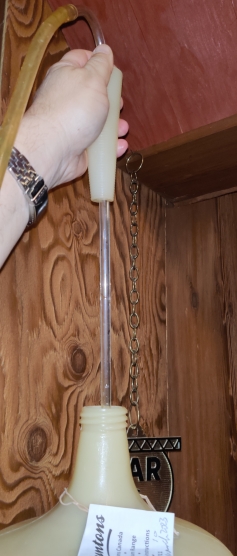
The airlock was removed from the secondary fermentor whose beer was going to be racked:
Airlock removed from secondary fermentor
The racking cane was carefully placed in the secondary fermentor whose beer was about to be racked:
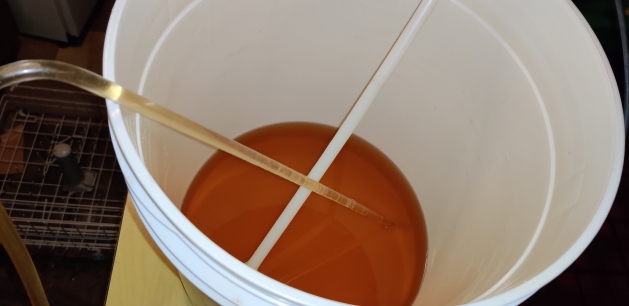
Racking cane placed in secondary fermentor
I sucked a bit on the end of the tubing to start the transfer of the beer from the secondary fermentor …
Beer transferring from secondary fermentor
… which allowed for the beer to be siphoned off and transferred to the primary fermentor with the dextrose, which was on the floor of the bar:
Beer transferring to fermentation bin
Beer level in secondary fermentor becoming lower
As the beer was transferring to the fermentation bin at floor level, I stirred the beer a bit to dissolve the dextrose:
Beer stirred to dissolve dextrose
As the beer was being transferred, the level in the secondary fermentor kept on dropping:
Beer level in secondary fermentor becoming lower
Once the liquid had been fully transferred from the secondary fermentor, I transferred the racking tube to the gallon jug:
Racking tube transferred to gallon jug
… until it too was empty:
Both secondary fermentors emptied
The large secondary fermentor was jetwashed …
Secondary fermentor jetwashed
… as was the gallon jug:
Secondary fermentor jetwashed
At this point, the original fermentation bin was filled with the beer, and was thoroughly mixed again:
Fermentation bin filled with beer, and beer mixed
While the beer was still being racked, a section of the bar was cleared again …
Section of bar cleared
… the plastic cloth was placed on the floor beside the cleared section of the bar …
Plastic cloth placed on floor
… and the fermentation bin with the beer was raised up to the bar again, with the racking cane and tubing having been placed in the bucket and draping down to floor level:
Beer raised to level of bar
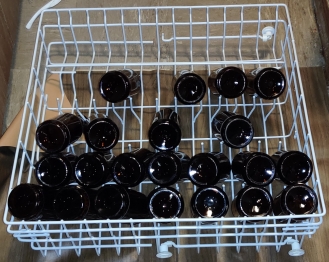
At this point, the dishwasher had finished operating, so the bottom rack with the large 1.18 litre and some 341 mL bottles were brought downstairs to the bottling area:
Rack of sanitized bottles brought to bottling area
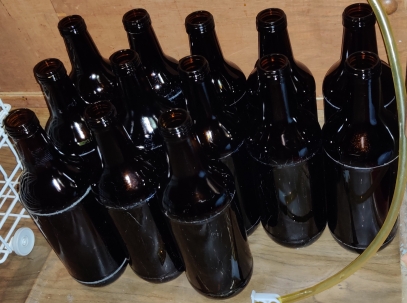
Large 1.18 litre bottles were taken out of the rack and stood upright for filling:
Large bottles stood upright for filling
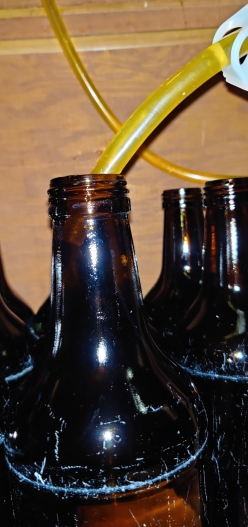
The racking tube was primed (flow started) and used to fill bottles one by one:
Filling beer bottles
Filling beer bottles
Filling beer bottles
Filled beer bottles
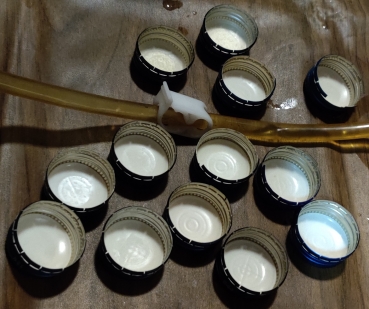
The clean caps were taken out:
Clean caps taken out
Clean caps taken out
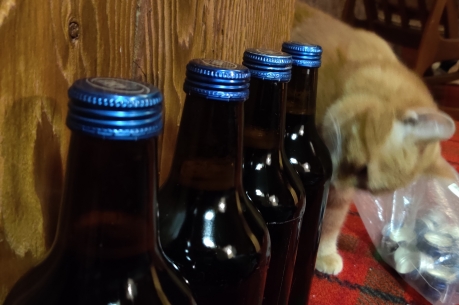
… and the bottles were capped, and moved out of the bottling area. And here is my cat helping out with the beer bottling!
Bottles capped and cat helping
All 1.18 bottles capped
Smaller 341 mL and a single 750 mL bottles were taken out of the dishwasher rack and stood upright for bottling:
Regular beer bottles stood upright for bottling
The regular-sized beer bottles were filled with the racking tube:
Regular-sized bottles filled with beer
The filled beer bottles were moved out of the filling area as they were filled:
Regular-sized bottles filled with beer
At this point, the level of beer in the fermentation bin had gotten low, however it still contained several bottles of beer:
Beer still left in fermentation bin
Also at this point, all the bottles from the lower rack of the dishwasher had been filled with beer:
Dishwasher rack empty
The upper rack from the dishwasher was brought down to the bottling area:
Upper rack brought to bottling area
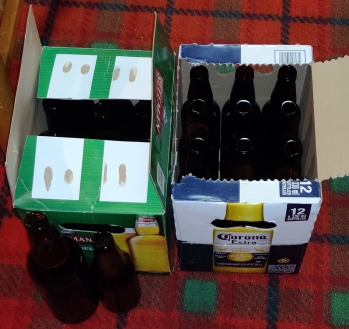
The rest of the beer was bottled, and the uncapped bottles were placed in beer cases in order to facilitate moving them over to where I capped the bottles:
Filled beer bottles placed in beer cases
At this point, I had set up my capping station, and had moved the cases of filled beer bottles there:
Bottle capping station
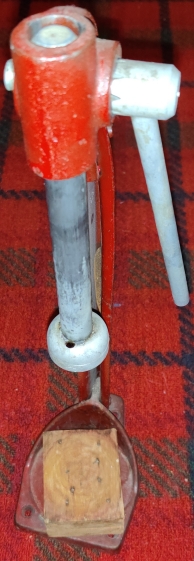
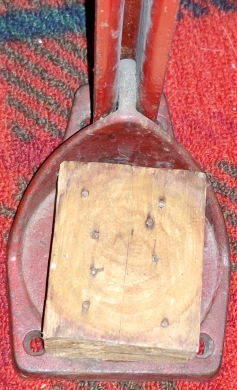
My beer bottle capper was taken out, along with a wooden booster to accomodate “modern” beer bottles, which are shorter than the tall bottles for which the capper seems to have been designed:
Beer bottle capper with wooden booster
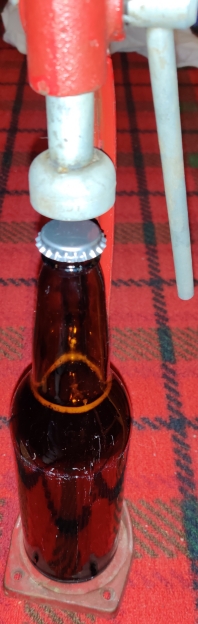
Uncrimped beer bottle caps were placed on bottles one at a time …
Uncrimped beer bottle cap placed on bottle
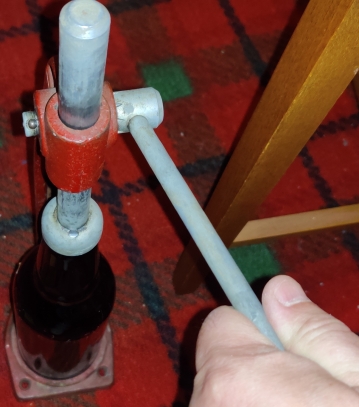
Bottles with caps were placed in the bottle capper, starting with a tall bottle not needing the wooden booster …
Bottle placed in capper
… and the plunger was pushed down over the cap, in order to crimp it onto the bottle:
Bottle cap crimped
… producing a capped and sealed bottle of beer:
Capped and sealed bottle of beer, showing crimping around edges
Capped and sealed bottle of beer, showing the depressed top of the cap
The wooden booster was placed back on the base of the capper:
Wooden booster placed in capper
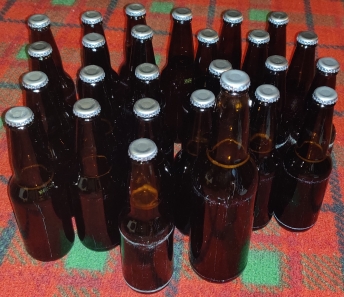
The bottles of beer were all capped:
Beer bottles capped
A permanent marker was taken out:
Permanent marker taken out
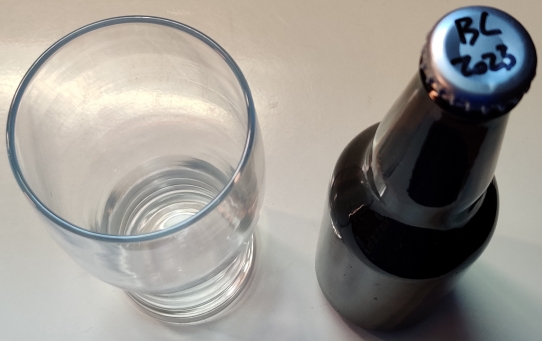
The tops of the bottles were identified, in this case with “BL” for the blonde beer, and 2023 … for the year 2023. 🙂
Bottle caps identified
Bottle caps identified
The bottles were placed back in beer cases:
Beers placed back in cases
Here are all the bottles of beer of the blonde beer:
All bottles of blonde beer
The bottling process was repeated for the brown ale:
Bottles of blonde beer and brown ale
After nine weeks:
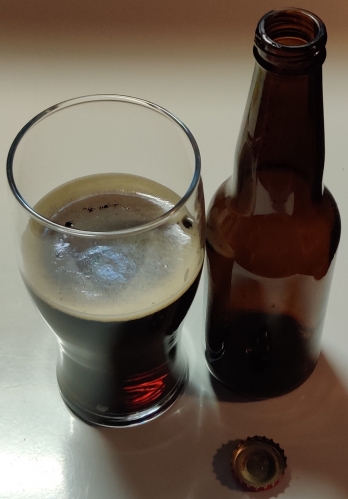
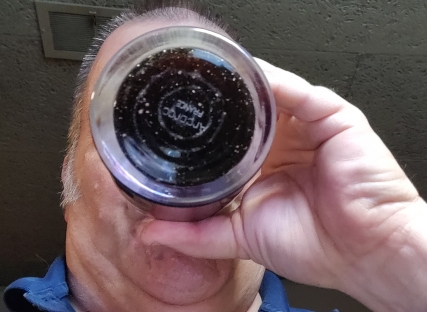
Of course, the beer had to be taste tested, so a bottle of the blonde beer, as well as a glass, were taken out:
Blonde beer and glass taken out
The bottle was held up to the light of a window to check that it had cleared on its own:
Beer checked for clarity
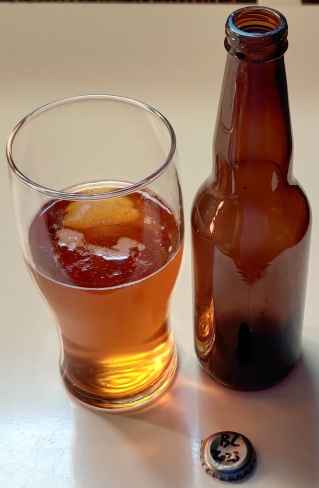
The blonde beer was poured into the glass …
Beer poured into glass
… and the beer was enjoyed:
Beer enjoyed
The beer is now ready to be consumed on … well, poor weather postponed the Canada Day festivities where I live, so it will be ready when Canada Day is rescheduled!
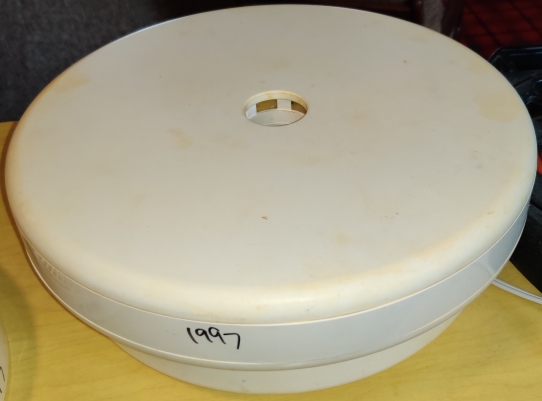
www.malak.ca is hosted by myself on an old desktop computer in my bedroom, using my home internet connection. The general specs are:
Dell Vostro 420 Series (64bits) — BIOS date of October 24, 2008
Intel(R) Core(TM) 2 Quad CPU @ 2.66GHz (with hyperthreading), with a clock speed of 333MHz; L1d cache 128KiB (4 instances); L1i cache 128KiB (4 instances); L2 cache 6MiB
8GB (4 x 2GB) memory, clock speed 800MHz
HD: 240GB SSD (OS and blog)
External USB hard drive: 1TB (static website data and other stuff)
Currently, it is running Fedora Linux version 37 Workstation Edition. Using the Server Edition for such a small, home-grown vanity project seemed unnecessary given a comfort level with the Workstation Edition and, since at its core, the two editions are subsets of the same OS. Ultimately, missing packages from one edition compared to the other are a “dnf install” command away. (As for a longer-term distro, I have always been a Red Hat user, so Debian or an Ubuntu LTS release aren’t interesting to me, while the new community respins of RHEL have neither captured my imagination, nor do they hold sufficient appeal anymore on a technical level.) Hence, I started from the Edition with which I and my brother (the technical heavy-lifter) are familiar, which allows for the (admittedly rare) use of a GUI as needed.
The filesystems are with ext4 on the boot partition of the SSD, as well as on the external USB hard drive; I use ext4 because I’m used to it, but can’t truly say I know, or can recommend, one filesystem from or over the next. UPDATE: I checked the filesystems and … the boot partition is ext4, and the SSD’s data portion seems to have defaulted to BTRFS; there you go, proof I don’t know much about the differences between various filesystems and their comparative advantages and disadvantages. 🙂
December 2017: IBM ThinkCentre, circa 2003 era and running CentOS 7.X (retired due to a suspected thermal event)
Sometime after 2017 and until April 2020: A Core 2-duo circa possibly 2010 era, running various current Fedora versions up to version 31 (repurposed due to power issues)
April 2020: IBM ThinkCentre, circa possibly 2006 or 2007 era, running Fedora 31 to Fedora 37 (retired due to unknown problems causing constant reboot cycles, which were not fully investigated)
But to wit, since hosting www.malak.ca myself, it has always been on my home internet service, a DSL line with a (now-)paltry 6.05MBit-ish down and, what, 0.67MBit-ish up capacity, which for reasons beyond the scope of this post had not been upgraded for (best I can remember) over 20 years.
Time marching on and the increase of devices in the household meant that while still minimally usable and just functional, the internet connection regularly became inadequate for daily use, and barely usable for things like weekly simultaneous videoconferences (and with slightly-more-than-tacit rules of “no other internet usage during said weekly dual videoconferences” and the like.) The slow internet access, especially the slow uplink, affected a blogging project started in late 2020 showing pictures of the preparation of my recipes from my collection by limiting photo sizes not only as a good idea for reasons of netiquette, page layout and formatting, but as an outright necessity given the limited upload capacity (thank you WordPress for lazy-loading!)
Well, last week we finally upgraded the internet package to cable with 120MBit down and 20MBit up. Interestingly, we had had a cable modem for a few years in the late 1990’s until it became quite unusable and made a switch to DSL; as a side note, a box, some equipment inside it, and some cable wiring from that period were still attached to the outside of the house, not having been removed at the time, and were still compatible and usable when we got the install last week.
As such, www.malak.ca now has decent upload speeds!
This is a relatively new addition to my collection of recipes, after having looked through an old community cookbook given to me by a neighbour. It is based on a near-identical recipe obviously (and expressly) intended to use up leftovers from a roast pork Sunday dinner; however, after trying the original recipe, which called for the use of brown sugar and apple slices, I decided to omit the sugar, which made the dish too sweet, and the apples, which didn’t suit us, and replaced them with cooked carrots.
This cooking session occurred in early April, 2023; for a variety of reasons, including the sheer number of photos to organize and prepare for this post — I went into overdrive! — it has taken a bit more than three weeks for me to build this blog post. Also, for the sake of the narrative, the photo progression presented here occasionally differs from the precise progression of when the photos were taken, either because of some mise-en-place activities, actual progression of the food preparation, photo shooting (and occasionally its impact on progression), several operations occurring concurrently, and the like.
Preparing the dish:
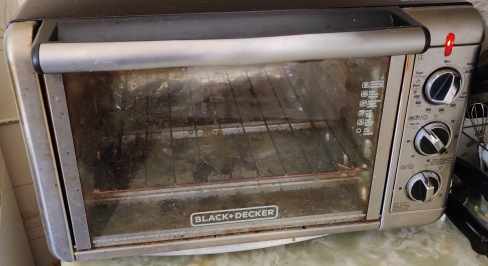
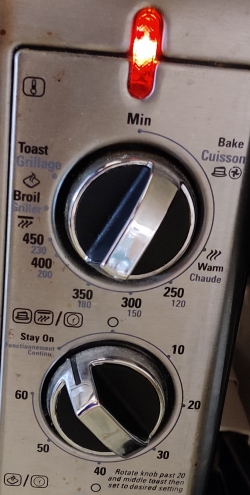
Firstly, a countertop convection oven was turned on:
Countertop oven turned on
Countertop oven turned on
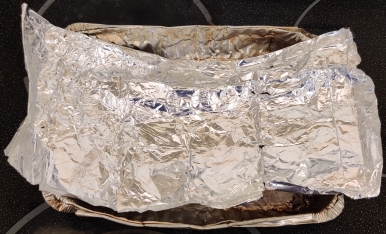
A roasting tray was taken out:
Roasting tray taken out
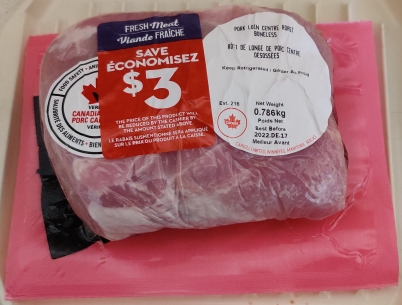
A package of (frozen) pork loin, defrosted prior to the cooking session, was taken out:
Defrosted pork loin taken out
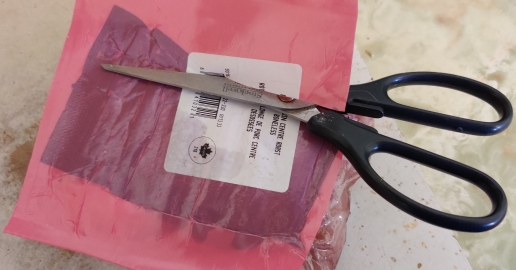
Scissors were taken out to open the vacuum pack sealing the pork:
Scissors taken out
The pork loin’s vacuum pack was cut open:
Packaging cut open
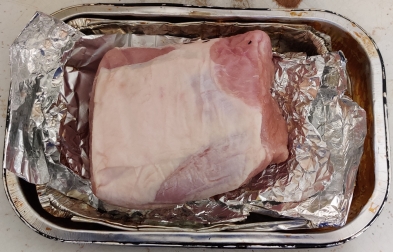
The pork loin, removed from the vacuum pack, was placed in the roasting tray:
Pork placed in roasting tray
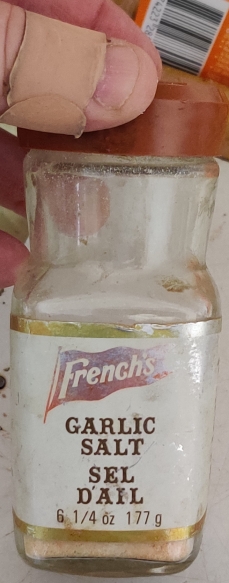
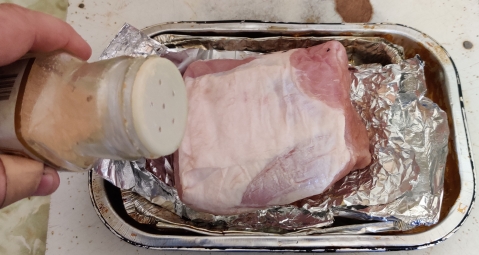
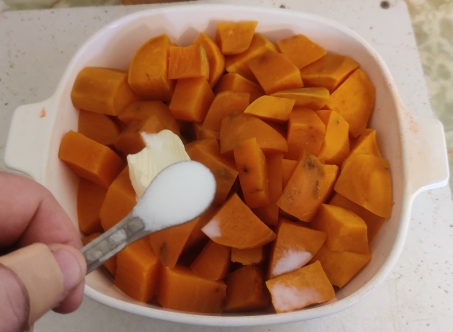
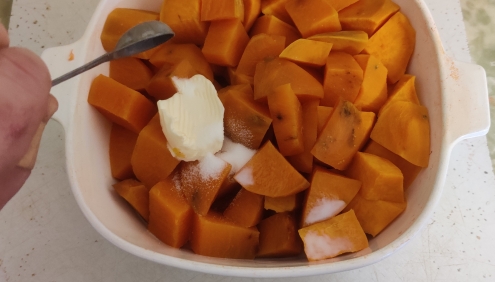
Garlic salt was taken out:
Garlic salt taken out
Garlic salt was liberally shaken on top of the pork loin:
Garlic salt shaken onto pork
Garlic salt shaken onto pork
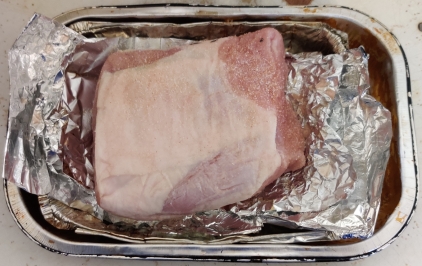
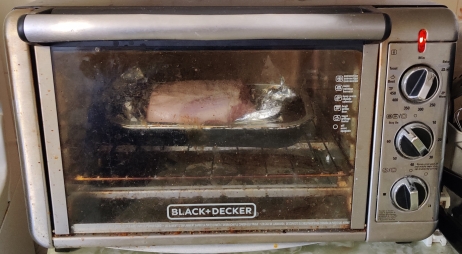
The pork loin was placed in the countertop convection oven:
Pork placed in countertop convection oven
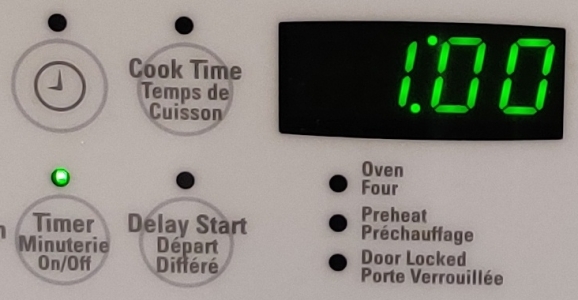
A timer was set for an hour as a reminder for how long to cook the pork loin:
One hour set on timer
A pot was taken out for boiling carrots:
Pot taken out for boiling carrots
A scale was taken out to know roughly measure out the right amount of carrot:
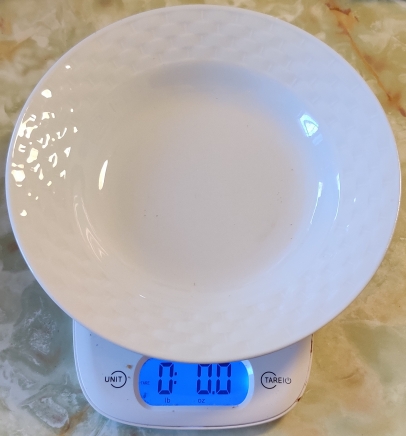
Scale taken out to measure carrots
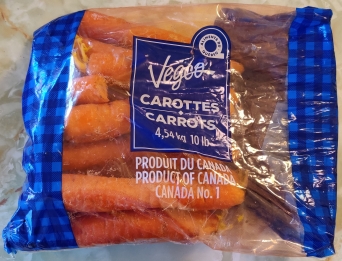
Carrots were taken out:
Carrots taken out
About a quarter pound of carrot — in this case, a single carrot — was taken out of the bag:
Quarter pound of carrot measured out
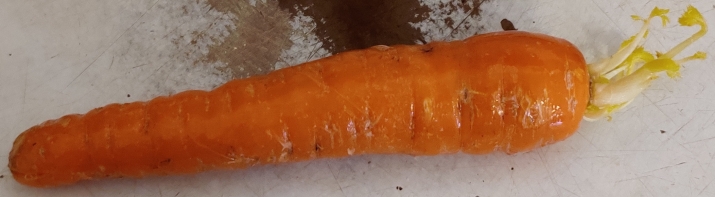
The carrot was cleaned and rinsed:
Carrot rinsed
The cleaned carrot was placed on a cutting board:
Cleaned carrot placed on cutting board
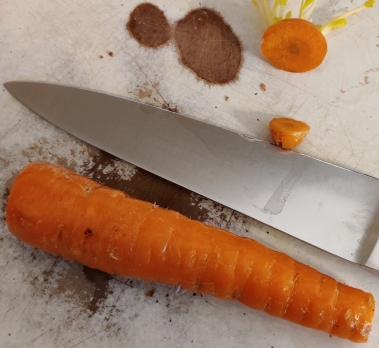
The carrot was trimmed:
Carrot trimmed
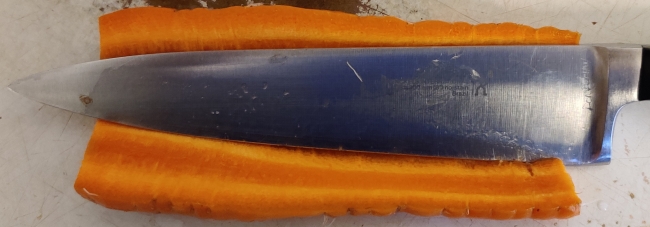
The carrot was sliced lengthwise:
Carrot sliced lengthwise
… and again sliced a few more times to make carrot spears:
Carrot sliced lengthwise to create spears
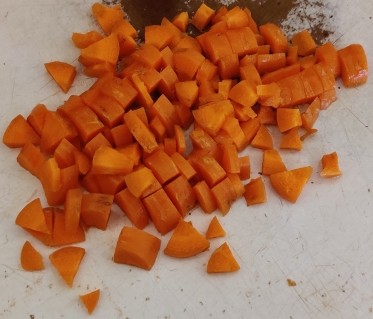
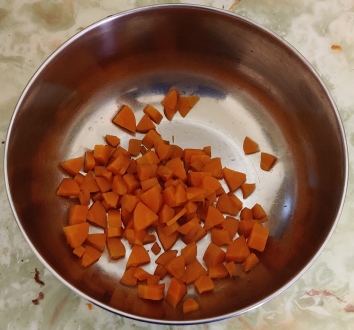
The carrot spears were chopped:
Carrots chopped
Carrots chopped
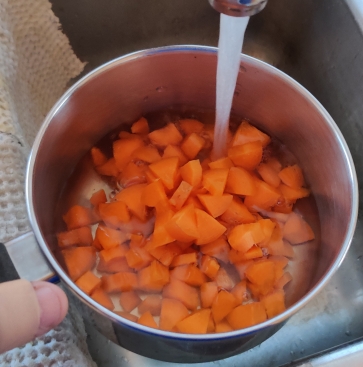
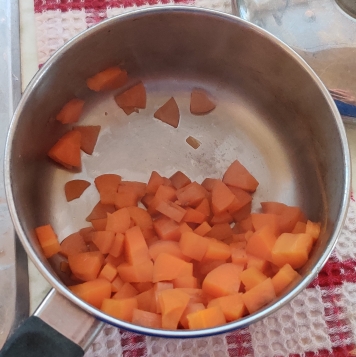
The chopped carrots were transferred to the pot:
Chopped carrots transferred to pot
Chopped carrots transferred to pot
Water was added to the pot of chopped carrots until the carrots were covered:
Water added to pot of carrots
Water added to pot of carrots
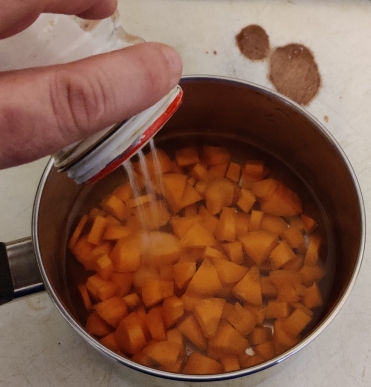
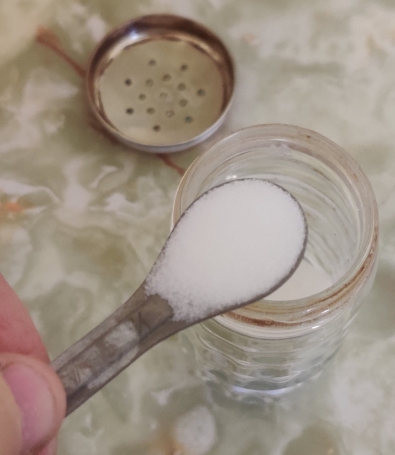
Salt was added to the carrots and water:
Salt added to water and carrots
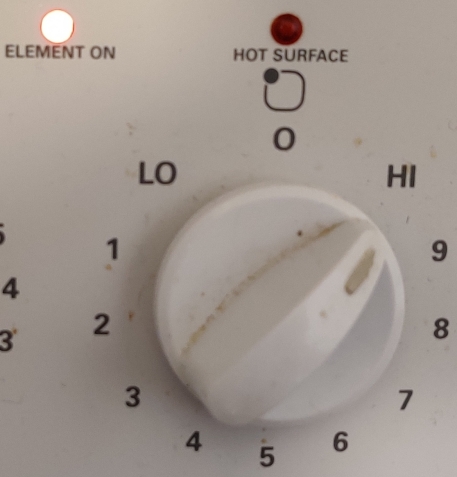
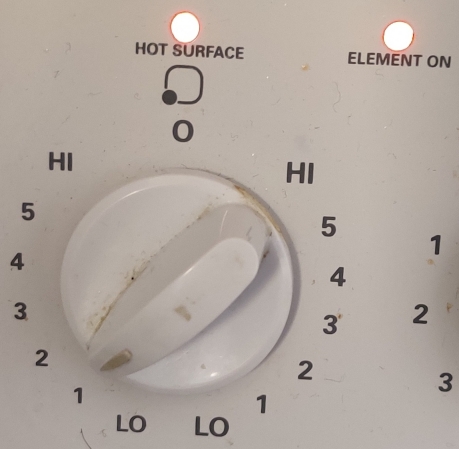
A stove burner was turned on:
Stove burner turned on
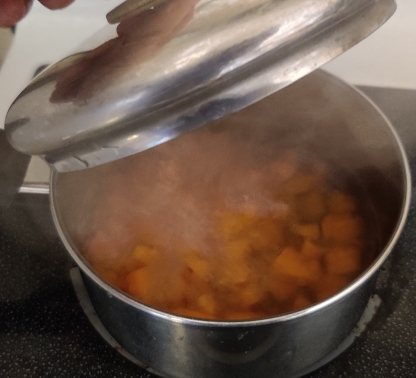
The carrots were brought to a boil …
Carrots brought to a boil
Once the carrots were boiled for about ten minutes, the boiling water was drained off:
Boiling water drained from pot
A mixing bowl was taken out in which to transfer the carrots:
Mixing bowl taken out
The boiled carrots were transferred to the mixing bowl:
Boiled carrots transferred to mixing bowl
Boiled carrots transferred to mixing bowl
The carrots were put aside for a bit.
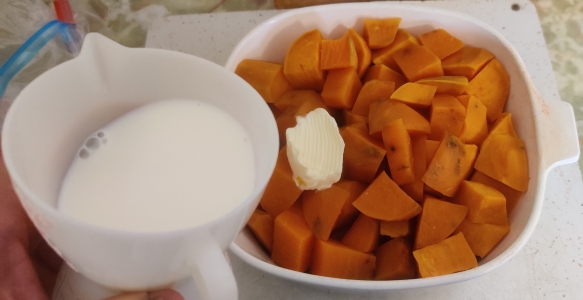
A microwave-safe cooking vessel was taken out, ready for a few moments later when the sweet potatoes would be peeled:
Microwave-safe cooking vessel taken out
Microwave-safe cooking vessel taken out
A bowl was placed on the scale, and the scale set to zero:
Bowl placed on scale, scale set to zero
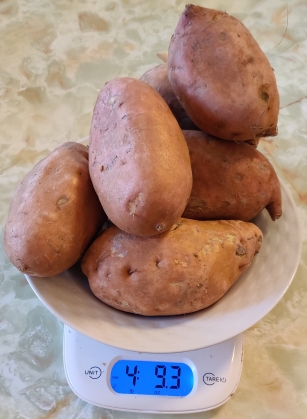
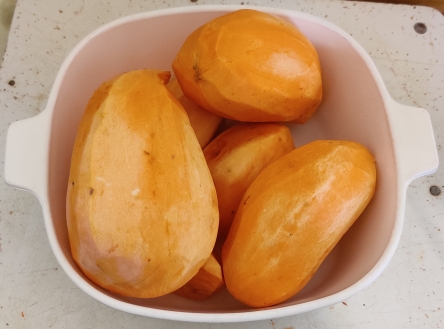
A bit more than four pounds of sweet potatoes were measured out:
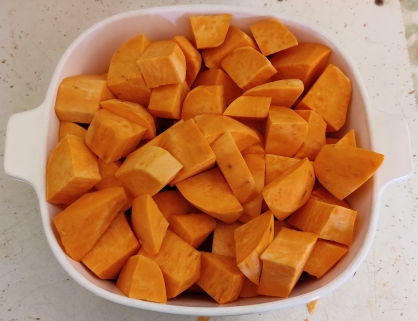
Sweet potatoes taken out
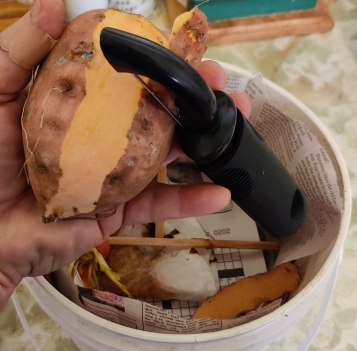
A potato peeler was taken out:
Potato peeler taken out
The sweet potatoes were peeled, with the peels placed in a bucket to keep for later disposal in a municipal composting programme:
Sweet potatoes peeled
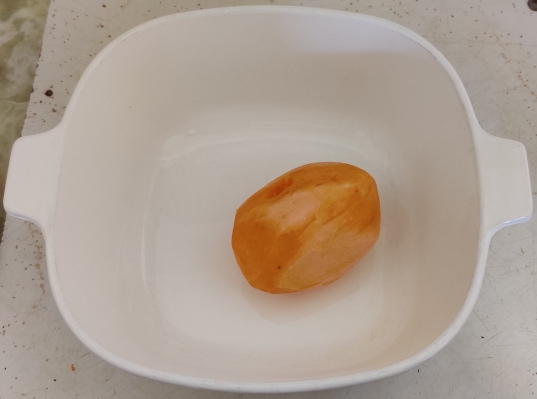
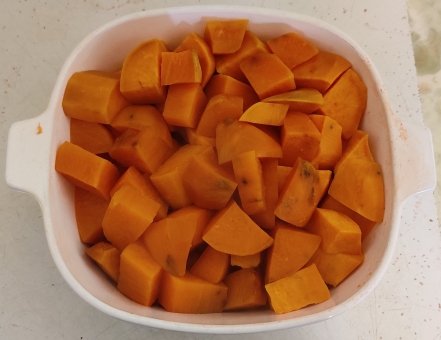
Peeled sweet potatoes were placed in the microwave-safe cooking vessel:
Peeled sweet potato placed in cooking vessel
Peeled sweet potato placed in cooking vessel
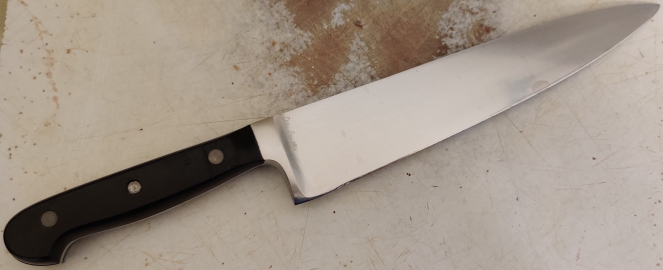
A kitchen knife was taken out:
Kitchen knife taken out
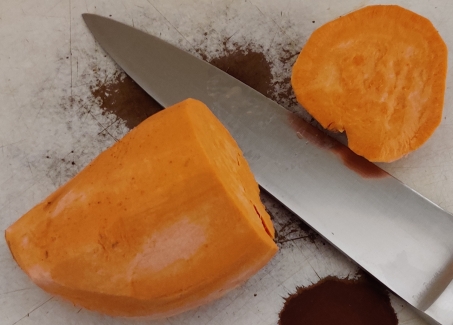
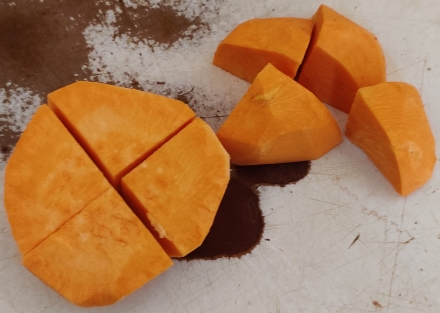
The sweet potatoes were sliced and quartered:
Sweet potatoes sliced and quartered
Sweet potatoes sliced and quartered
… and placed back in the microwave-safe cooking vessel:
Sweet potato quarters placed in cooking vessel
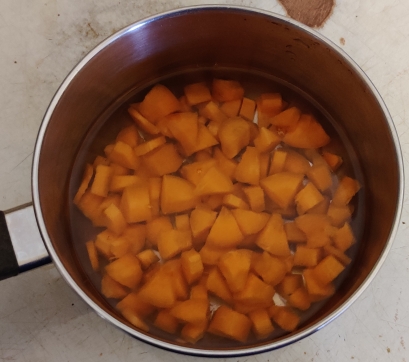
Water was added to the cooking vessel …
Water added to cooking vessel
… to about a bit below the surface of the sweet potatoes:
Water added to cooking vessel
The vessel was covered …
Sweet potatoes covered
… and placed in the microwave oven:
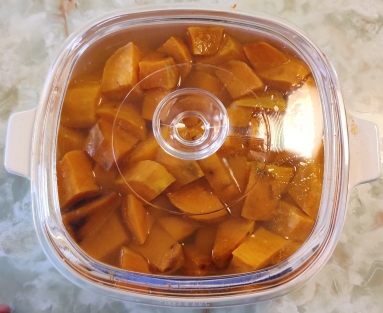
Sweet potatoes placed in microwave oven
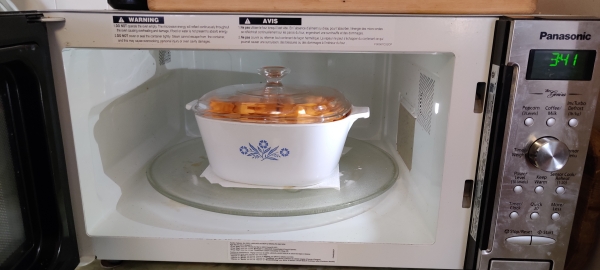
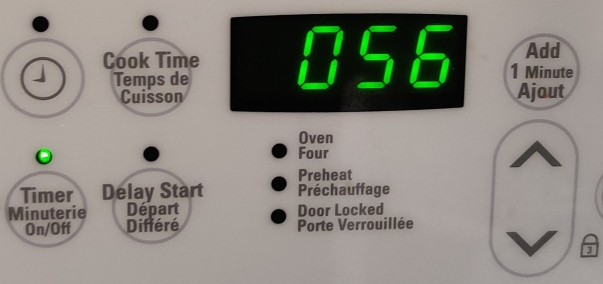
The microwave oven (1200 watts) was set to 18 minutes:
Microwave oven set to eighteen minutes
… and the microwave oven was turned on:
Microwave oven turned on
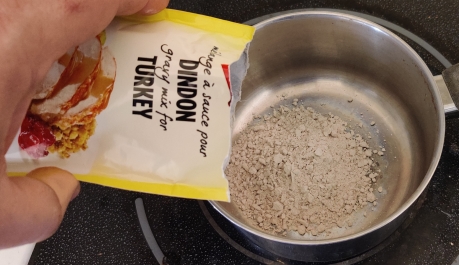
While the sweet potatoes were cooking, a package of dried gravy mix — turkey gravy, which is what I had on hand, and in a package that makes a cup’s worth of gravy, as called for in the recipe, was taken out:
Gravy mix taken out
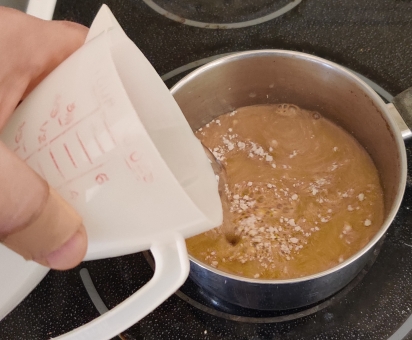
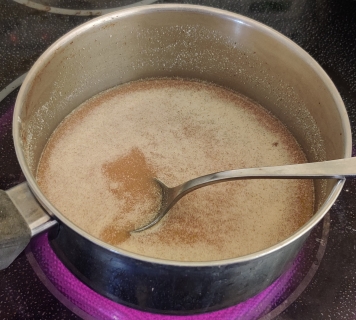
The gravy packet was opened and its contents transferred to another pot that was taken out:
Gravy mix added to pot
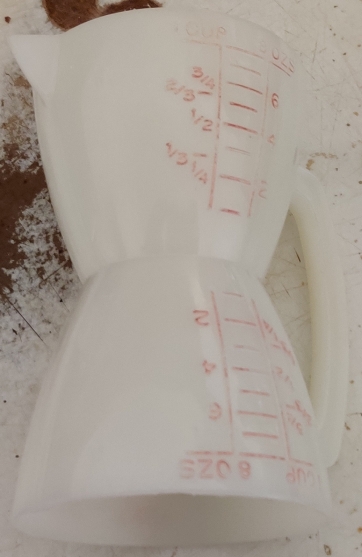
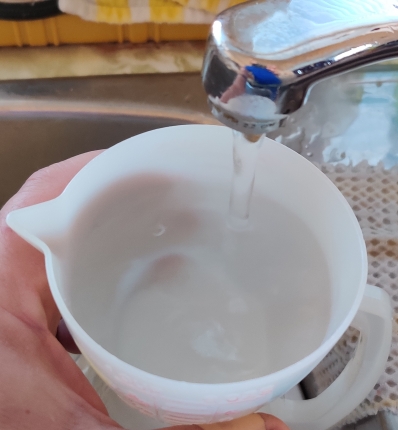
A measuring cup was taken out:
Measuring cup taken out
A cup of water was measured out:
Water measured out
The water was added to the pot:
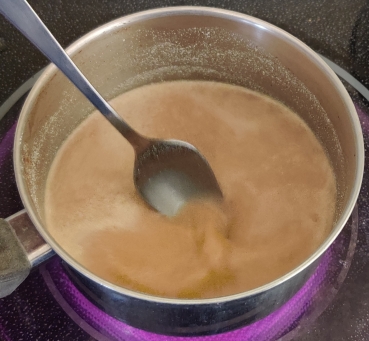
Water added to gravy mix
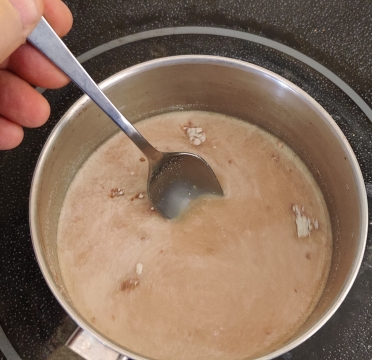
The gravy mix and water were mixed with a spoon:
Gravy mix and water mix
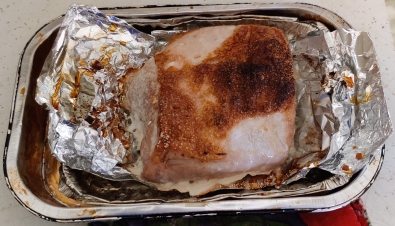
The gravy was put aside, since the time on the roast pork ran out:
Pork taken out of oven
A meat thermometer was taken out …
Meat thermometer taken out
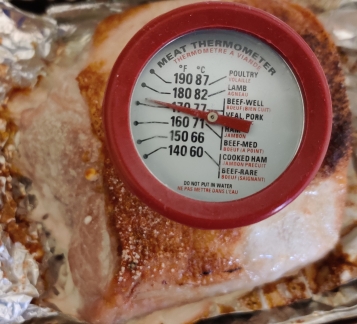
… and stuck into the pork, giving a temperature reading just right for fully cooked pork:
Meat thermometer reading of cooked pork
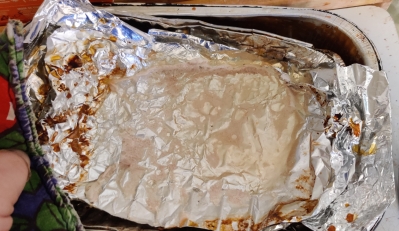
The pork was removed from the roasting pan:
Pork removed from roasting pan
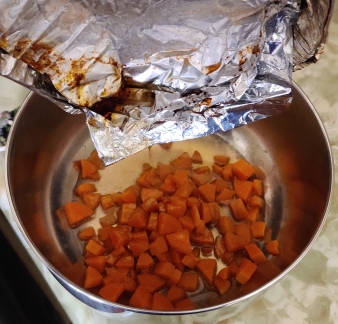
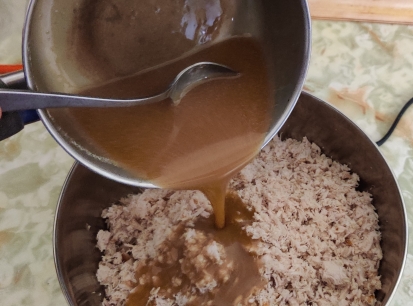
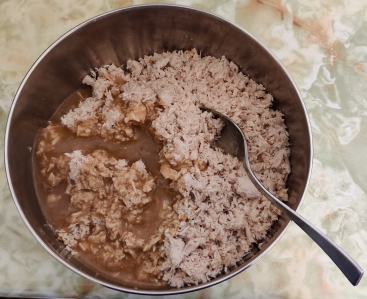
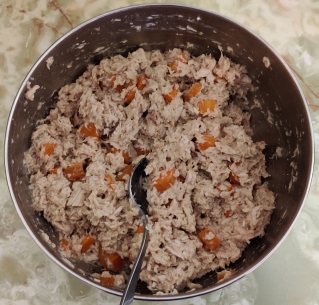
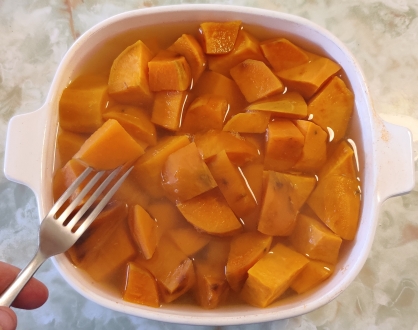
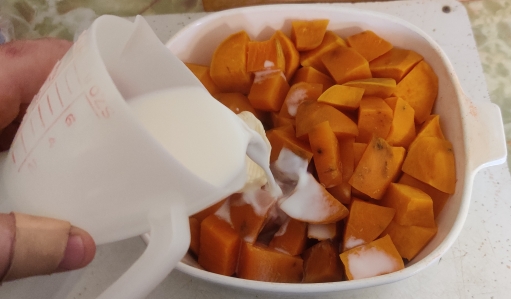
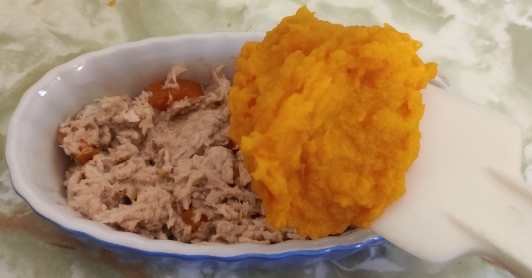
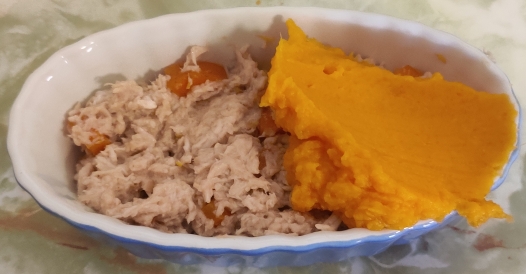
… and the juices in the roasting pan were drained into the bowl with the cooked carrots
Pork juices drained into bowl with cooked carrots
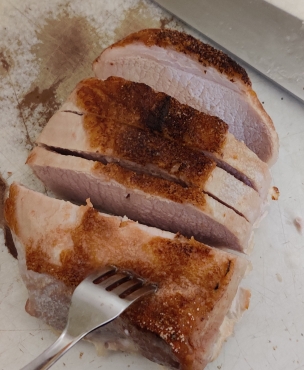
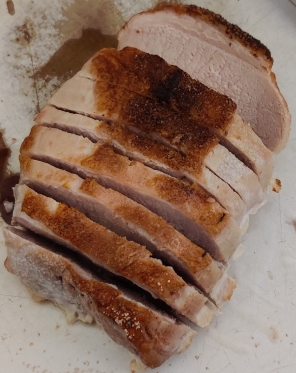
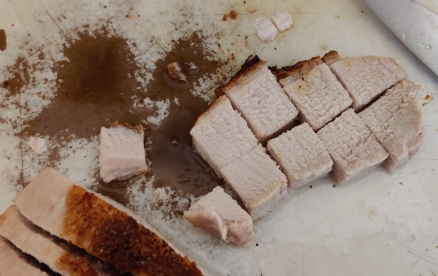
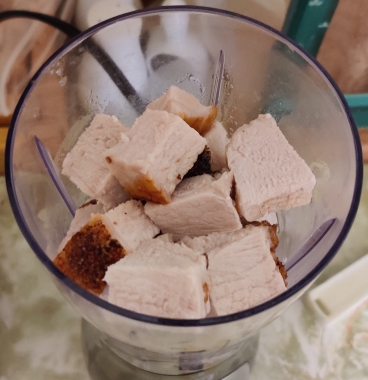
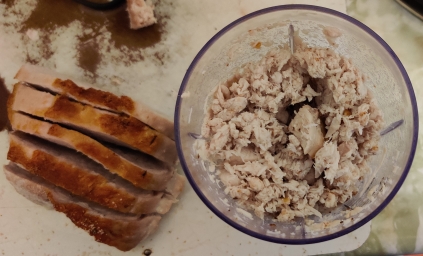
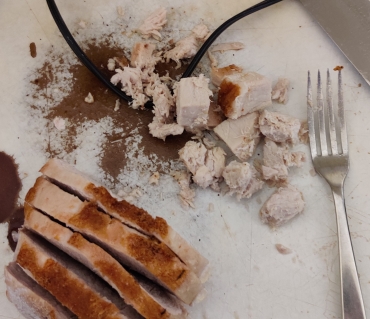
The roast pork was sliced thickly:
Pork sliced thickly
Pork sliced thickly
The roast pork was cut into cubes:
Pork cut into cubes
A small blender with chopping blades was taken out …
Blender with chopping blades taken out
… and the blender was plugged in:
Blender plugged in
Cubes of roast pork were placed in the blender …
Cubes of pork placed in blender
… and the lid placed on top of the blender:
Blender lid installed
The pork was ground finely without creating a mush:
Pork ground
The chopped pork was transferred to the bowl with the cooked carrots and pork juices:
Ground pork transferred to bowl with carrots
Ground pork transferred to bowl with carrots
Larger bits of pork which did not get ground finely enough were removed from the bowl, to be ground again with more pork cubes:
Larger bits of pork removed from bowl to be reground with the rest of the pork
The rest of the pork was ground and transferred to the mixing bowl.
Returning to the gravy, a burner on the stove was turned on, in this case, the smaller inner part of a larger burner which has two settings:
Stove burner turned on
Gravy being heated
The gravy was constantly mixed while being heated, to avoid burning:
Gravy constantly mixed
Once the gravy came to a boil, the timer was set to a minute …
One minute set on timer once gravy boiling
… while the burner setting was reduced to just about minimum to only allow for simmering:
Stove burner setting reduced
Once the minute ran out, the gravy was poured over the ground pork and carrots:
Gravy poured into bowl with pork and carrots
Gravy poured into bowl with pork and carrots
The gravy, ground pork, and carrots were mixed with the spoon:
Pork, carrots, and gravy mixed
At this point, oven-proof dishes were taken out, for filling:
Oven-proof dishes taken out
The meat mix was spooned into containers to about half full, and spread out evenly:
Meat mix transferred to oven-proof dish
Meat mix transferred to oven-proof dish
Oven-proof dishes filled with meat mix
At this point, I came back to the sweet potatoes, which had long since finished cooking in the microwave oven:
Cooked sweet potatoes taken out of microwave oven
The sweet potatoes were checked with a fork to see if they were properly cooked through, which they were:
Cooked sweet potatoes checked for degree of cooking
The water was drained off of the sweet potatoes:
Cooking water drained
A container of margarine was taken out and opened:
Margarine container taken out
Margarine container opened
A dollop of margarine was taken from the margarine container with a spoon:
Dollop of margarine taken from container
The margarine was added to the sweet potatoes:
Margarine added to sweet potatoes
Margarine added to sweet potatoes
A measuring cup and milk were taken out:
Milk and measuring cup taken out
Milk was measured out:
Milk measured out
The milk was added to the sweet potatoes and margarine:
Milk added to sweet potatoes
Milk added to sweet potatoes
Measuring spoons were taken out:
Salt was taken out:
Salt taken out
Salt was measured out:
Salt measured out
The salt was added to the sweet potatoes:
Salt added to sweet potatoes
Salt added to sweet potatoes
An electric mixer was taken out, to mash the sweet potatoes:
Electric mixer taken out
The electric mixer was plugged in:
Electric mixer plugged in
The sweet potatoes were mashed with the electric mixer:
Mashing sweet potatoes with electric mixer
Mashing sweet potatoes with electric mixer
Sweet potatoes mashed
A plastic icing spreader was taken out:
Plastic icing spreader taken out
Mashed sweet potatoes were picked up with the icing spreader …
Mashed sweet potato picked up with icing spreader
… and, back to the containers with the pork, gravy, and carrots mix, the mashed sweet potatoes were spread on top of the meat mix :
Mashed sweet potatoes spread on top of meat mix
Mashed sweet potatoes spread on top of meat mix
Mashed sweet potatoes spread on top of meat mix
Mashed sweet potatoes spread on top of meat mix
Plastic bags were taken out and identified and dated:
Bags taken out and identified
The dishes were placed in the individual bags:
Dishes placed in bags
And finally, the bagged dishes were placed in the freezer:
I bought a food dehydrator in early 1997 while I was still involved as an adult member in Scouting, and began by drying (mostly) various fruits for Scout Troop camping trips; Troop members were eager to test out the results of my efforts. While I am no longer involved in Scouting, I have continued drying fruits; I quickly decided that my favourite by far was dried pineapple, which comes out like candy to me.
A short overview of my very early experiences with drying food, from a Scouting perspective, is at what would have been a blog back in the late 1990’s before blogs were a thing at https://www.malak.ca/super.html#dried.
Drying the pineapples:
I keep an eye out for sales on pineapples, and brought home six pineapples last week:
Six pineapples (one is on its side)
I brought my cutting board, knife, and corer down to the bar area downstairs, where I normally do my fruit drying:
Cutting board, knife, and corer taken out
A bucket for the compostable trimmings was also set out:
Bucket for compostable trimmings taken out
My food dehydrator was of course taken out, with all its extra trays …
Food dehydrator and trays taken out
… and the unit was plugged into an extension cord caddy that was plugged into an outlet in an adjoining room, since the bar has an old outlet that doesn’t accept polarized plugs:
Food dehydrator plugged in
The food dehydrator was set to 135F for drying fruits and vegetables:
Food dehydrator temperature set
Now to the pineapples: The labels and their plastic tags were removed from the pineapples:
Labels removed from pineapples
A pineapple was placed on its side in order to trim off the top:
Pineapple placed on its side
The top of the pineapple was sliced off:
Top of pineapple sliced off
Top of pineapple sliced off
The top of the pineapple was placed in the scraps bucket:
Top of pineapple placed in scraps bucket
Pineapple tops in scraps bucket
The pineapple was rotated so as to slice off the bottom:
Bottom sliced off pineapple
Bottom sliced off pineapple
The bottom of the pineapple was placed in the scraps bucket:
Pineapple bottom placed in scraps bucket
Pineapple bottom placed in scraps bucket
The pineapple is now ready for the rest of the trimming:
Pineapple ready for trimming
I started trimming the skin off the pineapple:
Trimming the skin off the pineapple
Trimming the skin off the pineapple
As part of trimming the skin off the pineapple, sometimes the bottoms have to be trimmed too because of the somewhat rounded shape of pineapples, making it tricky sometimes to trim off the skin in full slices:
Bottoms to be trimmed as well
The trimmed pineapple skins …
Trimmed pineapple skins
… were placed in the scraps bucket:
Pineapple skins placed in scraps bucket
Pineapple skins placed in scraps bucket
The trimmed pineapple was again placed on its side …
Pineapple placed on its side
… and sliced into two halves roughly at its centre, essentially to accommodate the length of my corer, although the resulting slices tend to be of a convenient size as well:
Pineapple cut in half
Two pineapple halves
An apple corer was used to remove the pineapple cores:
Coring half of a pineapple
Coring half of a pineapple
Cored pineapple half
I began slicing pieces off the cored pineapple half, roughly two milimetres thick:
Slicing piece off pineapple
Slicing piece off pineapple
The slices were placed on a drying tray:
Sliced pineapple placed on drying tray
More slices were sliced off the pineapple, to about half of the pineapple half:
Almost half of the half pineapple sliced off
… until the tray was filled:
Tray filled with pineapple slices
The filled tray was placed on the food dehydrator base:
Filled tray placed on dehydrator base
The top of the dehydrator was placed on the tray:
Top placed on the dehydrator
Oh and here’s my cat to help me out:
My cat helping me out
I continued trimming and slicing the pineapples, filling twelve trays; as can be surmised from the following picture, in 2012, I added an additional eight trays to the original four I’d bought in 1997!)
Twelve trays filled with pineapple slices
The twelve trays were filled with a bit more than four and a half of the pineapples I’d purchased, leaving at this point a little less than one and a half pineapples to slice up later as the slices in the dehydrator dried and made space:
One and a half pineapples left after filling twelve trays
At this point, the breaker on the extension cord carrying case decided to trip (in my experience, unusual for a single device with a peak draw of only about 550 watts, although I do suspect that the caddy does have a lower trip level than a normal household circuit breaker):
Tripped breaker
Quickly, a new extension cord was taken out:
New extension cord taken out
… which was plugged into an outlet, and the dehydrator plugged into the new extension cord:
Dehydrator plugged in to new extension cord
Back to the pineapples, the scraps were placed in the scrap bucket, which was ultimately emptied into my municipal compostable waste bin:
Scrap bucket filled with pineapple trimmings
At this point, Mom asked for some mashed pineapple, and got a total of six containers, which were placed in the freezer:
Three of the six containers of mashed pineapple Mom got
After about six hours, here’s what a tray of partly dried pineapple slices looked like, including the size shrinkage:
Tray of partly dried pineapples
The partly dried pineapple slices were shifted around to make space:
Space made on tray
After space was made on all the trays, four trays were emptied:
Four trays of space freed up
… and the first few pineapple slices dried to my liking were removed from the trays. Allowed to completely dry, pineapple will become crispy like potato chips; I like dried pineapple that is still a bit chewy and flexible, while there is still a very small amount of humidity left in the slices. As such, I remove slices when they have a leathery feel, and after the surface of the slices are no longer sticky.
Almost completely dried slices of pineapple
A zipper style sandwich bag was taken out to store the dried pineapple:
Zipper style sandwich bags taken out
… and the dried pineapple slices were stacked and placed in the bag:
Dried pineapple placed in bag
At this point — seven hours in — I finished slicing the rest of the pineapples, spread them on a couple of the emptied trays, and inserted the filled trays back in the dehydrator stack, for a total of ten trays:
Ten trays after seven hours
After nine hours, here’s what the pineapple looked like:
Tray after nine hours
… and a few more slices of dried pineapple were taken out for bagging:
More dried pineapple after nine hours
Collection of dried pineapple after nine hours
… and my dehydrator was down to seven trays after nine hours:
Seven trays after nine hours
After twelve hours, the dehydrator was checked again:
Tray of dried pineapple after twelve hours
… and more dried pineapple was taken out after twelve hours:
Dried pineapple taken out after twelve hours
… and stacked for bagging:
Dried pineapple stacked for bagging after twelve hours
… and bagged:
Dried pineapple after twelve hours
… and after all the shifting around and bagging, I was down to five trays in the dehydrator:
Five trays after twelve hours
At this point, I had gone to bed, but I woke up after a couple of hours at midnight, and checked on the dehydrator, shifting pineapple slices around and removing dried sliced pineapple. Here’s the bagged cumulative production after fourteen hours:
Total production after fourteen hours
… and I was down to four trays after fourteen hours:
Four trays after fourteen hours
Finally, after seventeen hours — in this case, three in the morning! (yes, I had set my alarm) — I emptied the dehydrator and bagged the last of the dried pineapple slices, for a total of five bags of dried pineapple slices, from a bit over five pineapples:
Five sandwich bags of dried pineapple
After a couple of days, I started eating the dried pineapple — yes, like a kid in a candy shop! 🙂