Desktop Linux: Unveiled Chapter 7: Desktop applications

Previous chapter: Desktop Linux: Unveiled Chapter 6: Upgrading the Operating System

Using your computer of course requires some software beyond the base operating system; fortunately, most desktop linux distributions not only have repositories of freely installable software, often more common software as decided by the distro’s maintainers are pre-installed on the system at the same time as system installation.

This post is concentrating on the popular office suite LibreOffice which includes a drawing program, a word processor, a spreadsheet application, and a database application. While this post will show a few functions of each part, it is in no way intended to be a tutorial, but rather a cursory demonstration of each, leaving the exploration of each to you, the reader.

In this post I occasionally refer to operating systems beyond Linux. Also, contrary to my usual habit of not editorializing in this series, I offer the following: Many Linux software suites are largely, although importantly, not completely compatible with other known equivalents on other systems. They will often be able to open and edit files created by them; however, the compatibility and drop-in replacement value of each piece of software for the other (regardless of in which order) is often variable, sometimes quite substantially.

Note that occasionally, some screenshots were taken at different times for the sake of completeness, but presented in the order seen here, for the sake of the narrative.

Pinning Apps to the Dock:

Start from the Activities (hot corner in the upper left hand corner (the horizontal bar; either just quickly move the mouse there, or if necessary, click on the the horizontal bar):
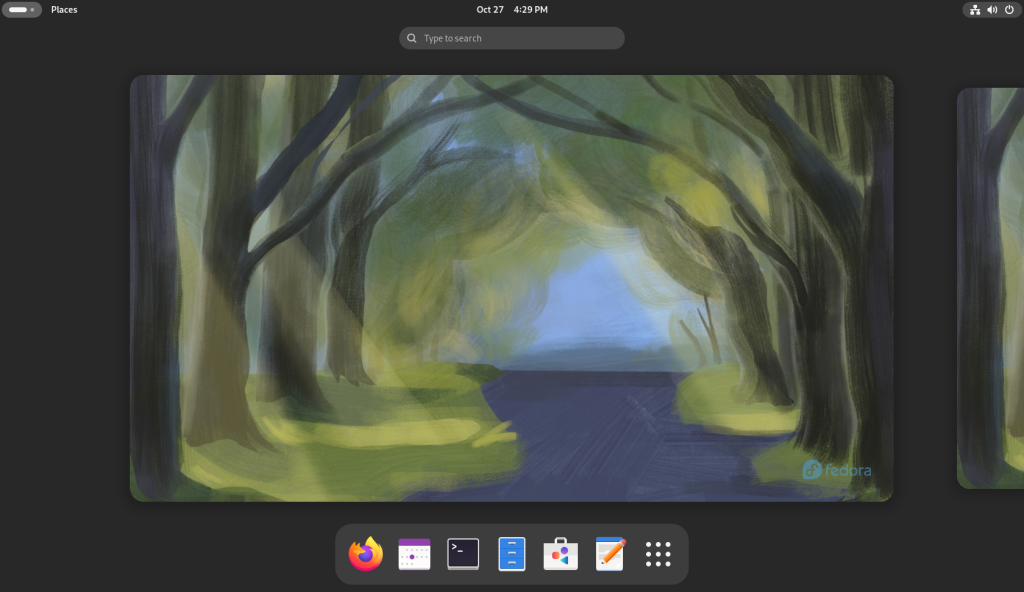
Activites screen

I searched for “Lib” which brought up three of LibreOffice’s apps: Writer, Calc, and Impress, and I right clicked each one …
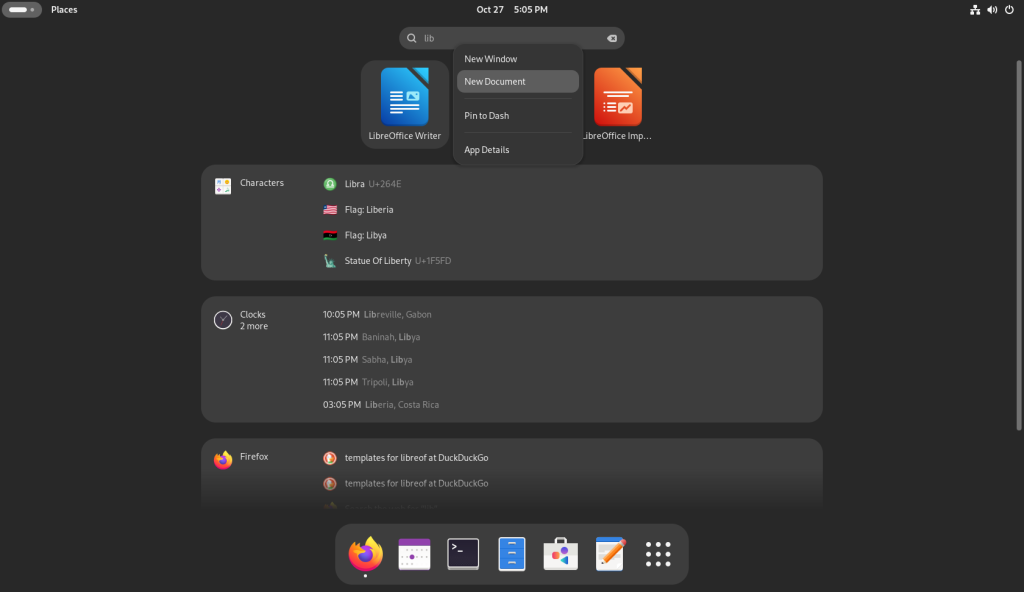
Searching for installed LibreOffice components

… each of which I pinned to the dock at the bottom, one at a time:
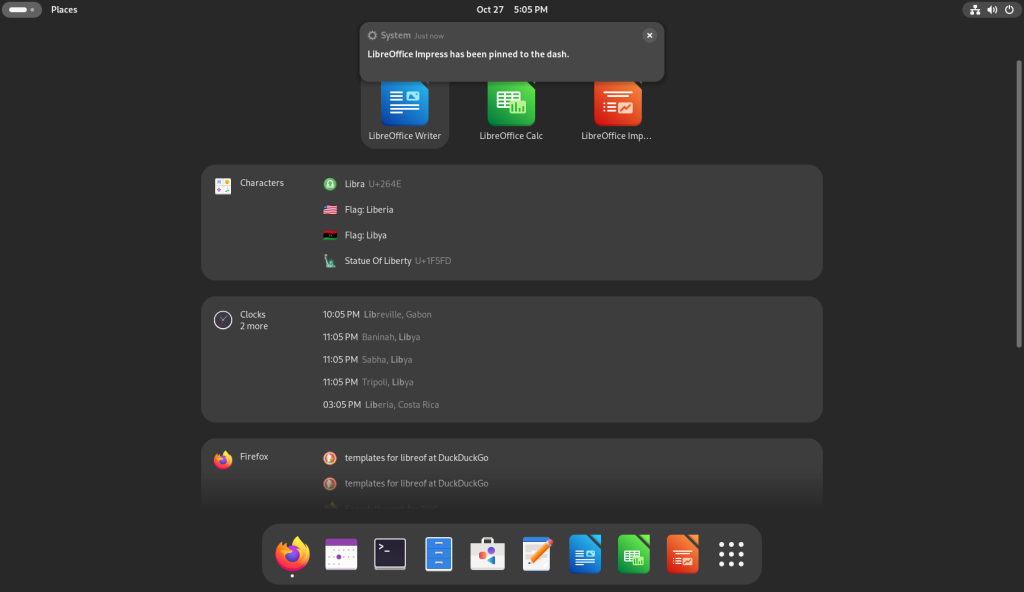
Pinning icons to the dock

Templates:

Note: In this post, the use of existing document templates found on the internet will be generously relied upon in order to demonstrate in a cursory fashion some of the resources available to desktop users — both of free software packages and other systems as well — as well as to simplify the mounting and development of the narrative using said existing documents. The site www.freedesktop.org, by happenstance, is frequently used, as is the templates section of www.libreoffice.org. Of note, especially on the former site, there are a number of templates which are in languages other than English, and some which have been on the site for several years, using older formats. Hopefully, the language barriers as the cases may be will not be too difficult to surmount given online translation services, while the older file formats are normally seamlessly supported by current software suites, with the ability to save in modern formats.

Users are of course free to create documents from scratch as they would on any system.

Going back to the activities screen, choose the Firefox icon (orange and blue, on the left at the bottom):
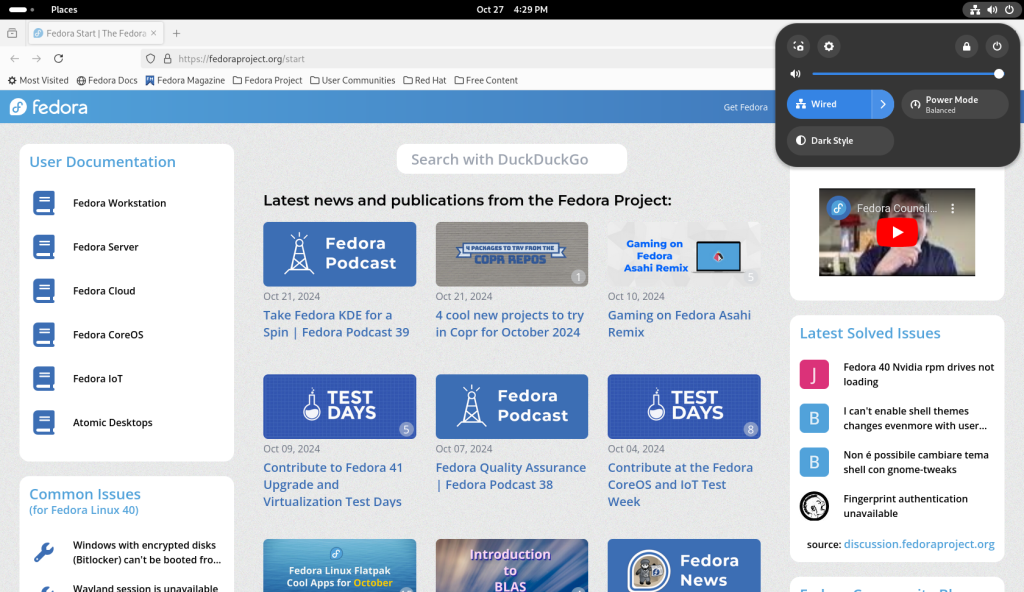
Firefox launched

In the address bar, enter the address of a search engine, such as www.duckduckgo.com:
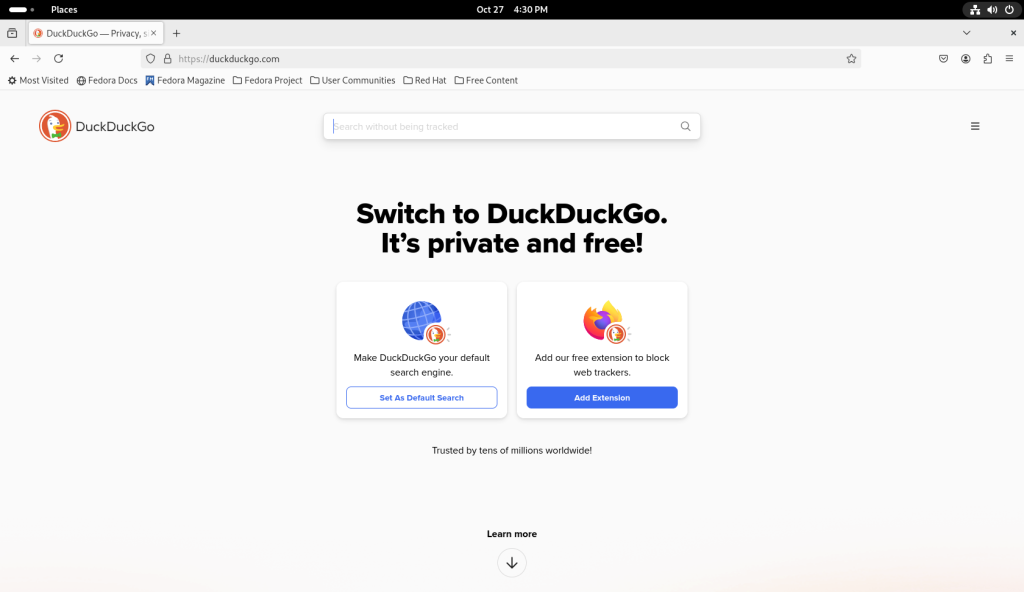
Navigating to a search engine

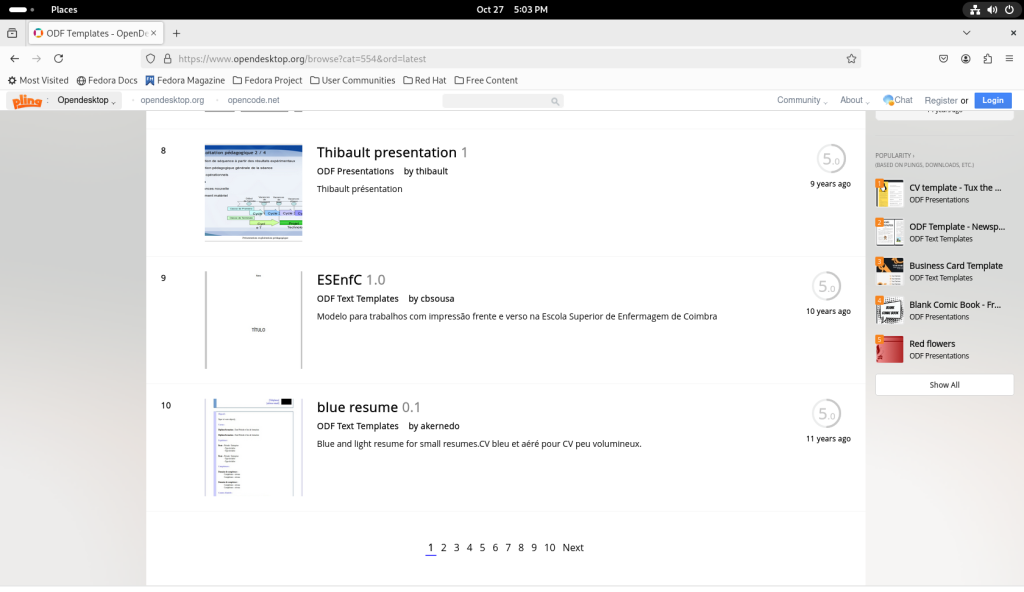
Search for templates. In this case, I specifically asked for templates appropriate for LibreOffice, which brought me to www.opendesktop.org:
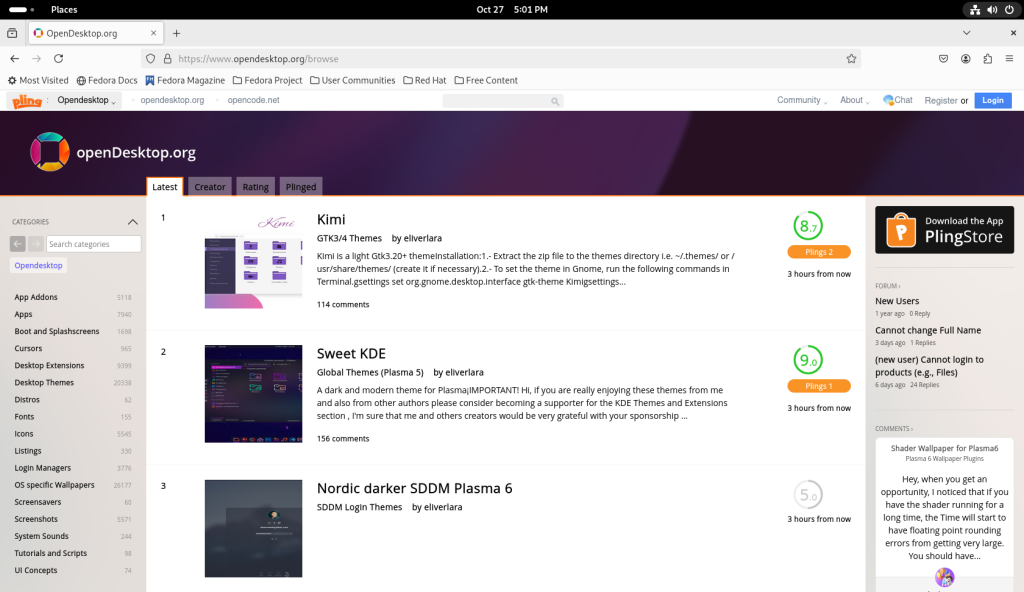
Navigating to opendesktop.com

In the search bar, I searched for LibreOffice, which gave me the following options:
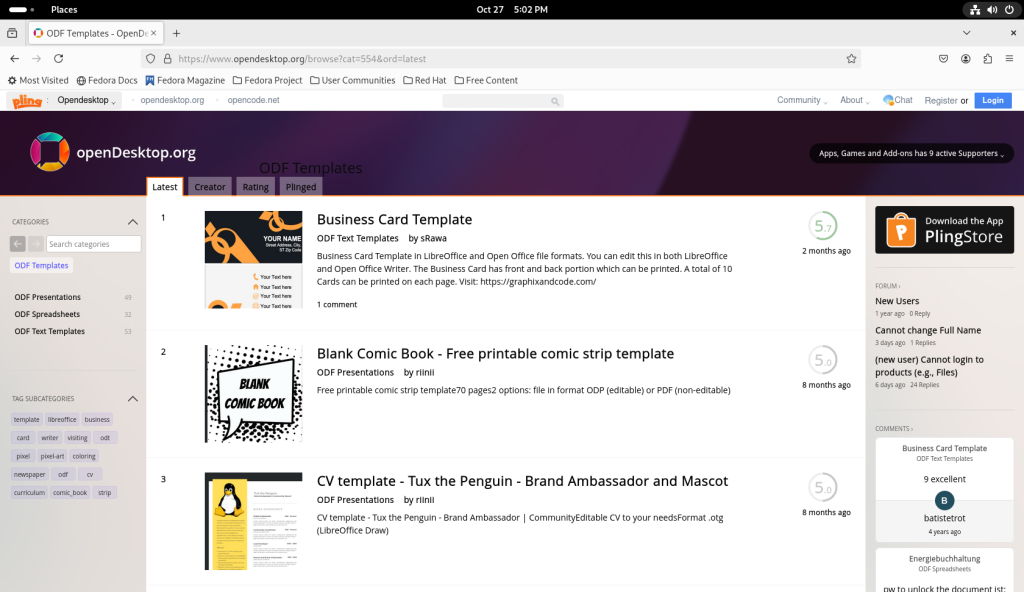
Searching for LibreOffice templates

… and chose for ODF Text Templates (for word processessing):
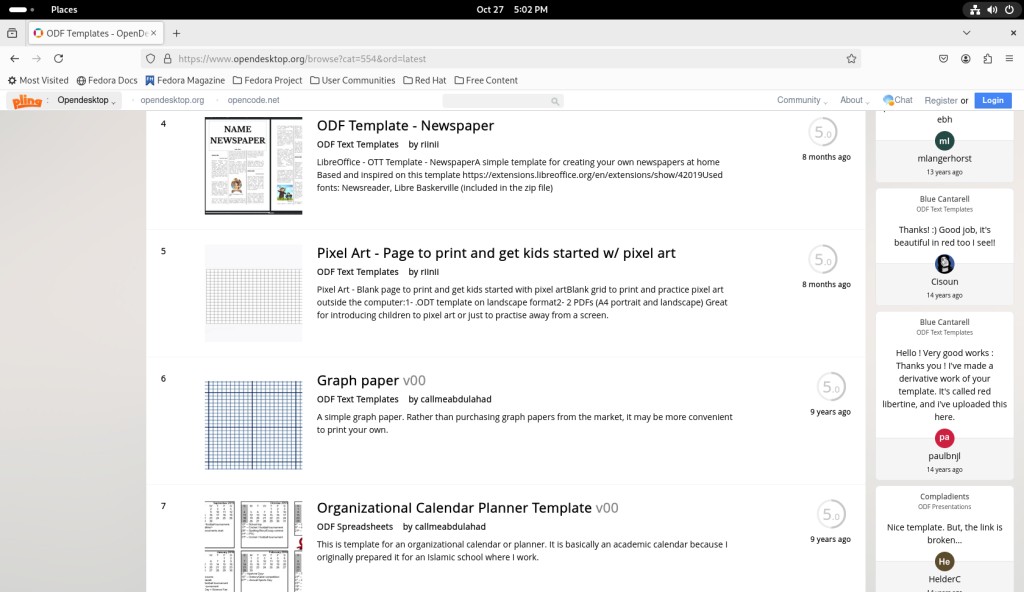
Sorting for odf files

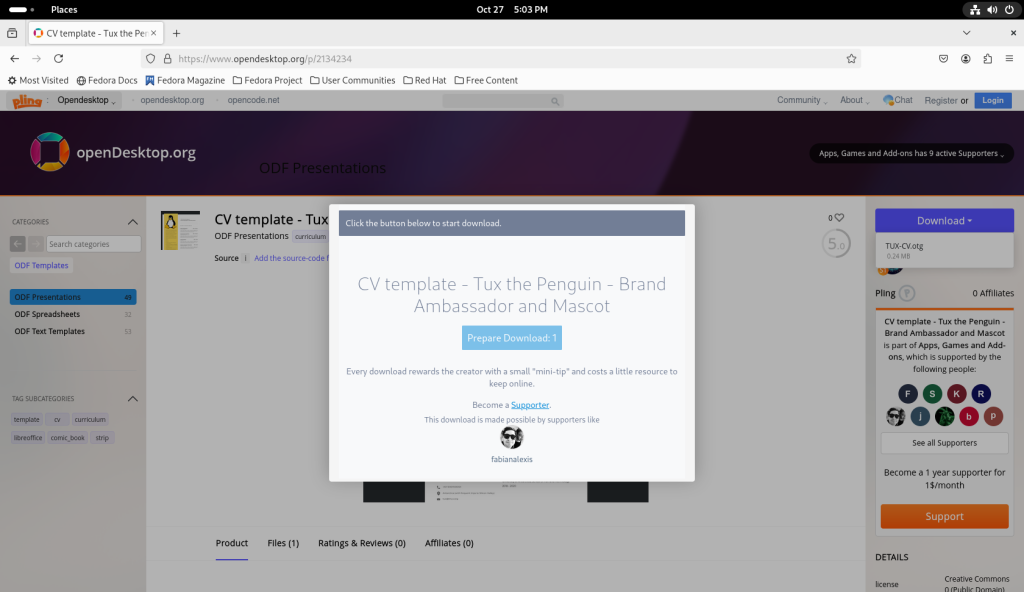
Browsing through the templates, I chose a CV template, for “Tux the Penguin — Brand Ambassador and Mascot”:
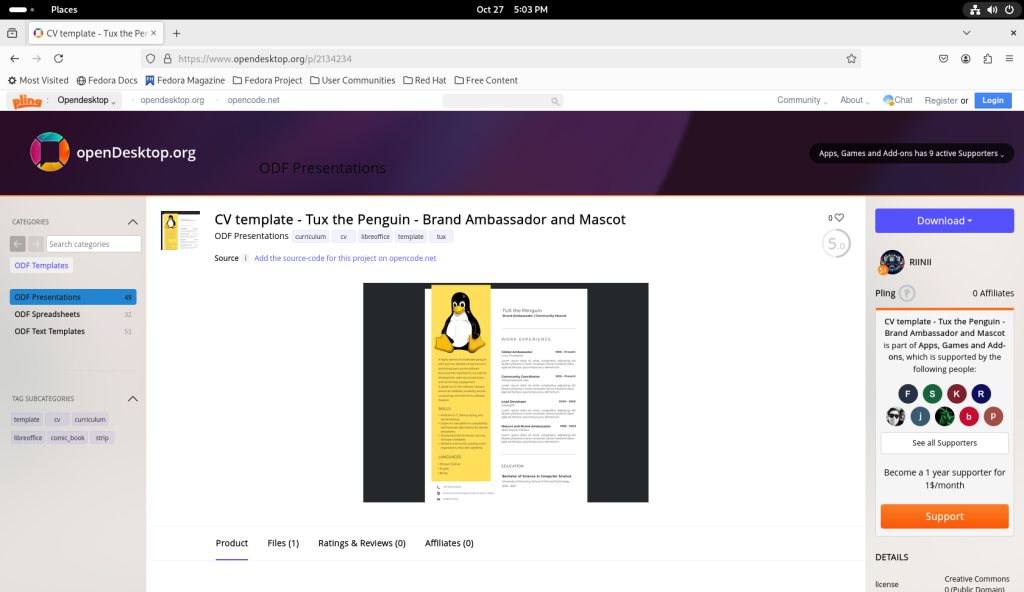
CV template chosen

… which I downloaded:

Downloading the CV template

On the activities screen, I opened up the Files application:
Files program launched

Drawing:

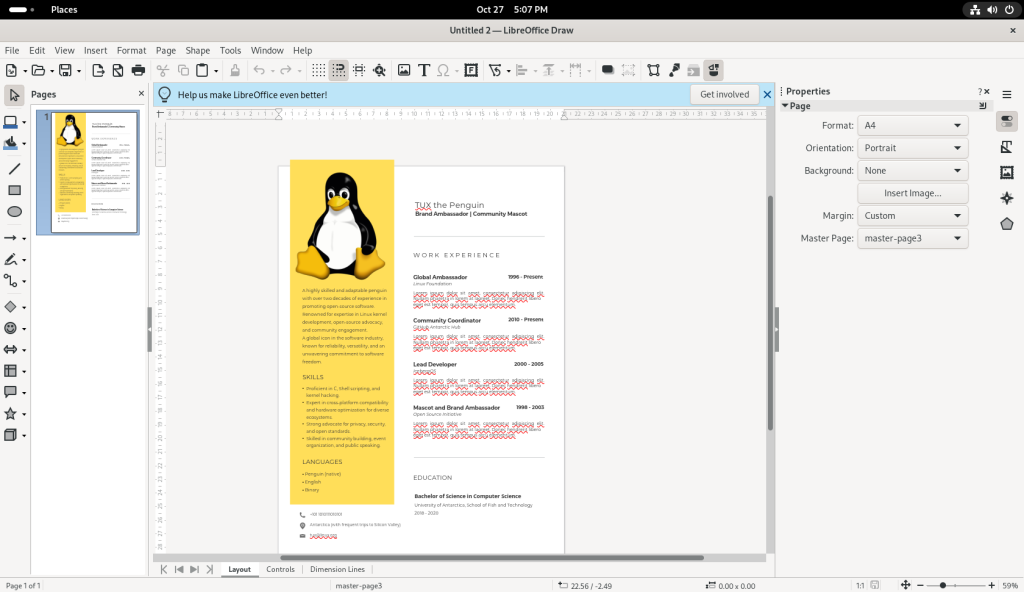
… and this is where I learned that the downloaded CV template was not what it seemed. 🙂

Much like other popular desktops, Fedora Linux has several fully functional and fully featured drawing software. One such piece is LibreOffice Draw, which functions similarly to Microsoft Visio, allowing for some basic-to-not-so basic graphical manipulations, editing, basic draughting, and inserting texts.

From the Files program just opened, I navigated to the Downloads directory, where the CV was located after downloading, and despite having believed that the CV I had downloaded was a text document, the file format in fact proved to be a drawing format:
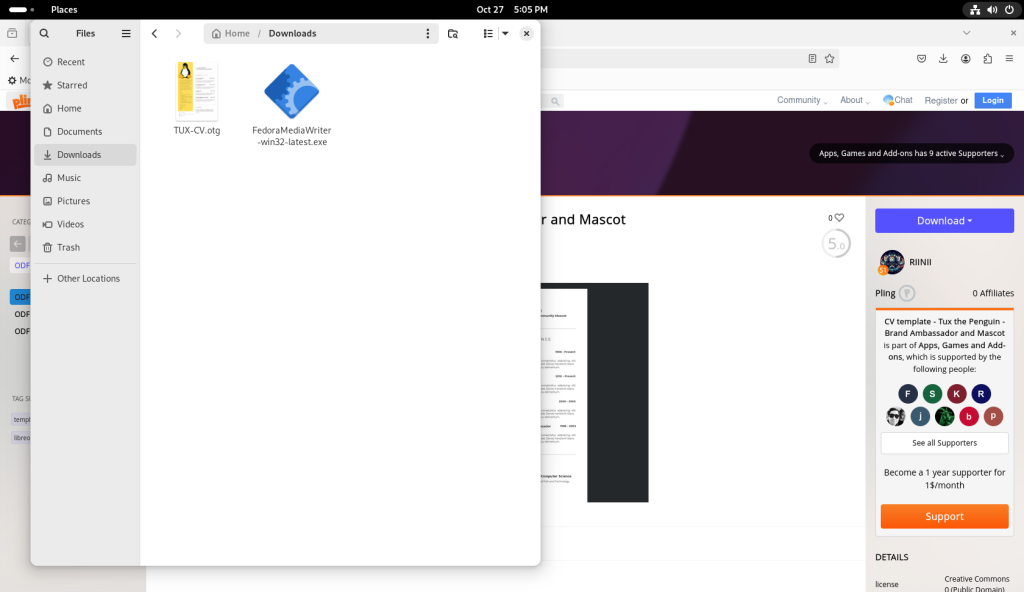
Downloads directory inspected

I double-clicked on the CV file, which, since LibreOffice Draw isn’t always a part of a Fedora base installation, launched the software store, and having found LibreOffice Draw in the Fedora repositories, offered to install it, which I accepted:
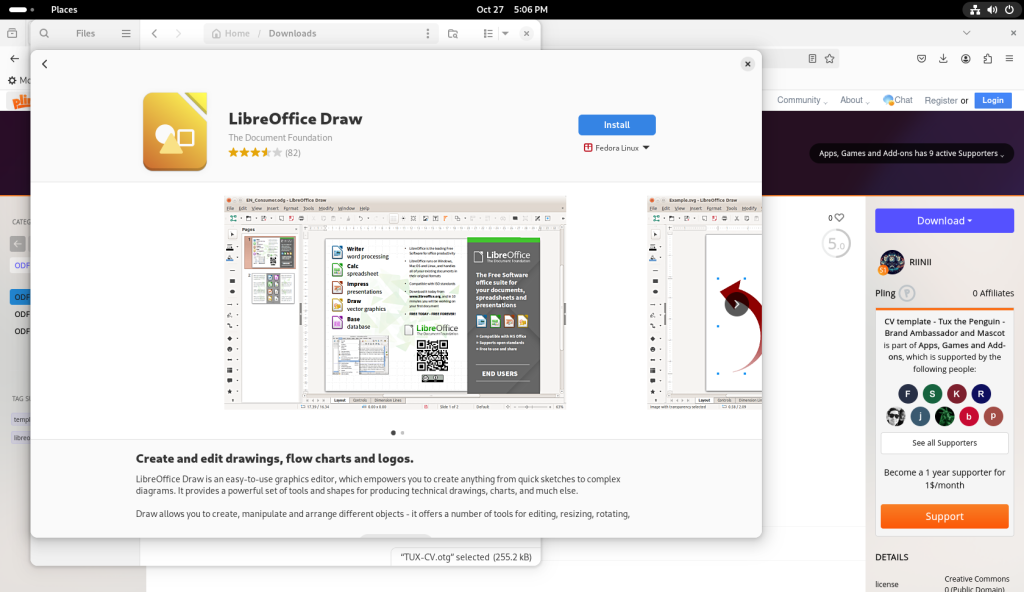
CV file double-clicked, launching the software store in order to install required software

Once LibreOffice Draw had been installed, I asked that it be launched:
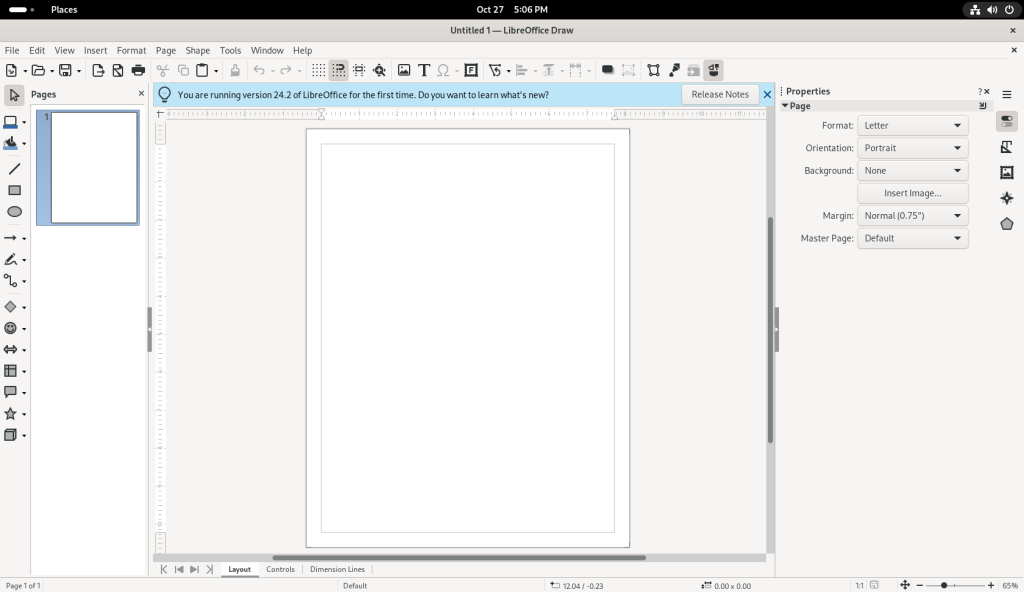
LibreOffice Draw installed

After closing the offer to see the “What’s New” notes, I went to the File dropdown menu to open the file:
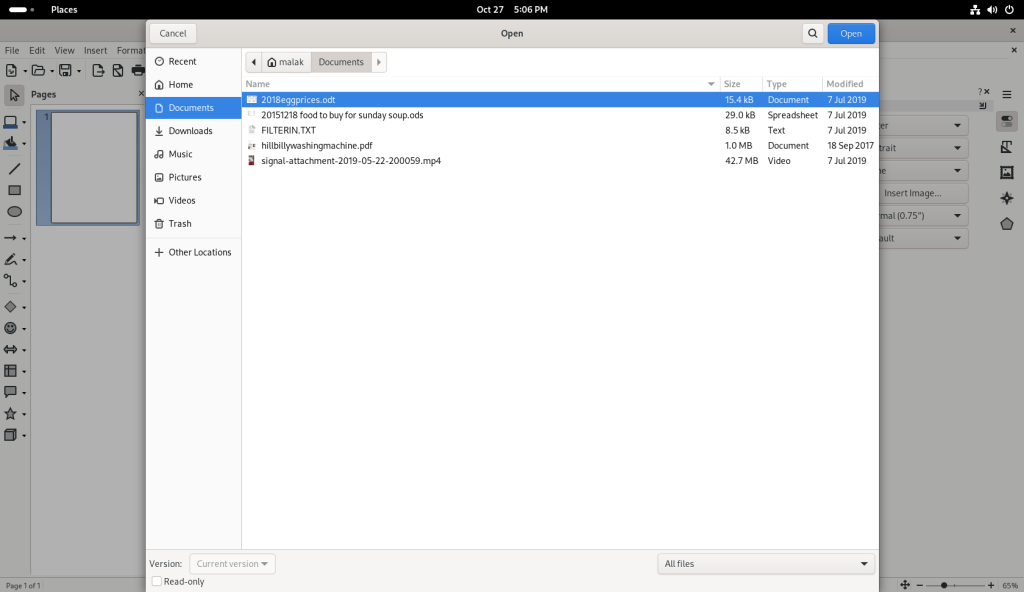
Opening the CV template

… and navigated over to the Downloads directory, where the CV was located.
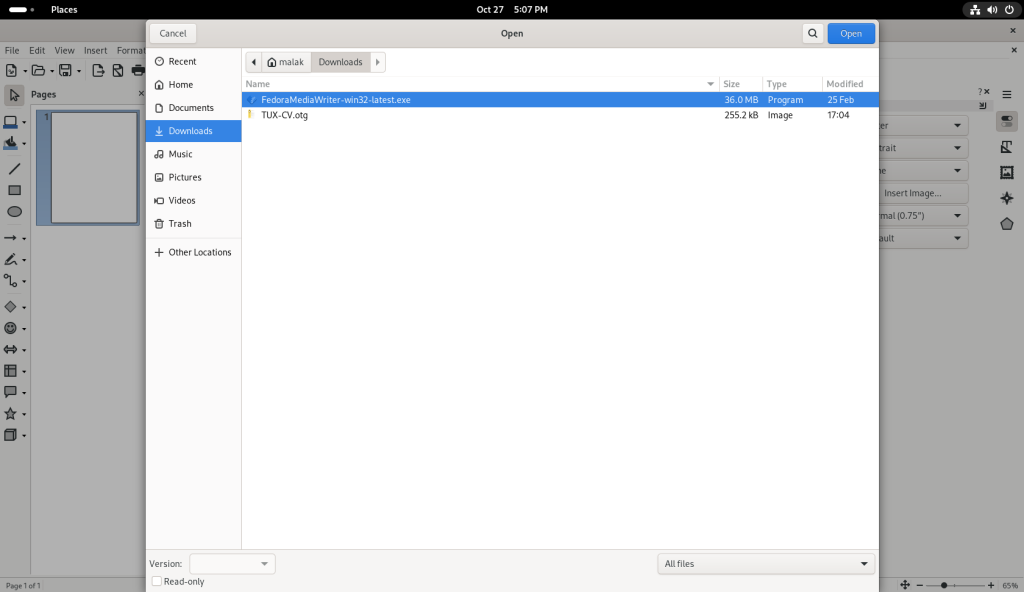
Navigating to the downloads directory

I clicked on the CV file to open it:

CV file opened

In Draw — depending on the nature of the input file — various existing texts can be modified, as well as many basic-to-not-so-basic graphical manipulations. In the case of this file, the file was designed such that the text could be modified:
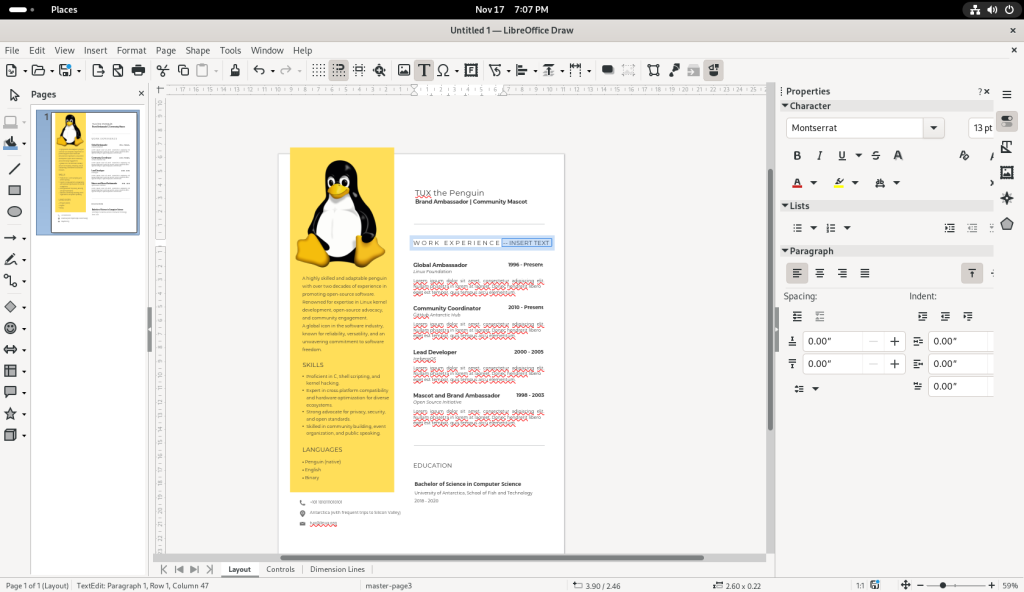
Editing the text of the CV

To manipulate images, the picture of Tux (the penguin) was double-clicked to select it, the right mouse button was clicked, and the “Rotate or Flip” option was selected:
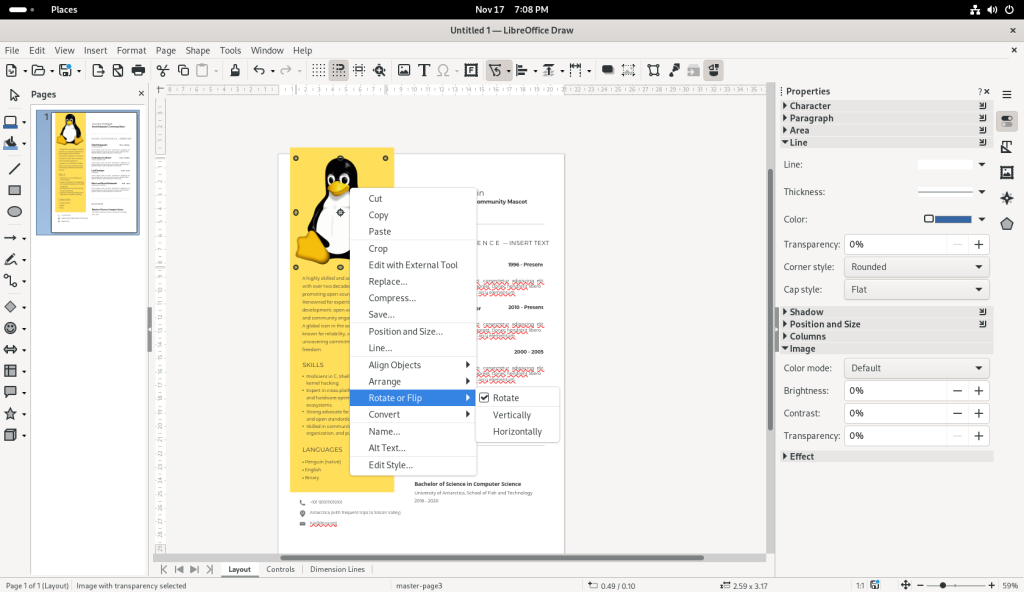
Manipulating the penguin image

… and I chose to flip the picture of Tux upside-down:
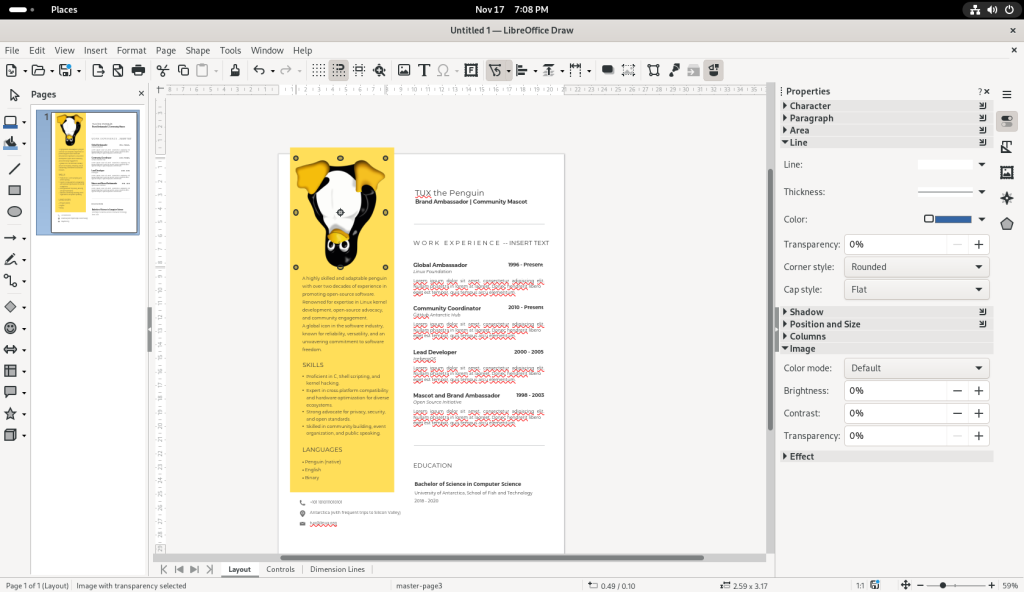
Penguin image flipped upside down

Some modestly — or more complex — drawings, including multimedia documents such as the CV shown above, can be created and / or modified, which I leave to the reader to explore.

Word Processor:

Much like other popular desktops, Fedora Linux has several fully functional and fully featured word processing software suites. One of the more popular such pieces is LibreOffice Writer.

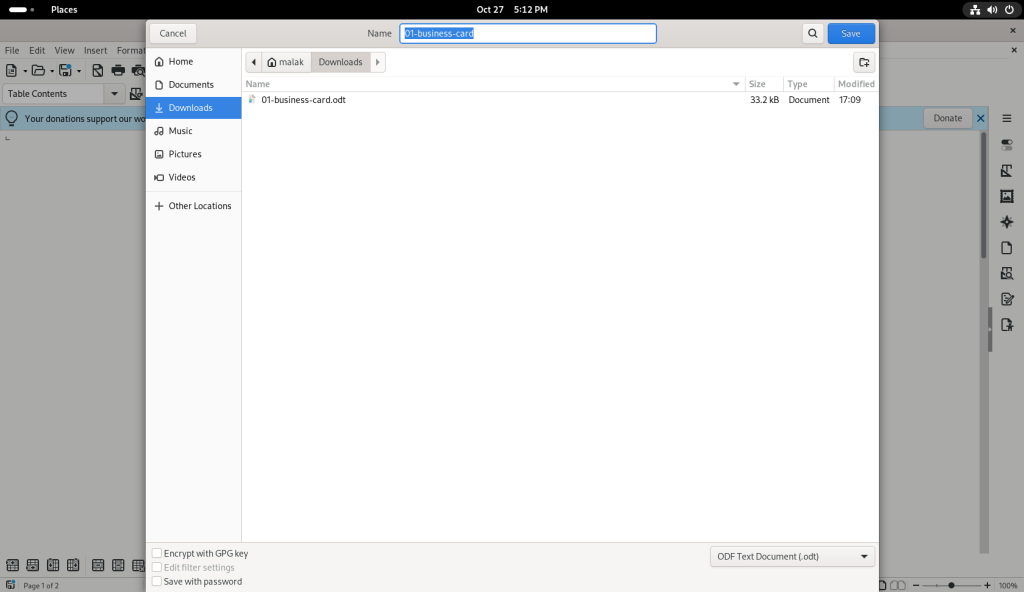
I returned to the opendesktop.org website, and chose a business card template to open in a word processor — LibreOffice Writer.

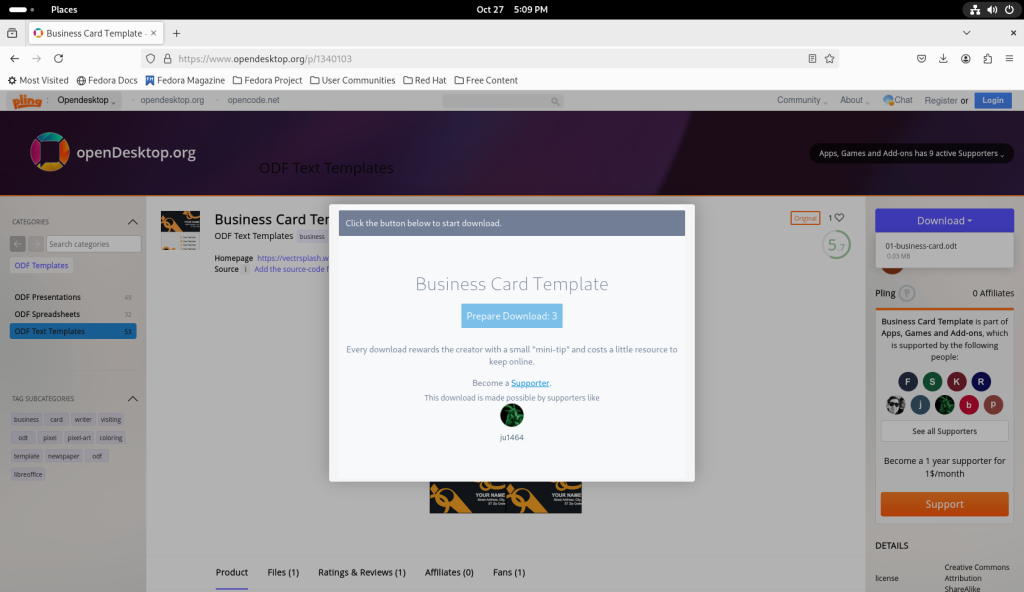
I navigated to find a business card template:
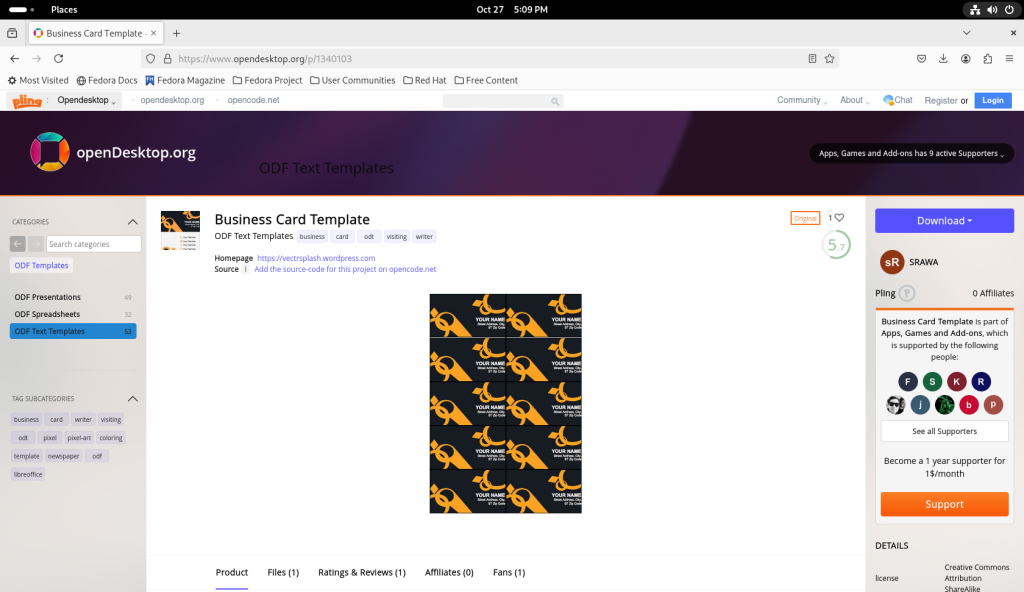
opendesktop.org template for business cards

… and downloaded the file:

Business card template downloaded

Similar to how the CV above was opened, the business card template was opened, without having to go through the installation of LibreOffice Writer:
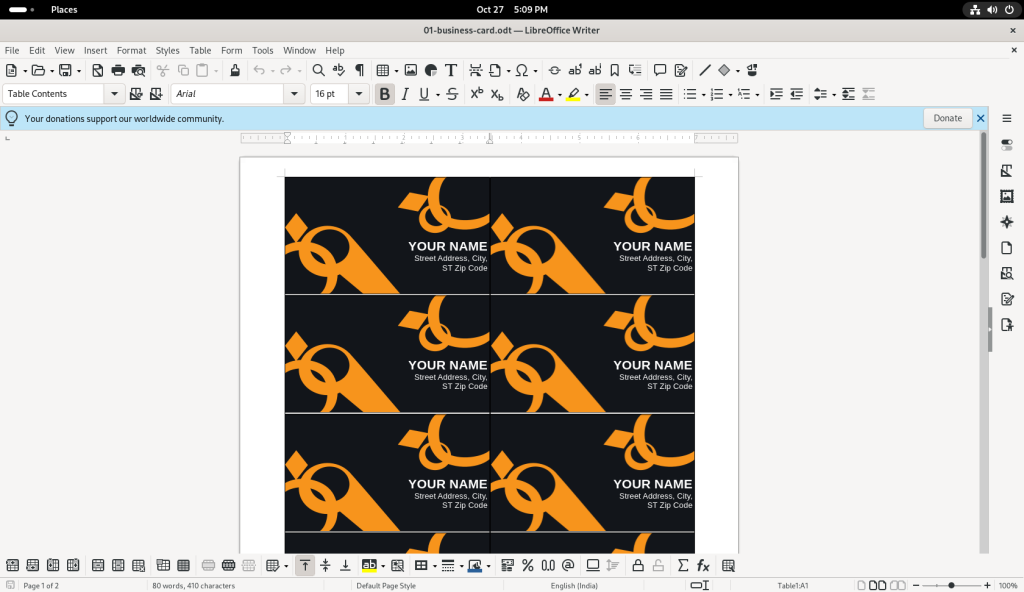
Business card template opened in LibreOffice Writer

The text of the first card was changed to a “Desktop Linux: Revealed” theme:
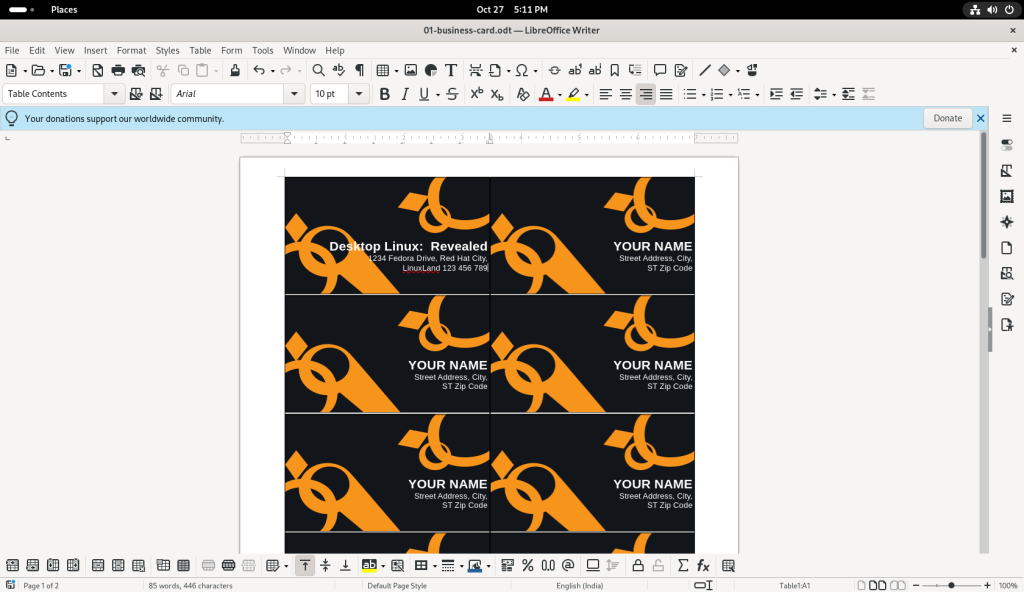
Name and contact details on first card changed

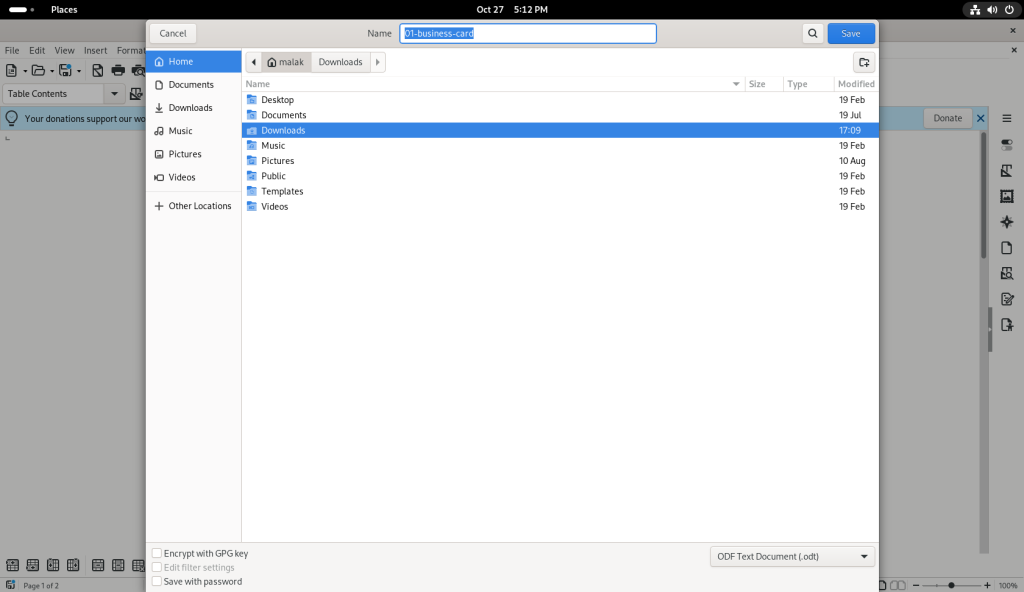
The modifications were also saved:

Saving modified business card file

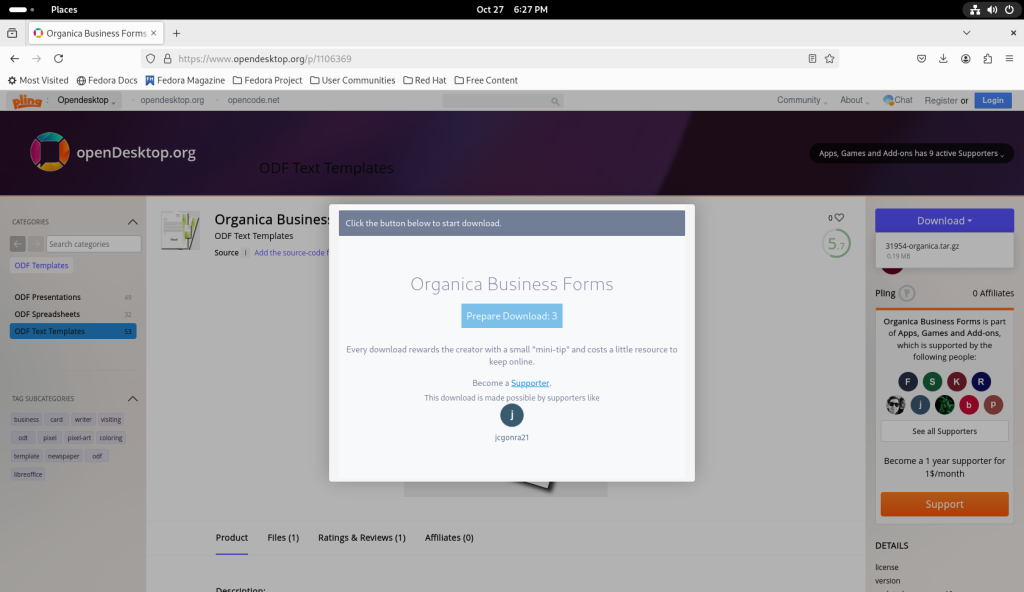
Returning to the opendesktop.org templates, I chose the “Organica Business Forms” to download:
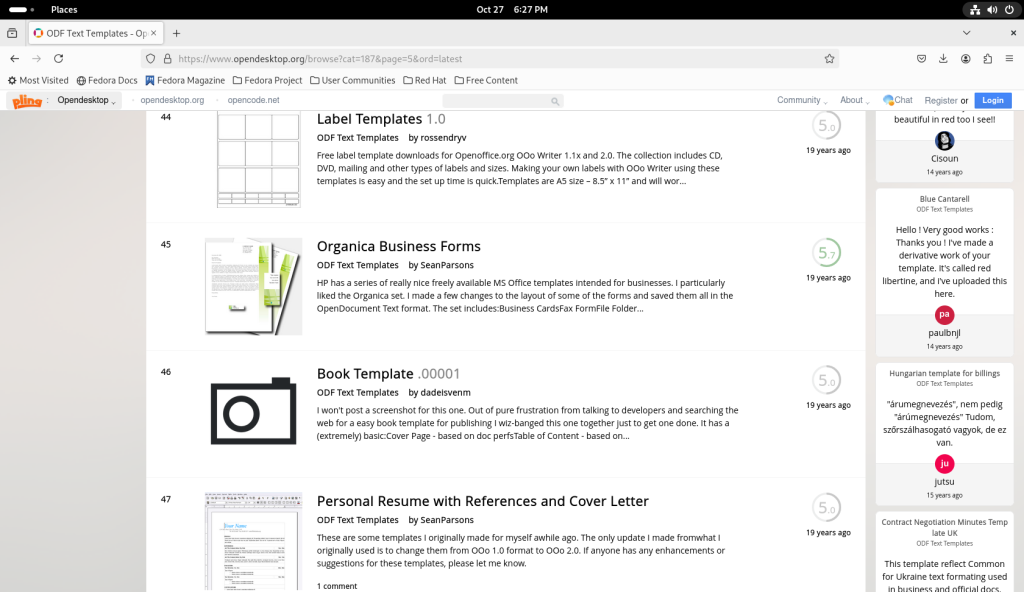
More Writer templates viewed

The page for the Organica Business Forms was opened:
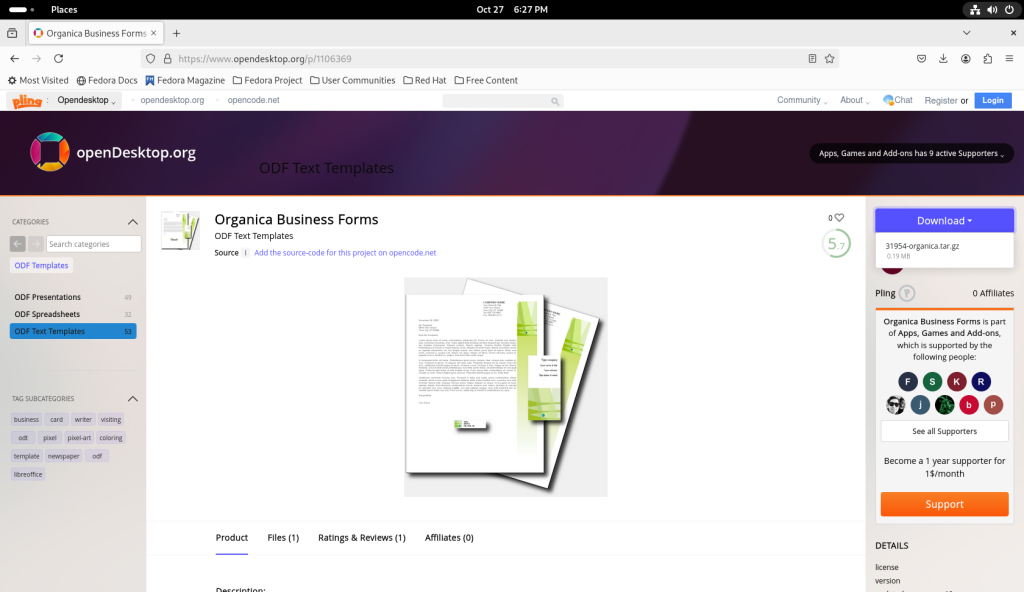
Business Forms template page

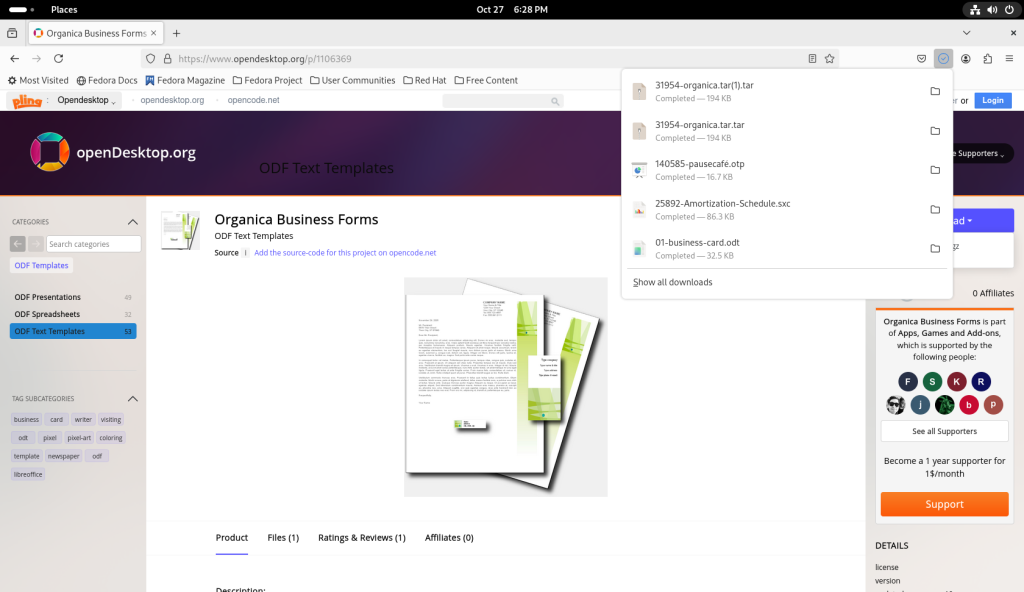
… and the file downloaded:

Downloading template
Template downloaded and directory opened

The business forms were compressed in the .tar format, analogous to .zip files:
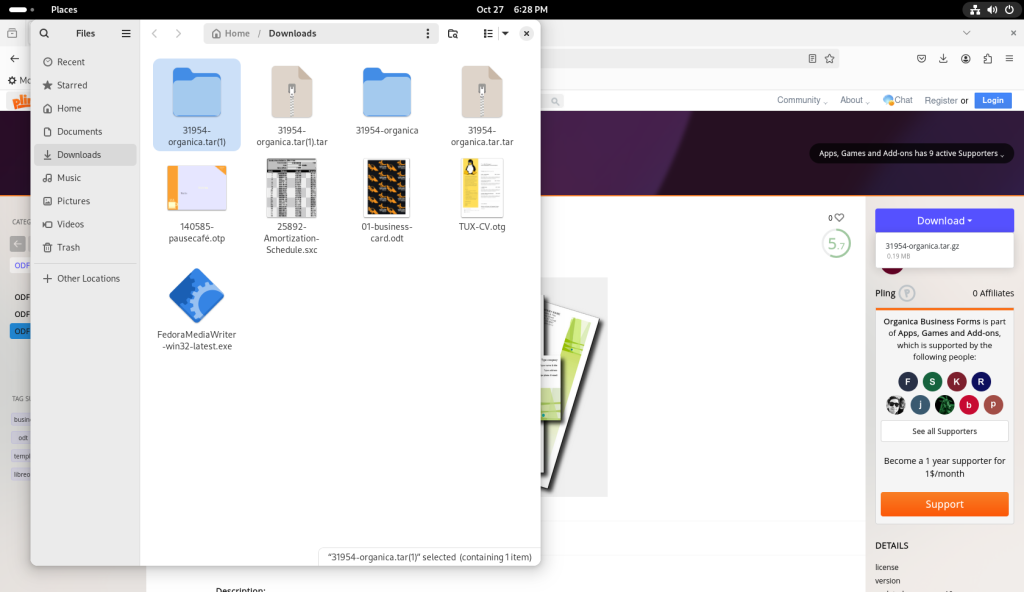
Directory with downloaded file, which was double clicked

The archive was double-clicked, revealing a directory contained within:
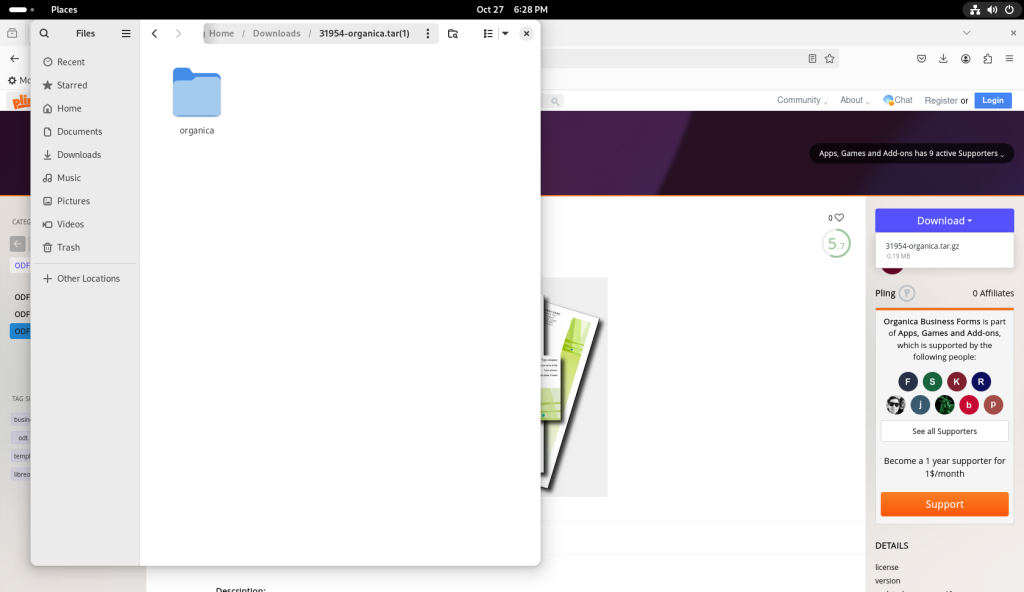
.tar file double clicked, opening up the archive

The directory was double-clicked, revealing several templates: Business cards (different from above), a fax cover sheet, four different kinds and sizes of labels, an invoice, and a letter:
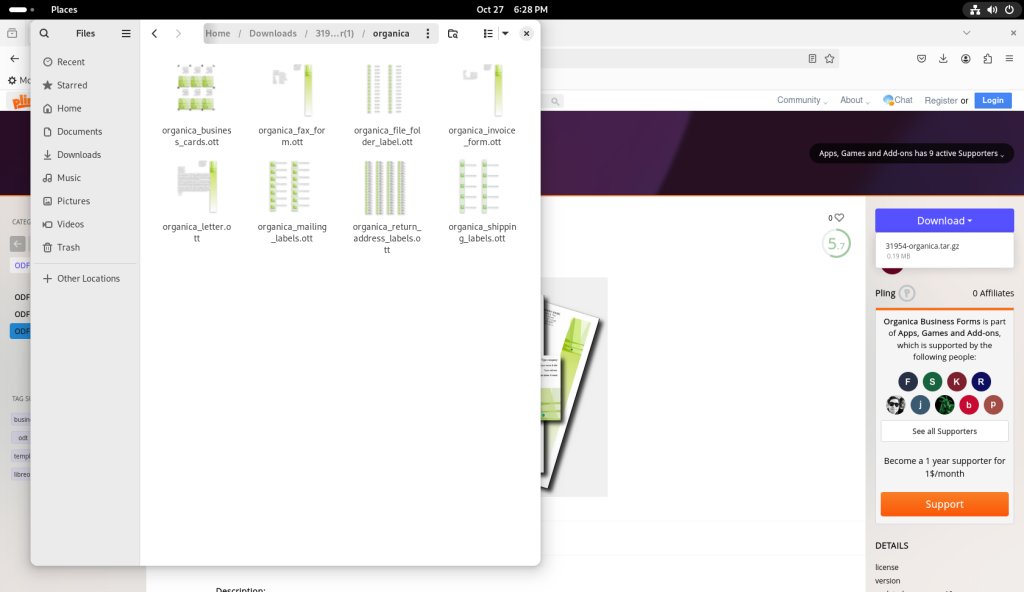
Various files in archive revealed

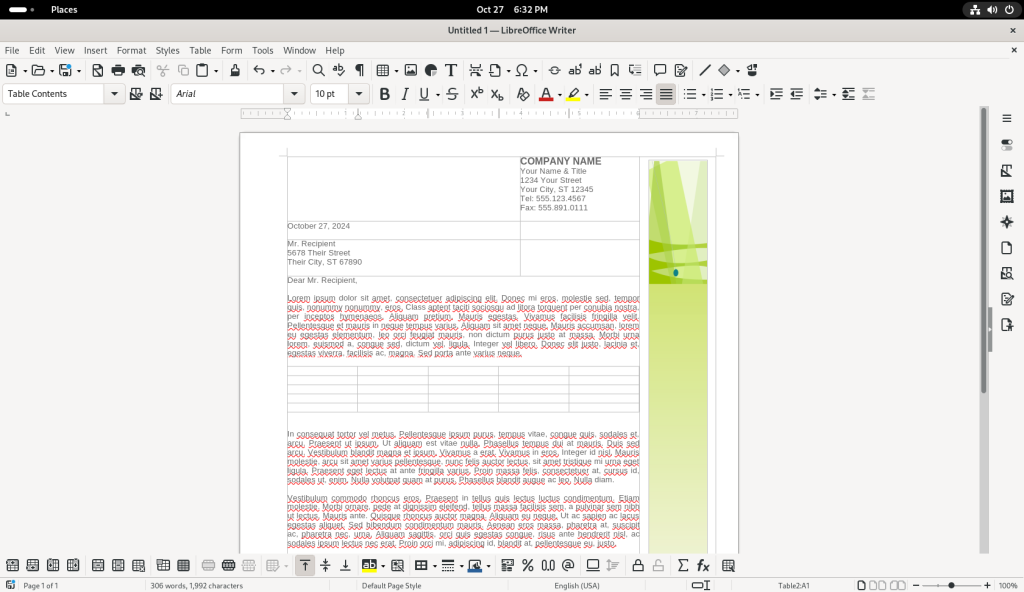
Going back to Writer, the letter file was double-clicked, which again opened the file in LibreOffice Writer:
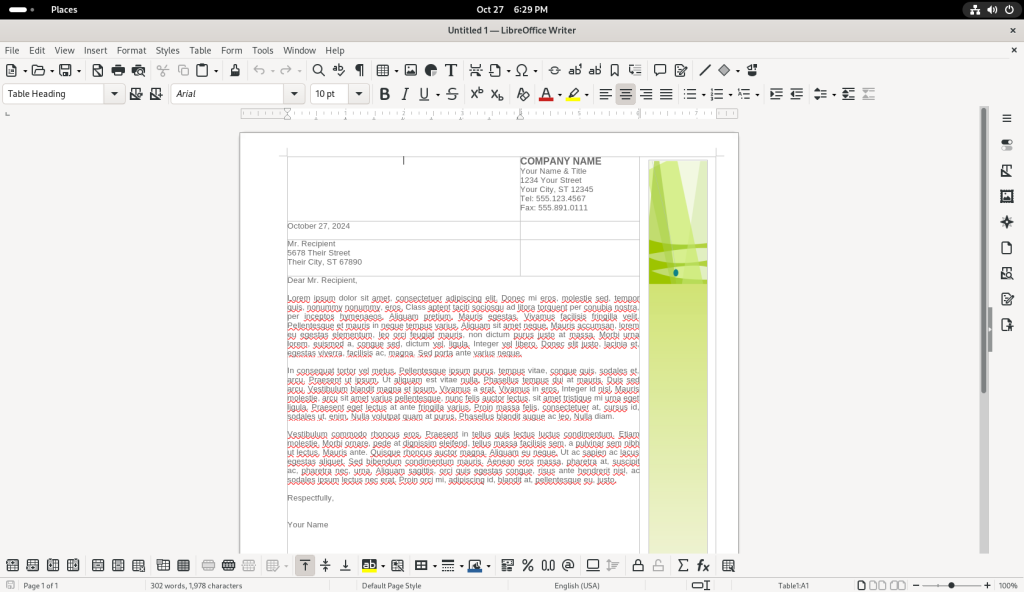
Letter file opened

A space was added between two paragraphs:
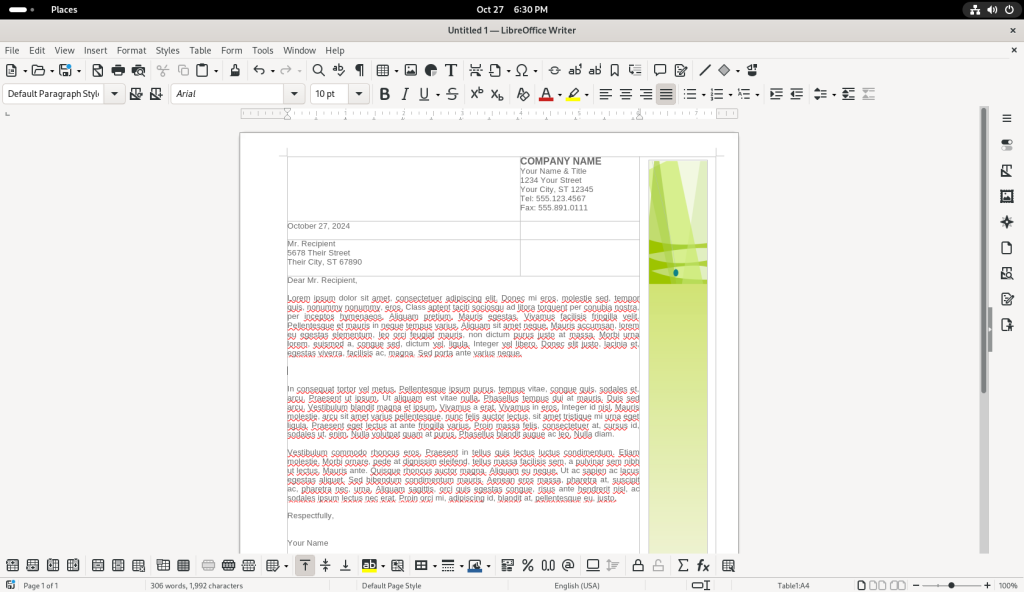
Spaced added between paragraphs

The “Table” drop down menu was opened:
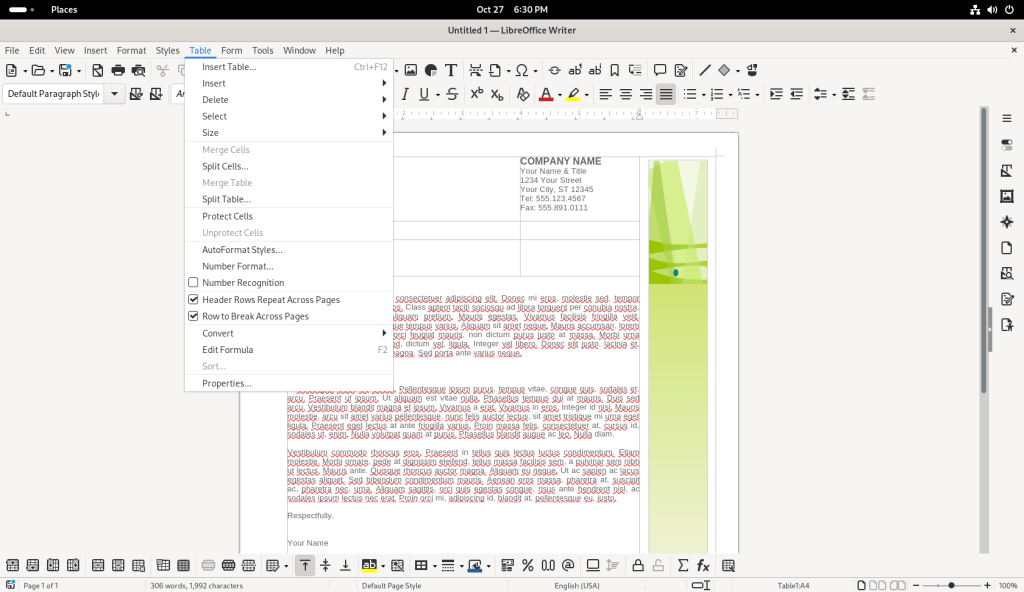
Table drop-down menu opened

… and the “Insert Table” option was chosen:
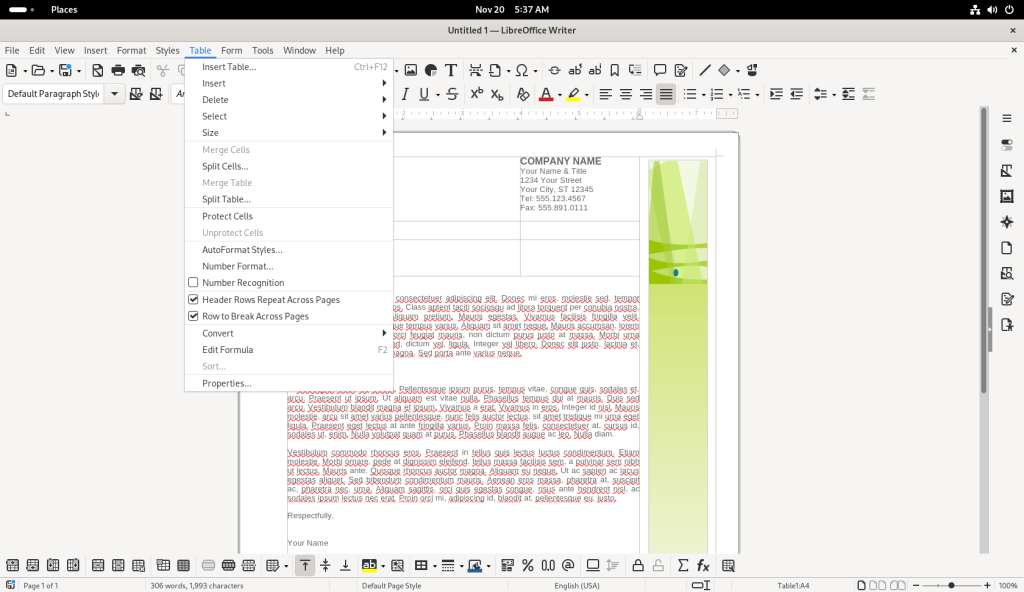
Insert Table option chosen

… which opened up a window to determine some settings for the table to be inserted:
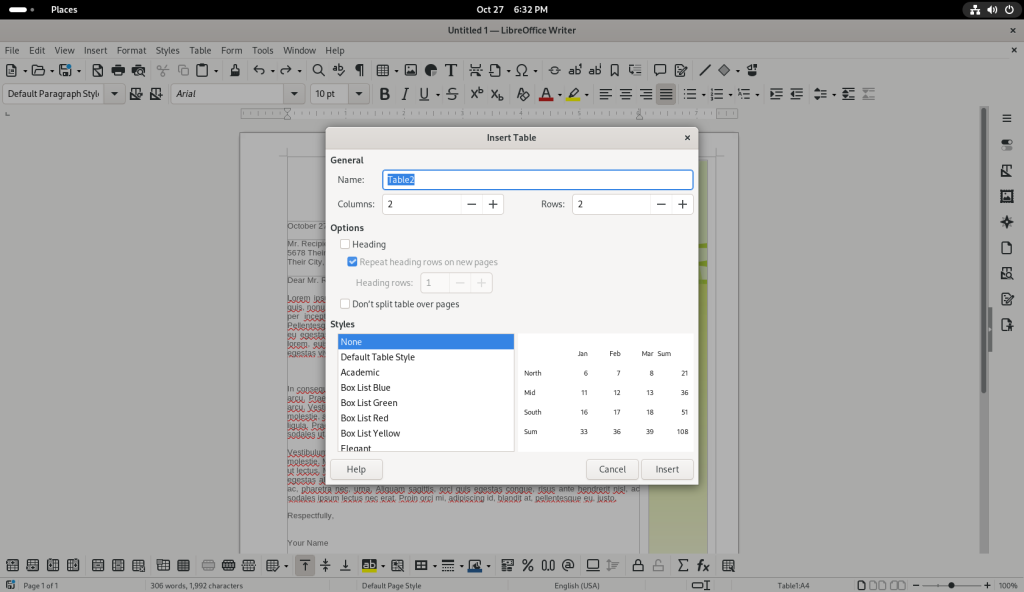
Window opened to set table characteristics

A table with five columns and five rows was selected:
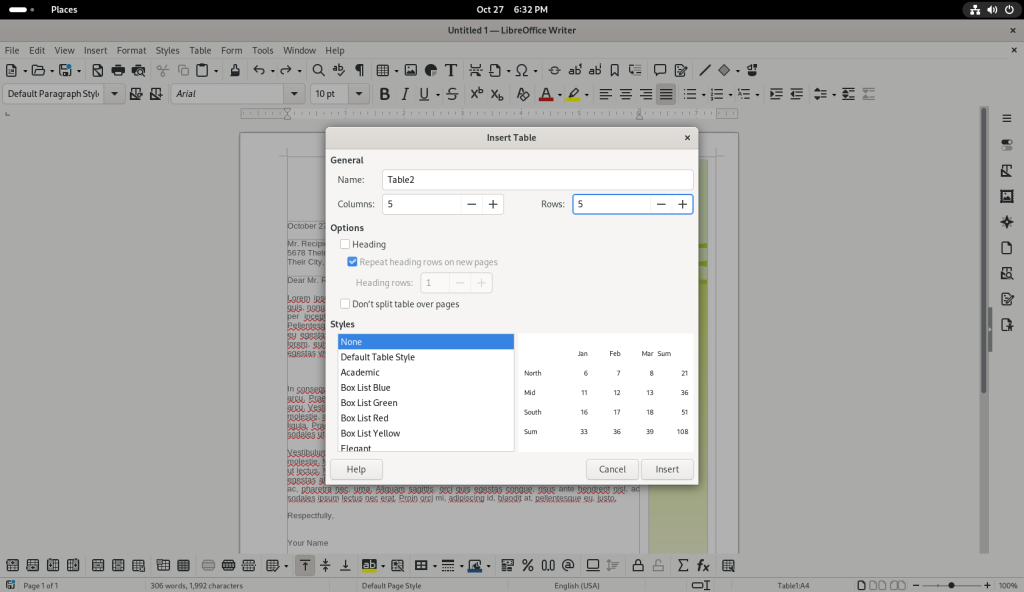
Table settings changed

The table was selected, and the right mouse button was clicked, revealing a contextual menu:
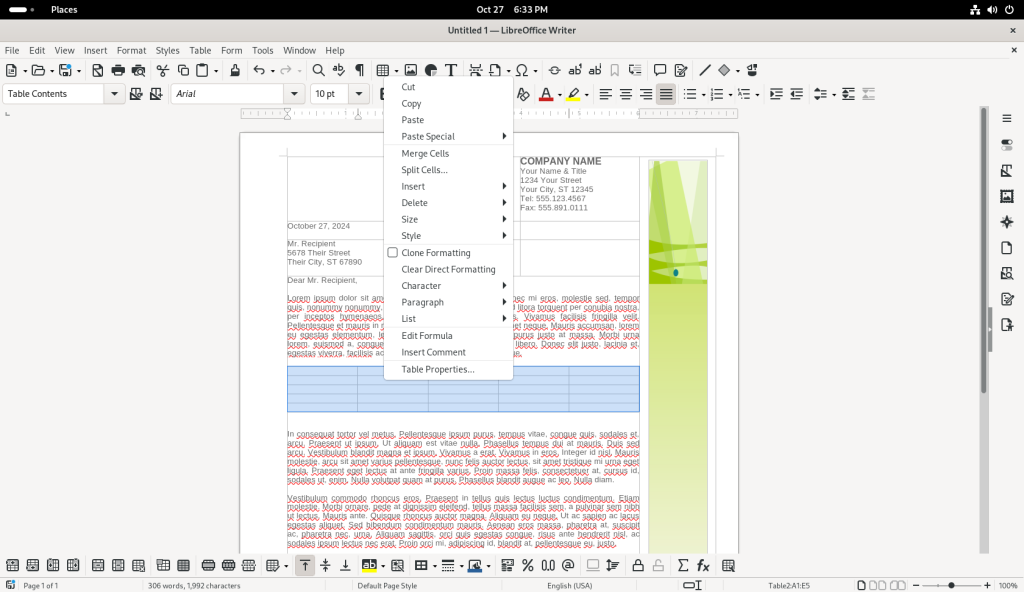
Contextual menu opened

The option “Table Properties” was selected, bringing up a window:
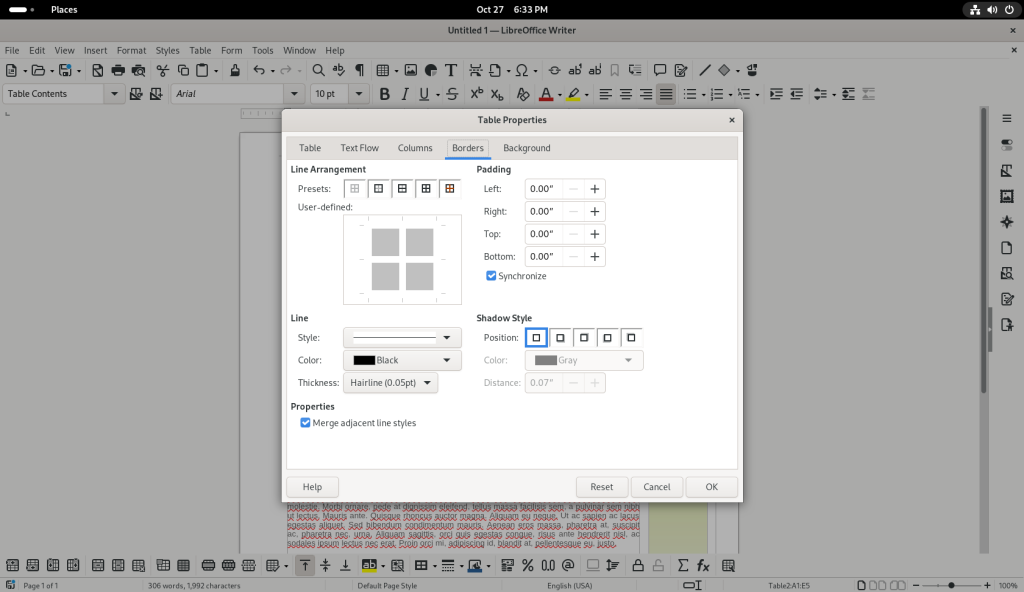
Table properties window opened

The button for all lines under “Line Arrangement” was chosen in the Borders tab, in order to insert borders around all the cells of the table:
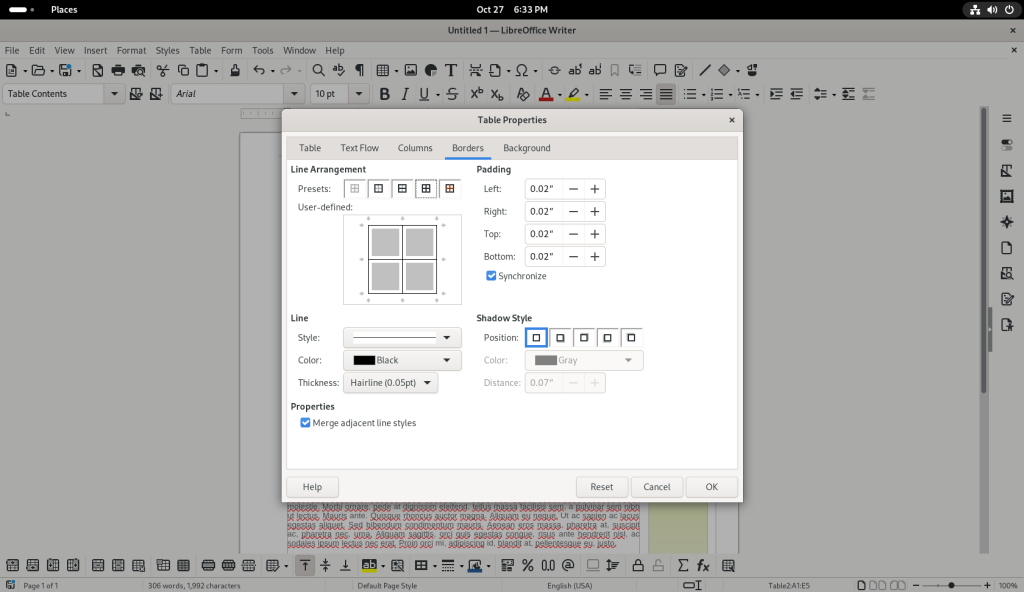
Table borders changed

The “Ok” button was pressed, returning me to the document, showing now all the cells of the table with borders:
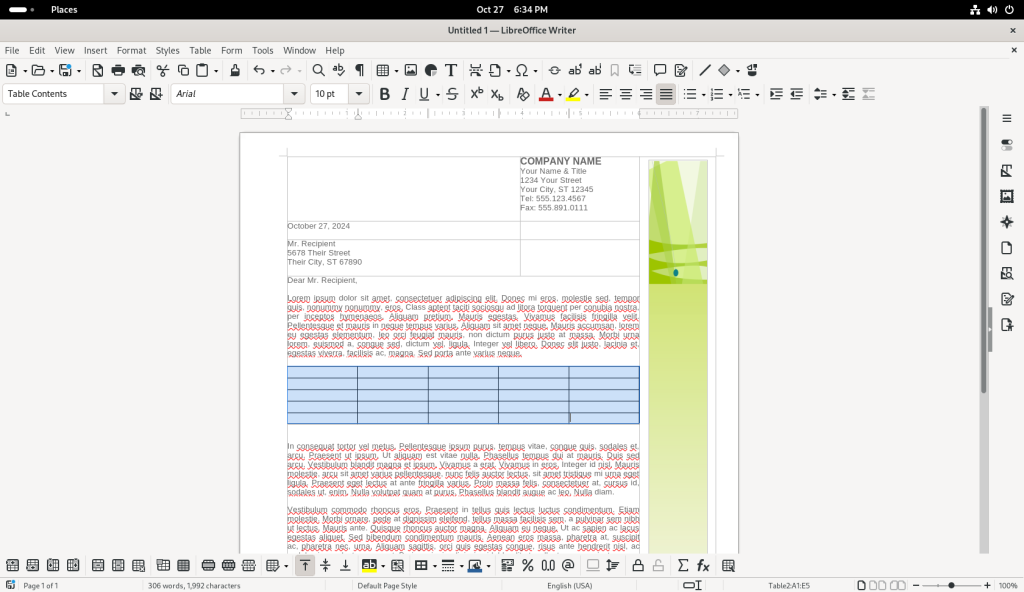
Table added to letter

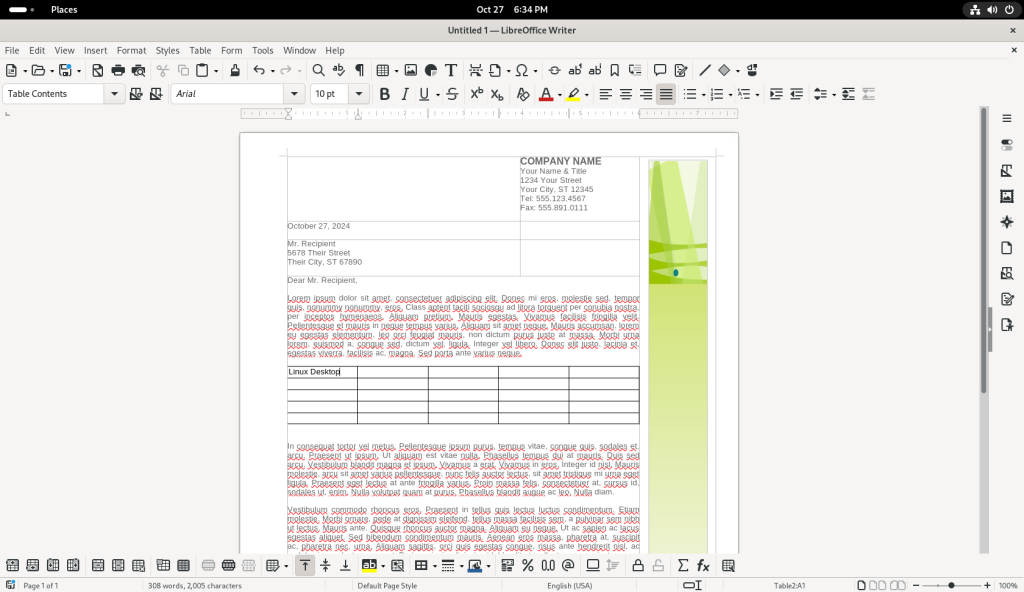
Text was added to a cell in the upper left hand corner (“Linux Desktop”):
Text added to table cells

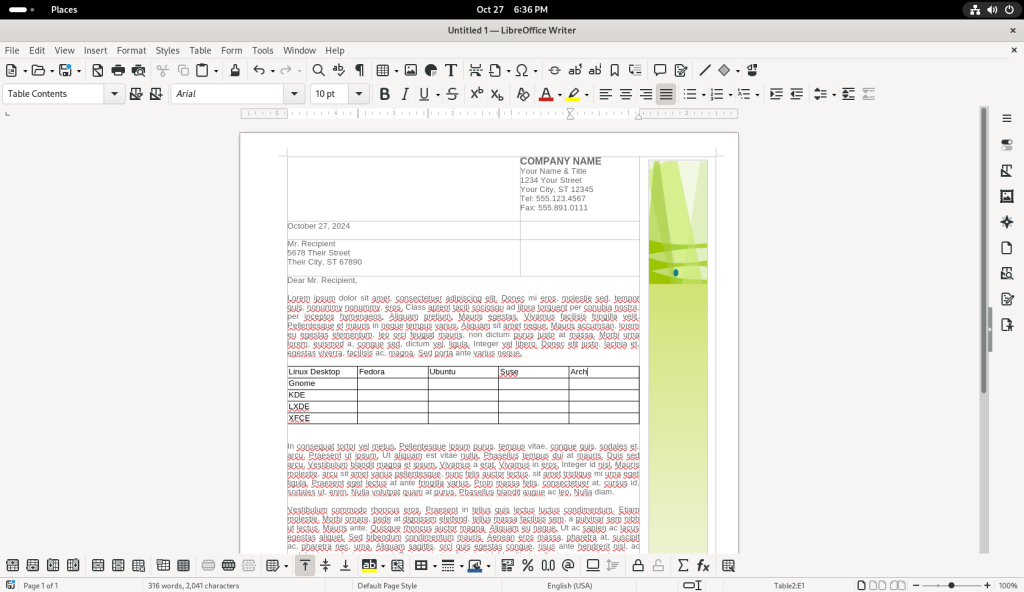
A number of other cells were filled in:
Text added to table cells

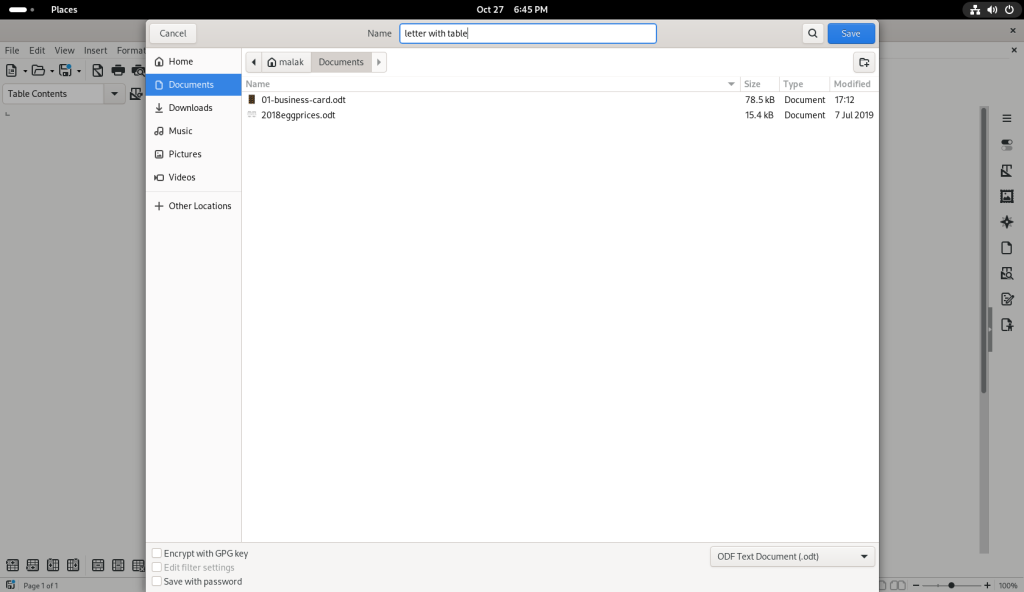
The “File” drop down menu was opened:
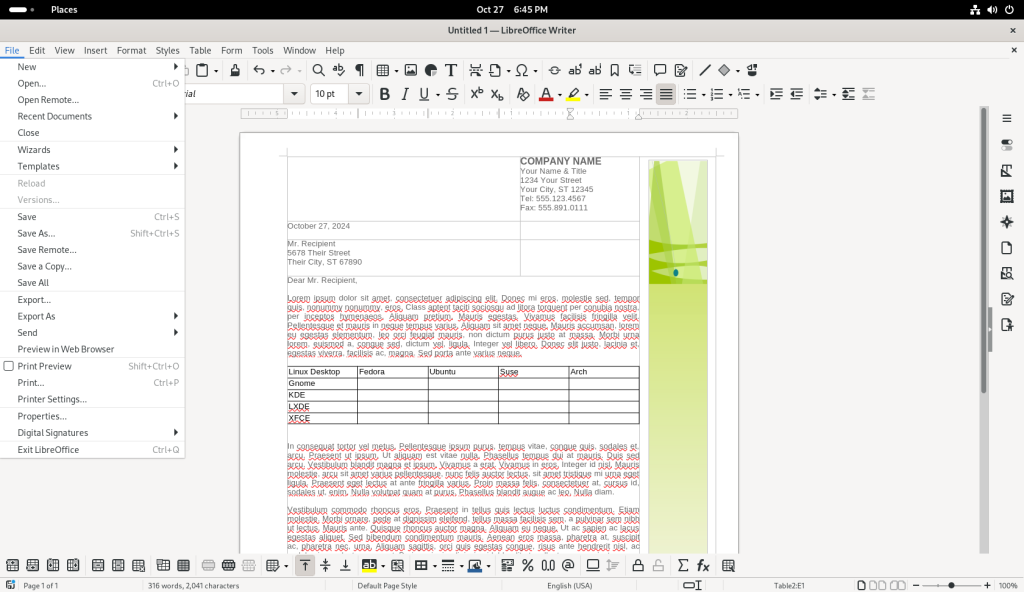
File menu opened

… and the file was saved:

File saved

As with the previous section, I leave it to the reader to further explore LibreOffice Writer to see the various options in the various menus, and the various kinds of text documents that can be created.

Spreadsheets:

Much like other popular desktops, Fedora Linux has several fully functional and fully featured spreadsheet software. One of the most popular such pieces is LibreOffice Calc.

After saving the business cards, I returned to the freedesktop.org website, browsing the spreadsheet templates:
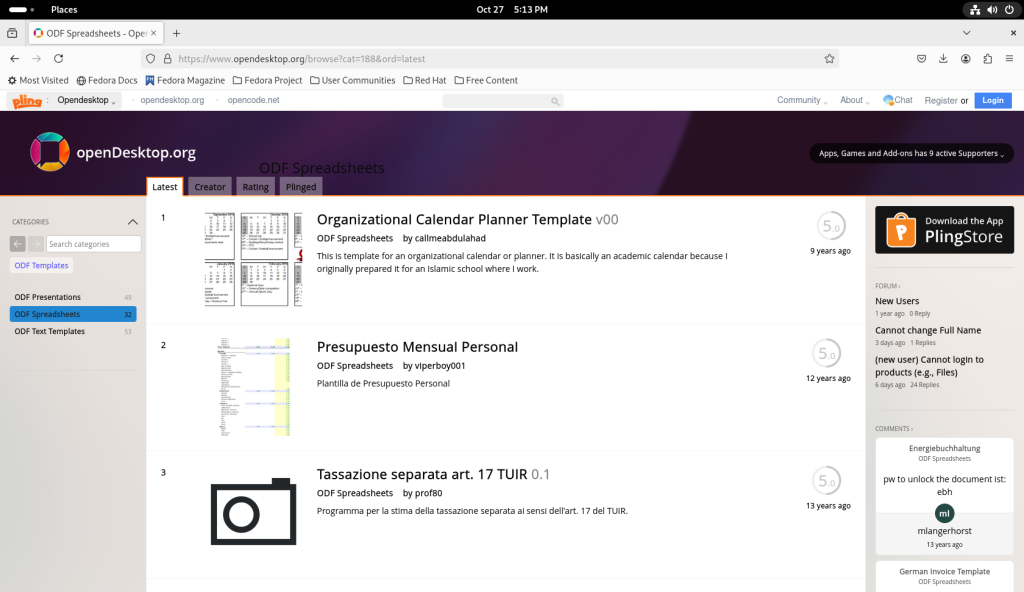
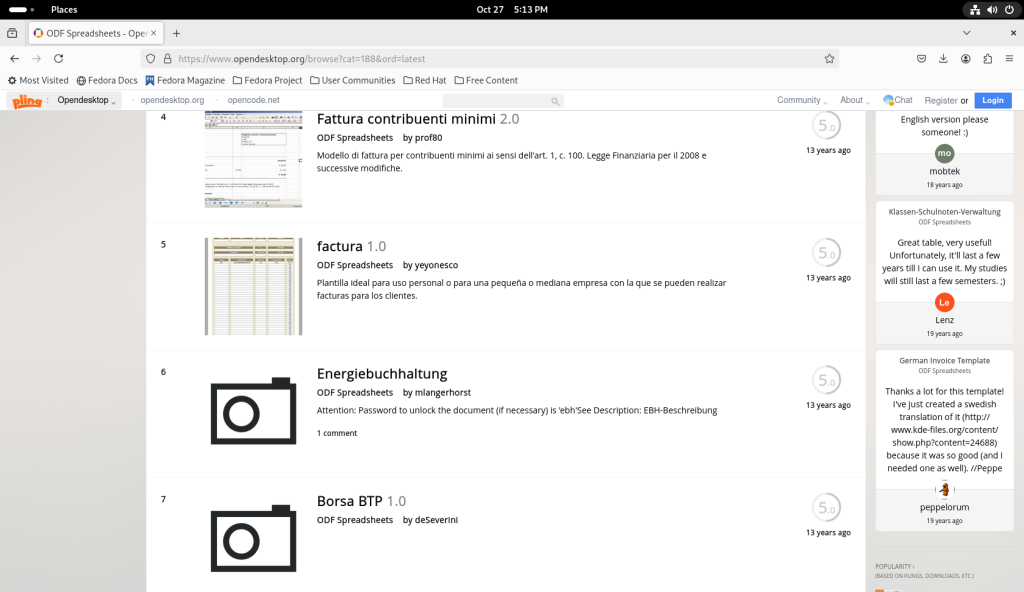
opendesktop.org page sorting for spreadsheets

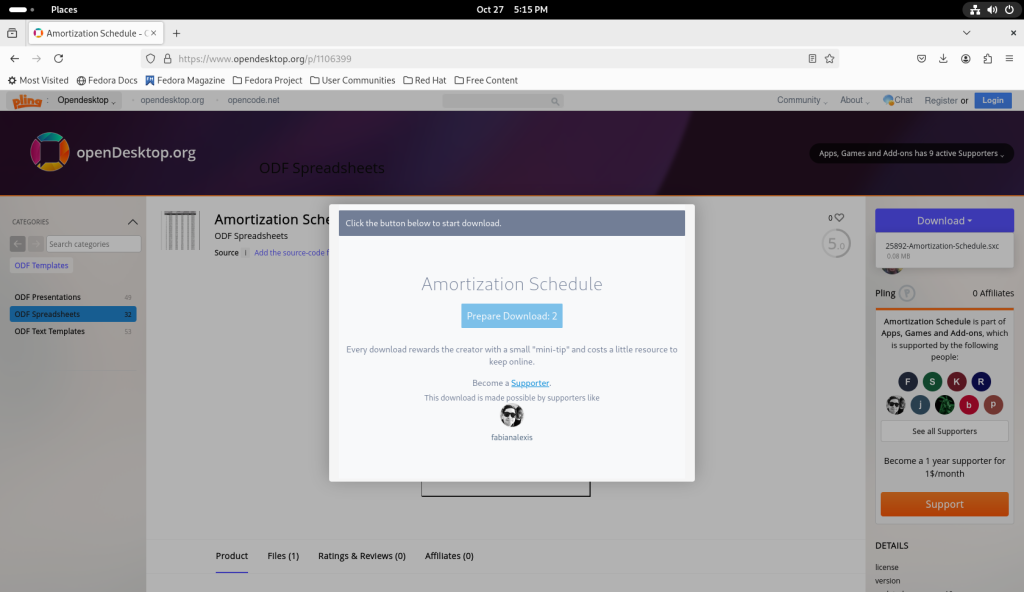
I chose the Amortization Schedule:
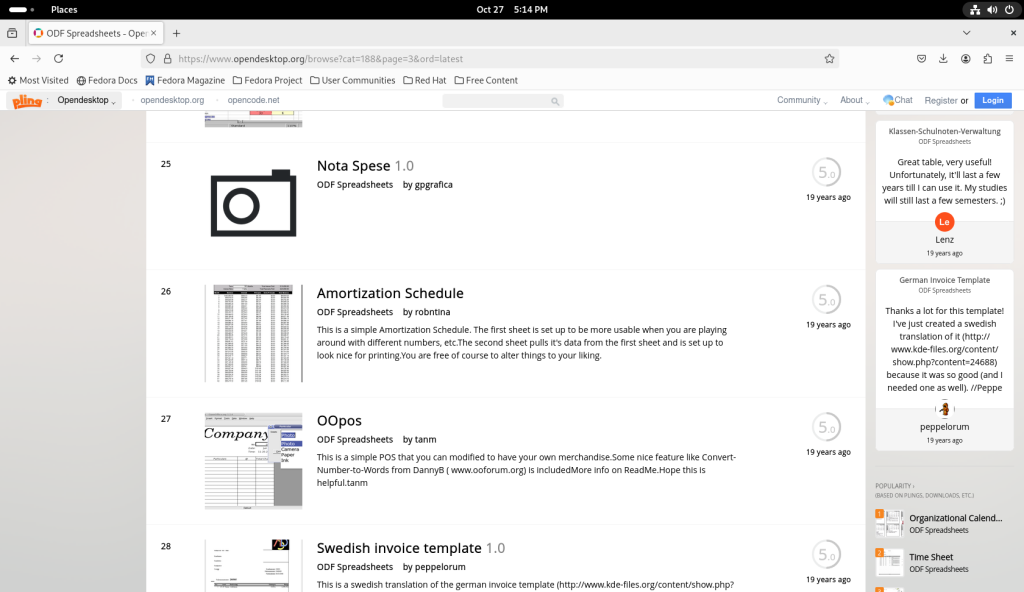
opendesktop.org page with amortization schedule

The amortization Schedule was downloaded:
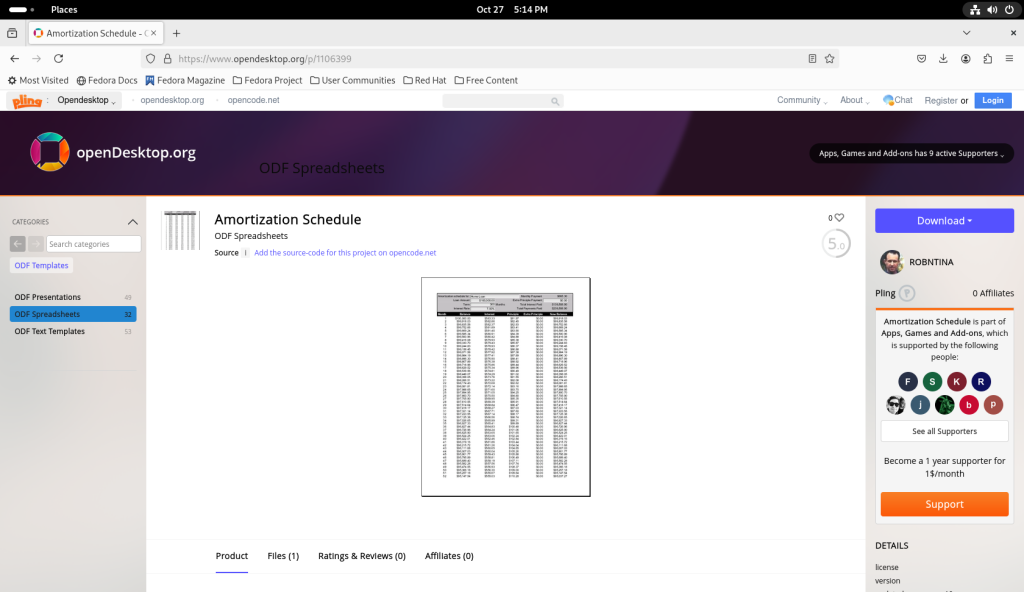
Amortization schedule downloaded

Similarly to previous files, the Amortization Schedule was opened (file double clicked in the file download directory).
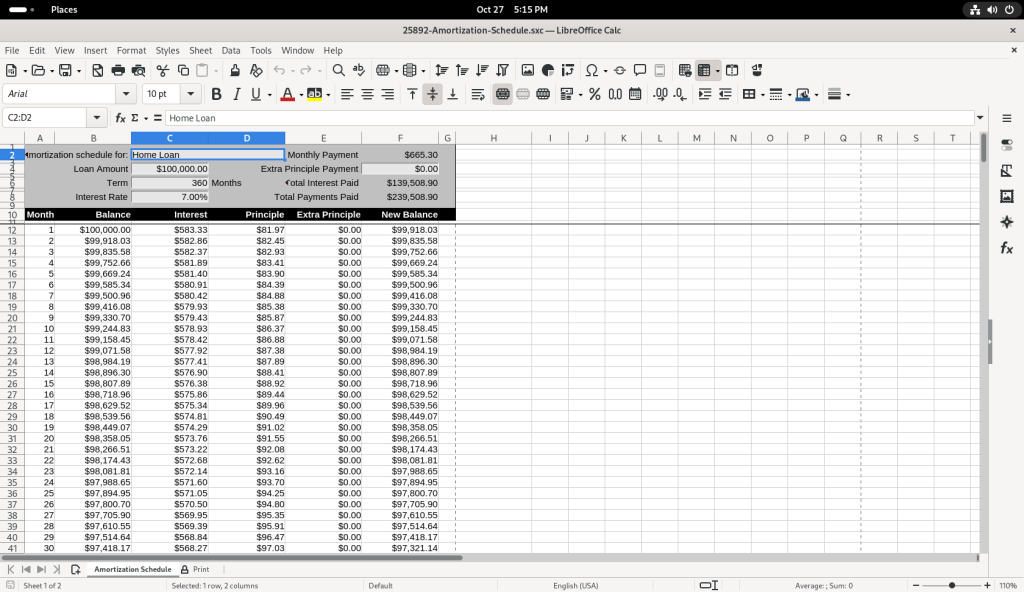
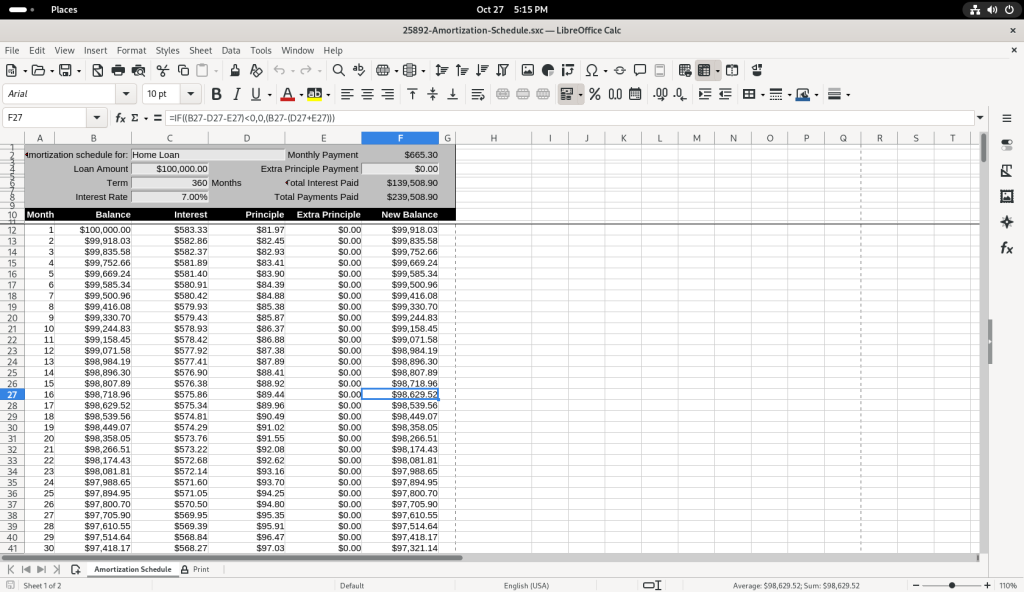
Amortization schedule opened in LibreOffice Calc

Several of the balance figures was selected, revealing how the value us calculated in the formula bar:
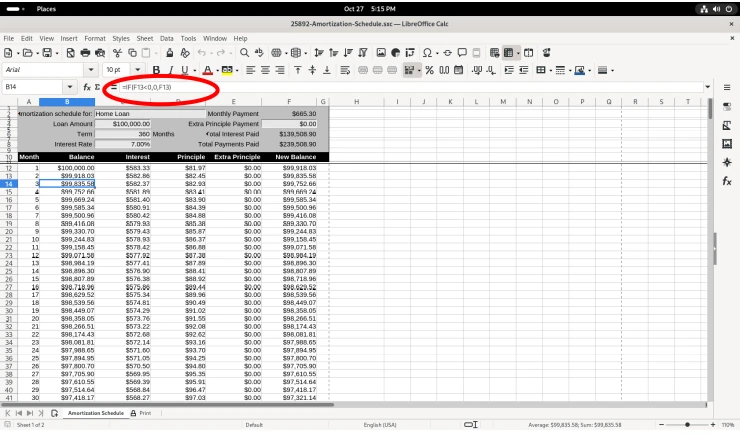
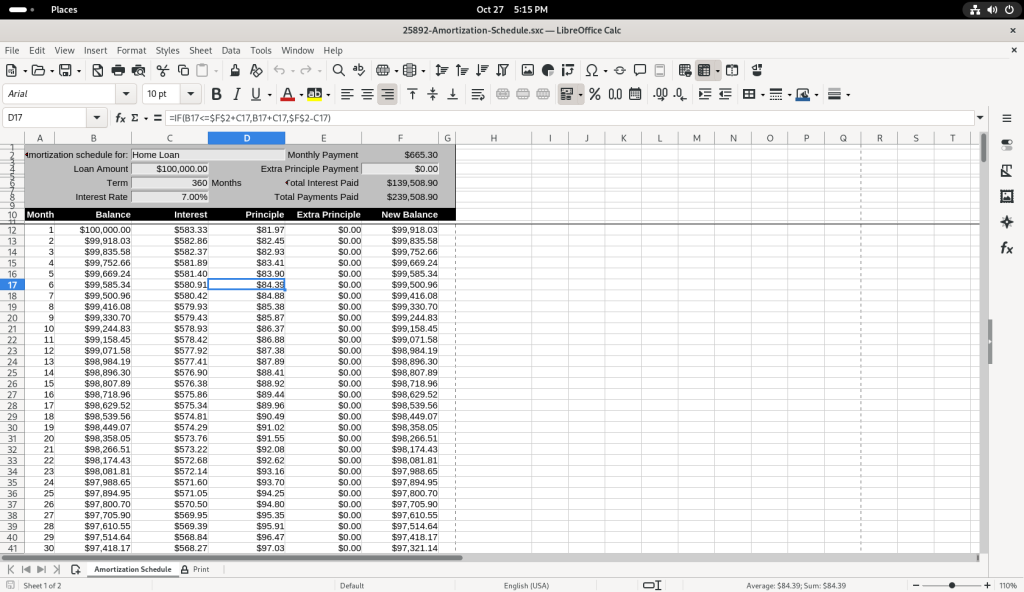
Amortization schedule, cell calculation revealed

I chose to modify the table, by adding a value of 1000 in the “Extra Principle Payment”, to change the values of “New Balance” …
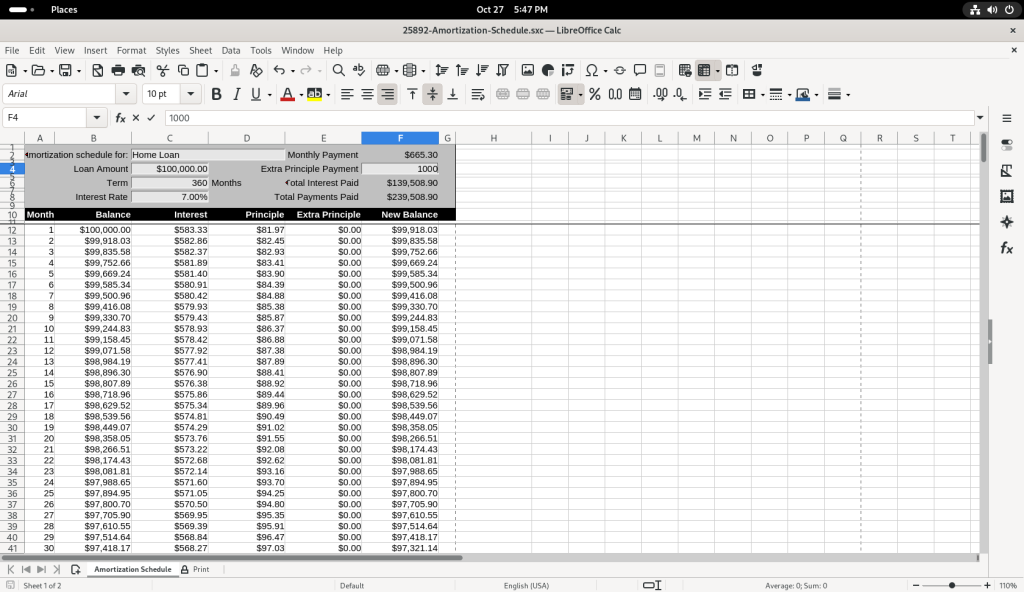
Value changed to 1000

… and then I changed the value to 500 to see how it affected the values of “New Balance”.

Again I leave it to the reader to further explore mounting spreadsheets of their own using their own data.

Slide Shows / Presentations

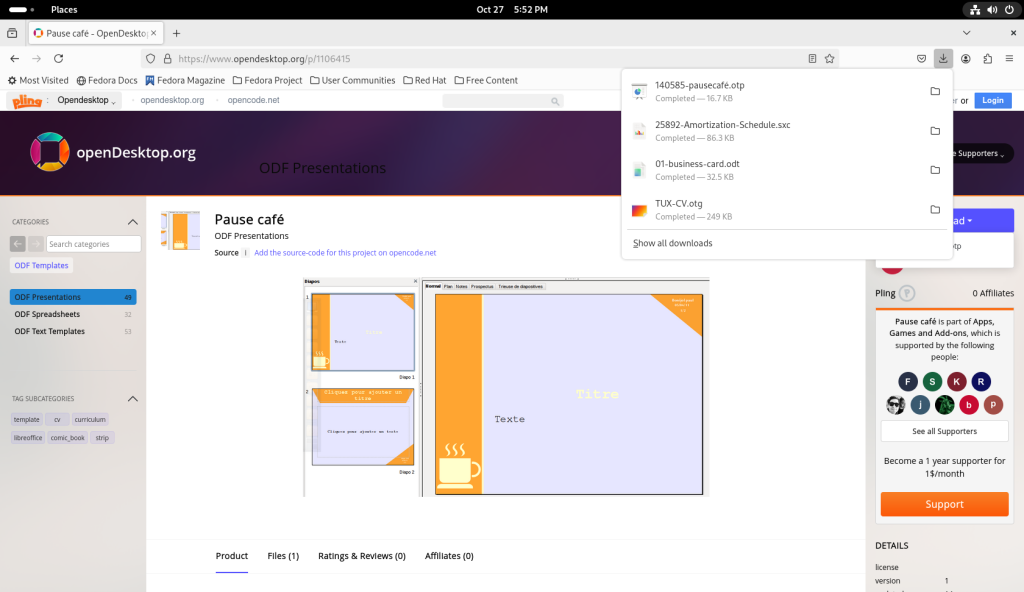
At the opendesktop.org collection of templates, I chose a slide show template to download:
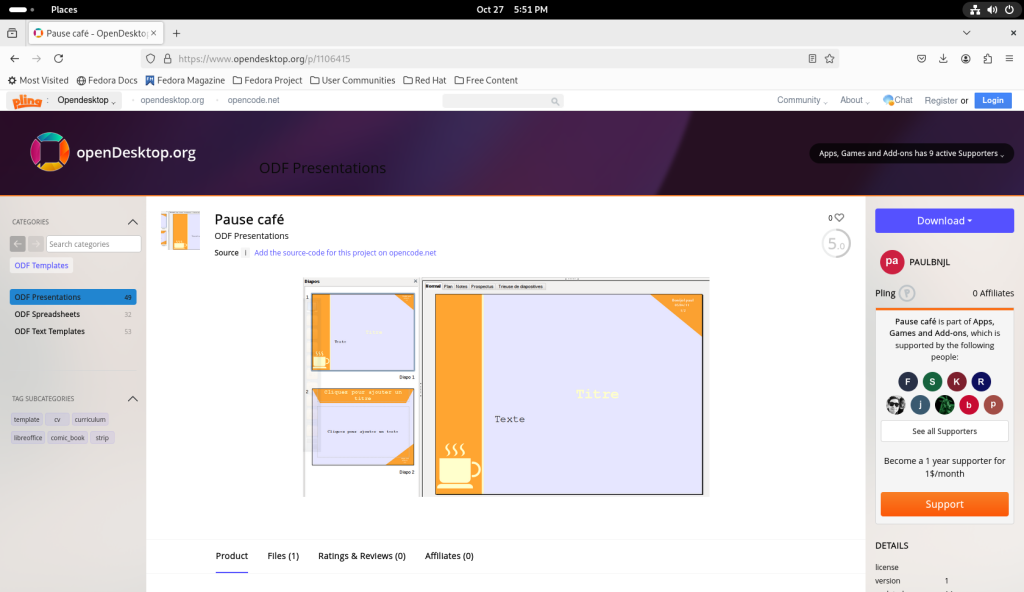
opendesktop.org page sorting for a presentation template

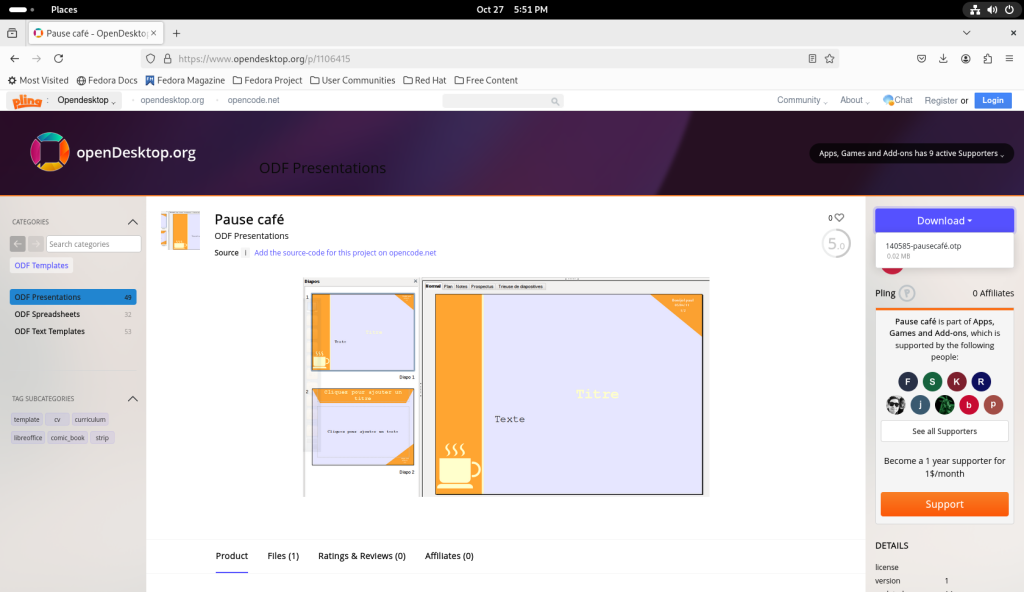
I chose a template to download …

Presentation template downloaded

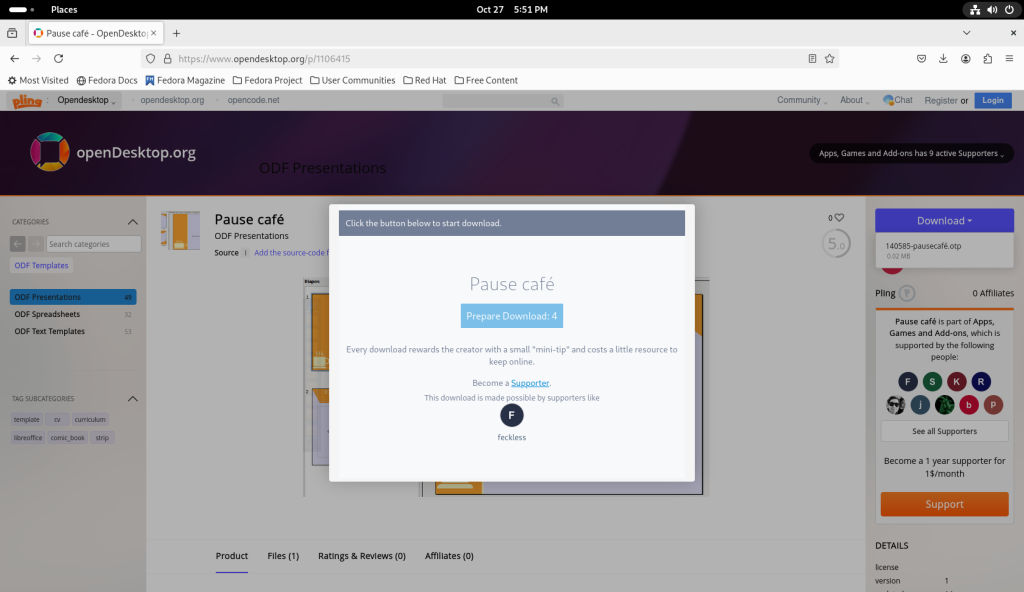
… and downloaded it:

Presentation template downloaded

Again through the files directory, I double-clicked on the downloaded file:
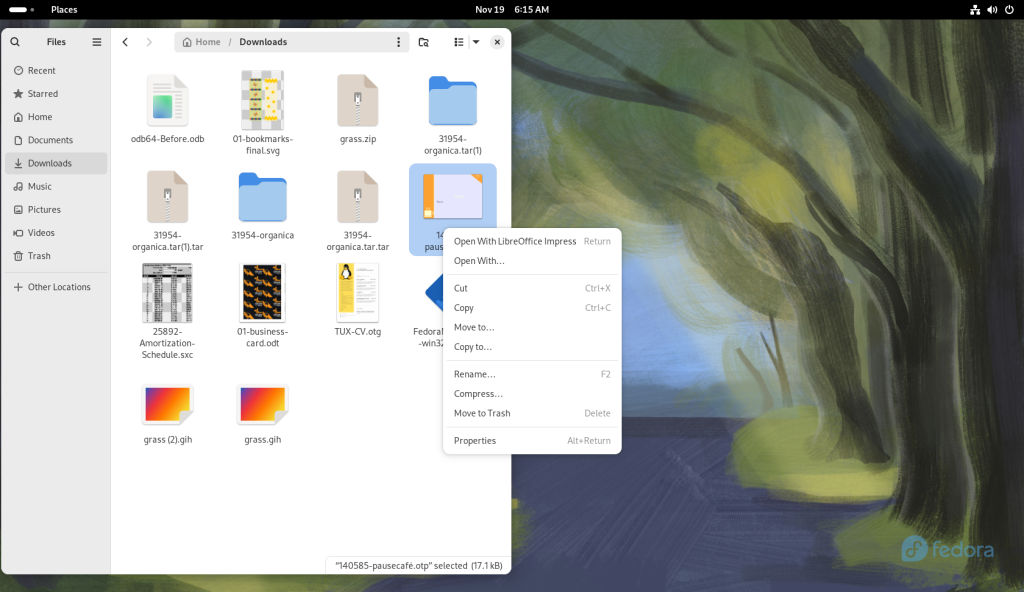
File in download directory double clicked

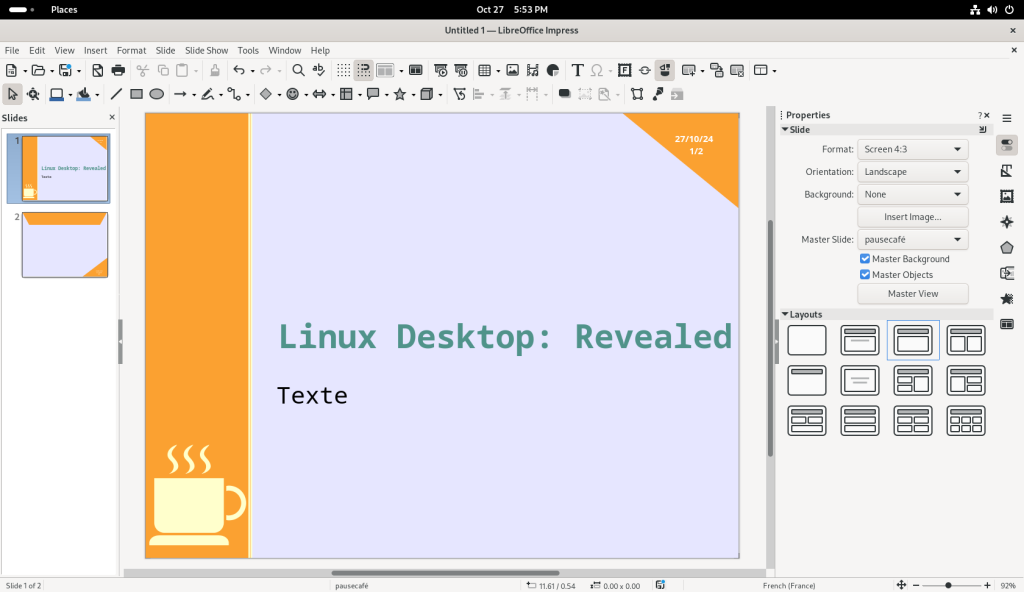
… which opened up the file in LibreOffice Impress:
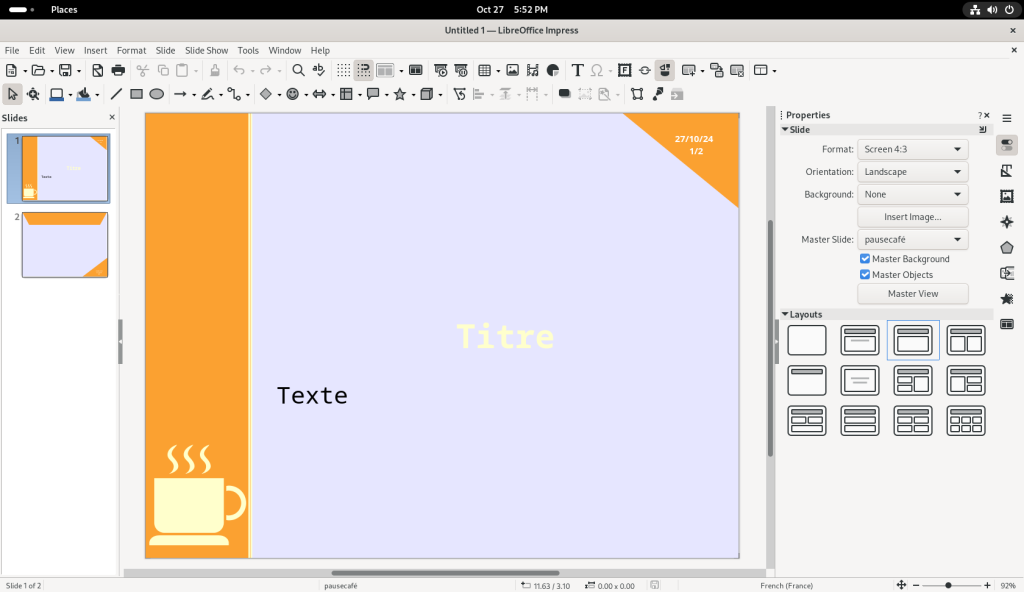
Presentation opened in LibreOffice Impress

I began editing the title line — in the process, using the wrong branding for this series!
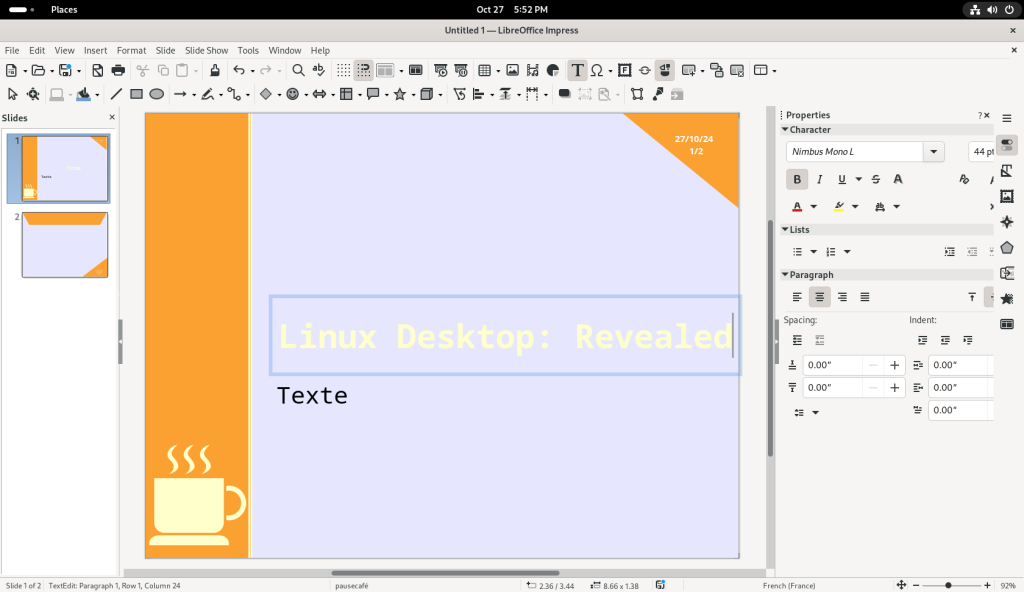
Text modified

The text colour, white, didn’t have enough contrast for my taste, so I selected the text …
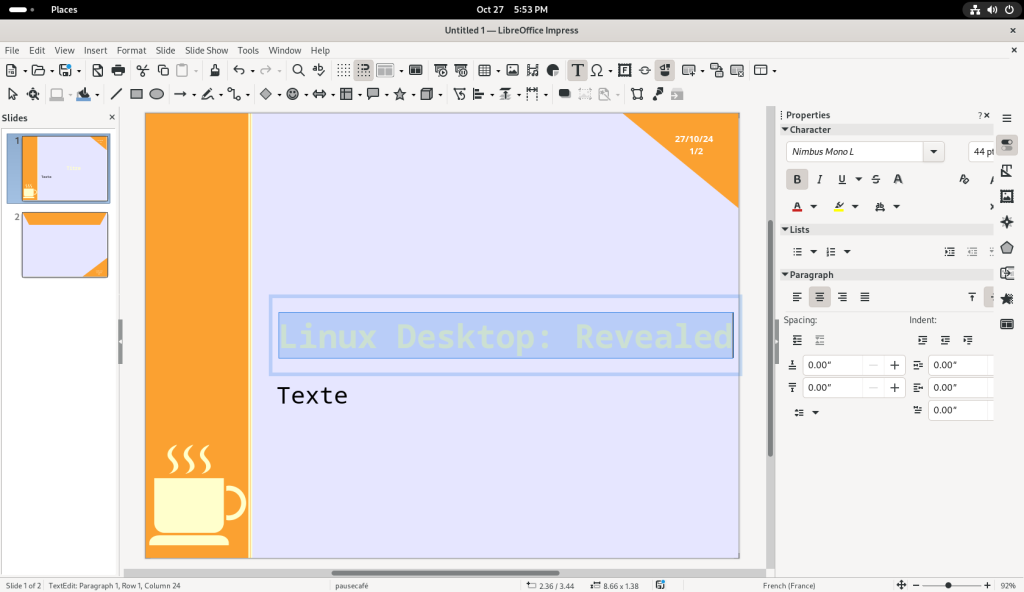
Text colour modified

… and went into the options area on the right to by clicking on the letter “A” with a red underline, to change the font colour:
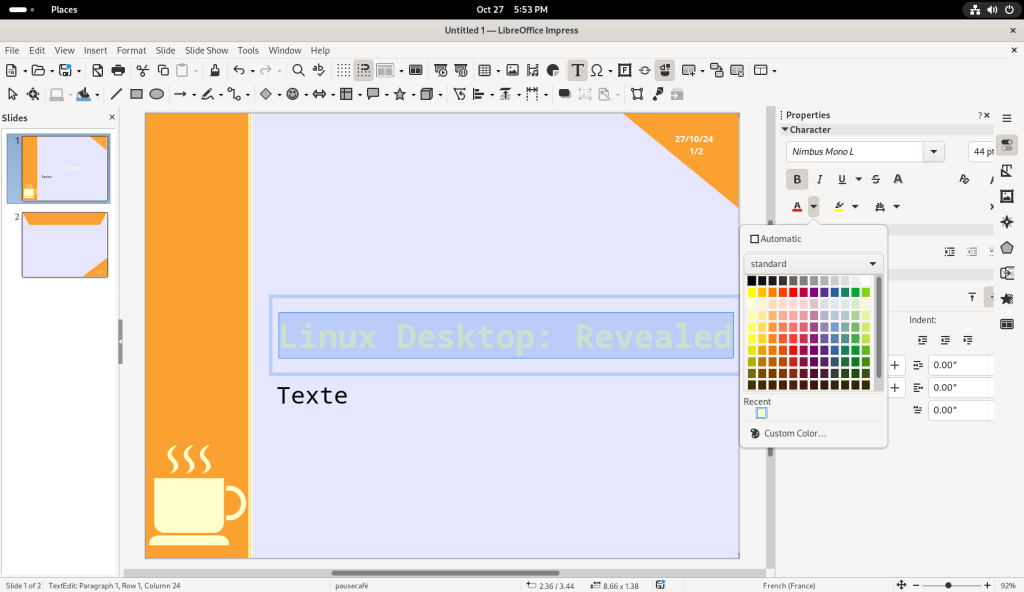
Text colour changed through menu icons on the right

The font colour was changed to a greenish-blue colour:
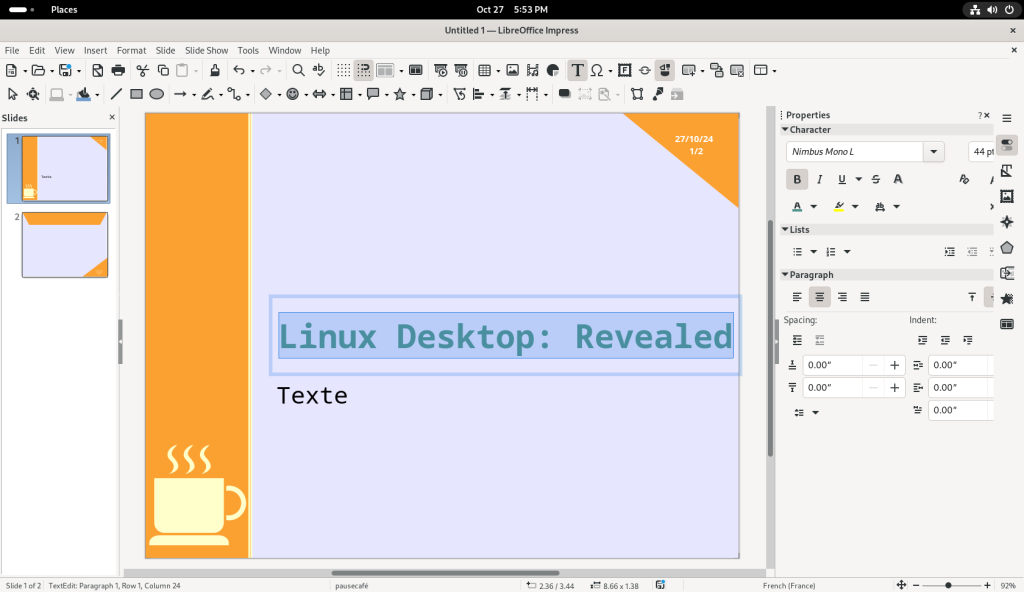
Text colour changed to a greenish-blue

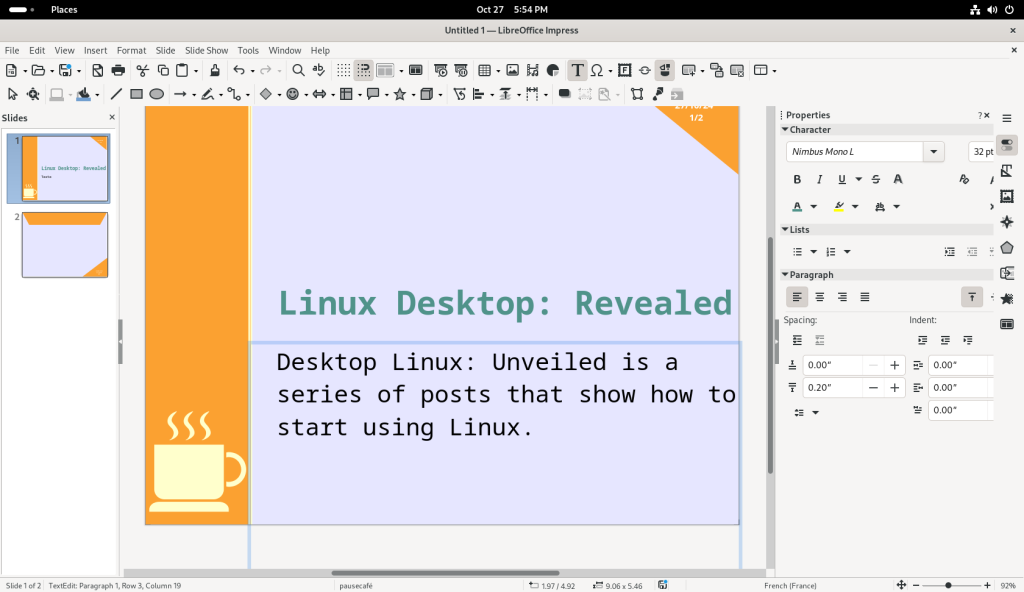
Other text was changed and added:

Text added below title

I changed to the second page, and similarly started to change the text:
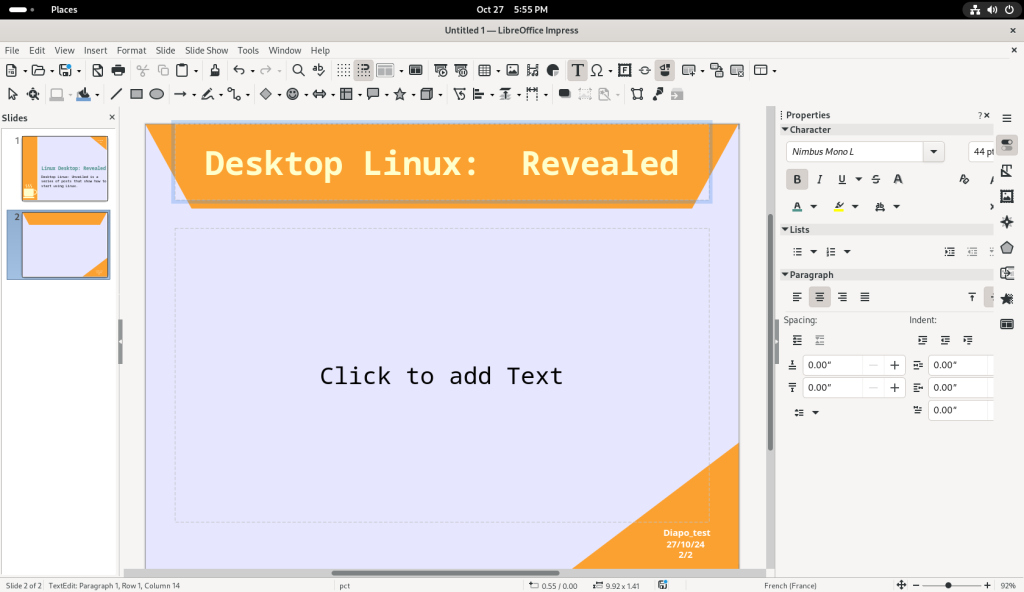
Navigating to second page

Text can be changed as per your needs, as well as pages added through copy / paste or other wizards available.

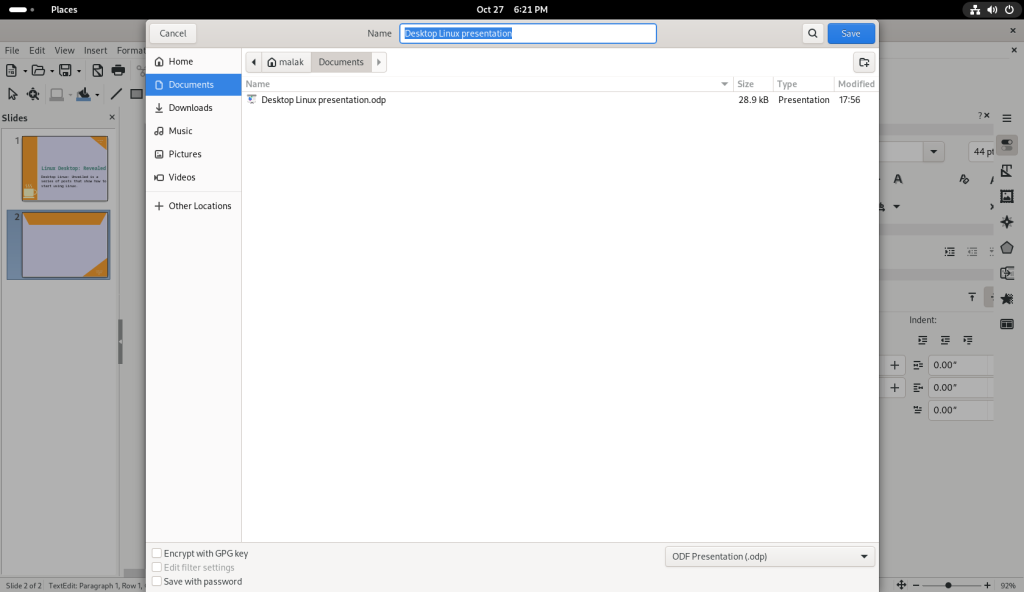
The drop-down file menu was chosen, so that I could save the file:
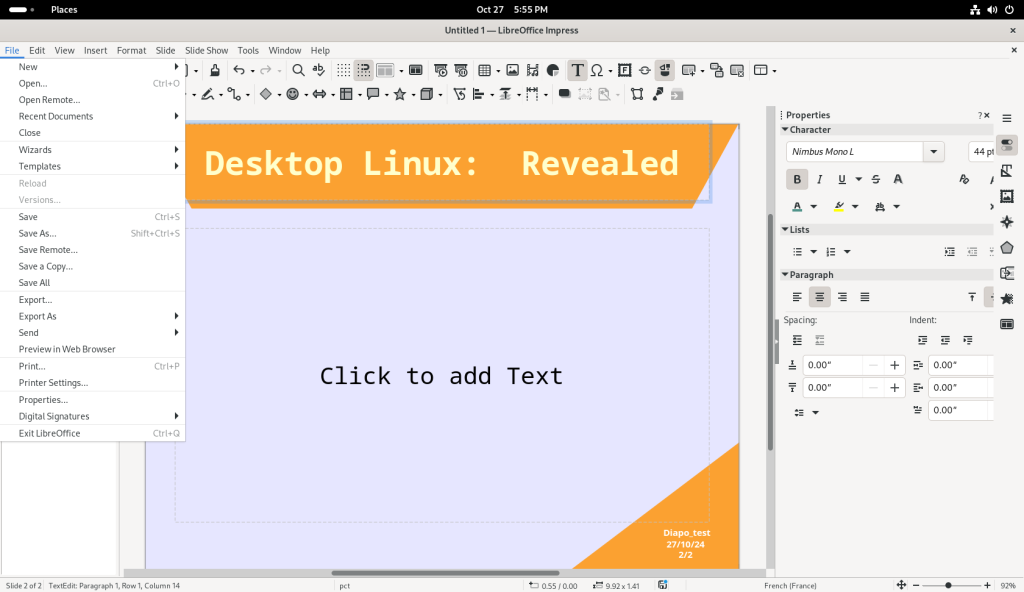
File drop down menu to save the file
File saved

Once the file was saved, I opened up the drop-down file menu again, and chose “Export As” so that I could export the file as a PDF. (Editorial note: As mentioned earlier, while there is a good amount of compatibility between LibreOffice and other office suites, it can be disappointingly incomplete, which I have particularly seen and experienced with — but not only — slide shows. For more of a discussion of such from the perspective of the usefulness of PDFs, please see my post on the subject.)

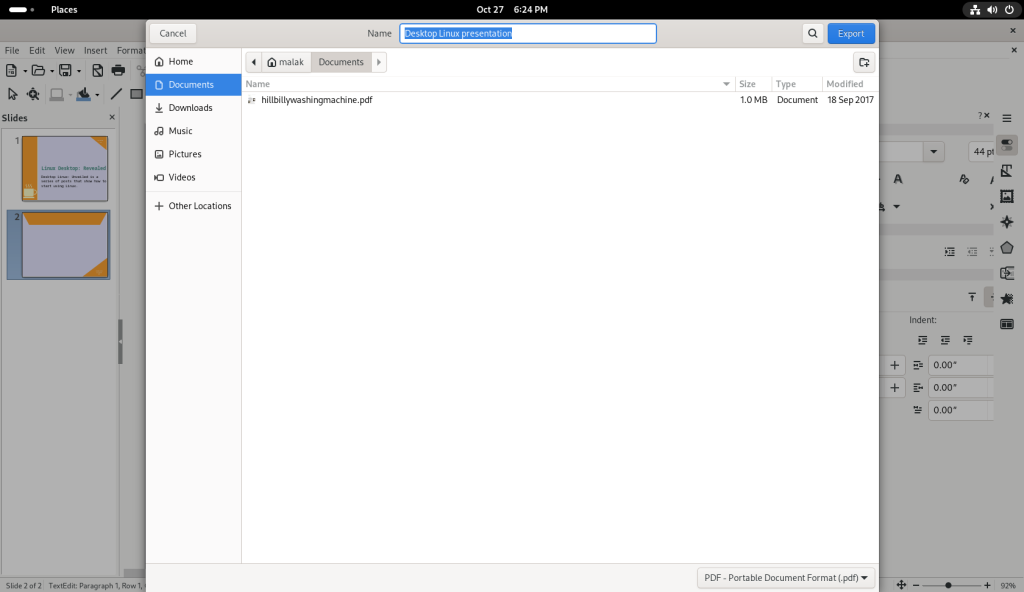
The file drop-down menu was clicked again, and the option “Export As” was clicked:
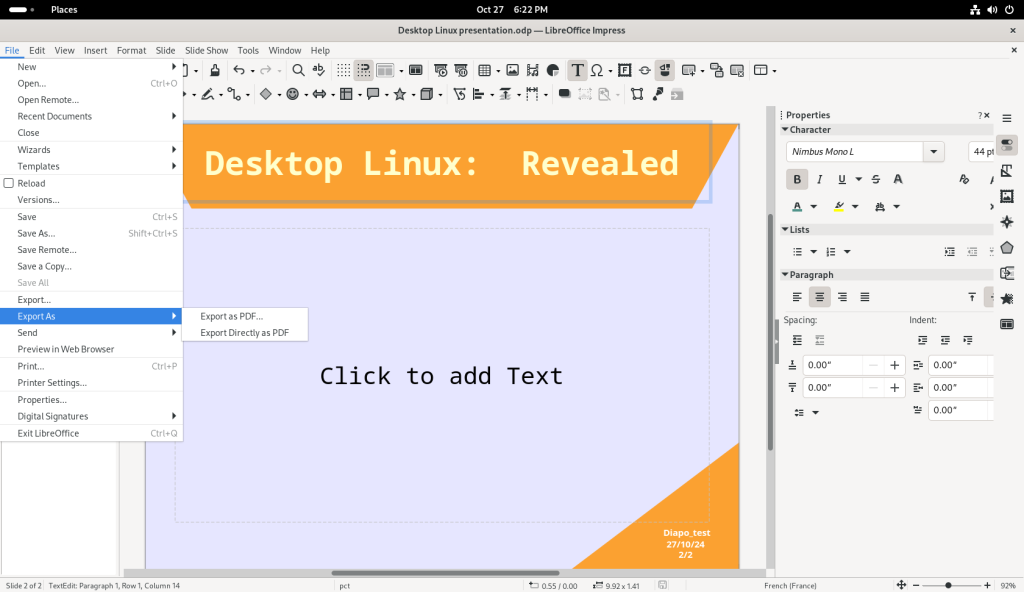
File menu opened to export the file as a PDF

Exporting to PDFs can be rather easy and direct, or, as I am going to show a little bit here, allows for a large amount of choices …
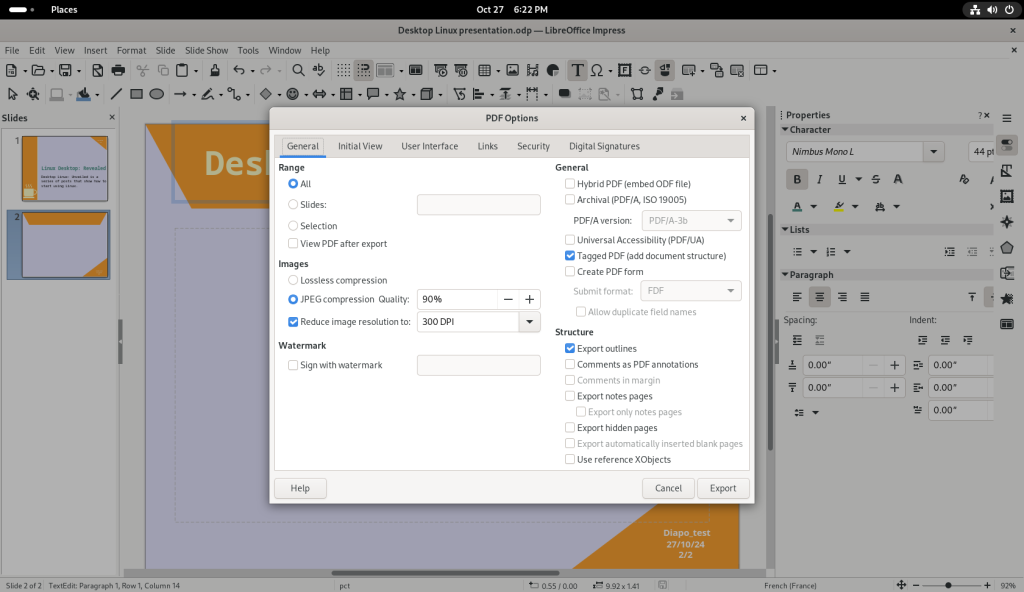
Options window for PDF options

… including protecting PDFs with passwords for opening:
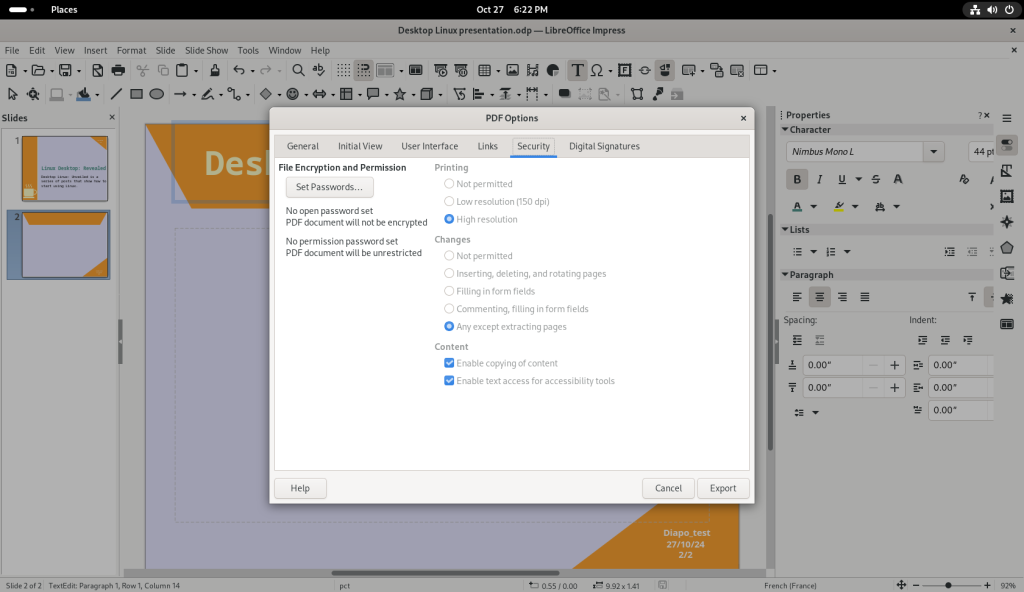
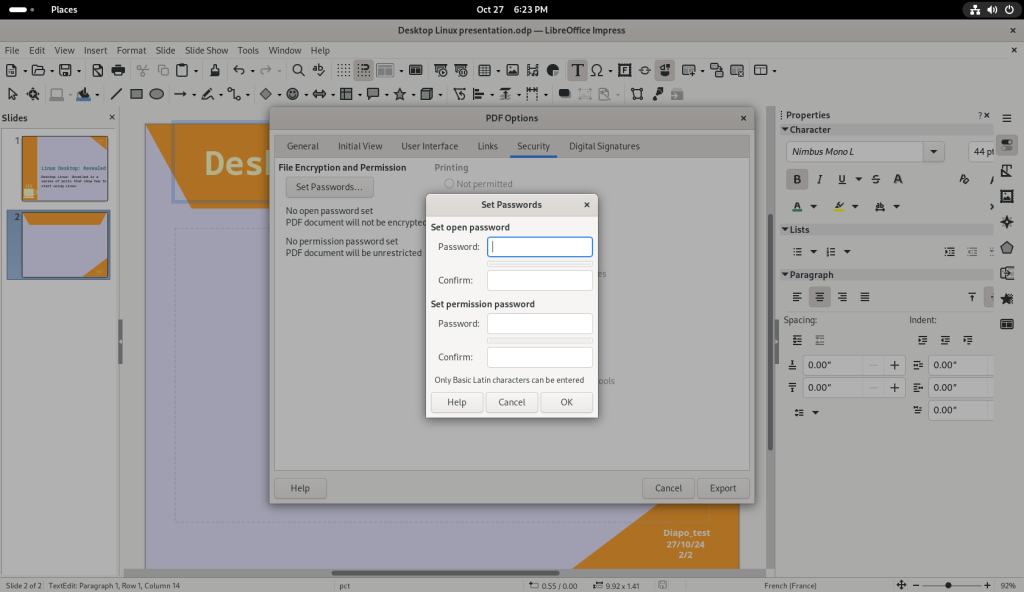
Tab with options for password setting for opening PDFs
Setting passwords for PDFs

Passwords were set for both opening as well as for “permission” which means to allow editing of the PDF (see my post on the subject), and the slide show was exported as a PDF:
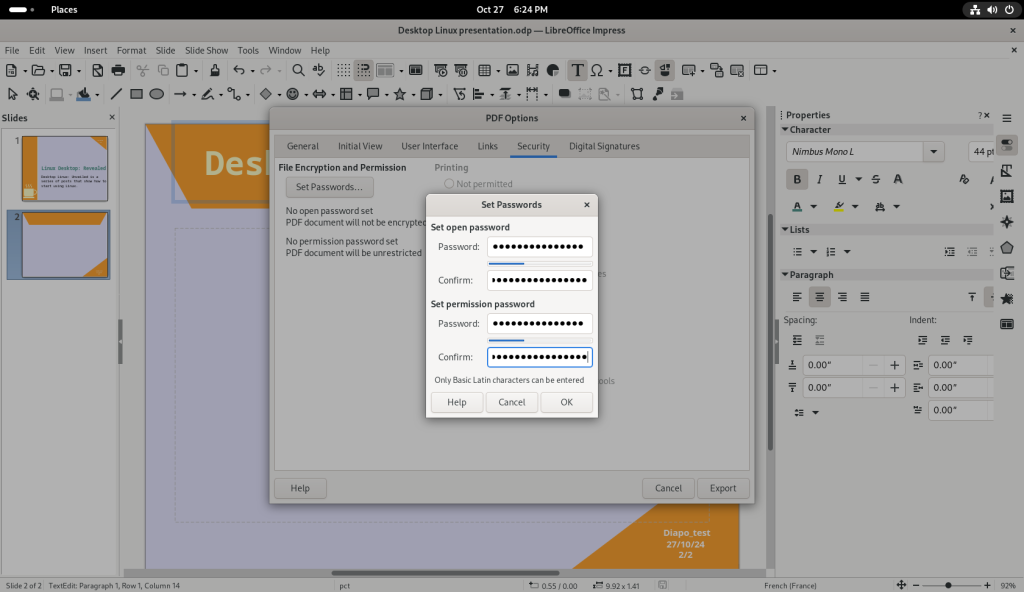
Setting passwords for PDFs

… and the OK button was clicked:

Presentation exported to PDF

As usual, I leave to the reader to explore further. Also, within LibreOffice itself it has a wizard to help the user create a number of presentations with various backgrounds and layouts.

Database:

LibreOffice also includes a database module, called “Base”, which is similar to Microsoft Access; it is essentially a front end manager — a gui interface — for the actual database software behind it that it leverages.

Before I show a properly mounted database, I will show some screenshots about how to start.

Starting from the home screen, the activities corner (hot corner) in the upper left was clicked:
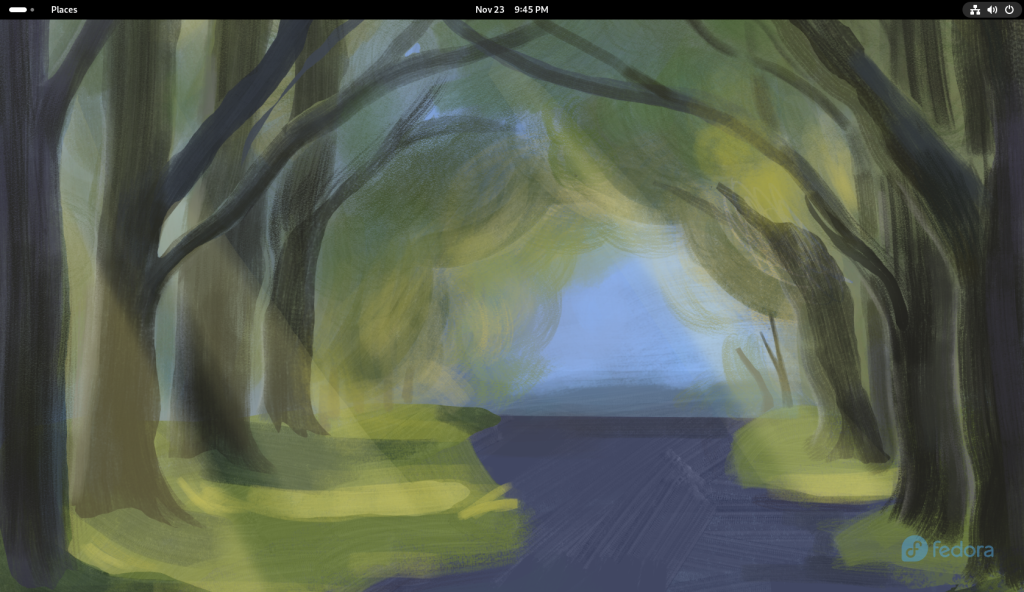
Desktop screen

On the Activies screen, “libreoffice base” was typed into the search bar, and the option to install LibreOffice Base, which is not always installed in a base install, was offered:
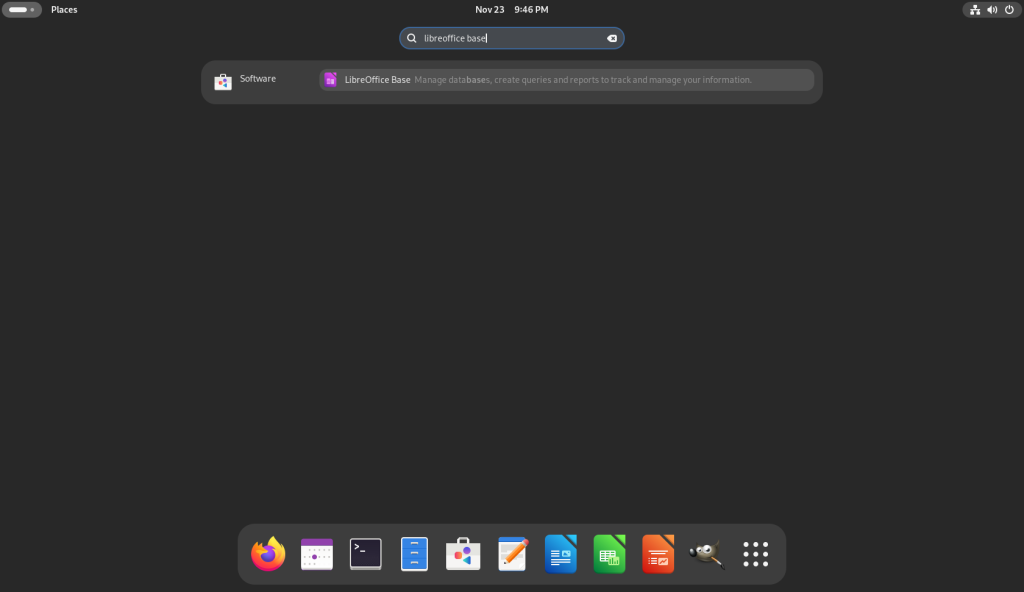
Activities screen accessed, and “libreoffice base” searched for; the option to install Base was offered

The option was double-clicked, which brought up the “software store” with the choice of LibreOffice Base …
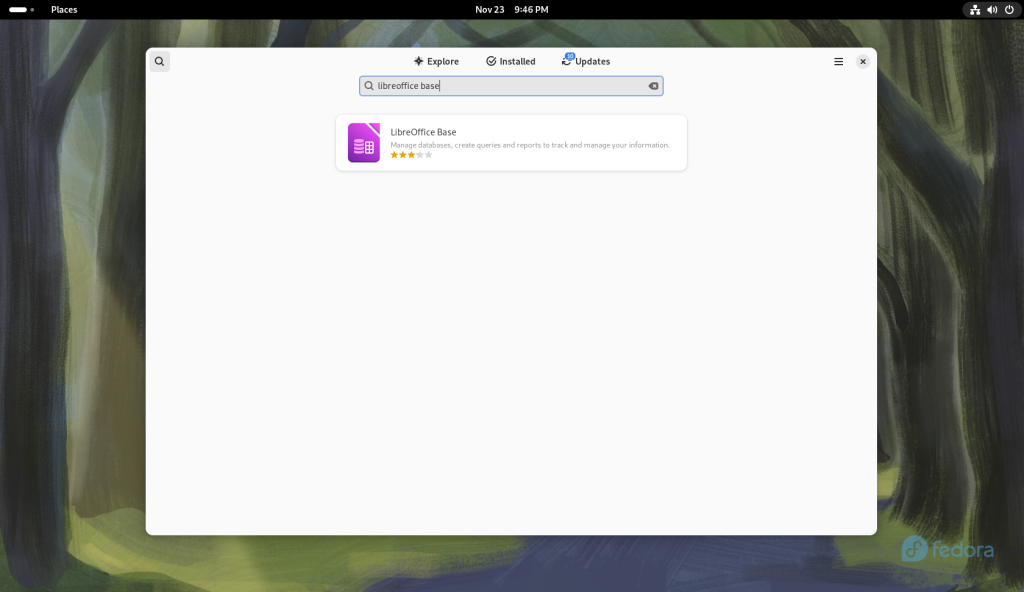
Software store opened to allow for installation of Base

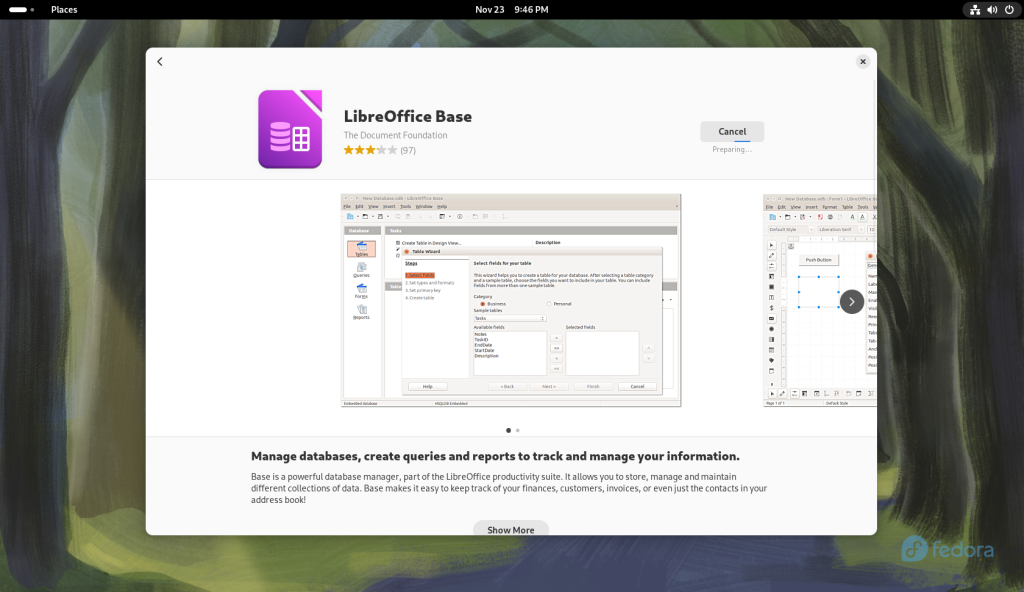
I double-clicked on the option, bringing up the information page on the package and the offer to install it:
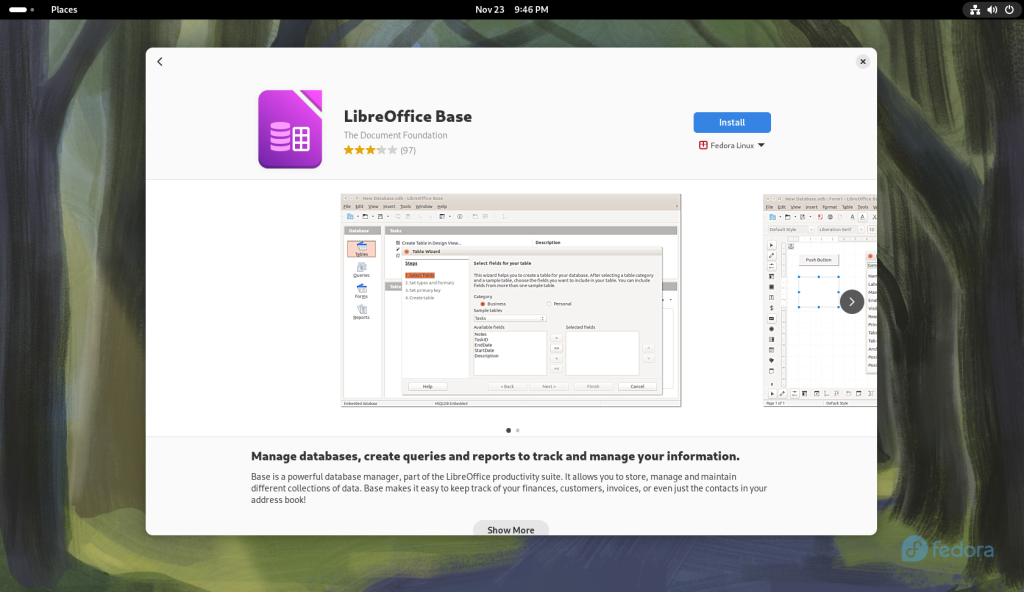
Description page for Base

I clicked the “Install” button:

Base installing

Once LibreOffice Base was installed, an “Open” button presented itself:
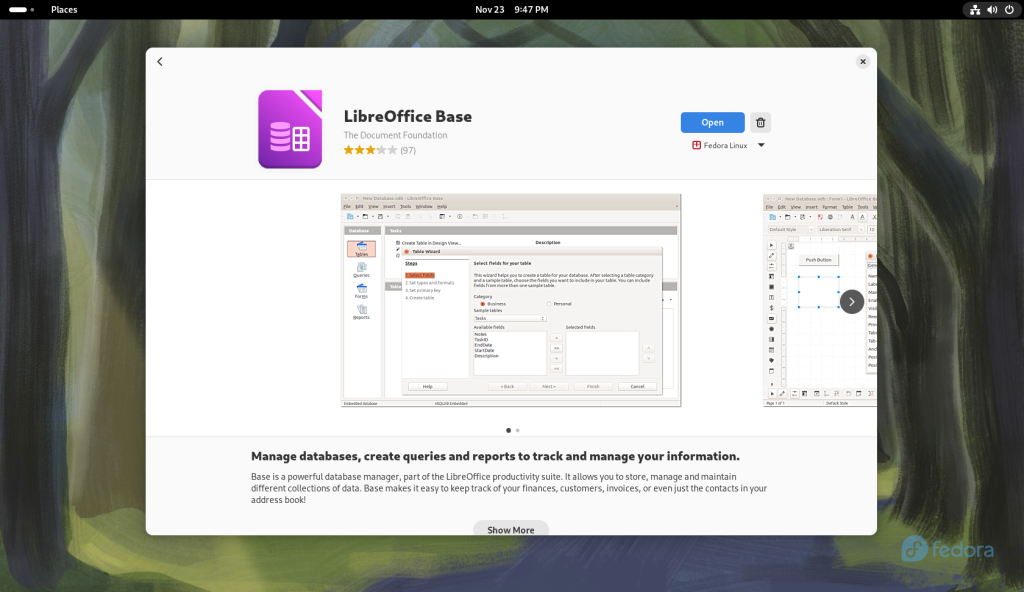
Base opened

The “Open” button was clicked, lauching LibreOffice:
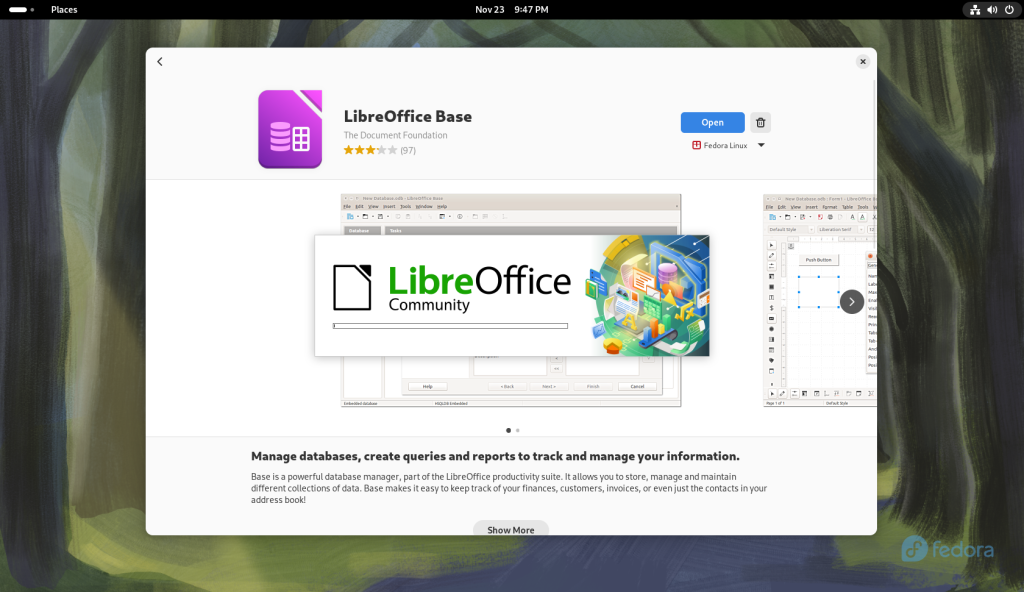
Base opened

A wizard came up to select a database:
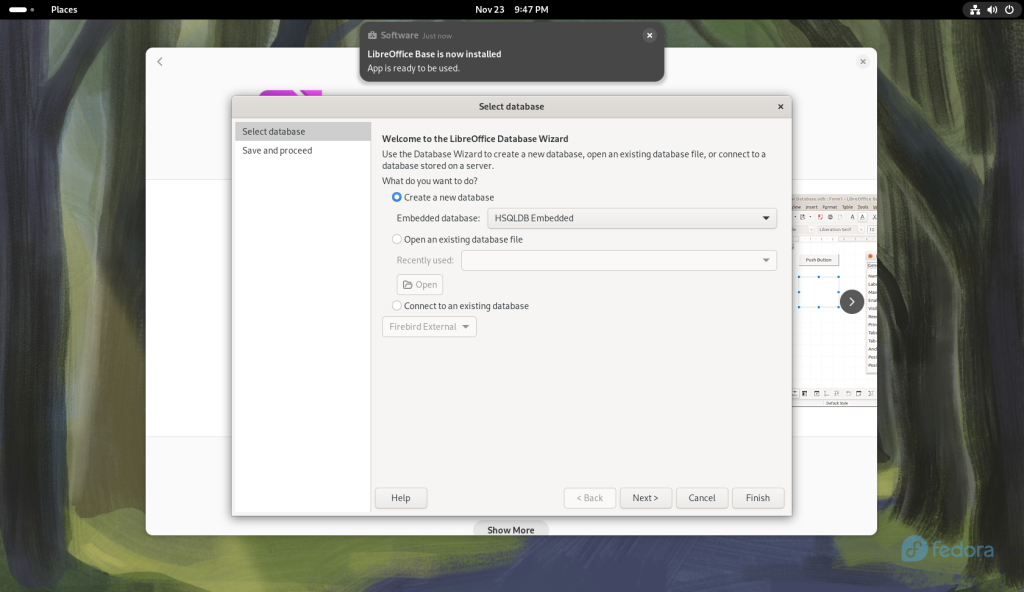
Wizard opened to allow choice to launch Base

The presented option was accepted, and the “Next>” button was clicked, bringing up a “Save and proceed” window:
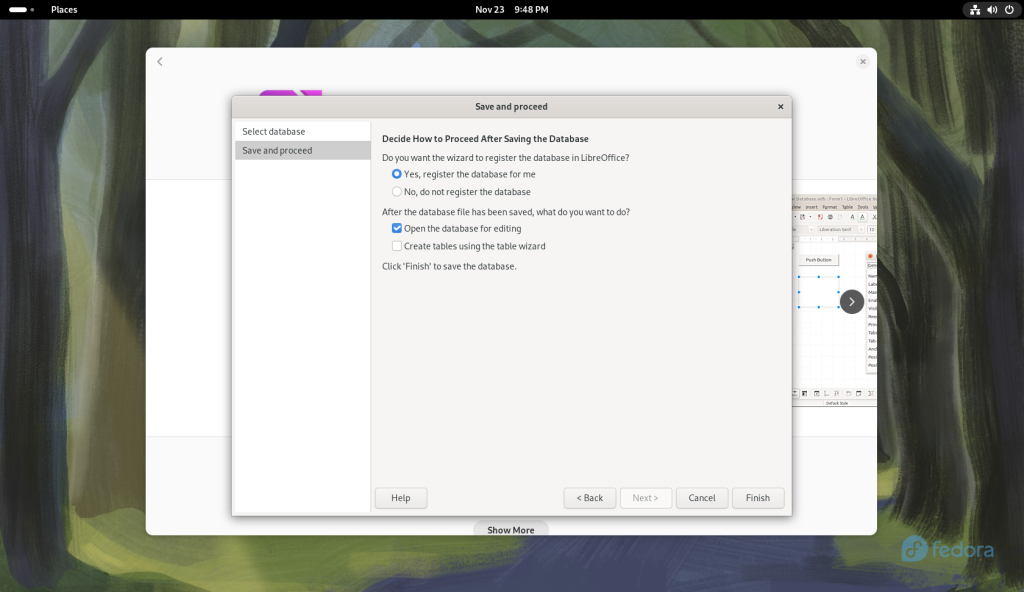
Save and proceed window

The “Finish” button was clicked, opening a Save window:
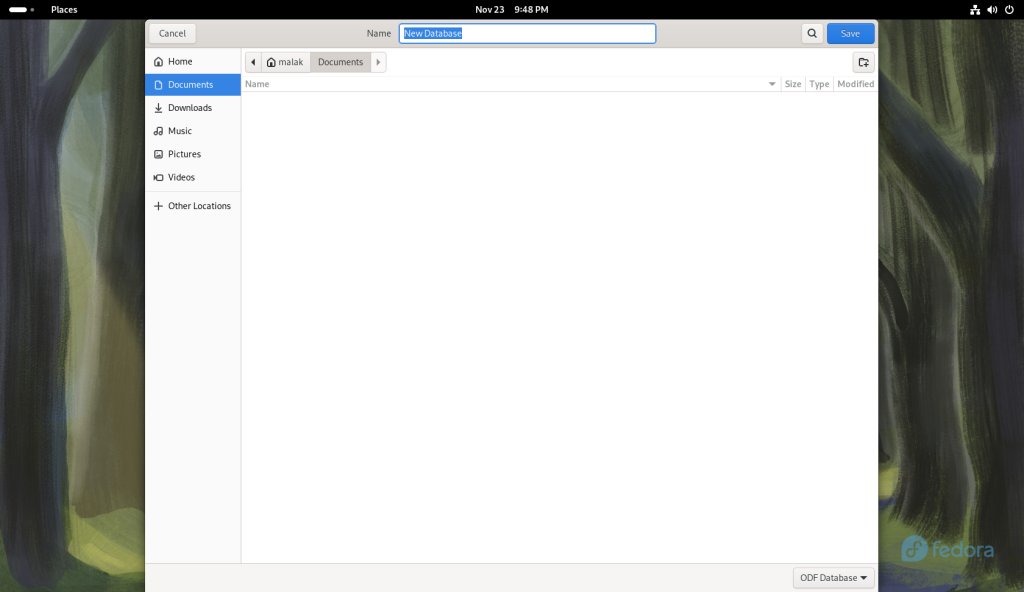
Finish button clicked, allowing for the creation of a database

Once that was done, the following screen came up, in order to start creating a database:
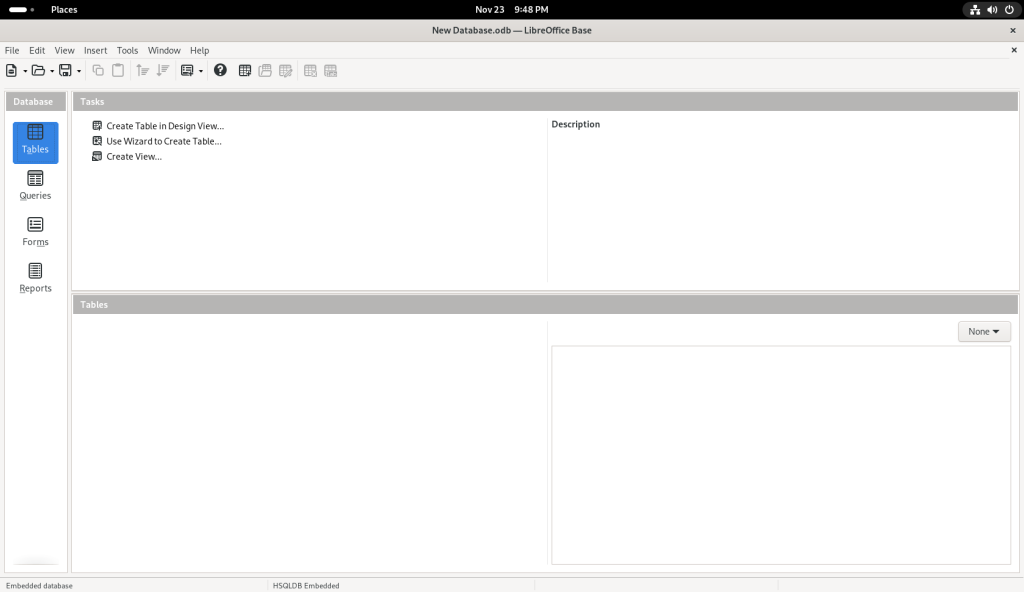
Initial screen for creating a database

Note that from this point on, I am showing some very basic things, and I will soon recommend a tutorial, which will better show how to use the software than I could ever present.

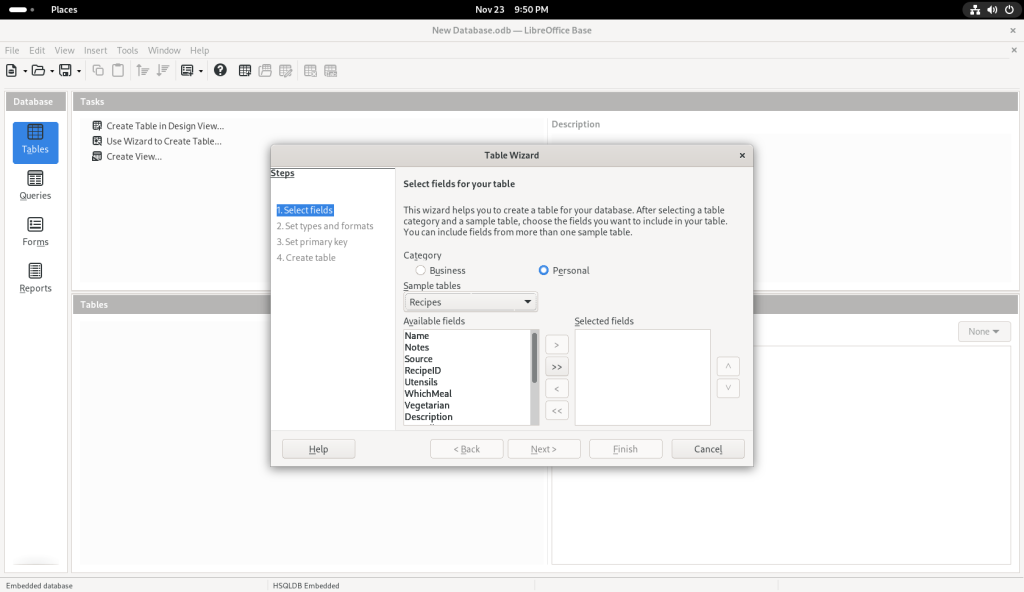
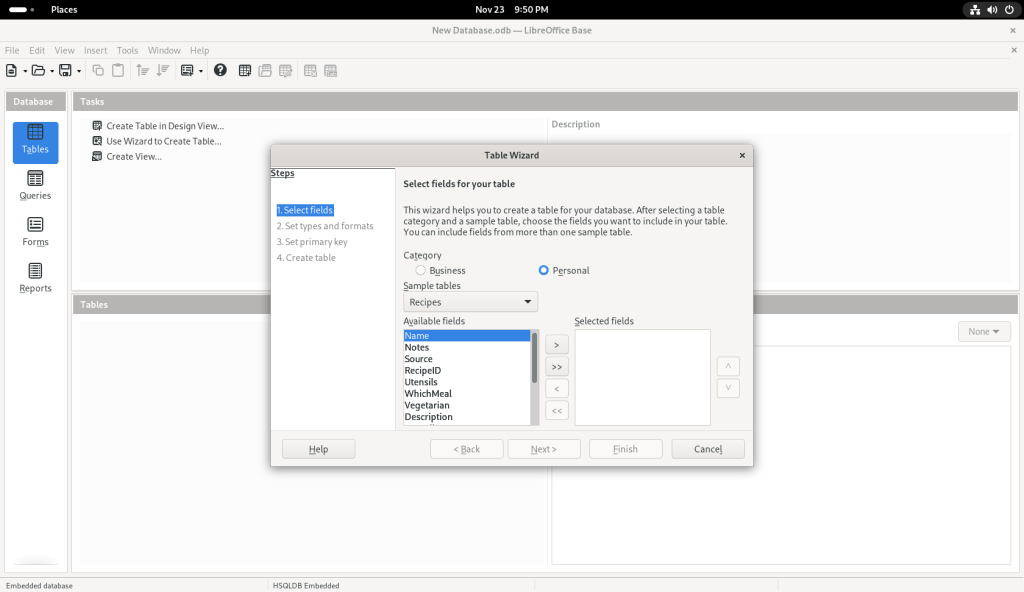
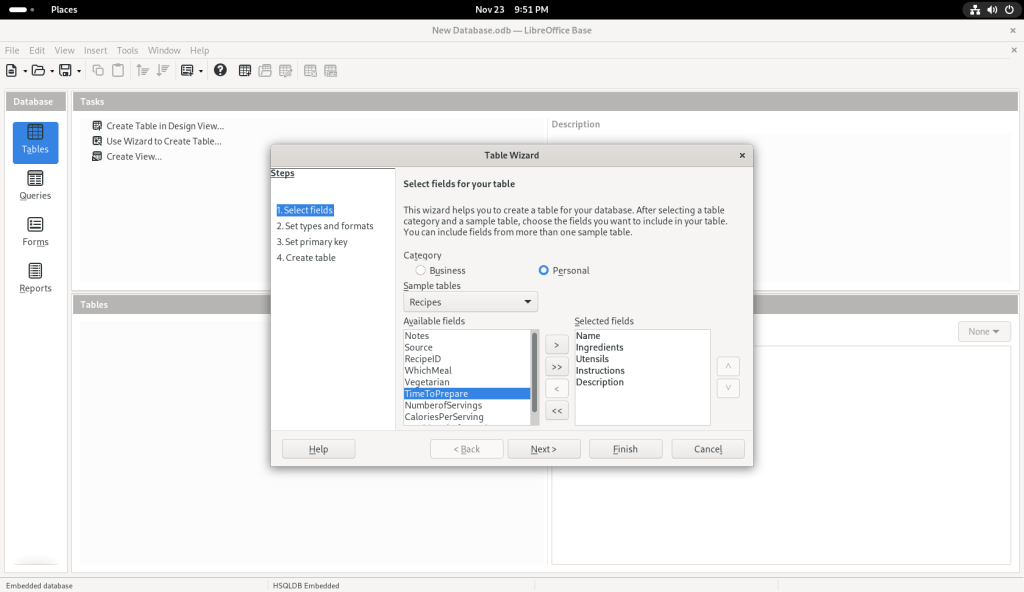
I clicked on the “Table” icon, which brought up a Table Wizard:
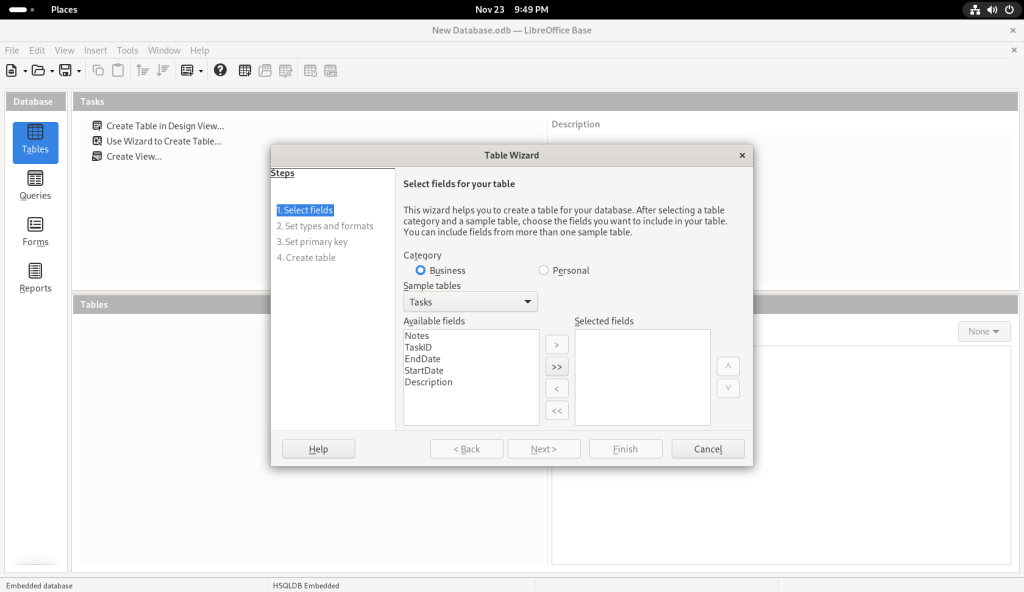
Table Wizard launched

I chose the “Personal” category, on the premise — in the context of this post, anyway which presumes that many readers may be seeking to use linux at home and not just at the office, and that a database might not as easily appear to be a personal piece of software.
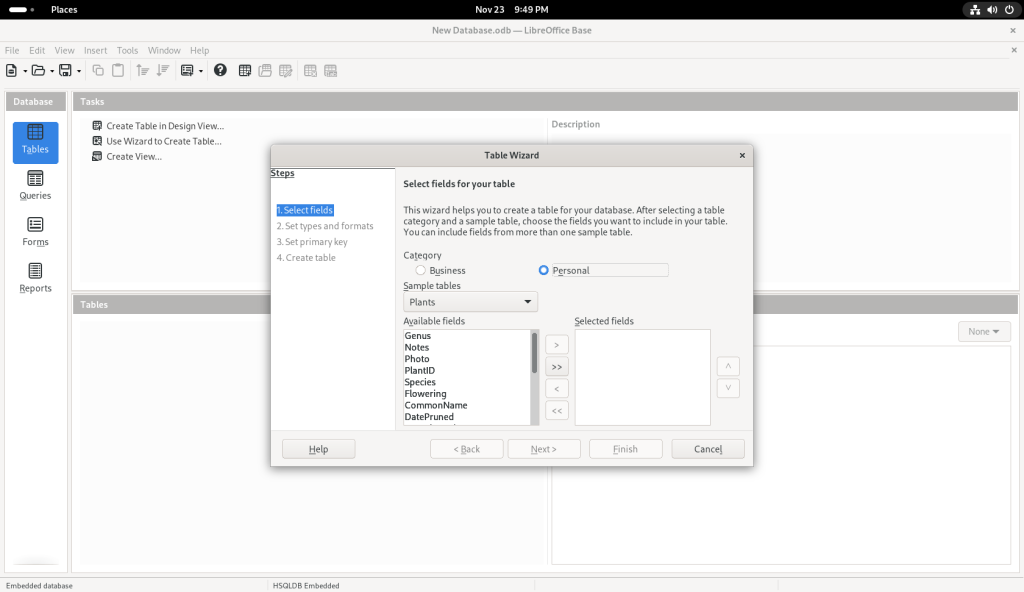
Personal category chosen

I pulled down the suggested list of topics:
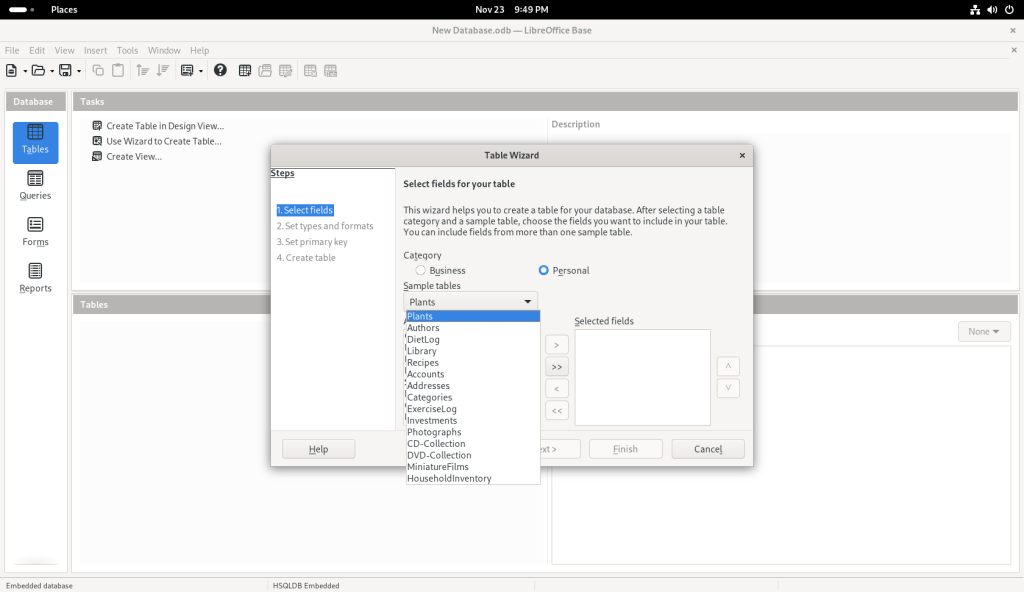
Suggested list of topics

… and chose “Recipes” for what I presume are obvious reasons — we all eat, and presumably many people have a personal collection of varying sizes (here’s my collection of recipes, incidentally NOT in a database format, at https://www.malak.ca/food).
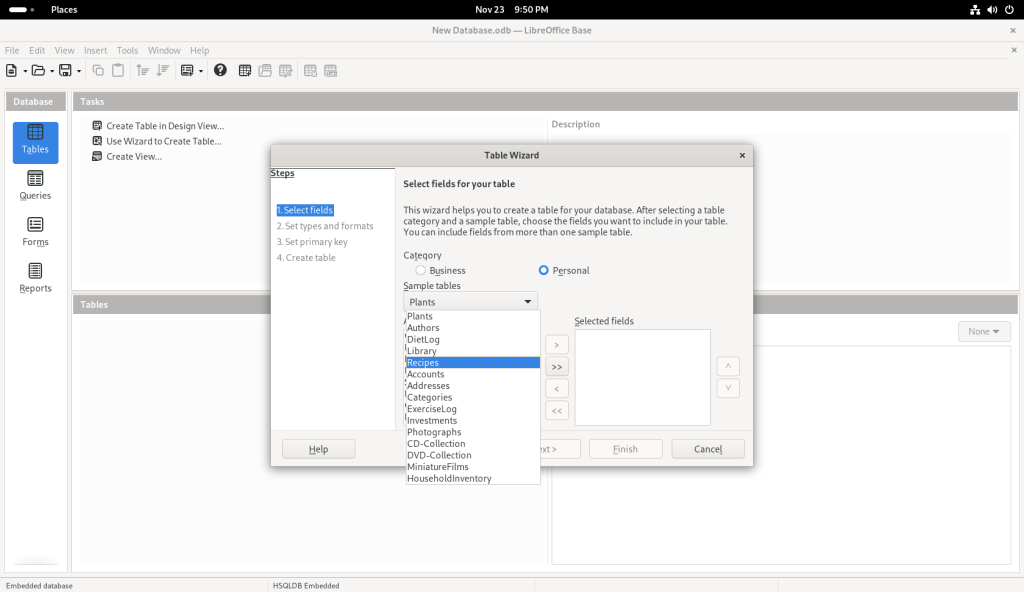
Recipe option chosen

Some field names were suggested:

Field names suggested

I clicked on “Name”:

Name selected

… which moved it over to the column on the right:
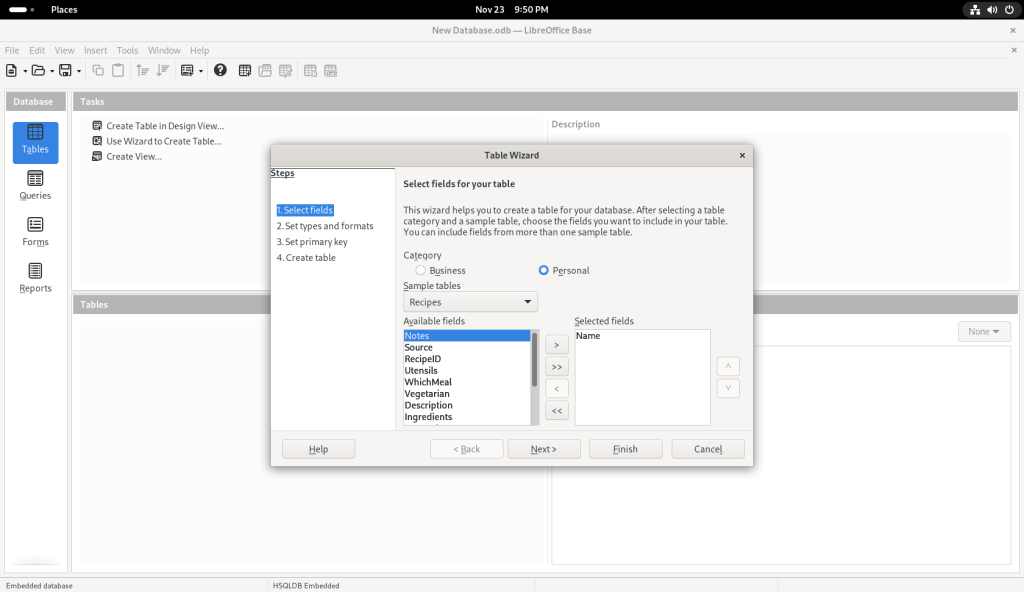
Name field moved to right window

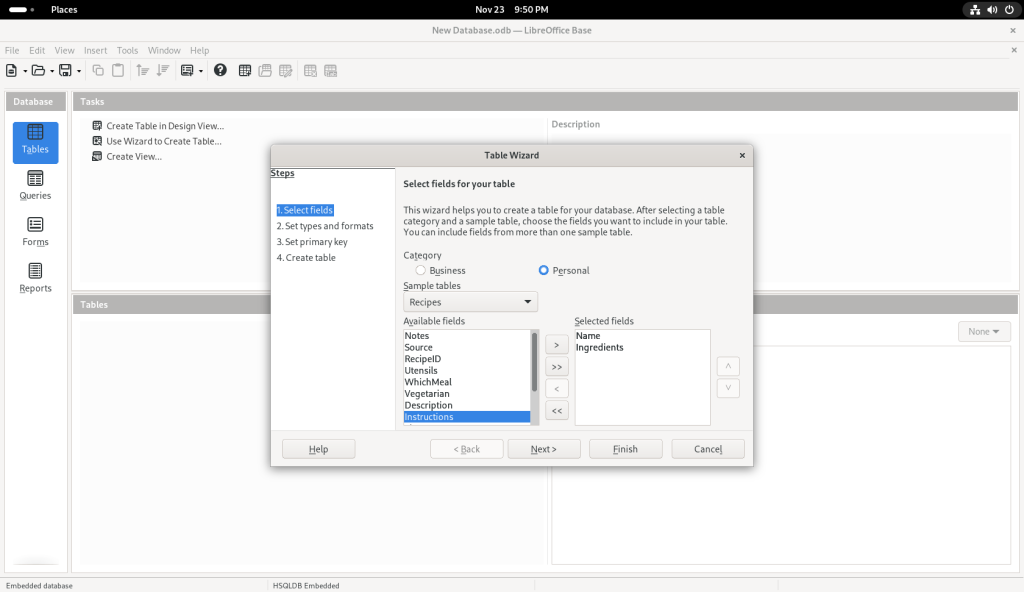
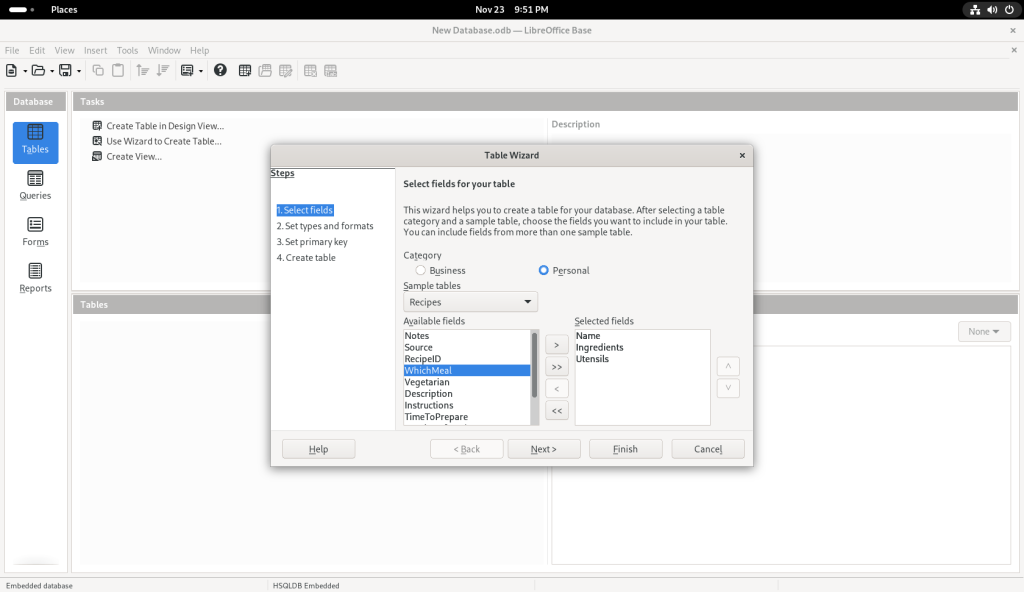
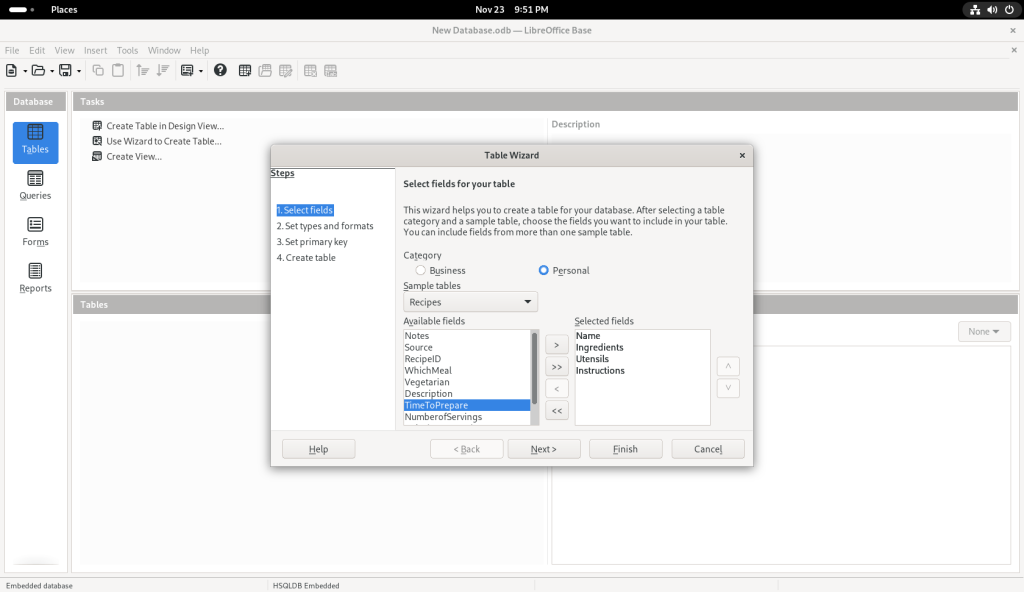
I also chose other sample tables:

Ingredients field chosen
Utensils field chosen
Instructions field chosen
Description field chosen

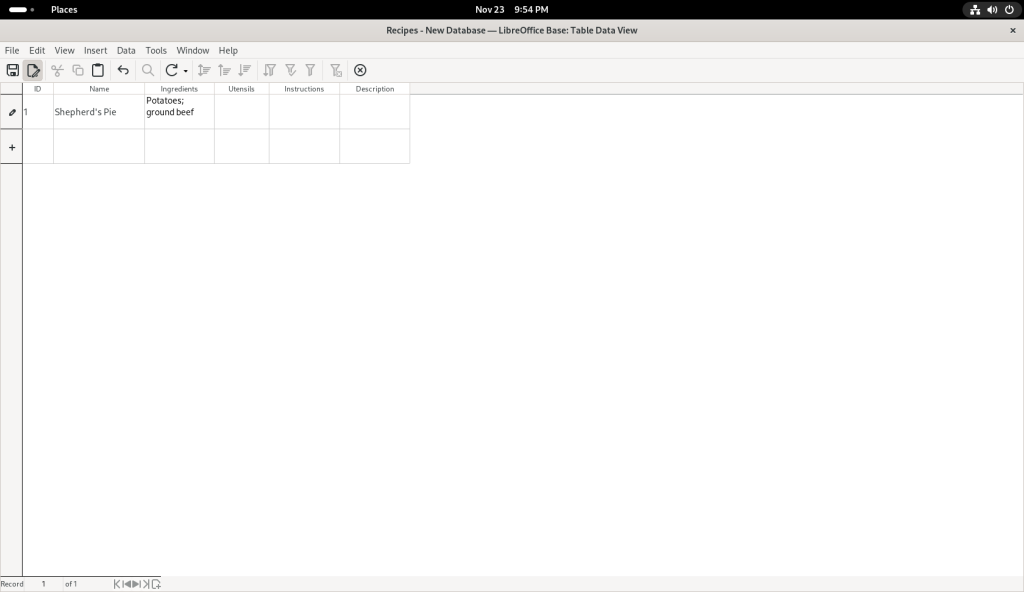
… at which point, I clicked on the “Finish” button, leading to the following screen:
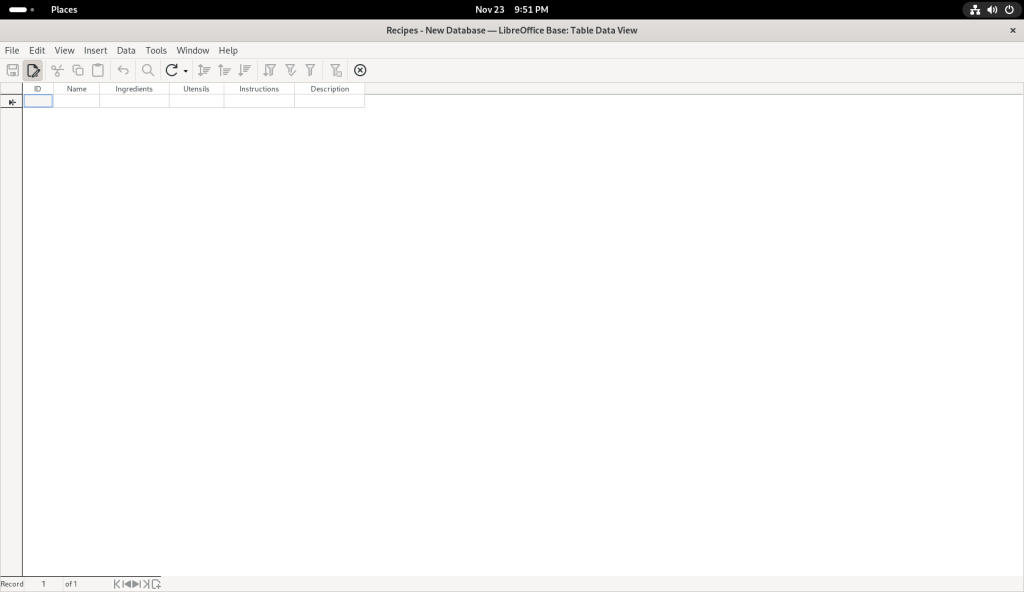
Finish button clicked, leading to a data entry page

I started entering data:

Data entered

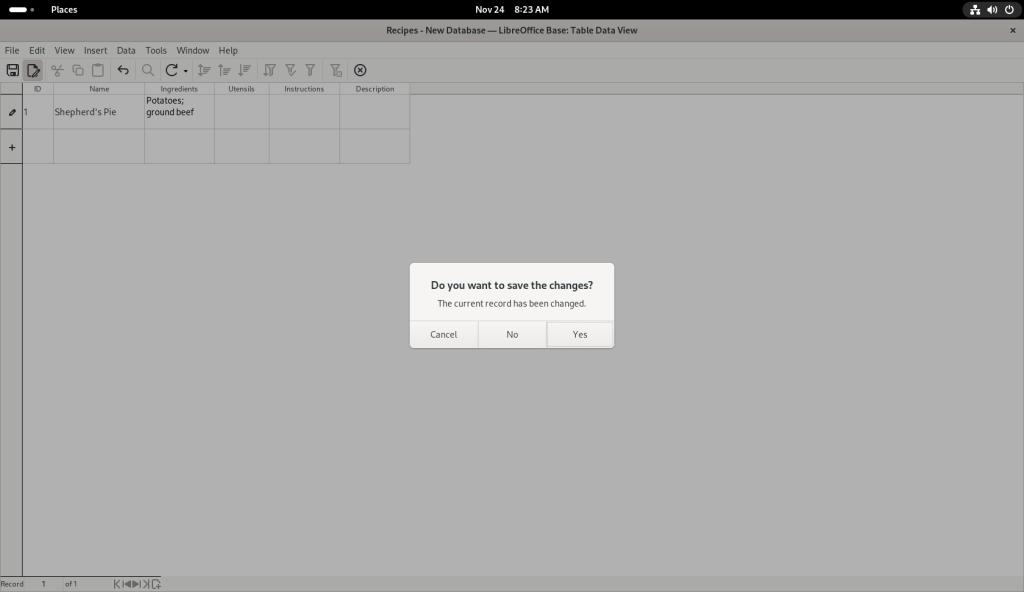
I chose to save my changes:

Database saved

At this point, I am going to direct you to a far better tutorial than I could ever present, even in the most cursory of fashions:

As of the writing of this post, a rather complete tutorial on using Base can be found at thefrugalcomputerguy.com/seriespg.php?ser=15/ (no doubt amongst countless other similarly excellent resources):
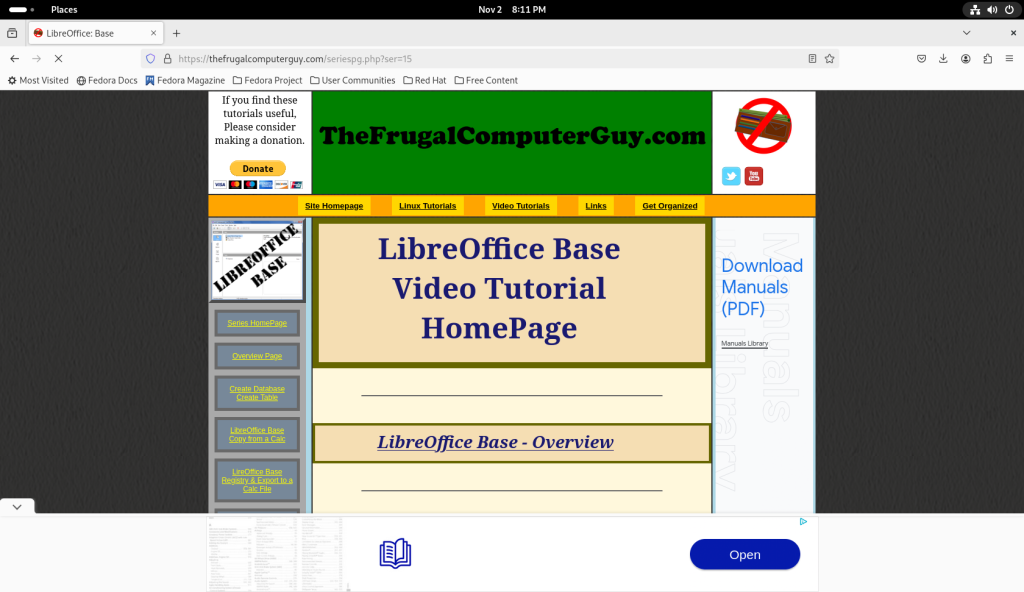
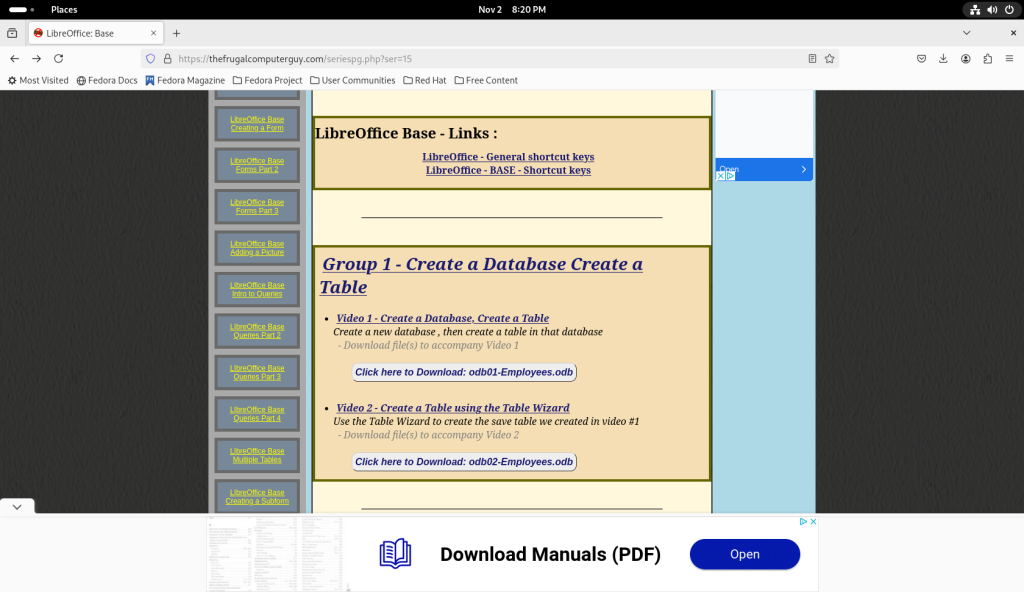
TheFrugalComputerGuy.com LibreOffice Base tutorial page

Although I think it best to leave the tutorial to TheFrugalComputerGuy, I will show a small database in action:

Starting again at the desktop screen:
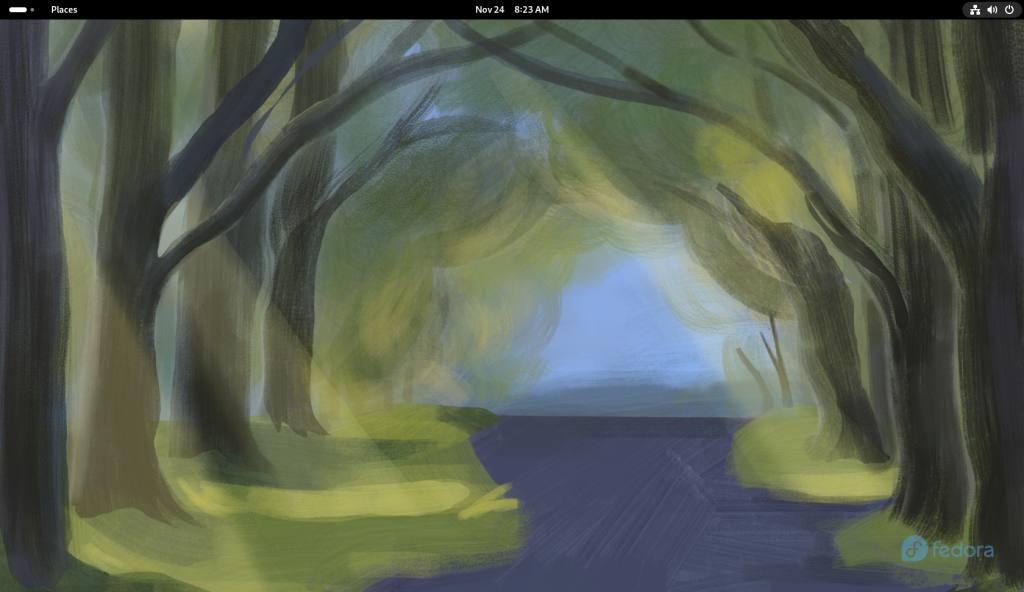
Desktop

The activities screen was accessed through the upper left hand hot corner with the mouse:
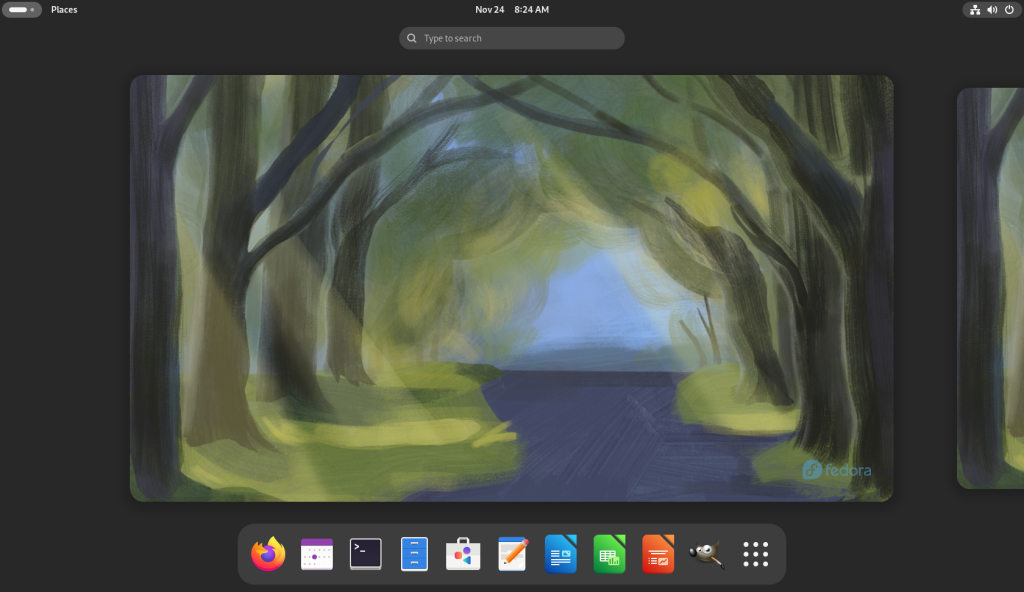
Activities screen with the dock

The Firefox icon (orange, on the left on the dock at the bottom) was clicked:
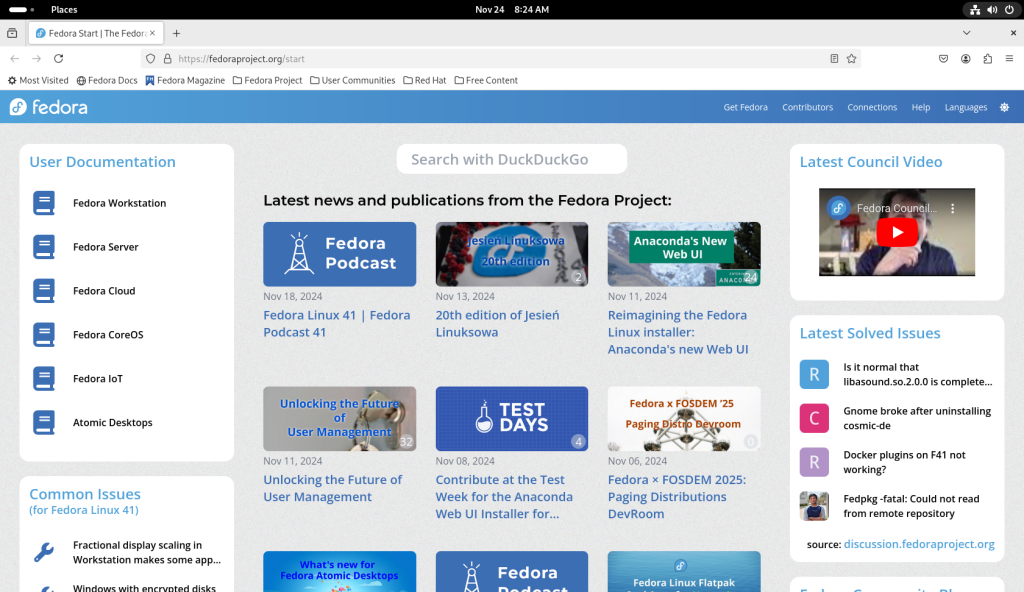
Firefox web browser launched

I went to my favourite search engine, duckduckgo.com:
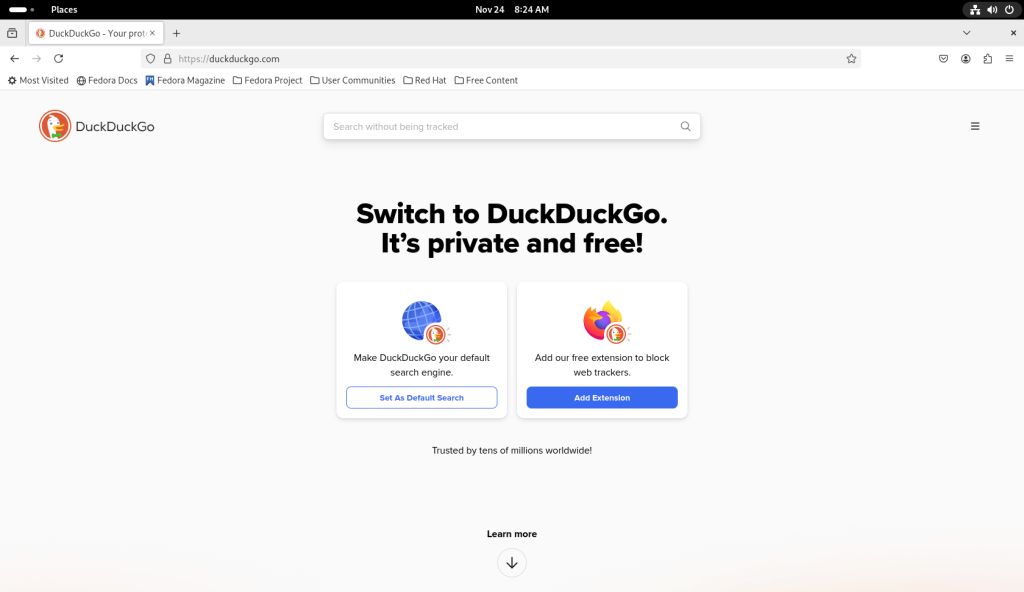
Search engine opened (in this case www.duckduckgo.com)

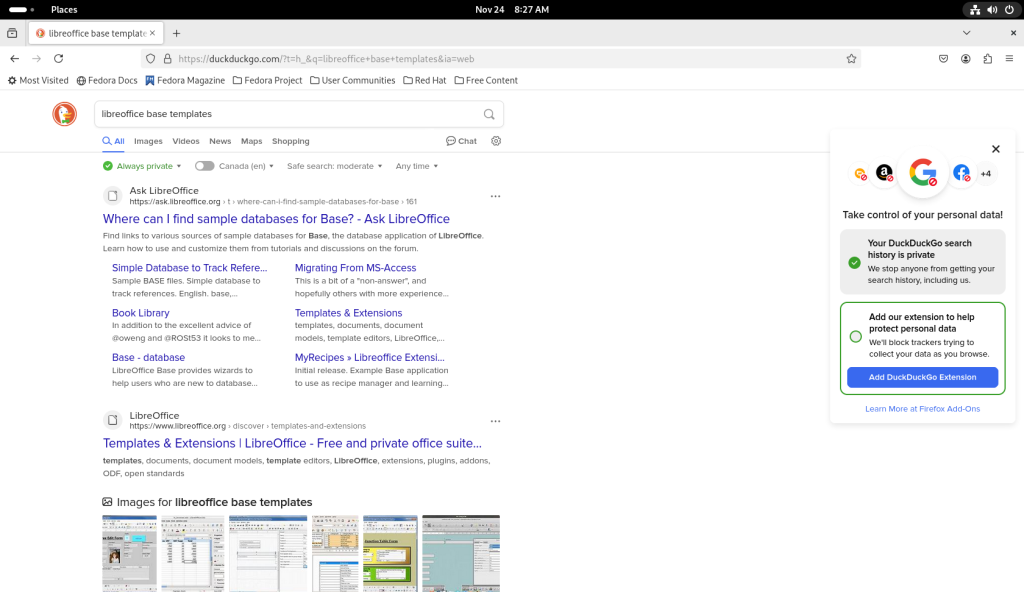
… and I searched for “libreoffice base templates”:
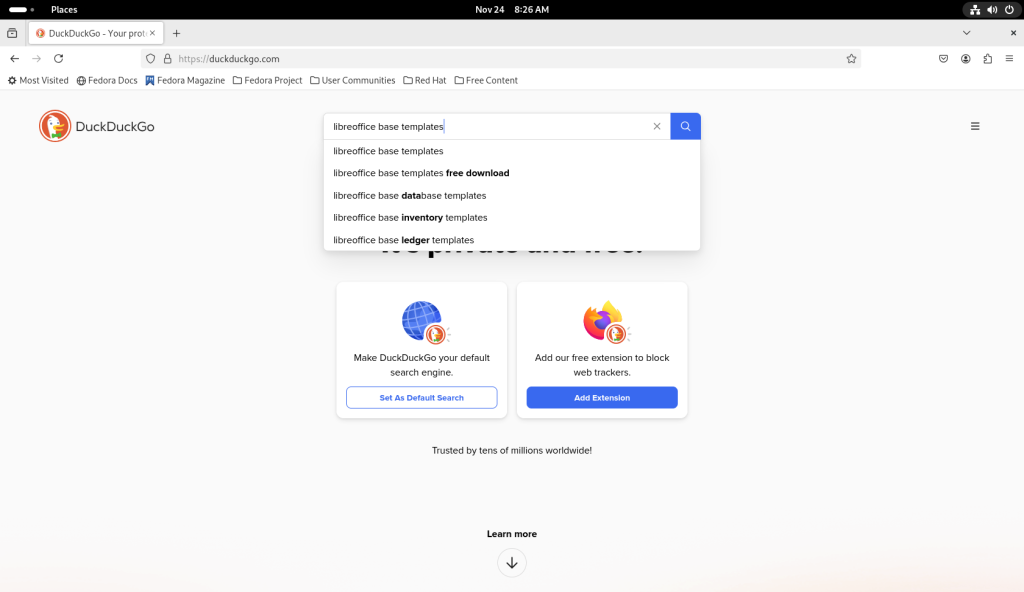
Searching for Base templates

I chose the “Templates & Extensions” link, the second link above, at the LibreOffice.org site itself:
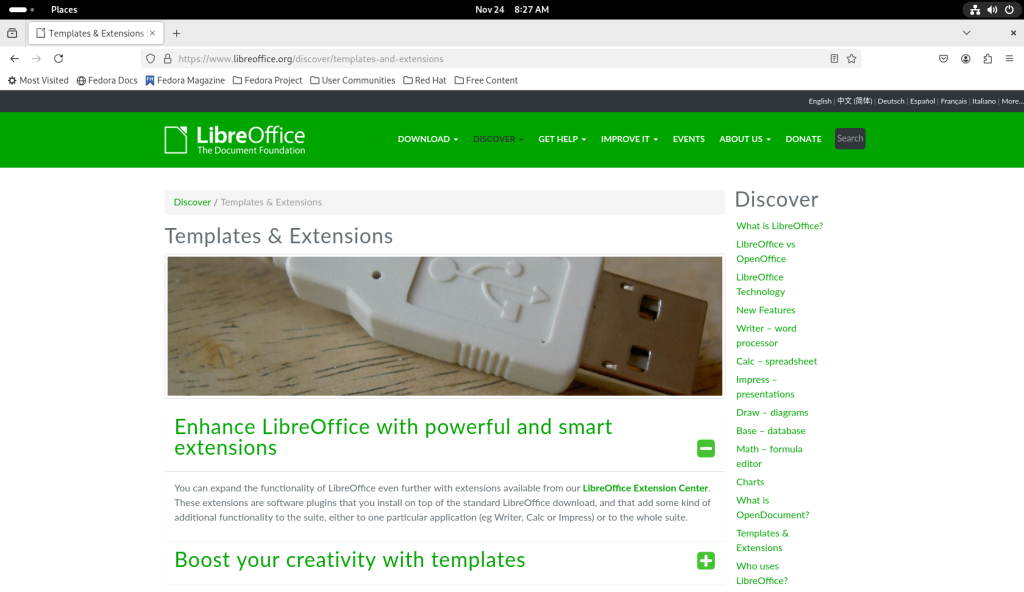
Templates at libreoffice.org

I clicked on the green “plus” sign to the right of “Boost your creativity with templates”:
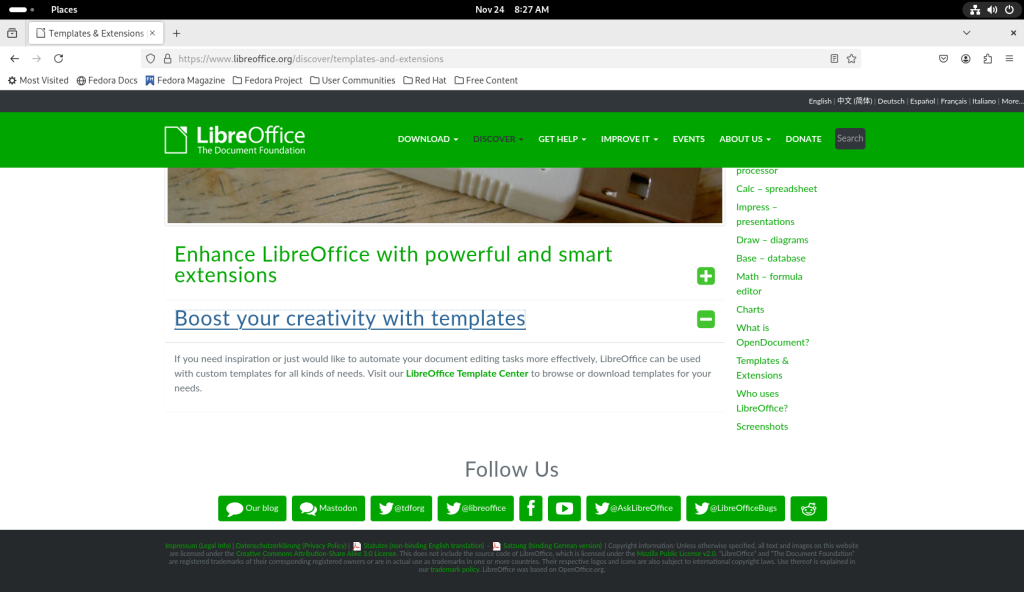
Template link clicked

… which led to the following page:

Templates page

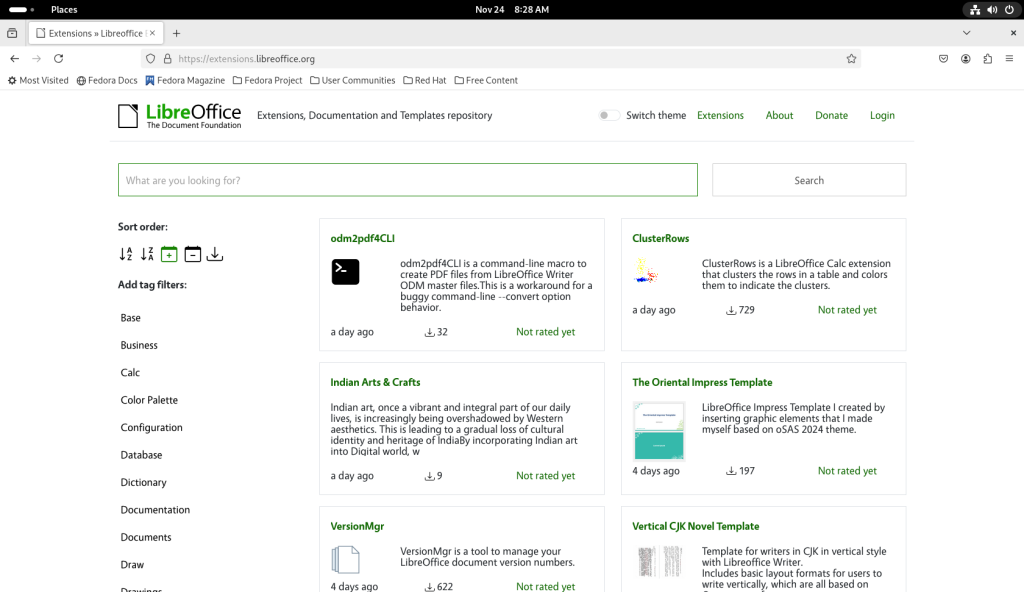
On the left, there are a number of filters under “Add tag filters:”, and clicked on “Base”, bringing up the following page:
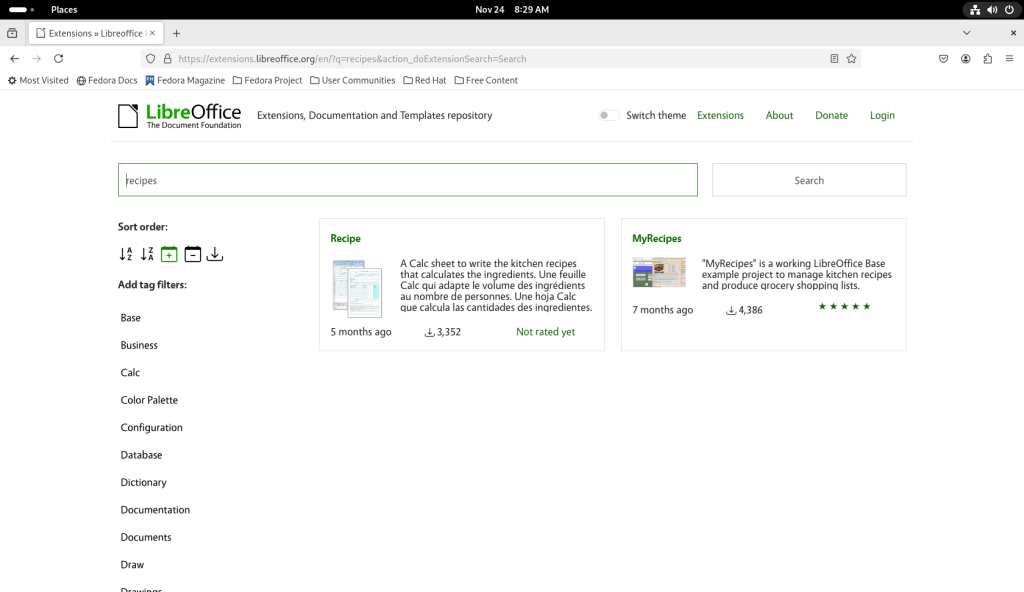
Page with templates for Base

I chose the “MyRecipes” template for LibreOffice Base:
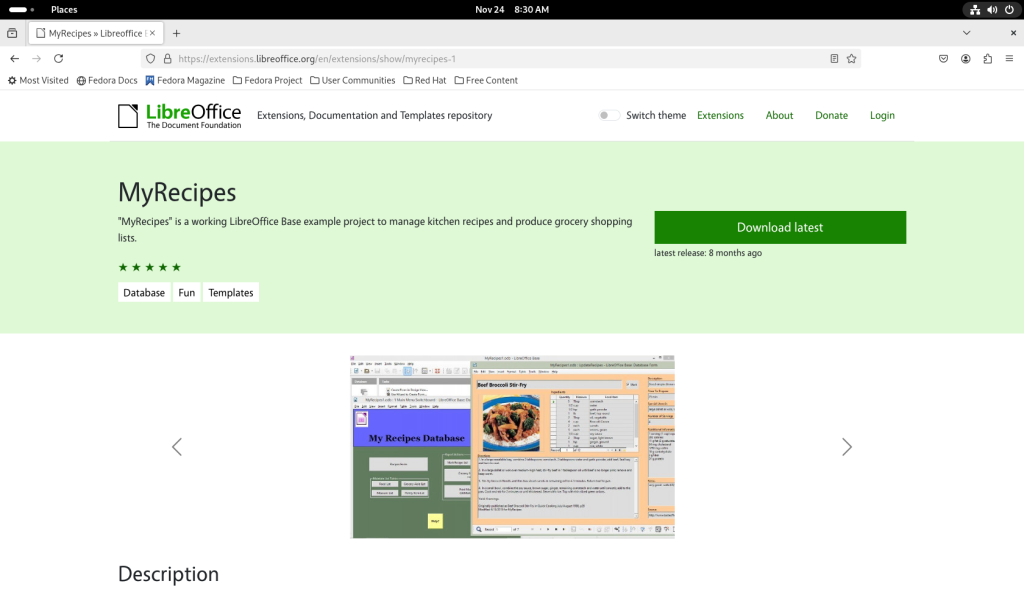
Page for a recipes database

I scrolled down to quickly assess the files, finding them eminently interesting for the task at hand:
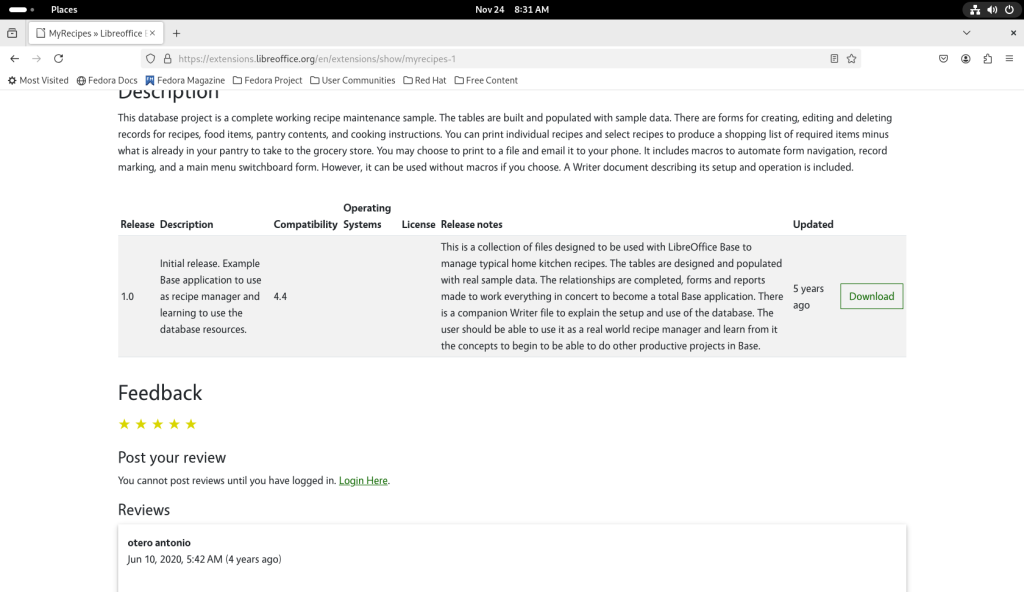
Template description

The download button was clicked, and the file downloaded:
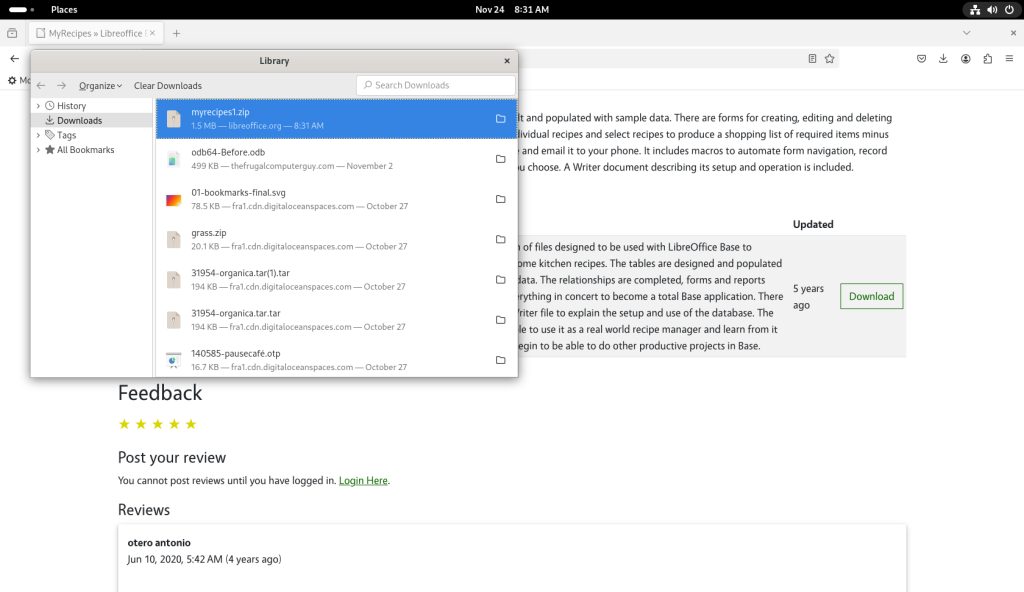
Template downloaded

The files program was opened, and the newly downloaded file was highlighted:
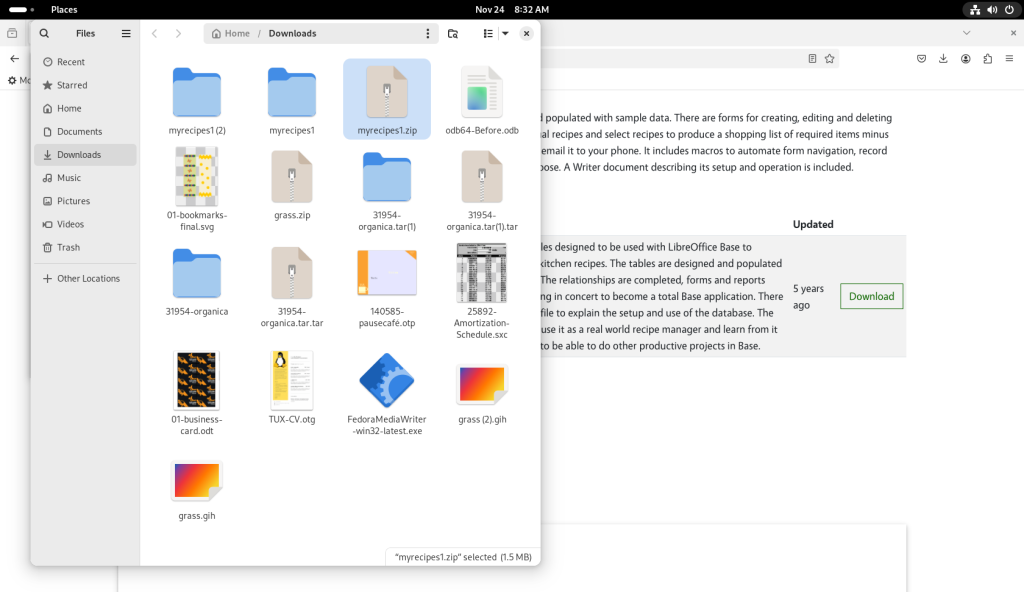
Downloads directory opened

The .zip file was double-clicked, creating a directory of the files (ok I accidentally created the directory three times!)
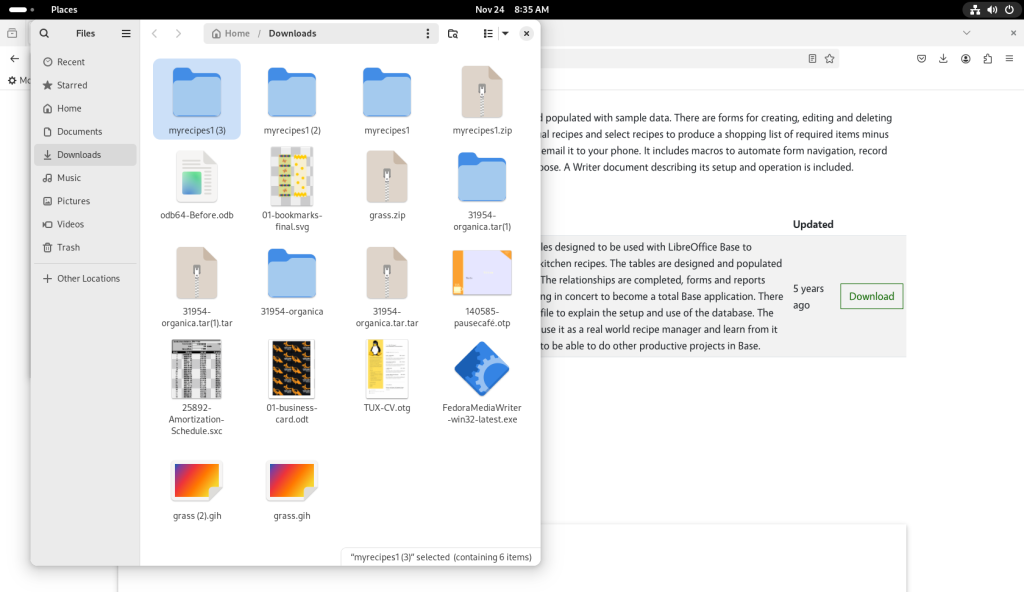
.zip archive opened

One of the directories was double-clicked and opened:
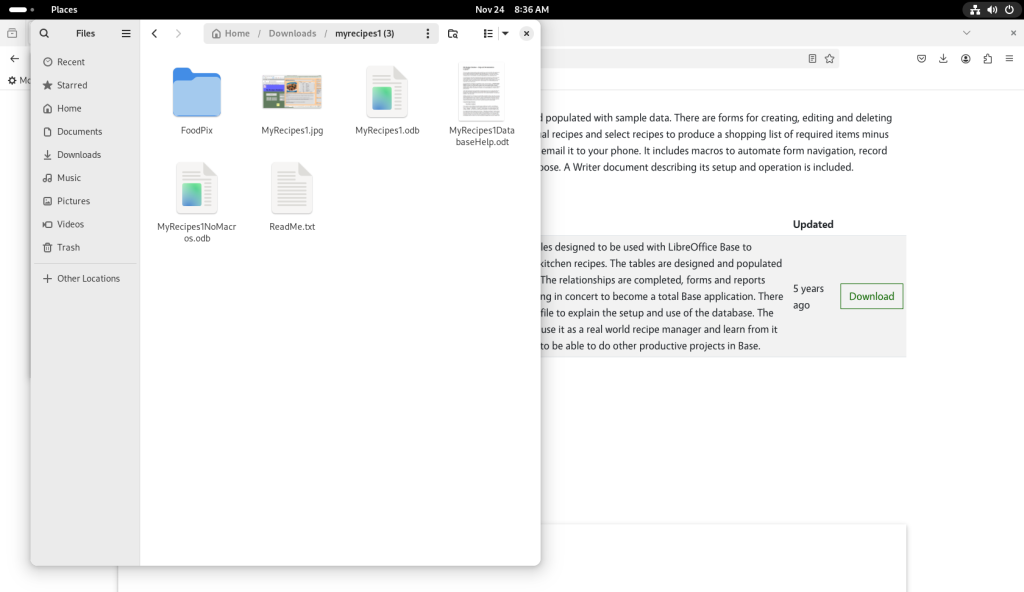
Archive consulted

The “ReadMe.txt” file was double-clicked and opened:
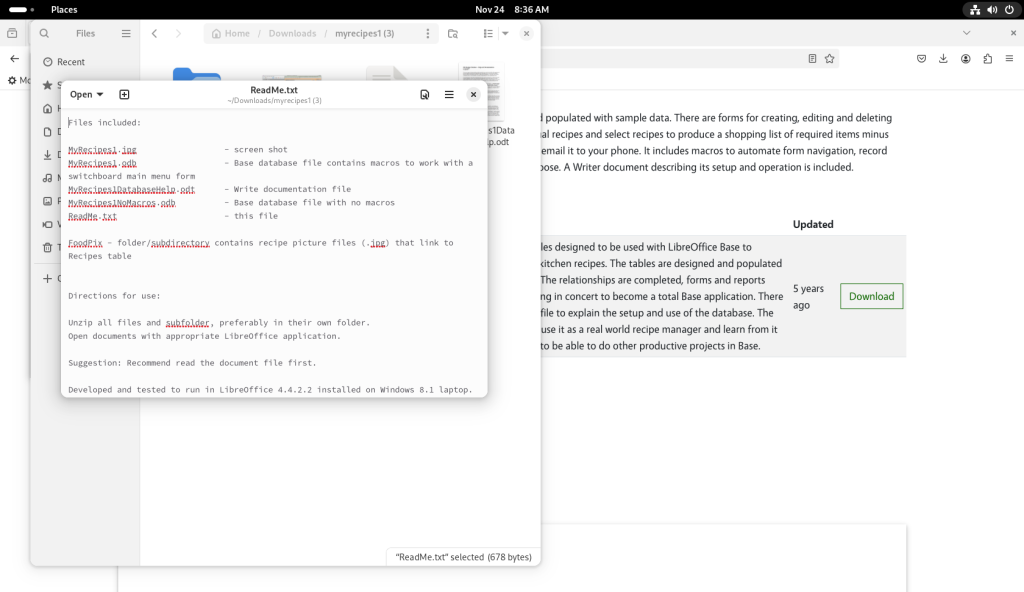
readme file consulted

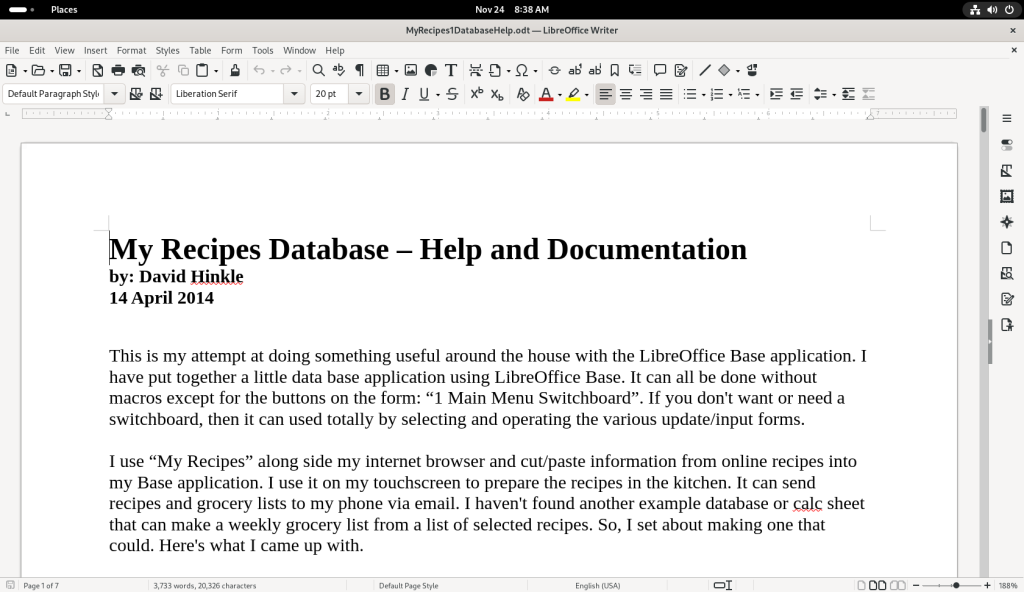
The .odt file was opened as well:

Instructions and general description file checked

The “MyRecipes1.jpg” file was double-clicked, opening a screenshot:
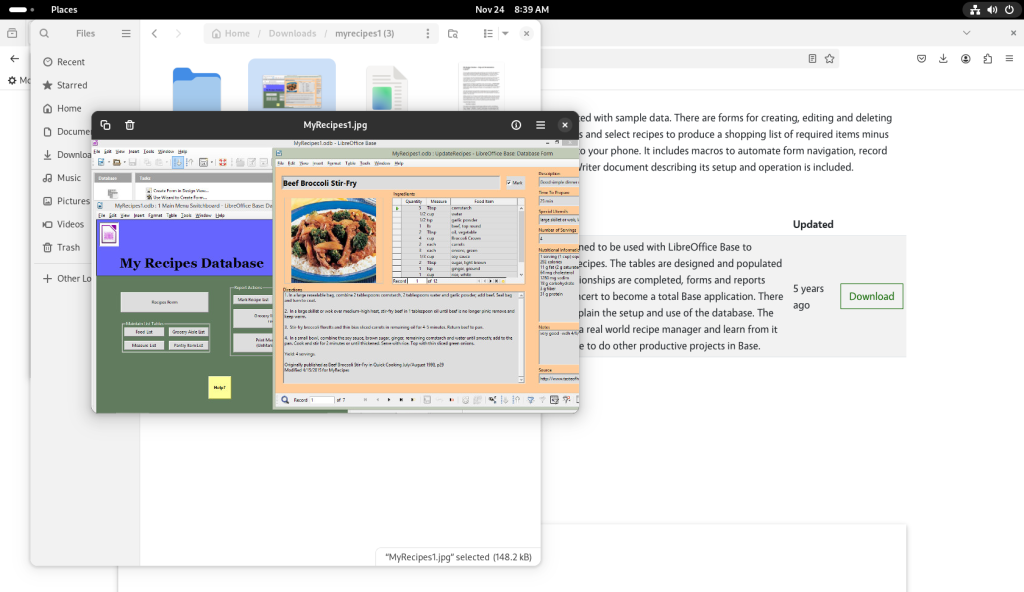
Screenshot of database operating consulted

The FoodPix directory was opened, showing pictures of the recipes in the database:
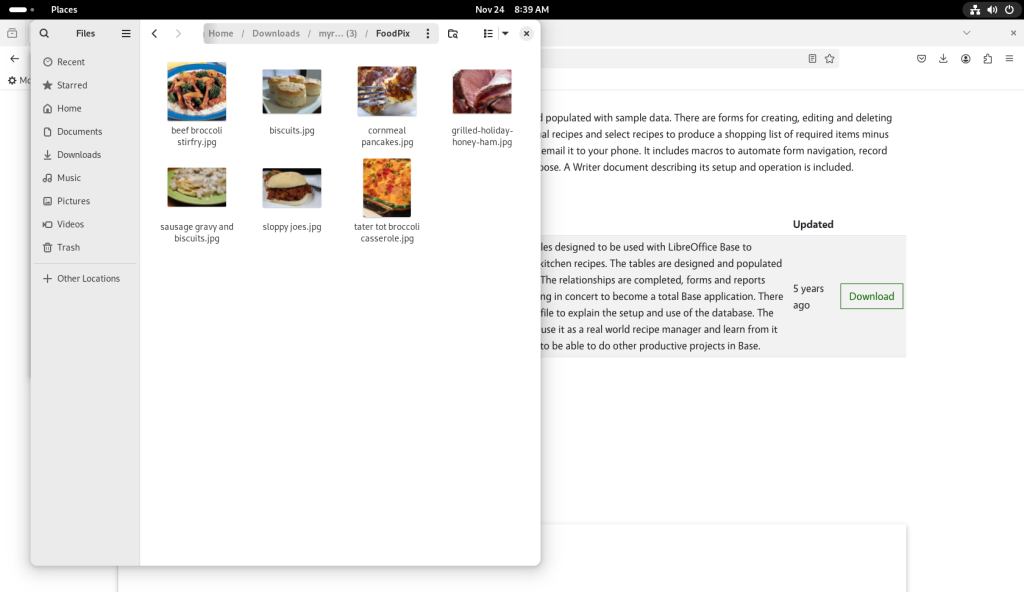
Pictures included in the archive viewed

From the database’s main directory, the database was opened:
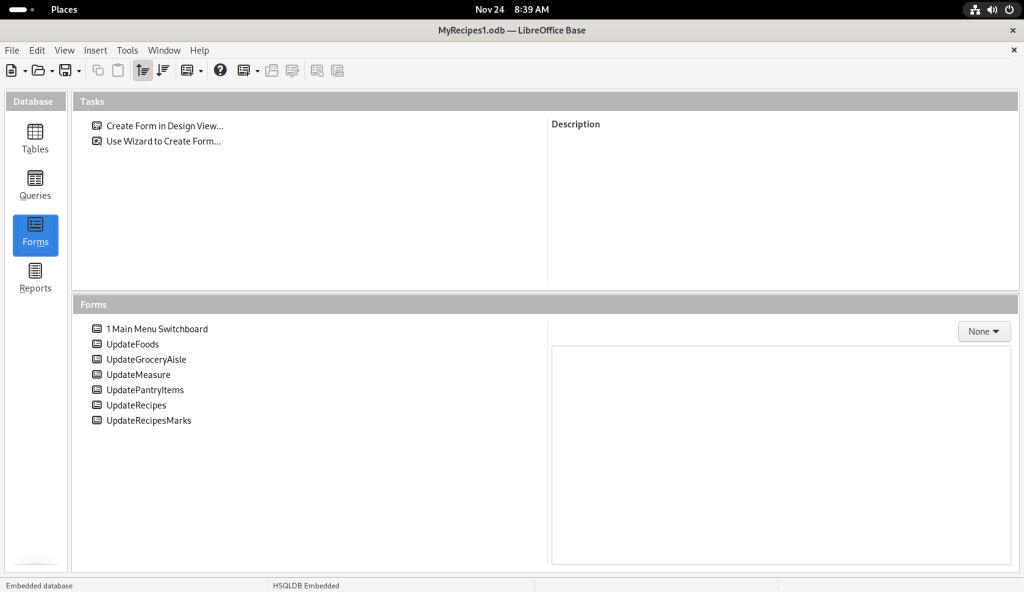
Database opened

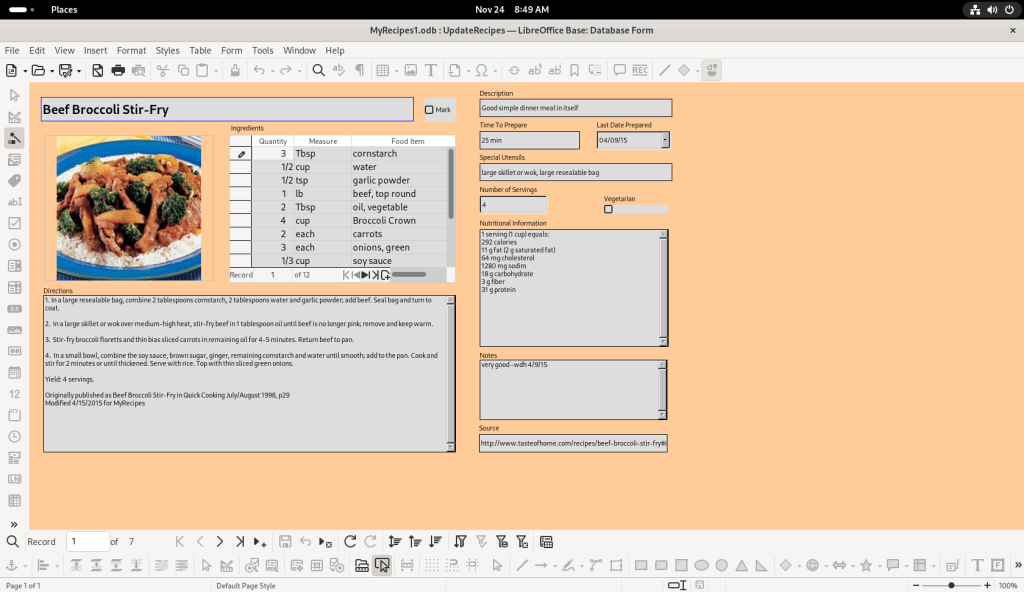
After looking about, the “UpdateRecipes” option was selected:
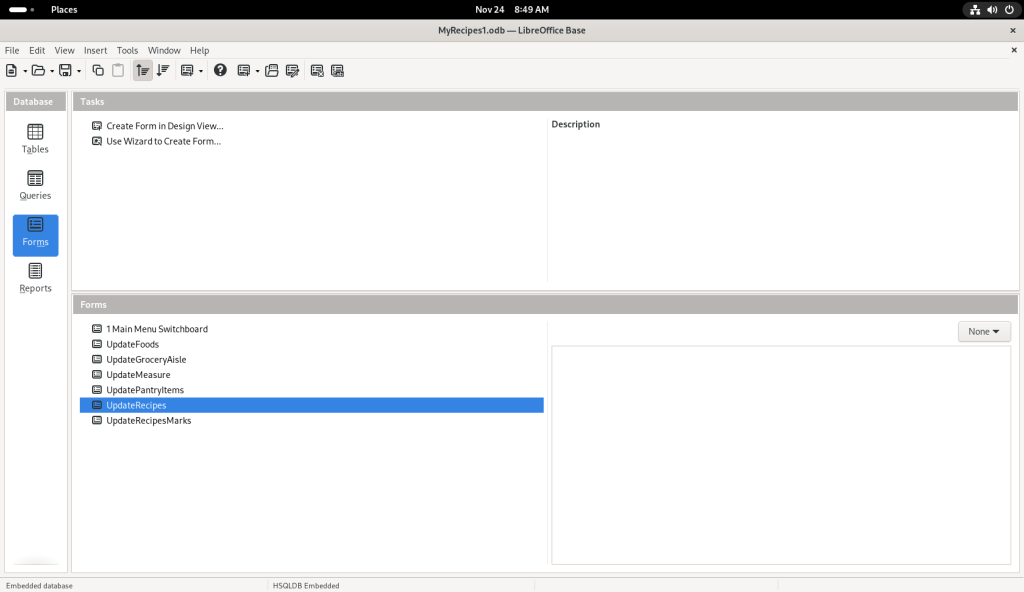
One of the options selected

Which opened up one of the recipes:

One of the recipes in the database

The database author chose to have an active Pantry list with checkable items, no doubt based at least partly on their recipes; by having it dynamic, when asked to create purchasing lists, the database can exclude pantry items already on hand:
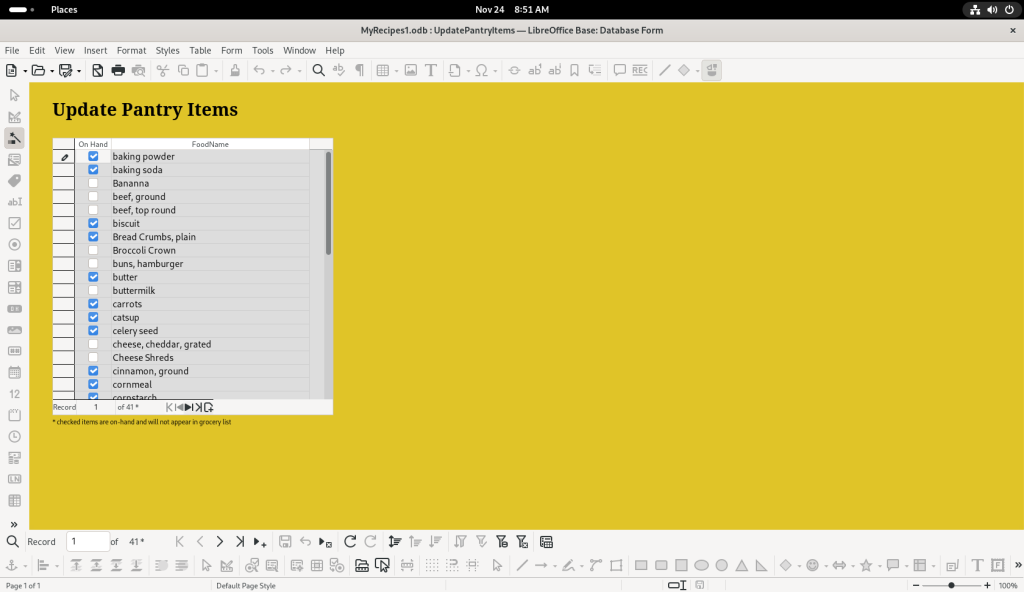
Pantry list

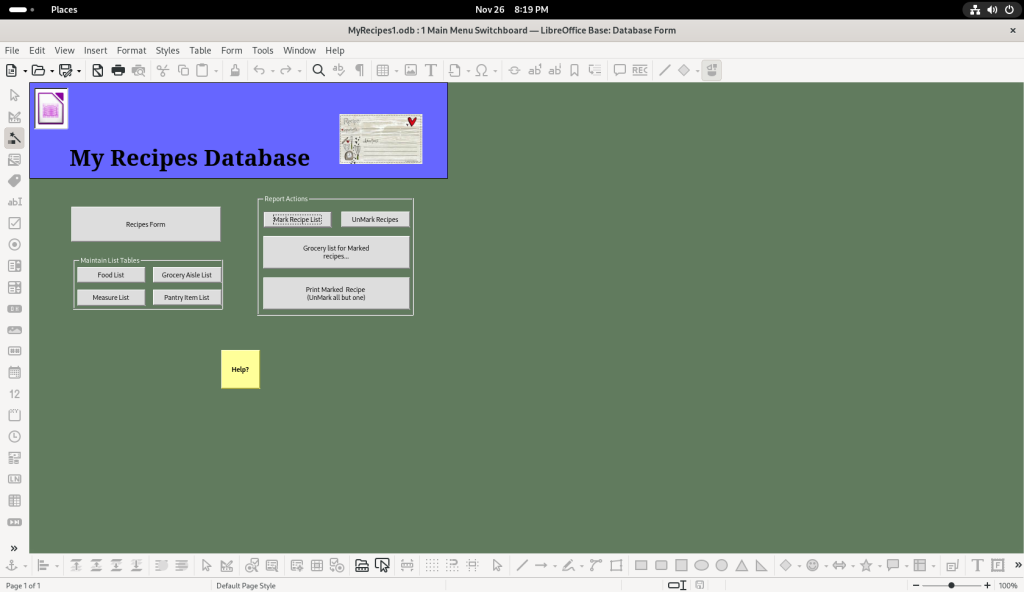
Said shopping lists can be generated from the “1MainMenuSwitchboard” option:
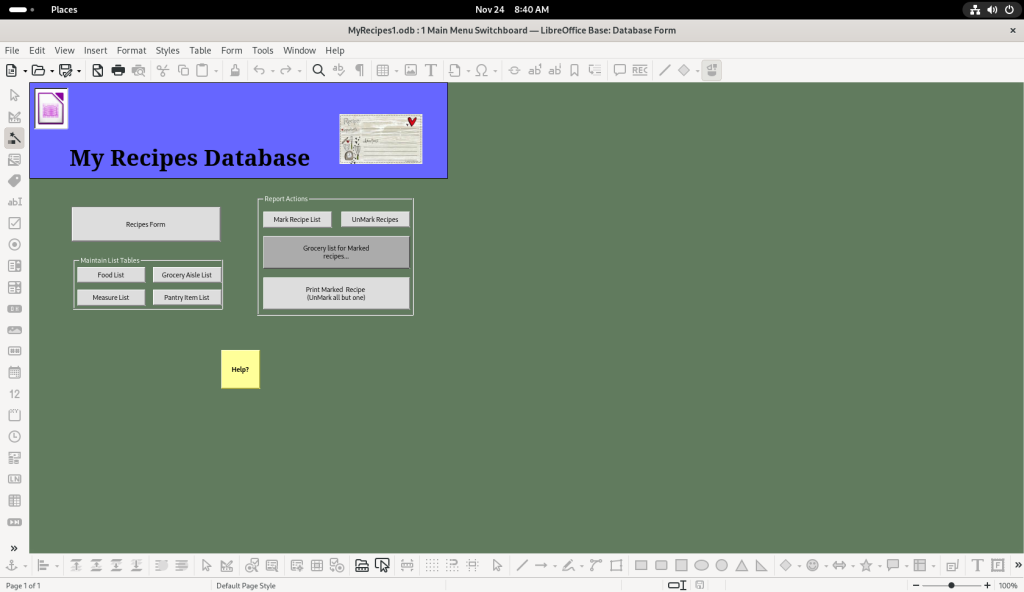
Main menu switchboard created by the author to navigate through their recipes and other functions they programmed

Given that the “switchboard” is based on macros, the Tools pull down menu was opened::
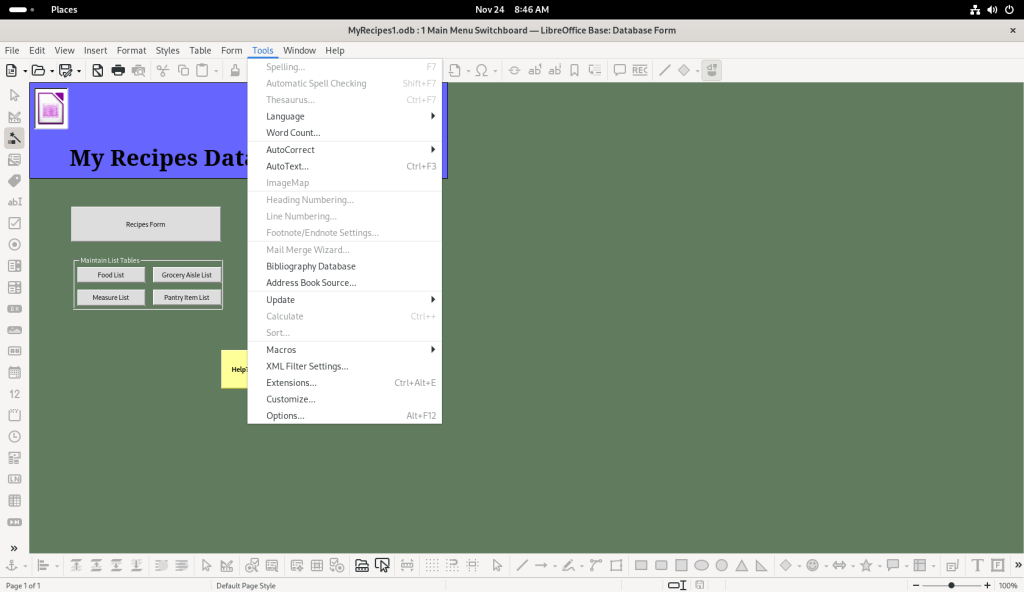
Tools menu opened

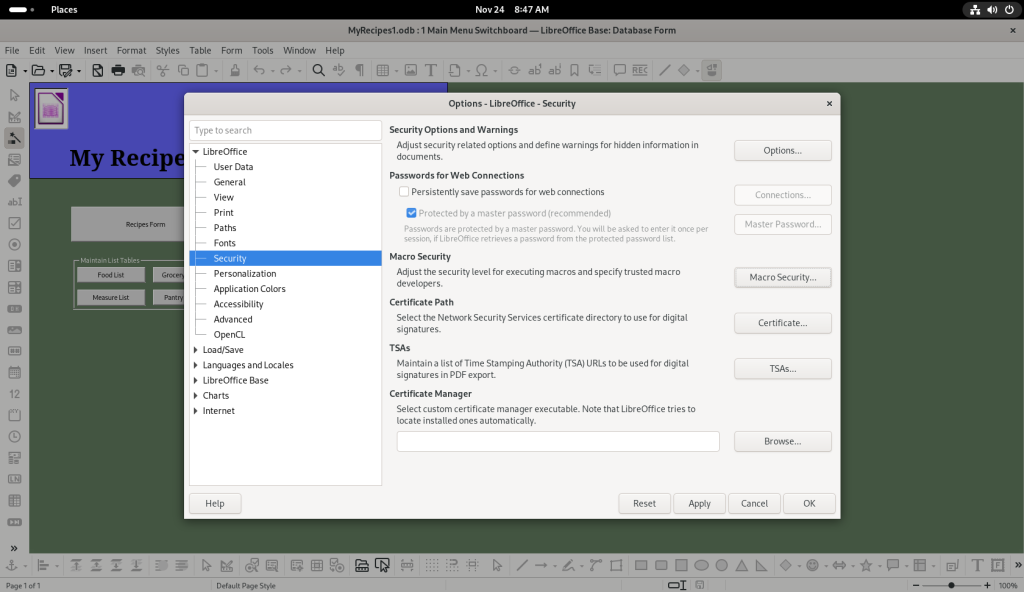
… and the “Options” option was clicked:
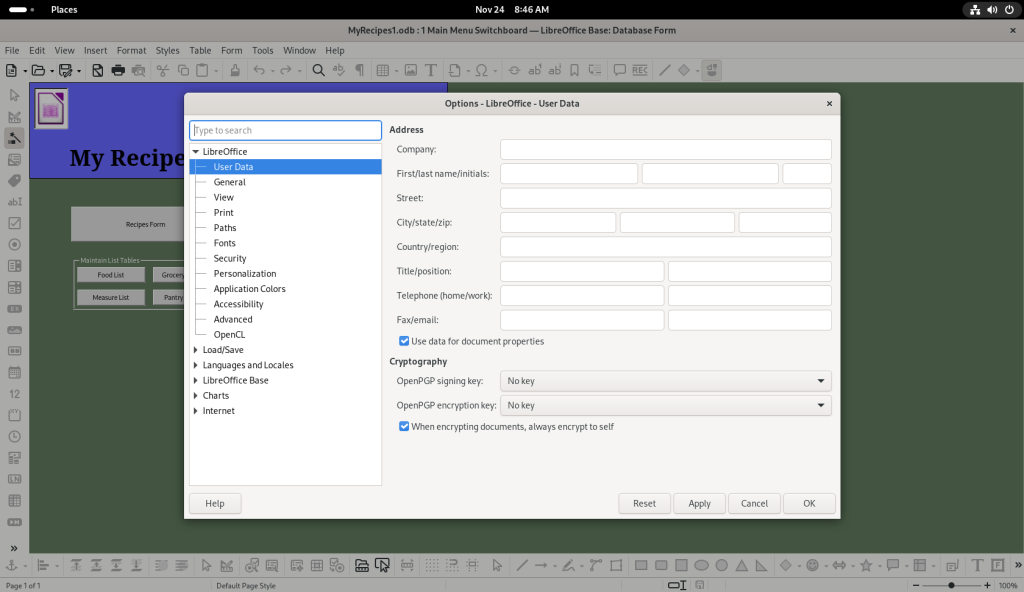
“Options” option clicked, opening an options window

The Security option was chosen:

Security option chosen

… and the “Macro Security” button was clicked. The security level was set to low, as per the author’s suggestion:
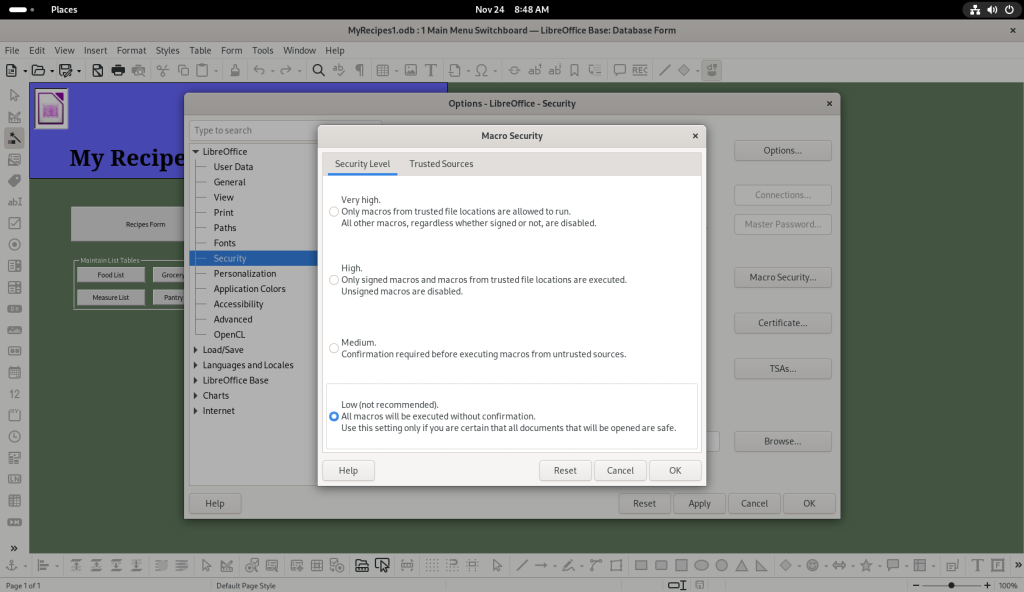
Macro security options changed

Back to the Switchboard:

Database main menu opened

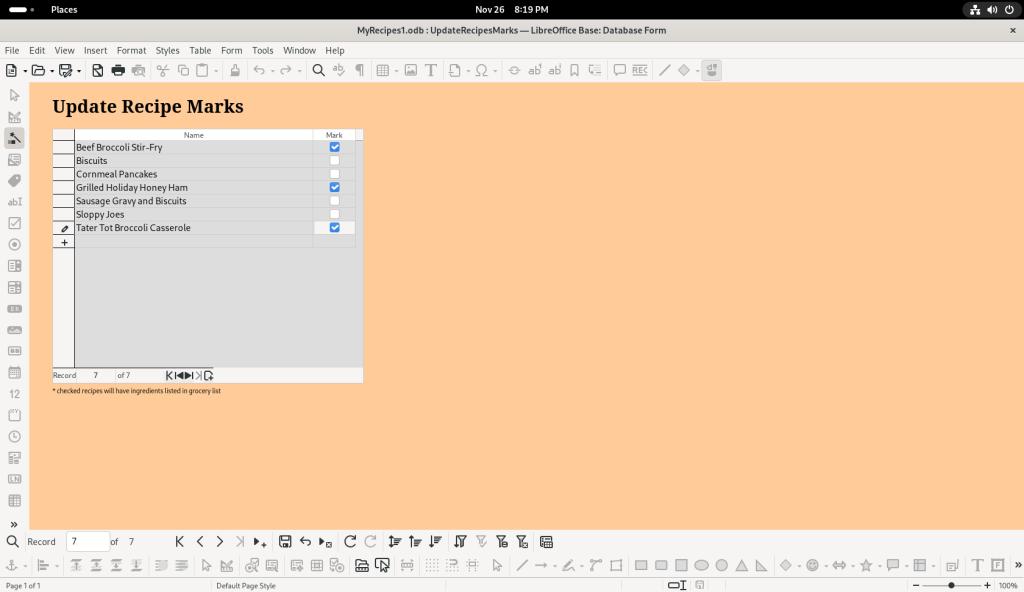
The “Mark Recipe List” button was clicked, and I decided to mark three of the recipes:
Recipes chosen

In trying to close the window, a window asked if I wanted to save my changes, to which I clicked “yes”.
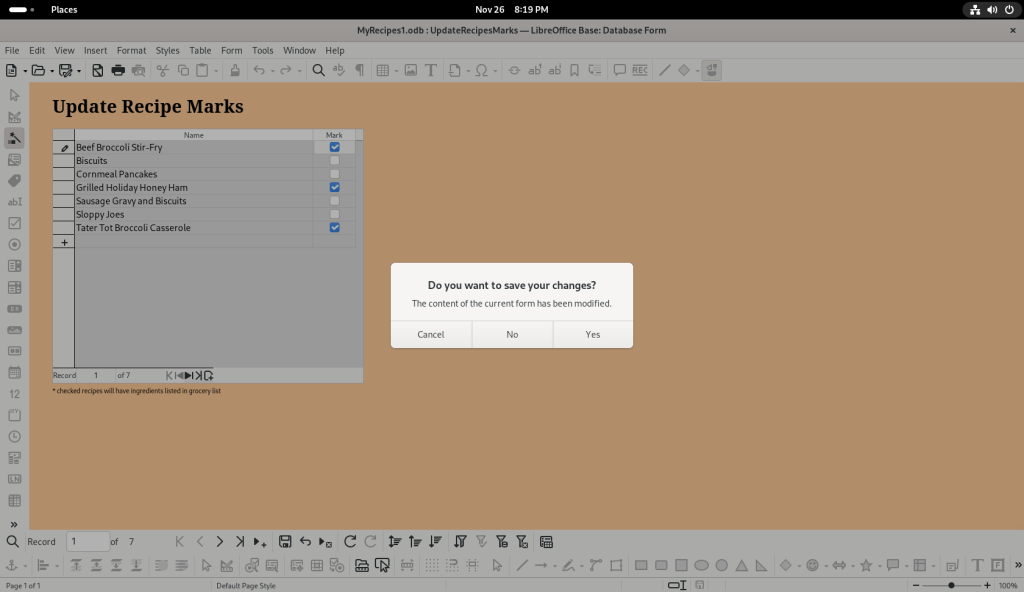
Window closed and changes saved

The “Grocery List for Marked Recipes” button was clicked:
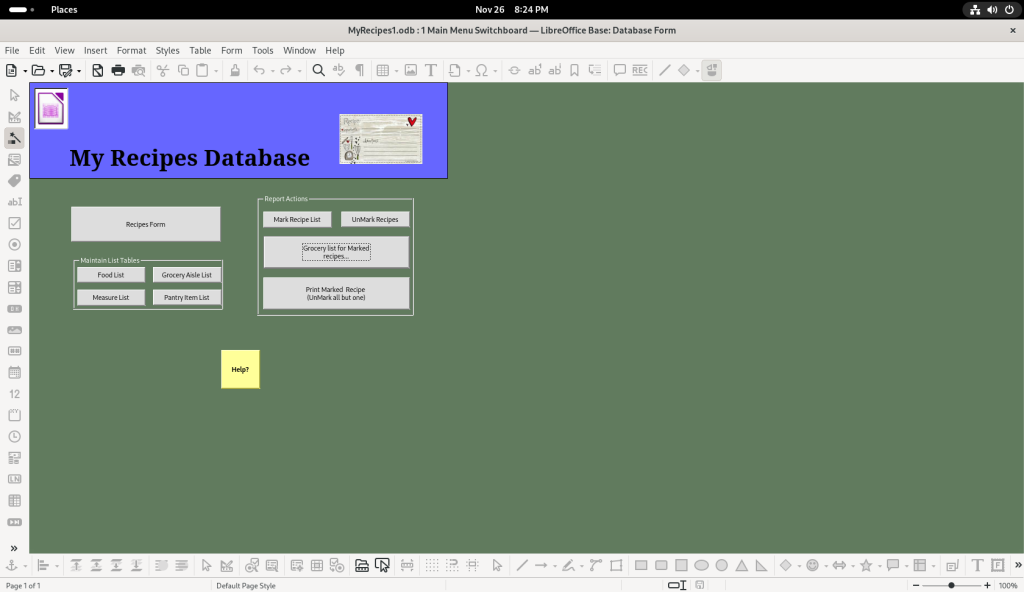
Grocery list option chosen from main menu

… producing a grocery list based on the recipes, which was automatically opened in LibreOffice Writer:
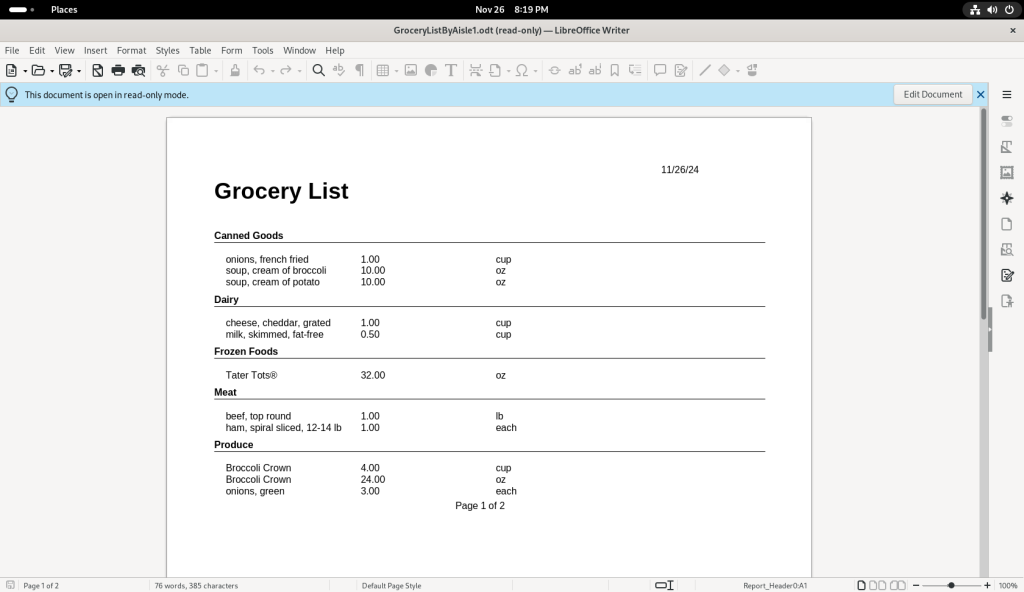
Grocery list created for the selected recipes

The next chapter will look at graphics.

Overview of Open Source / Free Software for PDF files

This post is a translation of and (somewhat of an) adaptation, as well as slight update, of a presentation I gave in November, 2021, at a meeting of my local Linux Meetup. This adaptation includes some extra limited mockups of demonstrations performed live during the presentation.

The presentation was put together using Fedora Workstation (a general purpose version of Linux, in this case specializing in being a desktop workstation), highlighting some software either installed by default, or available in the Fedora Linux and rpmfusion software repositories (“App Stores”). It is therefore not intended to be a complete exposé on all available open source / free software options for PDF, even under Fedora Linux, let alone GNU / Linux in general, or other systems.

It should be noted that the presentation’s original target audience was a French-speaking group of Linux enthusiasts, Linux professionals, and other IT enthusiasts and professionals familiar with Linux. Most of the listed software would typically be available in standard or easily accessible Linux software repositories (“App Stores”). Beyond the world of GNU / Linux, free software is generally available for use on other systems, and, barring instances of a specific given package offered with paid warranty support, are usually also free of charge to download, install, and use.

In the case of the software highlighted in this post, all are either free-of-charge, or represent the free-of-charge version.

The Value of a PDF File

Context / Situation:

Take the case of the exchange of a document between two computers — such as between one running Linux, and another running Windows (or vice-versa) — and each computer is endowed with a different office suite, such as LibreOffice (cross-platform) on one, and Microsoft Office (Windows / Mac) on the other. (Of course, other possibilities exist, such as Calligra Suite (cross-platform), Pages / Numbers / Keynote / etc. (Mac), Corel Wordperfect, Google Docs, etc.)

LibreOffice, and in days gone by, OpenOffice.org, have long been touted as being “compatible” with MS Office; this purported compatibility, however, is disappointingly nowhere near as good as I and many others would like to believe.

As such, each user will open the shared document, which will be displayed according to each suite’s interpretation of the file, and may find that the actual displayed content on their screen could be different — sometimes substantially so — from the intended original display of the document. Text lines may be cut off; fonts may not be available on one or more of the systems, causing font substitution; font sizes may be changed, or text size may be different while substituting a different font due to the lack of the specified font; certain symbols may not be available on some systems; table effects may not work, or objects inserted into tables may not function or be displayed as expected, such as the insertion of a spreadsheet.

Unfortunately, I would estimate that said disappointing lack of “complete and perfect” “drop-in replacement” compatibility is a very common experience in comparing many well-known pieces of proprietary software and their open-source counterparts — not just LibreOffice and MS Office. Personally, as a Linux user, I have experienced this lack of complete compatibility a number of times since beginning to use OpenOffice.org in 2005 and Linux in 2006. Since then, I have also seen the incompatibility in action on a number of occasions during varying presentations under completely unrelated circumstances in which the presentation files were produced in one suite, and attempts made to show them in another were met with varying degrees of disappointment, sometimes leading to complete failure.

Example PDF

The PDF at this link is a somewhat varied although basic document created for this presentation (you will need a PDF viewer); images of the PDF are shown below. It was developed in order to use throughout the presentation as an example PDF to demonstrate the various given points at hand. It should be noted that the PDF was written in French because the presentation’s original target audience was French-speaking.

The following four images are jpeg images of the pages of the PDF document linked to above, and which I created in LibreOffice Presentation. It should be noted that, for the sake of argument, the pages could have been created in another format, such as a word processor, a spreadsheet program, or a drawing program, for instance.

Page 1 — Song lyrics to be displayed for a Karaoke Night

Page 1, the lyrics to a French song, such as one might want to display during a karaoke event among friends

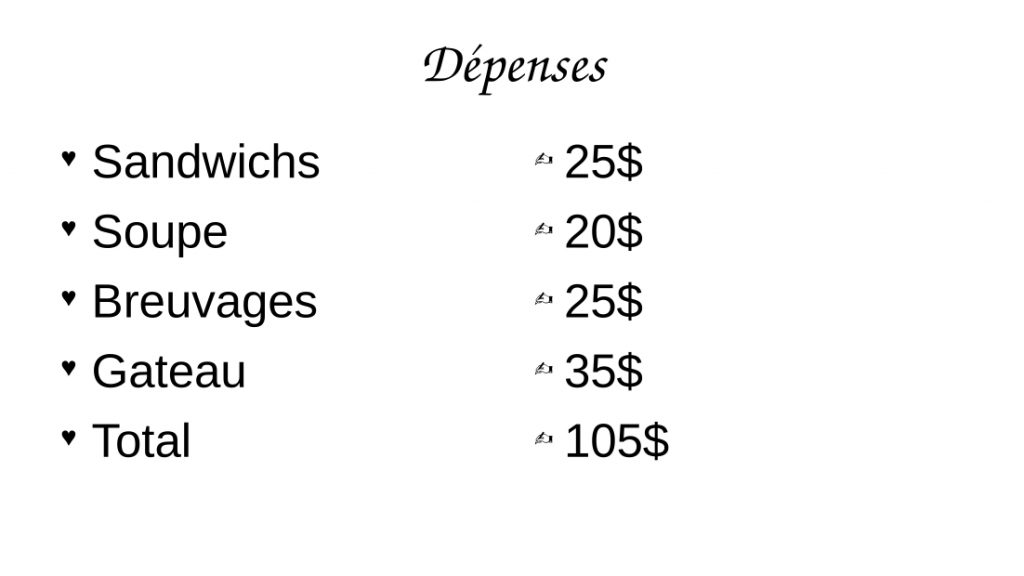
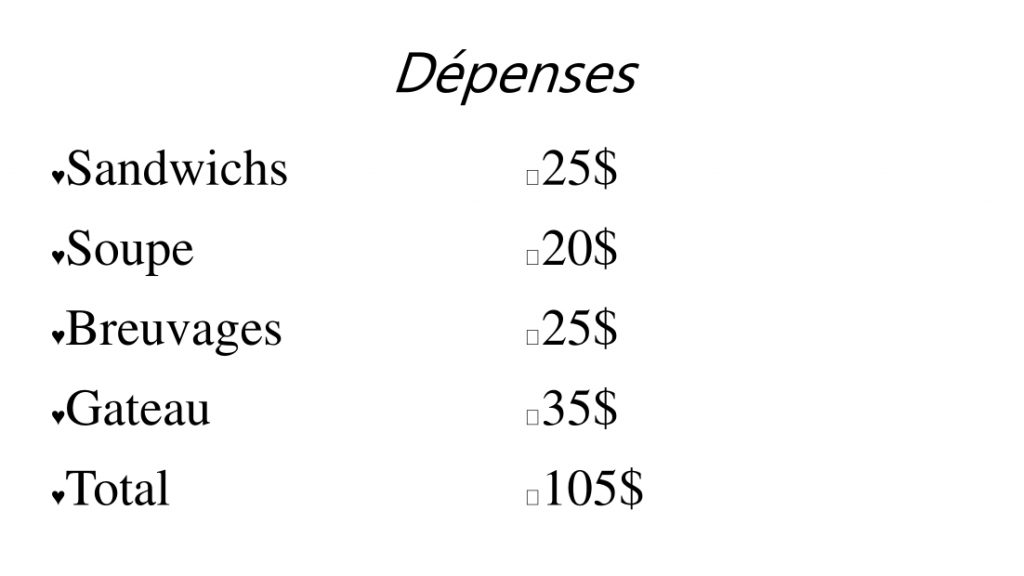
Page 2 — Expenses list for a Luncheon

Page 2, a fictitious list of expenses for a luncheon

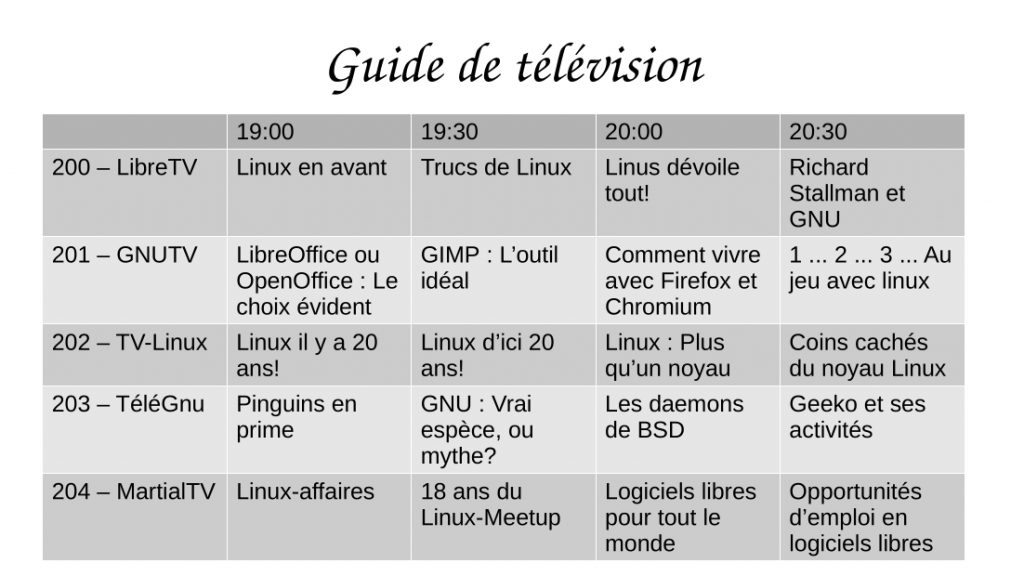
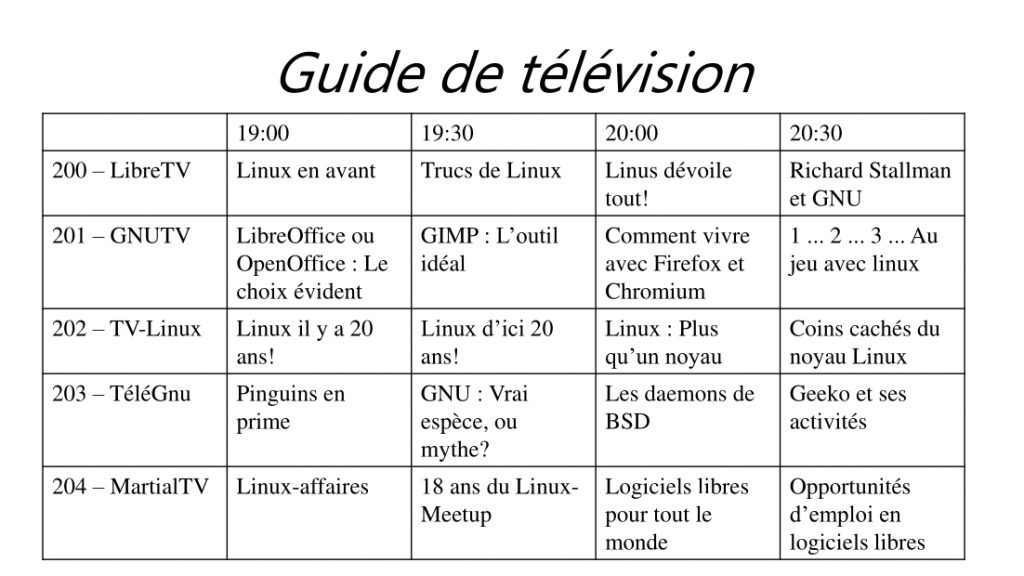
Page 3 — TV Listings

Page 3, a fictitious TV listing for an evening, with some Linux in-jokes and some in-jokes specific to the original audience

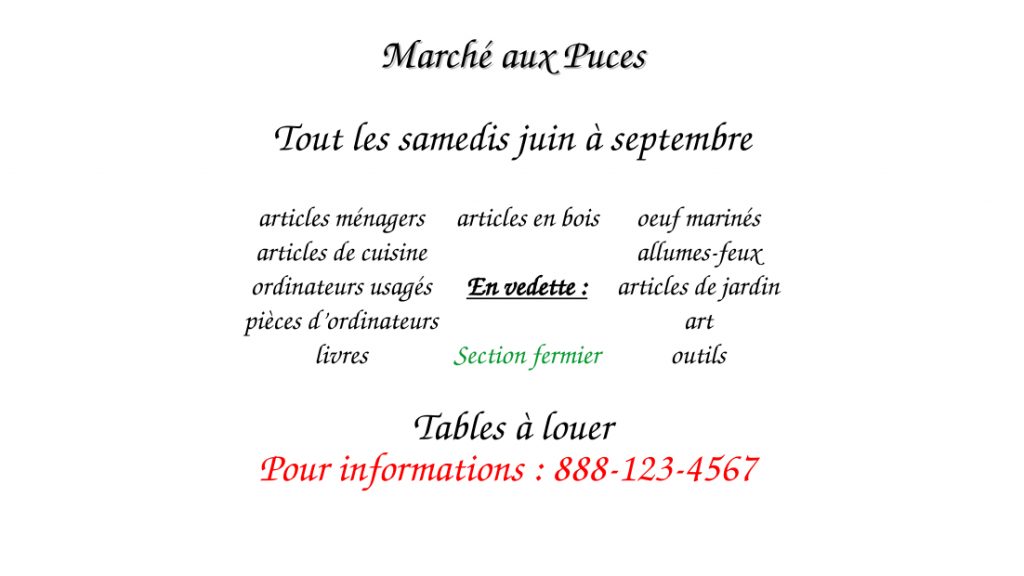
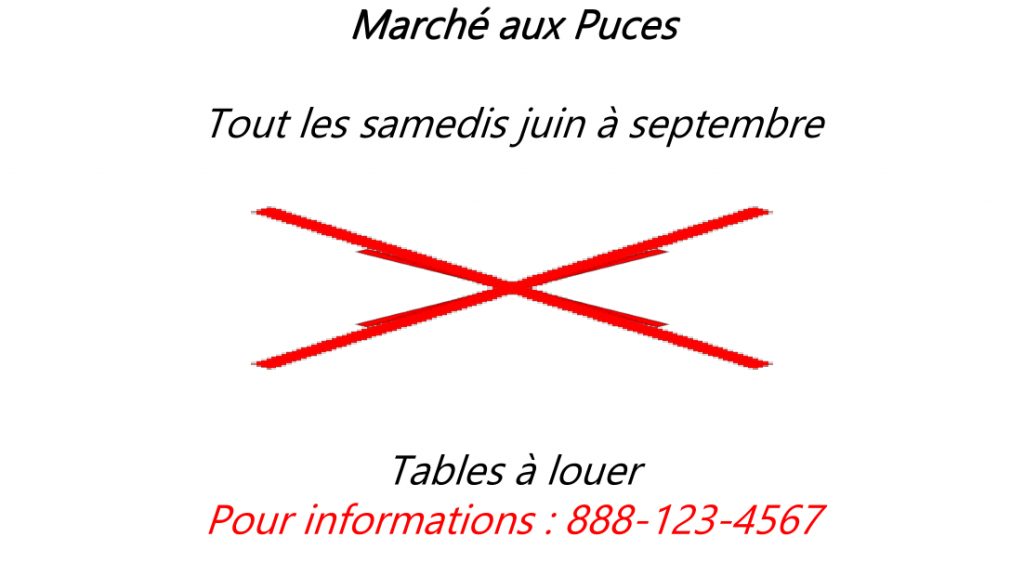
Page 4 — Flea Market Poster

Page 4, a fictitious flyer for a local flea market

The above document — represented here in jpeg format directly produced from a PDF of the document — was originally prepared in LibreOffice Presentation, and therefore correctly represented the original document.

However, the following four images are jpeg images of the pages of the PDF document I created in Microsoft PowerPoint (you will need a PDF viewer) into which I imported the original LibreOffice Presentation, in order to demonstrate the relative lack of compatibility between, at least in this case, LibreOffice Presentation and Microsoft Powerpoint.

Page 1 — Song lyrics to be displayed for a Karaoke Night

Changes: Text fonts and font sizes, causing text to be cut off the page

Page 1, note the changes in fonts and font sizes

Page 2 — Expenses list for a Luncheon

Changes: Text fonts, and improper translation of symbols

Page 2, note the changes in fonts, font sizes, and improper translation of symbols

Page 3 — TV Listings

Changes: text fonts, font sizes, and lack of background colours in the various cells

Page 3, note the changes in fonts, font sizes, and lack of background colours in the various cells

Page 4 — Flea Market Poster

Changes: Text fonts, font sizes, corrupted translation of spreadsheet table in the centre of the flyer

Page 4, note the changes in fonts, font sizes, and the completely corrupted translation of the spreadsheet table in the centre of the flyer

The value of a PDF:

PDF files are generally well supported across multiple platforms and software, generally regardless of platform, and will usually be displayed in a virtually identical fashion on all systems; in the case of discrepancies, they are usually inconsequential.

However:

There exists a certain perception that, short of having Adobe Acrobat Pro (a commercial, closed source piece software), PDF files are difficult to edit and modify, allowing for a certain view that PDF files are more secure. This is a case of “security by obscurity”, since editing and modification may be performed by many pieces of software, besides but of course including Adobe Acrobat Pro.

PDF files may also benefit from a perception of being less susceptible to viruses and malware, such as through macros. Suspicious files, regardless of format, should always be checked when there is reasonable doubt, particularly under certain environments.

Warning:

Be careful when using some PDF software downloaded from random websites on the internet, or websites which advertise PDF modification: The may add watermarks to the resulting file — this may be undesirable, and embarrassing, particularly if the software, website, or their output aren’t vetted prior to distributing the resulting file.

PDF Software which adds a watermark to edited watermarks when using an unregistered version

Further, websites providing PDF editing services may have very reasonable terms of service for editing your document, limiting their responsibilities toward you. By submitting a document to an external website, it may may not be able to protect personal privacy, nor be able to guarantee to not divulge commercial or industrial secrets or confidential personal information contained in the submitted document: They may become the victim of a hacking, or become the target of legal proceedings, not to mention potential dubious or unscrupulous intentions operators might have to begin with. Or, they may simply be unwilling to formally engage in such responsibilities in the absence of a paid service contract.

Sample from a website listing their conditions of use

This article’s objectives therefore are:

  • Firstly, presenting the utility of PDF as a useful format for distributing documents to a wide audience, without having to concern oneself with what software individual audience members may or may not have access to, if at all, and regardless of reason(s);
  • Secondly, presenting safe, free software and open-source software options for using and editing of PDF files;
  • Thirdly, beyond the general promotion of free and open-source software and PDF editing, this article is not about promoting nor deriding particular OSes or software packages, or strictly speaking their strengths or weaknesses.

As such, if a particular system or software package suits your needs and / or purposes, you should use it.

However, if a given preferred solution is costly software, perhaps your organization (or your family) may find it to be financially worthwhile to only purchase a minimum number of licences and only install it on a minimum number of designated computers, instead of needlessly on every computer in your organization (or family).

A simple cost / benefit analysis would be worthwhile: You should consider whether you wish to pay $5, $10, $15, or more, on a recurring basis (perhaps monthly), per computer on which such software would be installed. The costs, be they one-time costs or recurring, should be considered against how often the software may be used, perhaps in some cases only once or twice monthly — perhaps overall, let alone for each individual instance, depending on your organization’s size, needs, and other considerations. Further, it should be considered what operations are typically executed, especially if they simple operations such as joining multiple PDFs, or extracting a page or two, which can be easily performed by many, using any of a multitude of software packages you can get without cost, as opposed to perhaps more technical tasks which may justify costly specialized software.

Creating PDFs from an established document

To begin with, most software which create documents will have an option in the File menu or elsewhere to Print, or Print to Document, or an Export function, which will offer PDF as a format:

PDF (creation) Options in the “Export as PDF” option in LibreOffice

At the risk of skipping ahead to the PDF splitting section below, note that it is a common option to be able to selectively output some, instead of all, pages to the resulting PDF, thereby avoiding the question of having to later split the PDF to get only the desired page(s).

Overview of PDF Software

Perhaps (or perhaps not) to the surprise of many, there are many software packages and suites which will:

  • Display PDF files
  • Combine, divide, and export PDF files, as well as reorder pages within a PDF;
  • Edit PDF files, such as the overall files and the file metadata, as well as the PDF file content
  • Import and display PDF files according to particular strengths (The Gimp, Inkscape, e-readers)

Displaying PDF files:

Here are some examples of software which will display PDF files directly:

  • Evince Document Viewer (Gnome Project)
  • Okular (KDE Project)
  • Firefox and Chromium (Web Browsers)
  • PDFSam (limited free version; there is also a commercial version with more capabilities); a version for Debian derived Linux systems is available on their website

Here is a very short list of software which will open and display PDF files and allow editing, each according to their strengths, but whose primary function is not PDF display:

  • LibreOffice (Office Suite)
  • Calligra (Office Suite)
  • The Gimp (Image Manipulation)
  • Inkscape (Vector Graphics Editor)

Evince Document Viewer

PDF displayed in Evince Document Viewer

Chromium (web browser)

PDF Displayed in Chromium

Okular

PDF displayed in LibreOffice

Software to Combine PDF files

A relatively common activity is to combine multiple PDF files into one file — such as, separately scanned pieces of paper, or PDF files produced separately, perhaps by different people.

Here are some examples of software which will combine PDF files:

  • PDF Mix Tool
  • PDF Arranger
  • PDF Mod
  • PDF Jumbler
  • PDFedit
  • PDFTricks
  • PDFSam
  • LibreOffice
  • Calligra Suite
  • The Gimp

Combining PDF files in PDFArranger

Combining PDF files with PDFArranger

Software to Divide PDF Files / Extract Pages

Another relatively common activity is to divide a PDF File, or extract one or more pages from a PDF file.

Note that if you are the creator of the document, as shown earlier, the software you used to create the document likely allows for you to selectively export individual or multiple pages to PDF in addition to exporting the entire document.

Here are some examples of software which will divide PDF files / extract pages:

  • PDF Mix Tool
  • PDF Mod
  • PDF Jumbler
  • PDFedit
  • PDFTricks
  • PDFSam
  • LibreOffice — allows to print and / or export one or more pages
  • Calligra Suite — allows to print and / or export one or more pages
  • The Gimp — allows to print and / or export one or more pages

Splitting a PDF File with PDFMod

Removing pages from a PDF file using PDFMod

PDF Editing

Here are some examples of software which will edit PDF files to varying degrees:

  • LibreOffice permits the possibility of creating a hybrid PDF and .odt / .ods file (word processor or spreadsheet files), which will allow for the PDF to be more easily edited by any suite that is able to edit .odt and .ods files; create a document with LibreOffice, and in creating a PDF, choose Export — General — PDF Hybrid (incorporating .odt / .ods file)

Other software to edit existing PDF files:

  • LibreOffice Draw
  • The Gimp
  • Scribus
  • PDFedit (old, but good)
  • jPDF Tweak (old, but good)
  • PDF Mix Tool (Basic functions)
  • https://itsfoss.com/pdf-editors-linux/
  • https://alternativeto.net/software/pdf24-creator/?platform=linux
  • PDFFill (pdffill.com) (Windows)

In my personal experience, PDF editing — and ease of doing so — can vary wildly according to what one wishes to do, as well as wildly according to the nature of the source PDF. I have had excellent experiences editing a PDF created from a CAD software drawing (presumably created using commercial CAD software such as AutoCAD), and whose individual elements could be manipulated in LibreOffice Draw. I have also used LibreOffice Draw to insert text zones, arrows, and scanned signatures into PDFs. Conversely, documents composed primarily of scanned images — including text and forms — may require more image manipulation skills to edit, modify, and manipulate individual and specific elements of the document, depending on your objectives.

What you can do will also be dictated by which software package you choose and its strengths and weaknesses.

For instance, it should be noted that the phrase “Editing a PDF” can be a nebulous thing which can mean many and different things to many and different people. For instance, actually editing document text directly in the PDF may be what one understands and expects, while the strengths of a given piece of software may lay elsewhere.

LibreOffice has some PDF import functions, as well as imperfect document layout functions. Depending on the source PDF document, it can be quite effective at editing text directly.

Note from the closed-source world: I once had an excellent experience with a moderately-difficult-to-edit PDF using Microsoft Word, which included being able to edit the text — and presumably save in MS Word’s native file format.

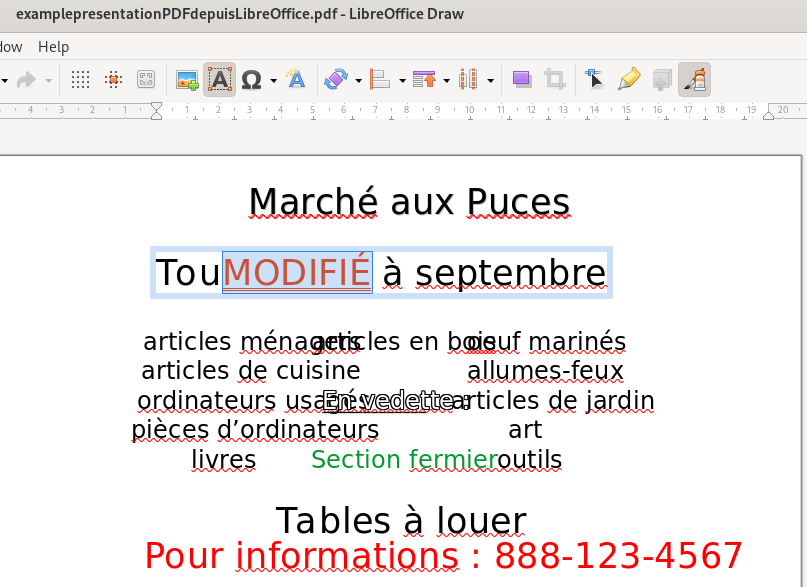
Importing and editing a PDF in LibreOffice Draw (note the imperfect import):

Editing a PDF in LibreOffice Draw

In the case of my example PDF, LibreOffice Draw allows for some direct editing of the text (Notice the word “MODIFIÉ” with a brick-red text colour replacing some of the text):

Importing and editing a PDF in Scribus, a desktop publishing programme:

Editing a PDF in Scribus

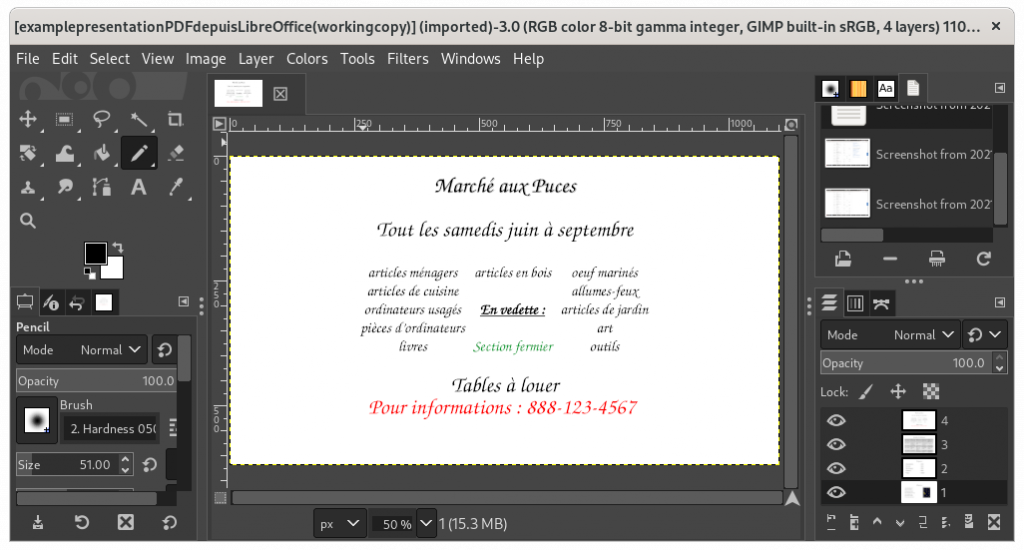
The Gimp can insert text zones into a PDF, and which text zones themselves may be edited within The Gimp; however, its strengths lie in dealing with a PDF as an image, and editing image characteristics, while editing the text as one might in a word processor might be more challenging.

Importing a PDF file into The Gimp, image manipulation software:

Editing a PDF in The Gimp

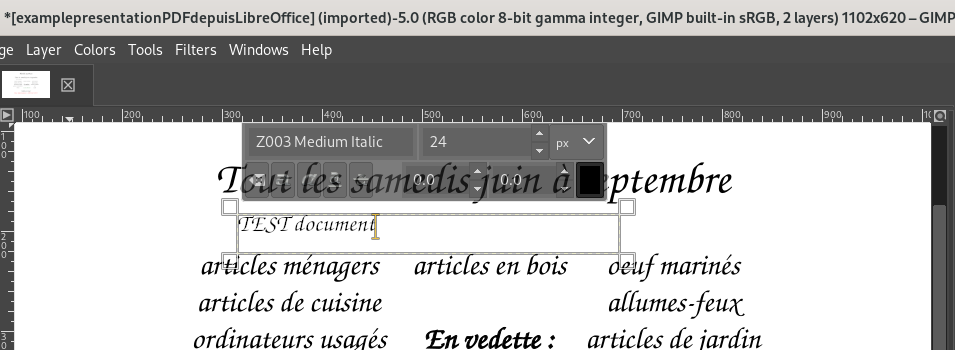
Adding a text zone to a PDF in The Gimp:

Note the insertion of a text zone under the first line, saying “TEST document”

Exporting Text, Cut & Paste, and .odt File Creating

Depending on the source PDF and its nature, “cut & paste” may work (as opposed to not working at all), and may even “work well”, although this may be wildly variable according to the source PDF document. However, even in the best case, this method will normally only copy the actual text, and some of the images, from your PDF document; it may not usually be particularly useful in actually replicating the PDF document formatting.

As for other document and content formats, such as drawings, pictures, and text rendered into images, other sections of this post should be consulted (ie. using LibreOffice Draw or The Gimp for drawings; optical character reading (OCR), including OCRFeeder, etc.)

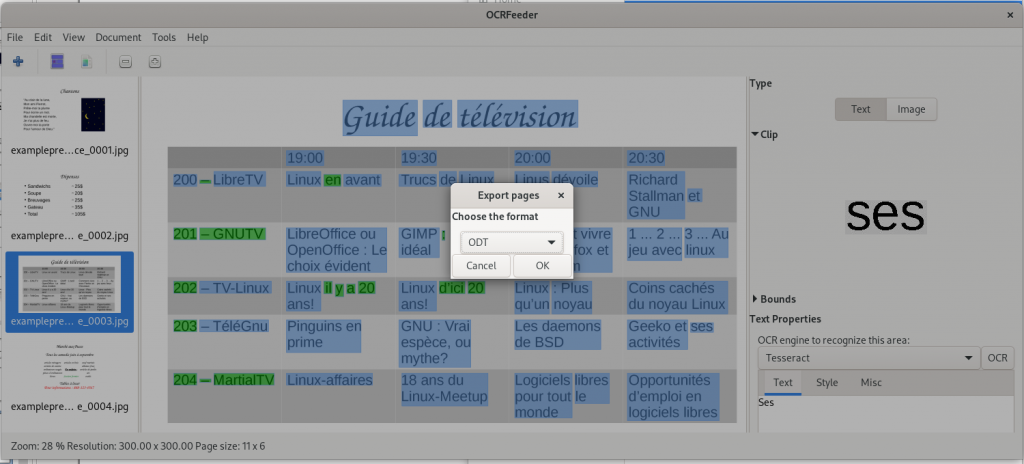
In addition to the mention of LibreOffice above, OCRFeeder is software that acts as a front end to optical character recognition software, and is able to import PDF files, and then export in HTML, plain text, OpenDocument (.odt) format, and of course PDF. Again depending on the source file, results may be variable, although the results are usable.

OCRFeeder in action and ready to export a page of the example PDF to ODT format

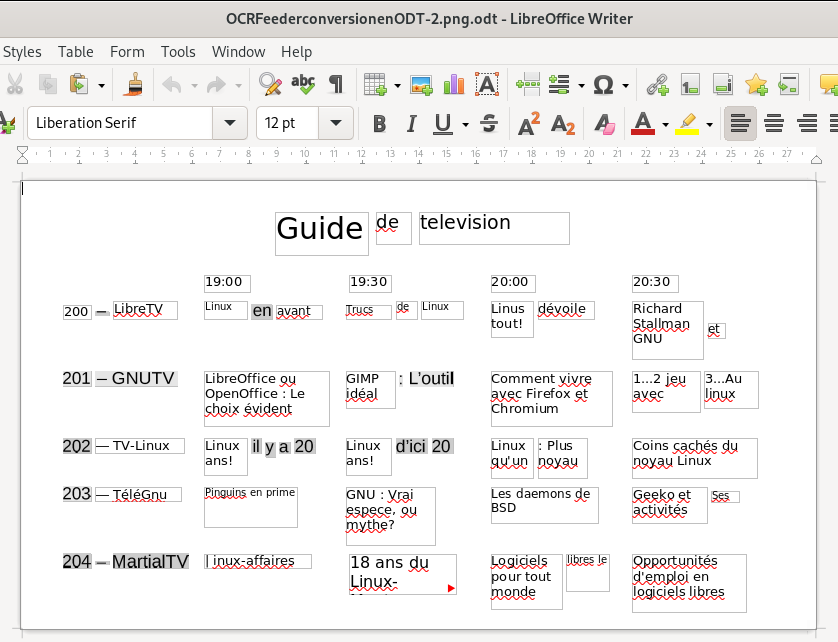
… and here is an image of the exported .odt file (word processor file) of the page viewed and created in OCRFeeder, then opened in my word processor (LibreOffice):

Exported word processor file

Ironically, as this case shows, the changes (or lack of adequate recognition and / or translation of the original layout) can be as great or even more as can occur by simply sharing documents between not-fully-compatible-though-similar software suites. However, though far from perfect, it is arguably usable, depending, of course, on how much effort you are willing to devote to replicating the original document layout — and then making your desired changes, and finally creating a new PDF document.

Exporting to other file formats:

As has been (indirectly) demonstrated several times throughout this post, PDF files can be imported into software that isn’t specifically dedicated to PDFs, and then allow for the resulting imported file to be exported into other formats. For example, The Gimp was used to create most of the working images for this post: In the case where PDF files were to be displayed, the PDF files were imported into The Gimp, and then exported in jpeg or png formats. This type of conversion — from PDF to another given format — can often be done by other pieces of software (to varying degrees) according to their strengths or weaknesses.

Photo Editing with PDFs

The Gimp is fully functional image processing software, very similar to — but, unfortunately, not fully compatible with nor a perfect drop-in replacement of — Photoshop. Using The Gimp, you can import a PDF and edit the image(s) directly, or extract photos and other images through a variety of means, such as selecting the area of the photo, copying the selected area, and creating a new document from the clipboard.

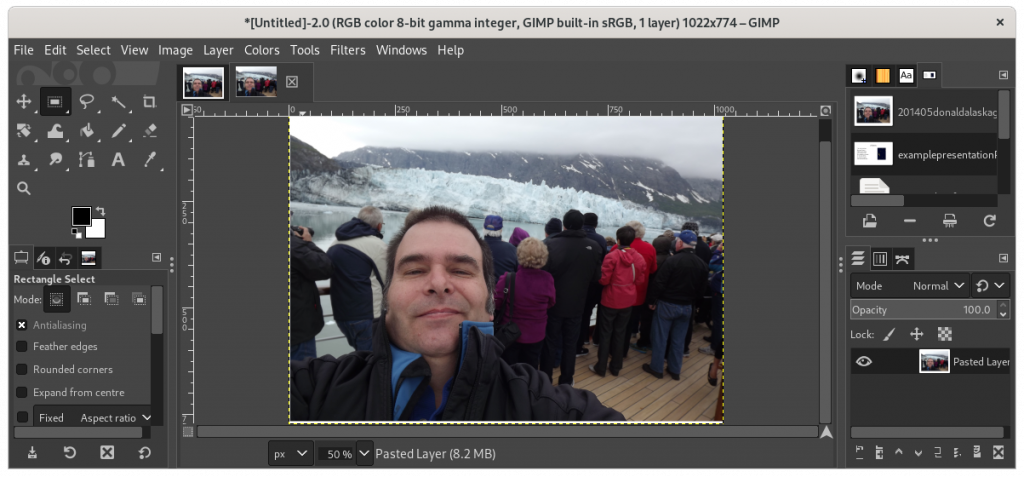
Here is a The Gimp having imported a PDF of a photo of myself on a cruise:

PDF of a photo of the author imported into The Gimp

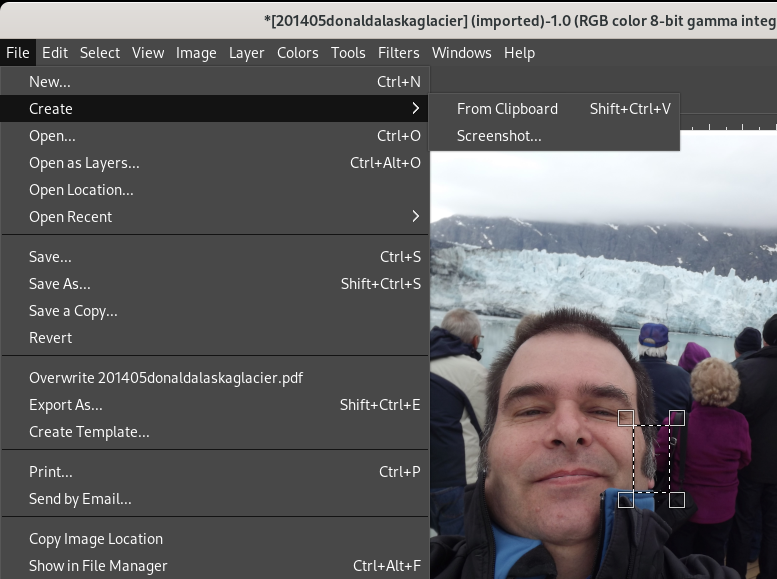
During the live presentation, I gave the hypothetical example — for the sake of levity — of a barber who particularly likes sideburns, and seeing mine in a PDF, decided to clip out one of my sideburns from the photo …

Selecting a region of the photo and creating a new document therefrom

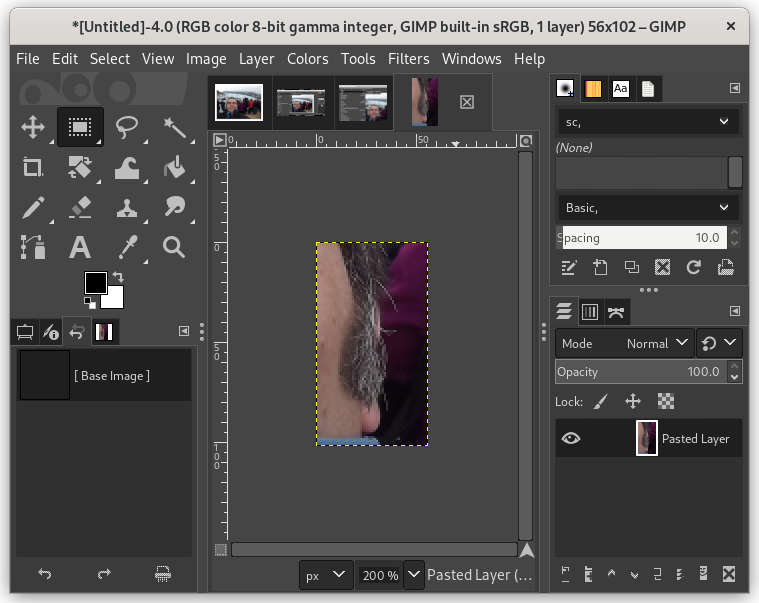
… and then notice on how I was starting to go grey at the time :

The beginnings of some greying in my sideburns

It is taken as an understood that use of The Gimp to manipulate the photo can be continued at this point — such as how my sideburns might look after a colouring, or to compare side-by-side against other people’s sideburns — and then the result exported as a PDF.

PDFTricks allows for resizing of images in PDFs, principally compressing and reducing the file size to the order of “large”, “medium”, “small”, and “extra-small”, as well as image exporting to .jpg / .png / .txt formats, and file merging and splitting.

PDF Tricks menu of options

During the presentation, the PDF document above composed of the photo of myself on a trip was run through the software’s “extreme compression” option. The following is a clip from a screenshot from a file manager, showing the size difference between the the original file, and the newly created compressed file:

File size difference before and after processing file with PDFTricks

LibreOffice Draw allows for some image manipulation.

LibreOffice Draw being used to manipulate an embedded image

In this particular situation, the night sky drawing in the karaoke page of the example PDF I created was selected, and the various options directly available were shown. However, as mentioned earlier, I have imported PDF documents of building plans and modified them to include notes showing were works were performed, or to add signatures to documents.

PDF Forms

PDF Form Creation

LibreOffice Writer and Calligra Suite are fully-featured for the creation of forms. Unfortunately, I am not particularly adept at creating forms.

Filling PDF Forms

  • Evince — if the PDF form was designed to be interactively filled
  • Okular — if the PDF form was designed to be interactively filled
  • The Gimp — allows for text areas to be inserted, as well as photos, drawings, and the like
  • LibreOffice Draw — allows for text areas to be inserted, as well as photos, drawings, and the like

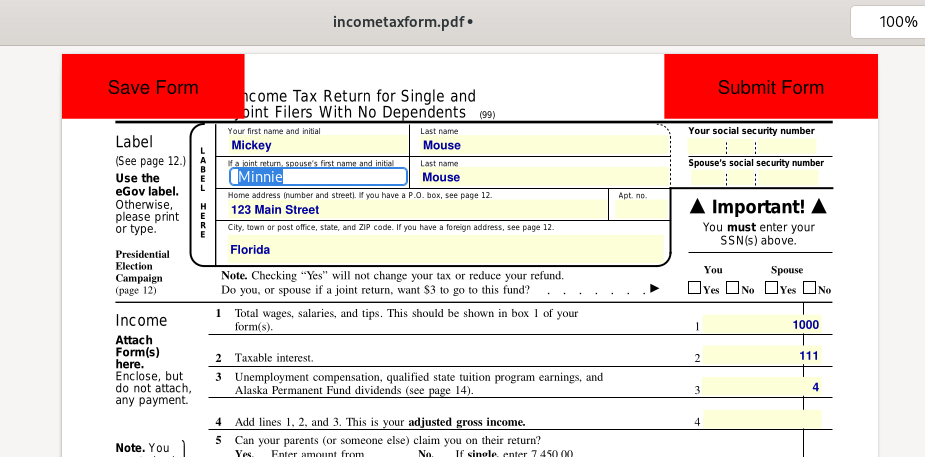
Here is an example form found at https://www.aloaha.com/sample-fillable-pdf-forms/ — a sample tax form which I began filling out for Mickey and Minnie Mouse, using Evince:

Fillable form being filled with the names of Mickey and Minnie Mouse

Final Choices:

  • Viewing / displaying PDF files : User’s choice (usually a system’s default PDF viewer is adequate, or a web browser)
  • Combining and splitting PDF files : PDFMixTool
  • Editing PDF files : User’s choice (depends on objectives and source file; The Gimp and LibreOffice Draw are good contenders)
  • Adjusting PDF file size : PDFTricks
  • Form creation : User’s choice
  • Form filling : User’s choice (usually a system’s default PDF viewer is adequate, or a web browser)
  • Exporting PDF to other formats : OCRFeeder (for .odt); LibreOffice Draw (Photos and images); The Gimp (photos and images)

Note on Linux availability of the above software:

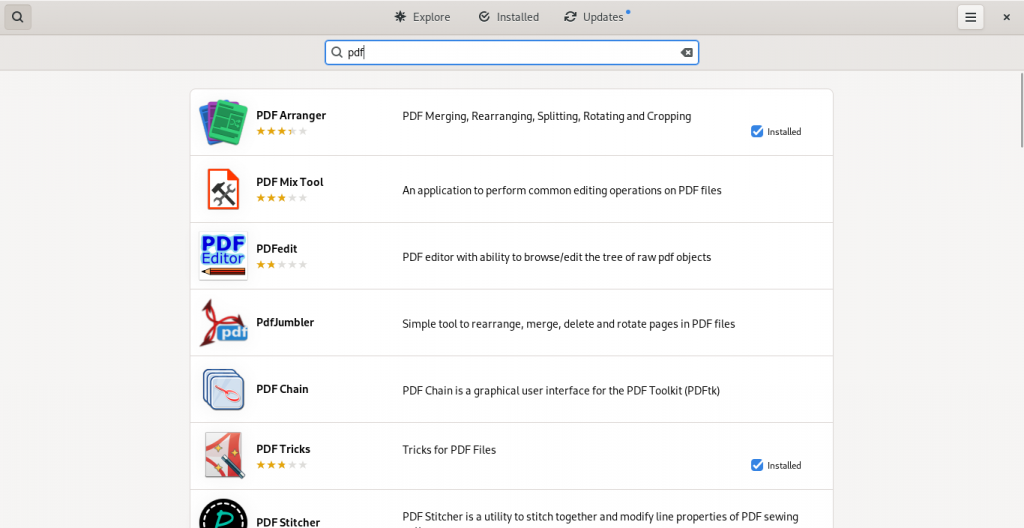
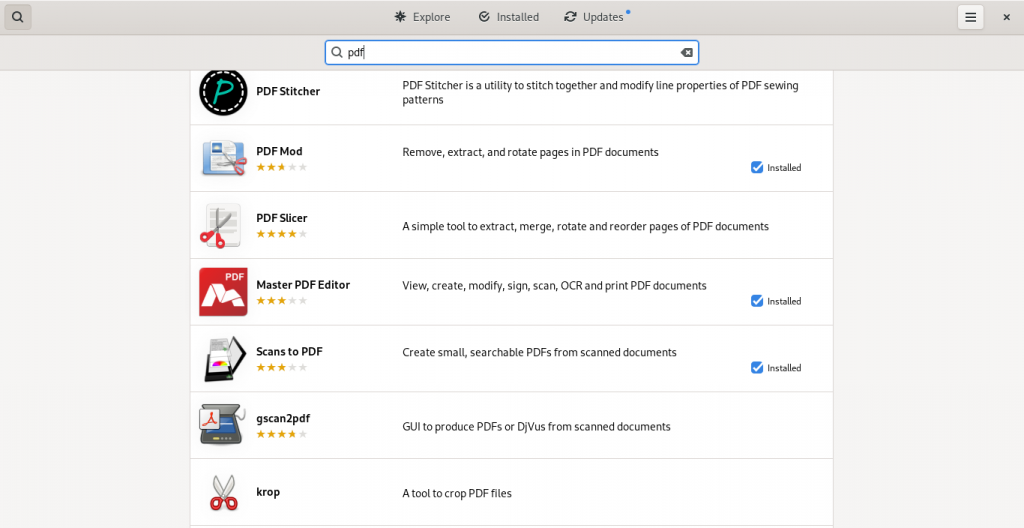
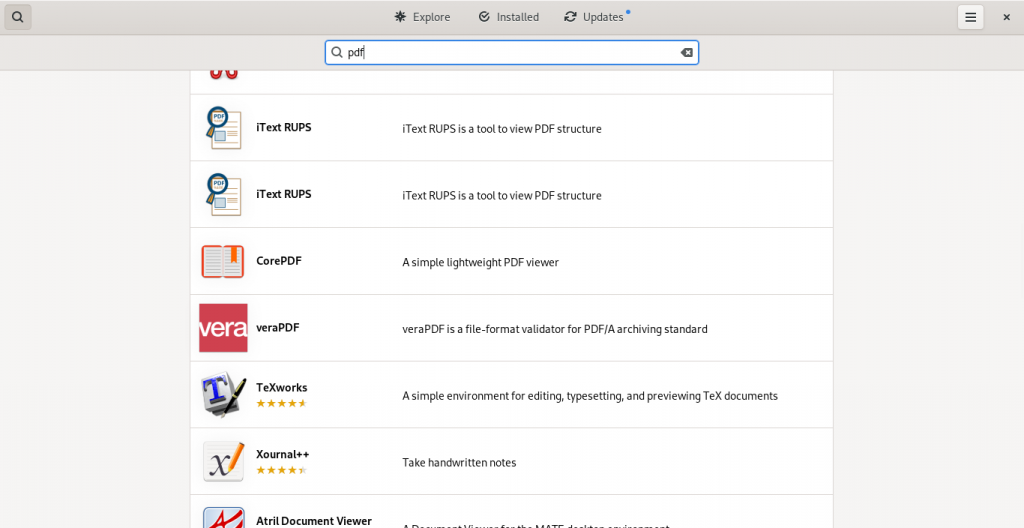
Here are some screen shots from my system’s installed repositories (Fedora Stable; Fedora Updates; rpmfusion.org — free and non-free)

PDF software easily accessible from my computer’s software repositories (“App Stores”):

Gnome Software list of available PDF software from various software repositories on Fedora Linux

As this list suggests, there is lot of software available which have varying PDF abilities, ranging from being dedicated PDF software of various kinds, to other pieces of software with other principal functions but with PDF functions ranging to simple importing from and exporting to the format, to being useful within the limits of the software’s main functions to manipulate PDF files in some way(s).

Summary:

This presentation’s goals are to highlight:

  • how PDF files are well supported most of the time on most systems, while the various pieces of software, between two versions, typically a well-known closed source project and an open-source counterpart, for document production, are not as compatible with each other as we may want;
  • free software while avoiding the security risks inherent to using unknown and potentially dangerous websites, as well as software which is easily available for routine tasks as well as to reduce costs;
  • the possibility of editing PDF files with various pieces of free software which are easily available in most Linux distributions’ repositories — as well as often easily available for other platforms — albeit occasionally with variable success.

Questions taken during the presentation:

A question asked midway through the presentation expressed a certain surprise that The Gimp can be used to edit PDFs. As mentioned earlier, The Gimp is able to import PDF files, and perform various functions on the file according to its strengths (image manipulation).

A participant asked at the end during a question period about a recommendation for software to affix signatures to documents. I replied that I was not aware of any open source official signing software with digital traceability, simply because that I had not done any research on that subject; however, an image of a scanned signature can usually be inserted in a document using The Gimp or LibreOffice Draw, or as a document is being created in a word processor.

A final comment recommended the use of LibreOffice Draw, based on the commentor’s frequent use of it to perform a number of the functions listed here, to which I’d commented that I had asked my employer’s IT department to install LibreOffice on my work-issued Windows-based laptop computer in order to be able to perform some drawing-modification functions as part of my employment.

Enjoy sharing and editing PDF files!

UPDATE 20220407:

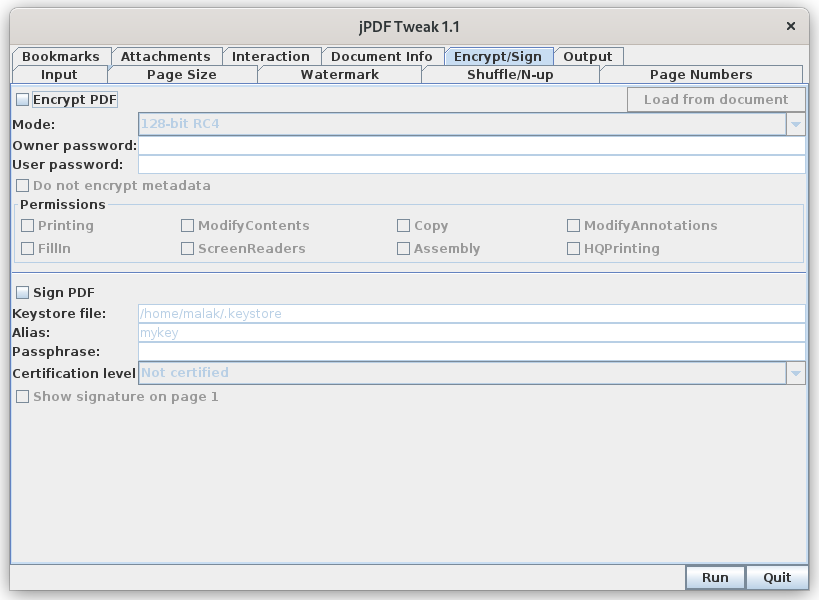
Signing PDFs can be performed with jPDF Tweak.

JPDF Tweak can also encrypt and add passwords to a PDF.

Document Formatting When Joining Texts From Various Sources

I have mounted, on a volunteer basis and in a lay capacity, the annual reports for a community group to which I belong, since about 2008.

Up to that point, the group’s annual reports were individual committee reports delivered to the secretary, individually printed out as and when received, and then stapled together with handwritten pages numbers when it had to be distributed, with an added cover page, and an extra page listing the reports and their page numbers. This did have the charm of not requiring a herculean effort and time requirement in both mounting the report, and on “printing day”, to print literally a thousand pages or more, depending on the number of pages to the report and the number of copies to be drawn. Admittedly, it does not take into account possible collating, as per how one might print out the reports (ie. pages with colour drawings and photos vs black and white, etc.).

The year I took on mounting the annual report, I believed that the annual reports should have been in an electronic format such as PDF so that it could be placed on the group’s website. But that was barely the beginning of why I took on the job.

To fulfill the technical goal of making a PDF for download from the website was not too difficult. Two easy options would have been to either scan the report once produced the “old fashioned way” and produce a PDF from all the images, or, at least for those received in electronic format, create individual PDF documents plus scan for those received on paper, then use a PDF joiner to string the PDF files together into a single document. In fact, at the time, I gathered as many previous annual reports as I could and scanned them, making them available on the website.

However, going forward, I did not consider either option to be satisfactory.

The aesthetic appearance of the annual report irked me. It wasn’t the old school printing on paper — to this day, I still print lots of paper copies for distribution. Rather, I saw an opportunity to put to the test some angst stemming from a bit over a decade earlier when the community group’s recipe book to which I’d contributed led to my having had a few ideas on improvements to the text’s basic formatting and overall layout. (The actual recipes, variety, organization, editing, and recipe testing that I learned went on behind the scenes, and the like, were beyond the scope of my interest, although one common error, separate from my angst, was a mild nuisance.) I of course wisely kept my opinions to myself, both at the time of the recipe book in the mid 1990’s, as well as at the time of initially volunteering to mount the annual report.

As can be surmised from the above, each report came from almost as many different people as there were reports, depending on how many committee reports given individuals would take on. Each person would typically type their report on their computer and email it to the office, or perhaps print it out at home and drop it off at the group’s office personally. They used whichever word processor they had: Sometimes simple text editors, or MS Write, or MS Word, presumably ranging through Word 98, Word 2003, and Word 2006. Presumably some people had Macs with whichever word processor they might have had. I believe that the secretary, who was sometimes typing up the reports which were submitted handwritten, was using a version of Wordperfect. Finally, I was submitting my reports at that point using OpenOffice.org. Presumably, there may have been other text editors or word processors used. Each instance presented a random opportunity for default settings to be different, as well as for the user to change the settings to those that suited their own personal taste.

As a result, each report predictably had formatting unique to each author, sometimes unique to each individual report, if two or more reports were submitted by the same person.

The various differences in formatting in the reports received included the following, without being an exhaustive list:

– varying text fonts and font sizes, and occasionally, more than one of either or both in a given report;
– varying line spacing;
– varying paragraph indentation, including lack thereof;
– line jumps or lack thereof between paragraphs;
– varying page margin widths;
– varying text alignment, typically either left justified, or left and right justified;
– the occasional use of italics over the whole document, beyond that which would normally be used;
– the inclusion or lack of section titles, sometimes (or not) rendered bold and/or italicised and/or underlined and/or capitalized;
– tables listing figures in formats unique to each table and report, or simple lists with varying bullet styles;
– varying spelling conventions, ie. American vs. British vs. Canadian spellings (ie. neighbor vs. neighbour, or center vs. centre);
– varying naming conventions: Sometimes full names, sometimes initialized first names with full last names, sometimes full first names with initialized last names, or sometimes very informally with only first names;
– varying honourific format conventions: sometimes honourifics, titles, and/or ranks would not be used, with persons simply named, and sometimes referred to with variations of their title such as Reverend, Rev., The Reverend, The Rev., etc.
– varying naming conventions for committee names, multi-word names, places, and the like, which were sometimes fully spelled out, and sometimes initialized, abbreviated, and / or contracted;
– etc.

As such, as alluded to in a previous post, minor changes and differences in formatting between the individual reports created subtle (or, depending on the changes, more obvious) visual changes in how each report appeared compared to each other, when joined and printed on paper or read on a computer screen. Multiple permutations and combinations of the above formatting issues often led to creating wildly varying end results which go beyond the subtle, creating a patchwork of formatting over the multiple reports joined together into a single document. This may be jarring to the eye of some readers, particularly when it is not a subtle, unified, overarching design choice, but rather the result of a decided lack of unified design choice.

This link shows a hypothetical example of how such a report could look (you’ll need a PDF reader) — with various individual reports each having unique blends of formatting as compared to each other. Note that I intentionally use the “Lorem Ipsum” text so as to highlight the formatting.

The obligatory let’s tie it all together part at the end:

When I collect the individual reports and create one document, I cut and paste all the electronic reports (and rarely, type up handwritten reports) into a single document, imposing a uniform text formatting throughout in the form of a standard font, font size, line spacing, (lack of) paragraph indentation, page margins, and standardized and / or uniform versions of the other items above. Pages are automatically numbered, and standard page headers and footers are automatically added throughout, with date codes to distinguish between earlier and later versions. Basic spelling and typing conventions are applied and made uniform. Note that I don’t dictate or edit writing style, so one report might have section headers, while another may not, nor do I edit for turns of phrase and the like.

This link shows the above hypothetical report changed (you’ll need a PDF reader) to show the same reports with some basic text formatting across the whole document made uniform, while allowing each author’s text flow (and implicitly, were each text to be unique, writing style as well) to remain relatively untouched.

Have I addressed my angst from the mid 1990’s? Yes.

Is the document formatting on the annual reports I produce every year a work in progress, with subtle improvements, changes, and the like every year? Of course.

A text formatting riddle

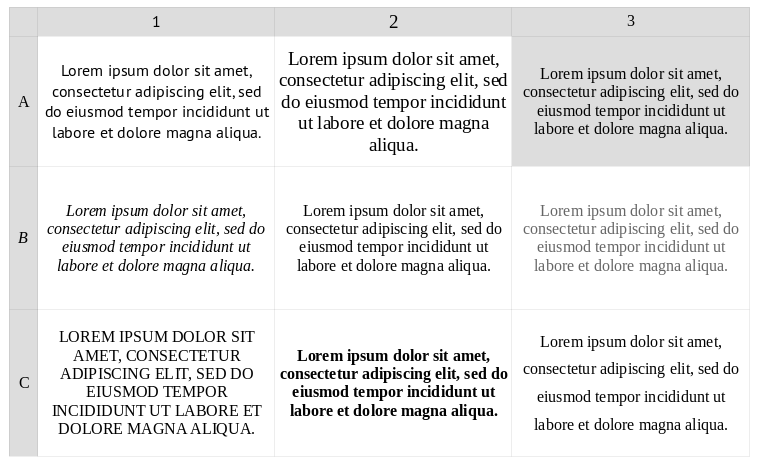
I’d like to propose my version of a little visual puzzle I saw years ago. In the following table, the same text is repeated in each cell. In eight of the cells, an element of formatting has been changed from the appearance of the text using a basic set of formatting, while the ninth contains, in this case, the default settings on my wordprocessor on my system. The riddle is to find which cell has not been modified as compared to the other eight. (View a slightly larger version of the table here.)

A hint of sorts: What the basic formatting settings are, or which word processor I used on which system or OS, all represent red herrings to solving which is “the original”, or “vanilla”, version.

a text formatting puzzle

Scroll down for the solution.
Scroll down to see the solution
The solution is B2, the cell / square in the centre of the table.

All the other cells have one thing changed from the B2’s qualities.

A1) The font was changed (from a Serif font to a Sans Serif font);
A2) The font size was changed to a slightly larger point size;
A3) The cell’s background colour was changed to a light grey;
B1) The text was italicized;
B2) Standard, unchanged text using my word processor’s standard settings;
B3) The text colour was lightened from a standard black to a grey;
C1) The text was capitalized;
C2) The text was made bold;
C3) The text’s line spacing was increased.

Besides at the core being what I perceive to be a fun riddle, it demonstrates how subtle differences can be made to standard document formatting in a variety of ways. It also alludes to the challenges presented by receiving documents from multiple sources for integration into a single document, such as a community group’s newsletter, or a community group’s annual report, presenting content and / or reports from its various members, leaders, subgroups, committees, and the like. In a forthcoming post, I will further discuss basic issues of varying formatting, and the need for standard formatting in a text document from the perspective of a layman editor of a community group’s annual report.

Updated recipes

I have been adding my personal recipes to malak.ca since the beginning of December, 2017.

It has been a sort of starting from fresh to create my personal cookbook, a project I started, I think, long before 2011 — as early as 2007-ish, as I recall.  (I remember discussing the cookbook with someone somewhere around 2012, and said conversation could not have occurred before 2011.)

Several years ago, I’d put together a personal cookbook, but at a certain point during its construction, somehow the main file either got corrupted, or I had several copies which I didn’t manage properly (and presumably, in this scenario, began overwriting previously entered recipes with newer versions of other versions.)  However it all happened, I became disillusioned and lost interest on a practical level to reconstruct it all, let alone finish it, despite a certain allure it had.

Back in December, I decided to start from scratch, doing a rather 90’s thing — or perhaps even an 80’s, or 70’s, or 60’s thing — I used a basic text editor and started retyping each recipe, sometimes using what I did still have as a reference, and in at least four cases, just reusing the recipe as I’d entered it back a few years ago, with the remnants of the original cookbook file.

In the case of some of recipes I’ve been typing in, I’ve actually been able to tune the text based on recent memory of just having made the items in the last couple of weeks (as in, as I was making the item in question, going over to my computer to make adjustments), or up to a couple of months ago.

I started posting pdf’s on my website.  And, I’ve been using a “post early, post often” approach to each recipe, as in, check recipes, fine tune them, repost the update, and, fine tune them again, adding sections like “equipment” as I’d start to be using that in other recipes, and so on.  I even have been recalling a lightning talk I rather liked at a linux conference I attended in 2011 which, ironically, used baking and recipes as a way to demonstrate the need to developers the importance of clear, concise, and complete instructions and documentation in order to encourage others to join their software projects.

And, fun fun fun, today I took advantage of another day of holidays, er, waiting for the garage to call me back and say that my car, in for servicing, was ready:  I went through all my recently-typed recipes and did some basic editing.  Lists and sentences / semi-sentences were capitalized.  Lists received dash points.  Instructions which hadn’t already been fleshed out, were fleshed out.  Sentences with multiple steps were broken up into discrete instruction lists.  A number received sections “do this part, then while that cooks, do this part”, etc.  (And then, transferring the updates to my webserver, to my laptop as a backup, and to my backup server which is also my webserver.)

Obviously, the likes of “cooking sausages” isn’t there, even though apparently when I make them for a Santa’s Breakfast, they are highly rated beyond the fact that I’m the only volunteer who actually relishes in making 200+ sausages at home in advance.  And, that having the sausages pre-cooked so that they only need to be reheated in the oven is quite convenient when you’re serving 100+ people.

Eventually, if you look at the eggplant, first meatball, cheese biscuit and zucchini dish recipes, I may update them in the style of the newly retyped recipes as above, while converting the texts of the newly retyped recipes to that format (the original format for my “personal cookbook”), and take photos.

Finally!  My recipes are now documented, accessible, shared, sharable, and, if I ever get around to it, ready for transfer into a “cookbook”.

Free PDF splitters, and other crippleware

Yesterday I downloaded a PDF splitter to use on my MS computer at work. And I got bitten, hard. I wouldn’t exactly call it crippleware; most people expect even crippleware to be minimally useful. This piece was not.

I shall quote the message that I sent to their support email addy:

I am writing to let you know that your free trial download for the PDF splitter is not a useful piece of software at all, for the simple reason that it intentionally and flagrantly renders the split documents useless by inserting the “watermark” — a large message spanning the diagonal of the page, in cherry red characters, saying “in order to remove this message please visit our website” — across every page of the document.


Were it to put a far more discreet message along the top or bottom, this might be tolerable however ugly it would be; however, it is hardly of any value to anyone wishing to take advantage of the “15 free uses” or somesuch in order to evaluate the software before deciding to purchase it; in fact, I expect that most people downloading the evaluation copies are immediately turned off by this malfunction.

Obviously, I don’t expect a response from them, at least not a useful response. Obviously, I would never have bought the software to begin with were I to have had a good experience using the software — I admit it, I’m cheap.

And sure, I should have thought things through a bit better and (as I mention below) install Ghostscript to do the job. Sure, I was in a bind and embarrassed myself and my employer in front of the client.

So of course, the following reactions come to mind:

– What, the programmer(s) wanted to show off their skill at insering “watermarks”, and that are ugly to boot?
– Or did the programmer or company put more thought into the dollar signs floating in front of their eyes than, oh, I don’t know, producing a piece of software that someone may actually wish to buy?
– Or did the Marketing Department convince the programmer’s supervisor that the watermark had to be put in?

And on a personal level:

– I should install ghostscript and run:
“gswin32c -sDEVICE=pdfwrite -dNOPAUSE -dQUIET -dBATCH -dFirstPage=m -dLastPage=n -sOutputFile=out.pdf in.pdf”
– I should stop trying to delude myself that there won’t be an ever increasing number of useless PDF tools out there that require you to buy the product before getting a true evaluation copy;
– When using my work computer, stop using a Windows mentality, and apply a thing or two that I know how to do under linux.

Of course in the short term, what I did was speak with the secretary very nicely, who has Adobe Professional to split the file, and she did.

My point should be clear: If you want to sell your software, go right ahead; I won’t be buying it anyway. And if you want to give away a trial period during which people can, well, try the software, go right ahead; I may try your product during the trial period. But why give a free trial period (in the case above, 15 operations) that reflects poorly on the company and actually annoys your potential customers?

PDF’s, Scanning, and File Sizes

I’ve been playing around with PDF’s for the past few weeks and have noticed a very interesting thing: A PDF is *not* a PDF is *not* a PDF is *not* a PDF, ad nauseum, and it would seem, ad infinitum. At least, so it would seem. Part of me almost wonders if the only distinguishing feature of a PDF is the .pdf extension at the end of the file. In “researching” this post I have learned what I knew already; PDF boils down to being simply a container format.

Lately I have been scanning some annual reports from years past for an organization I belong to, and due to the ways xsane 0.997 that comes with Fedora 12 scans pages — which I will concede straight out of the gate I have only explored enough to get it to do what I want and to learn how it does things “its way” — the PDF file sizes are “fairly” large.

In order to find this out, I first found out about one of the quirks in xsane 0.997: Something about the settings with xsane doesn’t have it stop between pages for me to change pages; at least, I haven’t gotten around to finding where the settings in xsane are to have it pause between pages. This is important because my scanner doesn’t have an automatic page feeder. The first page of results of a google search indicate several comments about this problem, but not a solution. At first glance the second page of results is of no help.

So I end up scanning pages one at a time, and then use GhostScript to join them all up at the end to make a single PDF.

Without having added up file sizes, it was obvious that the total size of all the scanned pages at 75 dpi and in black and white was sufficiently larger than the single PDF with all the pages joined. This did not bother me since, again without having added things up, the difference didn’t seem *too* great, and I assumed that the savings were principally due to adminstrative redundancies being eliminated by having one “container” as opposed to having 25 to 30 “containers” for each individual page.

Then this week a curious thing occurred: I scanned a six page magazine article, and then separately, another two page magazine article, at 100 dpi and colour, and whaddya know, the combined PDF of each set is smaller than any of the original source files. Significantly so. In fact, the largest page from the first set of six pages is double the size of the final integrated PDF, and in the case of the second set of two pages, each of the original pages are triple the size of the combined PDF. I’m blown away.

Discussing this with someone who knows the insides of computers way more than I, I learn something: It would appear that xsane probably creates PDF’s using the TIFF format (for image quality) as opposed to what I imagine Ghostscript does when joining files, which would seem to be to do what it can to reduce filesizes, and as such in this case I imagine convert the TIFF’s inside the PDF’s into JPEG’s. A bit of googling indeed appears to associate tiffs and PDF’s when it comes to xsane; indeed a check on the “multipage” settings shows three output file formats — PDF, PostScript and TIFF. And looking in Preferences/Setup/Filetype under the TIFF Zip Compression Rate, it’s set at 6 out of 9.

So I google PDF sizing, and one result led me to an explanation of the difference between using “Save” and “Save As …” options when editing a PDF: “Save” will typically append metadata on top of metadata (including *not* replacing the expired metadata in the “same” fields!); “Save As”, well, that’s what you really want to do to avoid a bloated file since all that should be will be replaced.

Another result begins describing (what is no doubt but a taste of) the various possible settings in a PDF file, and how using a given PDF editing application, you can go through a PDF, remove some setings, correct others, etc., and reduce the size of PDF’s by essentially eliminating redundant or situationally irrelevant — such as fields with null values — information whose presence would have the effect of bloating the file unecessarily.

I’ve known for a few years that PDF’s are a funny beast by nature when it comes to size: For me the best example by far used to be the use of “non-standard fonts” in the source file, oh say any open-source font that isn’t in the standard list of “don’t bother embedding the font since we all know that nine out of ten computers on the planet has it”. In and of itself this isn’t a problem; why not allow for file size savings when it is a reasonable presumption that many text PDF’s are based on a known set of fonts, and most people have said known set of fonts installed already on their system. However, when one uses a non-standard font or uses one of the tenth computers, when one constantly creates four to 6 page PDF text documents ten times the size of source documents, frustration sets in; having wondered if designating a font substitution along the lines of “use a Roman font such as Times New Roman” when such a font is used — such as in my case, Liberation Serif or occasionally Nimbus Roman No9 L — I asked my “person in the know”. Apparently, Fedora 12’s default GhostScript install, whose settings I have not modified, seems to do just that.

I guess what really gets me about this is how complicated the PDF standard must be, and how wildly variable the implementations are — at least, given that Adobe licences PDF creation for free provided that the implementations respect the complete standard — or more to the point, how wildly variable the assumptions and settings are in all sorts of software when creating a PDF. I bet that were I to take the same source and change one thing such as equipment or software that the results would be wildly different.

So, concurrent to the above scanning project, I happened to experiment with a portable scanner — a fun challenge in and of itself to make it work, but it did without “too much fuss”. And I found out something interesting, which I knew had nothing to do with PDF’s but (I presume) rather with scanners, drivers, and xsane. I tried scanning some pages of one of the said annual reports with the portable scanner on an identical Fedora 12 setup using xsane, and the PDF’s that were produced were far greater in size than those scanned with my desktop flatbed scanner. My flatbed scanner would scan the text and the page immediately surrounding the text, but correctly identified the “blank” part of the page as being blank, and did not scan in those areas, thereby significantly reducing the image scanned size. The other scanner, a portable model, did no such thing and created images from the whole page, blank spaces rendered, in this case, to a dull grey and all, thereby creating significantly larger PDF files than the scans of the same pages created on my flatbed scanner. However, as I mentioned, I assume that this is a function of the individual scanners and their drivers, and possibly how xsane interacts with them, and in my mind is not a function per se of how xsane creates PDF files.

Another interesting lesson.

Printing PDFs

I’ve just had an interesting object lesson in the differences between two different pieces of software that have more than essentially the same function.

Today I had an important PDF document to print out at home instead of at the office. For the purposes of practical convenience, it was far better to print it out at home and just deliver it to the office than spend the extra time at the office (5-10 minutes) turning on my office computer and printing it out there on a printer I knew would have no difficulty dealing with it, having printed out a few dozen identically-generated documents on it.

On my pretty much stock Fedora 10 box, I use the Evince Document Viewer 2.24.2 using poppler 0.8.7 (cairo) for the Gnome desktop to display and print PDF documents. So far, I’ve been satisfied.

The PDF’s layout had margins beyond my printer’s abilities. And of course the most important parts of the document, being right at the edges of the margins in this document, were being cut off in the process of printing out the document. A reduction in the print size was not useful since the vital information was on the end of the document being cut off in the margins. I suppose I could have tried rotating the document to try to see if the cut off part would not contain crucial information, which I didn’t think of at the time. Both these strategies, however, miss the point: If the original document has very narrow margins, something is going to get cut off no matter what; not exactly desireable.

I did try something that happened to involve a Windows box (ughh) mostly because it had a different printer, and you never know how things behave differently with different equipment.

Not surprisingly, the windows box happens to have an Adobe viewer installed (I avoid that box as much as possible; I don’t even maintain it, that’s my brother’s job. 🙂 ). I click to print the document and whaddya know, in the print dialog there’s an option to fit the document within the printable area. Document printed, convenience secured.

Now what I would like to know is how much of the print window in my desktop is governed by HPLIP, how much by Gnome, how much by CUPS, and how much by the application invoking it at the moment. So I did a little experiment: Always selecting my printer, I opened a print dialogue in Evince Document Viewer, OpenOffice.org (3.0.1), Firefox (3.0.7), The Gimp (2.6.5), Xpdf (3.02) which I intentionally installed for the purpose of this experiment, and gedit (2.24.3) (on which I’m composing this blog). Besides Xpdf, each appears to have the same base, and except for Evince Document Viewer, each also adds a function tab of its own. Xpdf, on the other hand, has its own stripped-down interface — either invoke the lpr command or print to a file.

Here’s a quick table listing the tabs listed in the print dialogs available in five, off-the-shelf standard installs of Fedora 10 software, with my printer selected, plus Xpdf, which was installed directly from the Fedora repositories without any modification of settings or whatever on my part:

OpenOffice.org*: General; Page Setup; Job; Advanced; Properties
Firefox: General: Page Setup; Job; Advanced; Options; Properties
Document Viewer: General; Page Setup; Job; Advanced
The Gimp**: General; Page Setup; Job; Advanced; Image Settings***
Xpdf: Xpdf has its own stripped-down interface
gedit : General; Page Setup; Job; Advanced; Text Editor

* There is an Options button in the “Page Setup” tab for OpenOffice.org.
** The Gimp treats my “special” PDF as an image much like any other, and automatically sizes it to the current settings, much like it would handle a .png or .jpg image
*** The Gimp has an option to ignore the margins; see above note

Not one, besides The Gimp, has an option to fit the document within the printable range, and The Gimp only indirectly, because of the way it seems to handle PDFs by default as an image to be manipulated. And of the others, to be fair, only Document Viewer and Xpdf deal with PDFs — even FireFox delegates PDFs to the Evince Document Viewer by default.

Then I did another little experiment: I installed Adobe Reader 9.1 (that license is interesting, pretty convoluted, and makes me wonder whether I may use the installation at all; in any case, I’ll be getting rid of it since I really only installed it for the purpose of this experiment, and decided a while ago that having 2 PDF viewers above and beyond that which is available in the basic distro installation is superfluous unless ther’s a particular reason for it.) And what do I see? A new print dialog that reminds me of the one I saw earlier on the windows box. Interestingly, it has “fit to printable area” and “shrink to printable area” options.

So my little experiment has led me to the following conclusions:

– many pieces of software, presumably not wanting to reinvent the wheel, rely either on the OS or I suspect, at least in this case, the desktop environment for its print dialogs;
– some software authors do want to reinvent the wheel, such as to “do it their own way”, or to be completely platform and environment independent, and therefore make their own dialogs;
– some software authors want to do extra things but don’t want to reinvent the wheel, so they have a wrapper for to add extra functionality to an existing base;
– in my documents, I shouldn’t try to stuff as much content as possible into each page too far, at least not by playing around with the margins.

Looks like something for the Evince authors to toss in. Assuming, of course, that — without fundamentally changing a document — resizing a PDF and/or its content to the local printer’s printing range is a really useful feature, such as to deal with awry margins, or PDFs sized for A4 instead of letter sized or vice-versa. 🙂 And that such non-conformities and/or their prevalence make it worth my using the Adobe Reader, licensing issues aside. Or that another PDF reader out there that has that functionality.